


DIY Lazy Susan

I'm working on several small DIY projects for the upcoming show. Small projects are a fun change of pace from time to time. This is a quick project that would make the perfect gift, a small project to sell in a booth or just a fun DIY project for your home.
First things first, stain your round as desired. Once dry apply a coat of topcoat. Some designs and applications may require one more coat of topcoat.
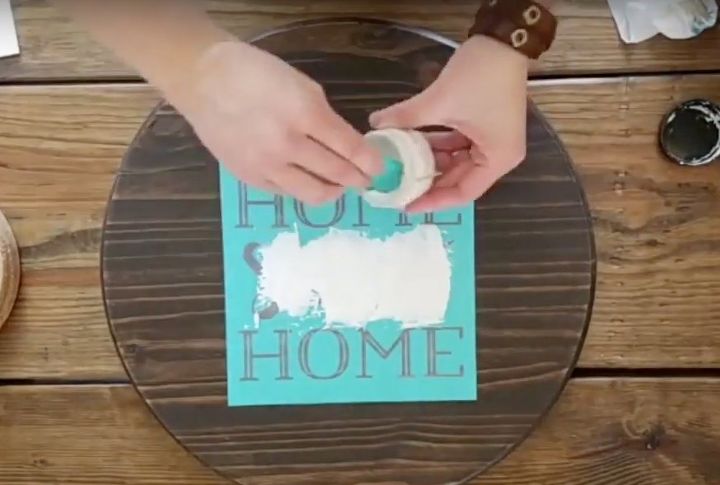
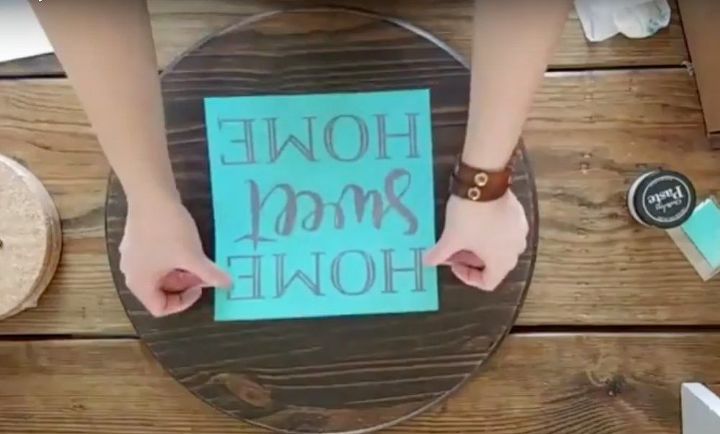
Then apply your design (if desired) - be sure to center it and smooth it out. I used a fun new product called Chalk Couture to decorate mine, it's a fast, easy application that really makes it special.
Just remember, to work fairly quickly when applying the chalk paste because it dries pretty fast. Or you could also paint a design or use vinyl. So many options...
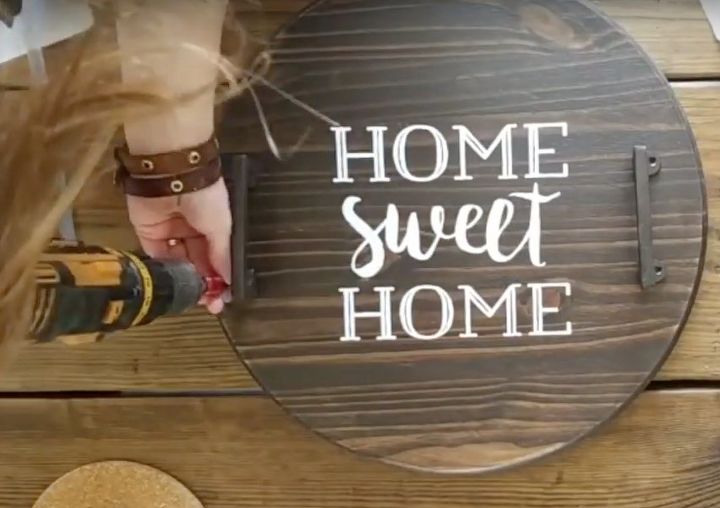
Attach handles with small screws. I found cabinet screws to be the perfect length and color for this project.
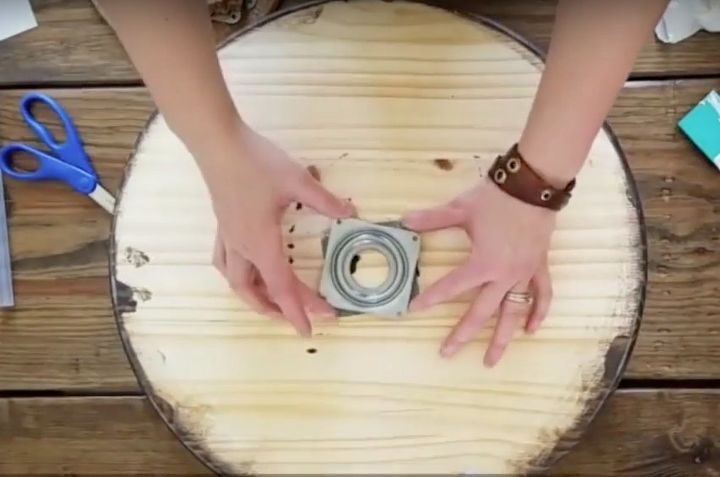
And for the finishing touches to make it spin, attach your lazy susan hardware to the back. Then, using hot glue, attach the cork pad to the base of the lazy susan hardware.
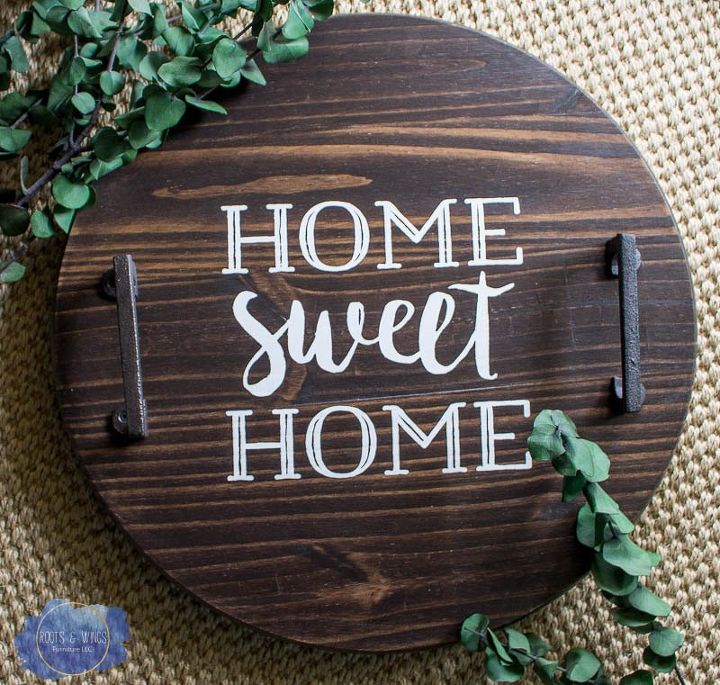
Turn it over and let it spin!! Isn't it the perfect piece of farmhouse home decor?! I love how this turned out!! Check out this quick video tutorial to see exact how it's made and my blog (using the link below) to get ALL the project details!!
👇👇👇👇
http://www.rootsandwingsfurniture.com/blog/diylazysusan
Also, subscribe to my blog so I can continue to share these fun little DIY projects with you or you can following me on Facebook @rootsandwingsfurniture.
Until next time, create something beautiful!


Frequently asked questions
Have a question about this project?
Cord Pad? Can you show a picture of the bottom. I want to make a lazy susan and am struggling as to what to put on bottom part Thanks