


DIY Lazy Susan Tiered Tray for Organizing
Let's face it, we all have areas of our homes that need some organizing help. We wanted to create a pretty tray that could be used to hold a lot of stuff (getting it off counters!), with the added bonus of it being able to turn easily for quick access. We can't wait to show you what we built!
This video show the building process for you. Be sure to watch so that you get all the helpful tips and tricks for your tiered, lazy susan tray.
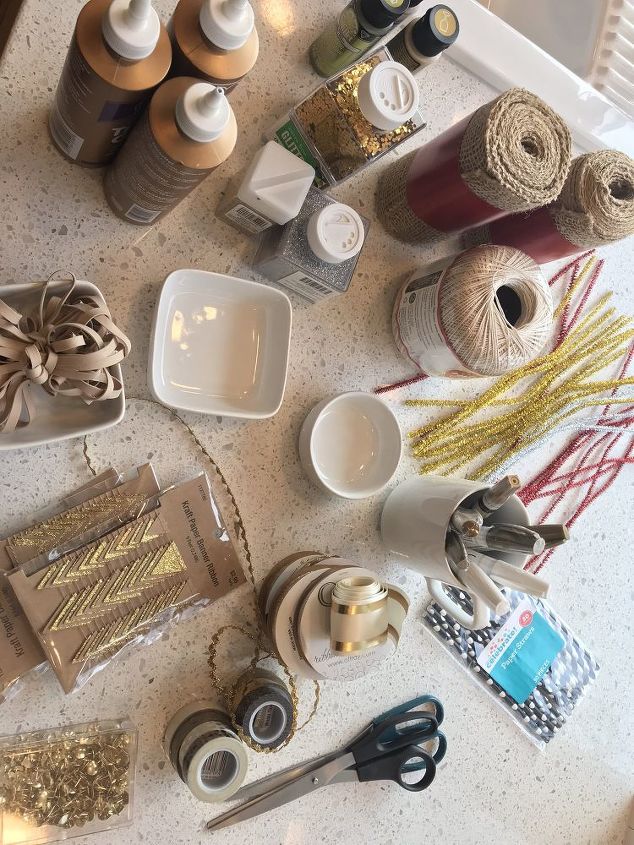
To show you how much this tray can hold, we gathered some crafting supplies. You might choose to use the tray for makeup, party food, etc.
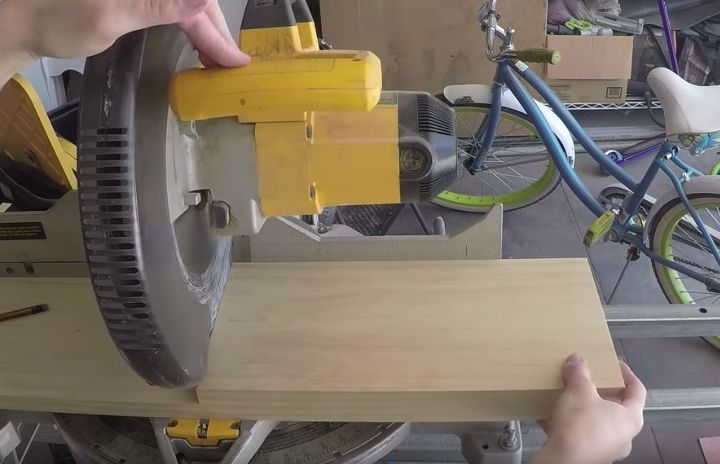
Head over to our blog (Remodelaholic.com) to get your free, printable building plans. Start the project by cutting the 1x8s to the specified length. We joined the larger pieces together using a doweling jig, dowels, and glue. See video for instructions.
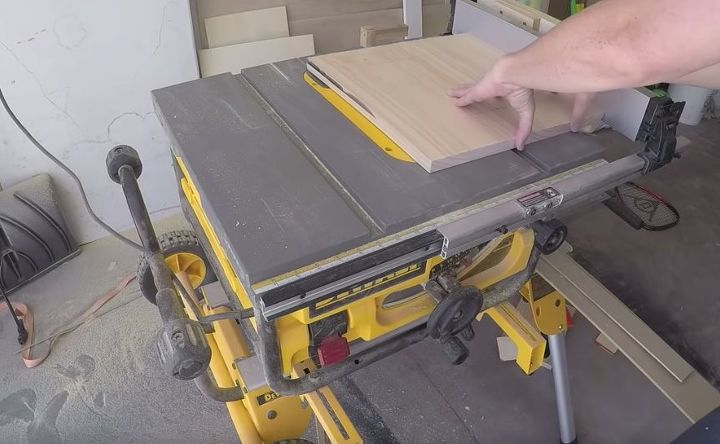
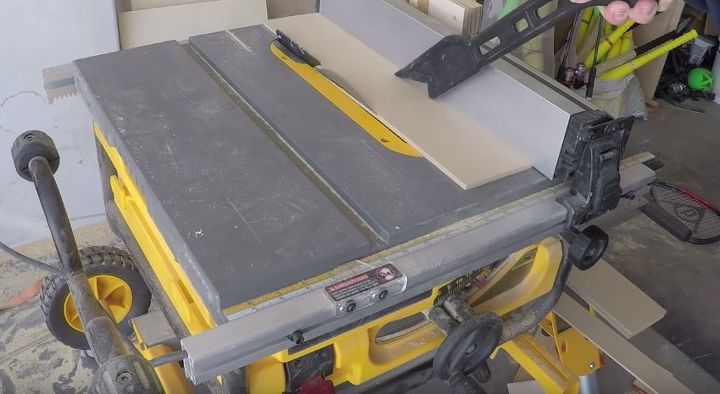
Setting table saw to 20 degrees, cut edges of large board you just created and the smaller piece cut earlier. Also, create a small square from remaining scraps.
Shorten bender board using a miter saw, then run the long edge through the table saw, set at 20 degrees. The video gives more detail, but you want to end up with parallel angles.
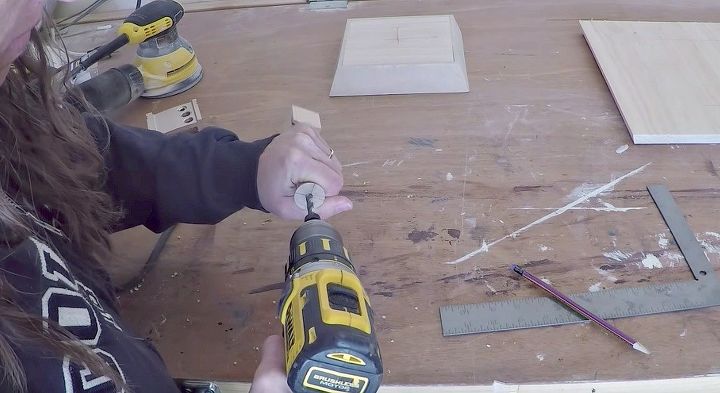
Cut baluster to length. Drill dowel holes in both ends. Mark centers in bottom of top tray and top of bottom tray and drill holes for dowels. Mark position for turn table (bottom of large tray) and pilot holes.

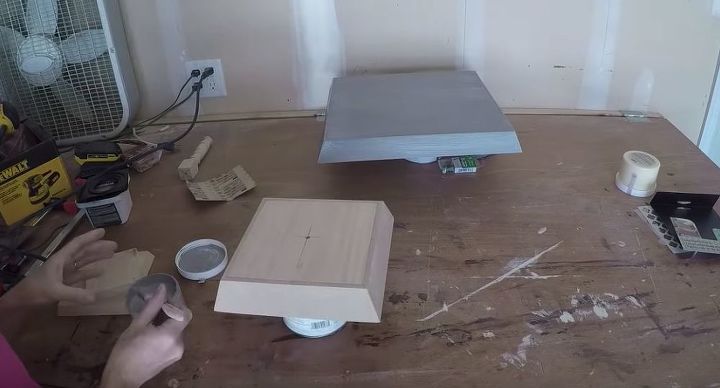
Cut side pieces on miter saw. Check the building plan for angles. Attach side pieces using glue and brad nails. Repeat for both trays. Cut a wood base the same size as the turntable. Fill nail holes. Drill pilot holes for turntable in the base you just cut and the bottom tray. Sand all pieces as needed.
Paint the pieces. We chose to stencil the top of one tray. You get to be creative here! What color do you want for your home?
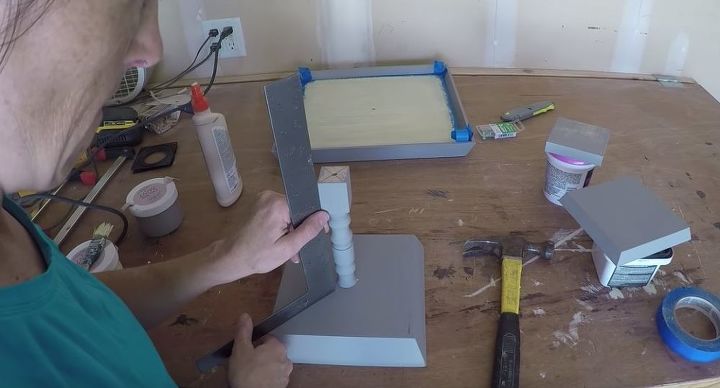
Install the baluster using glue and dowel. Attach turntable to square wood base, then attach to base of large tray. Nail remaining wood piece to this assembly.
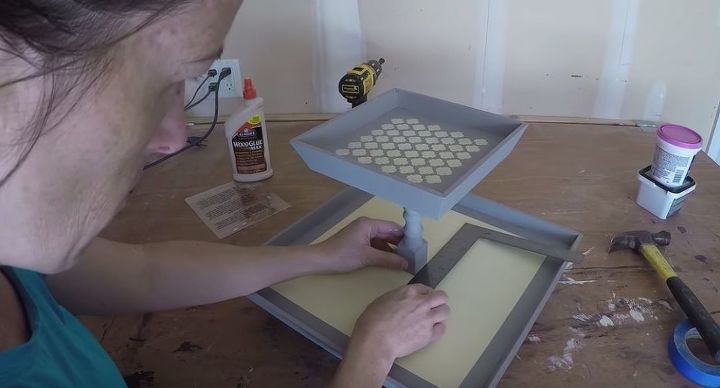
Finally, using glue and a dowel, attach the top tray. You're done!
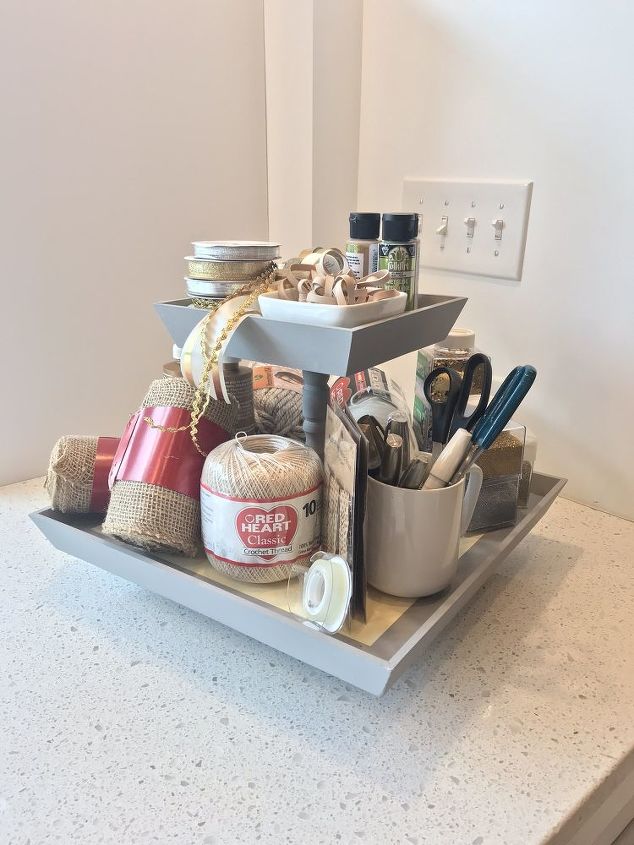
Now, it's your turn to gather items and fill your tray! Maybe you even want to use it for entertaining.


Frequently asked questions
Have a question about this project?