


Quick, Easy, and VERY Affordable DIY Phone Stand

Ahhh…our cell phone. Research over the years has shown that we pick it up as many as 80…96…160…344 (!) times a day! We all know how we feel when we hear that irresistible song of beeps, rings, and buzzes--we are compelled to immediately locate it and pick it up to see what 's going on. But what about when it’s really inconvenient to pick up and look at that phone--like when my hands are messy or full or I am working on my laptop? How about (let’s be real) when I want to binge-watch my new favorite show or face time while I complete other tasks? I have purchased gadgets in the past to help me in these situations, but most of them have just been so-so and many of them cost more than I felt it was necessary to spend. I have been searching for the right materials to simply and affordably construct a better solution, and I believe I have found something that works and allows me to engage my creative side.

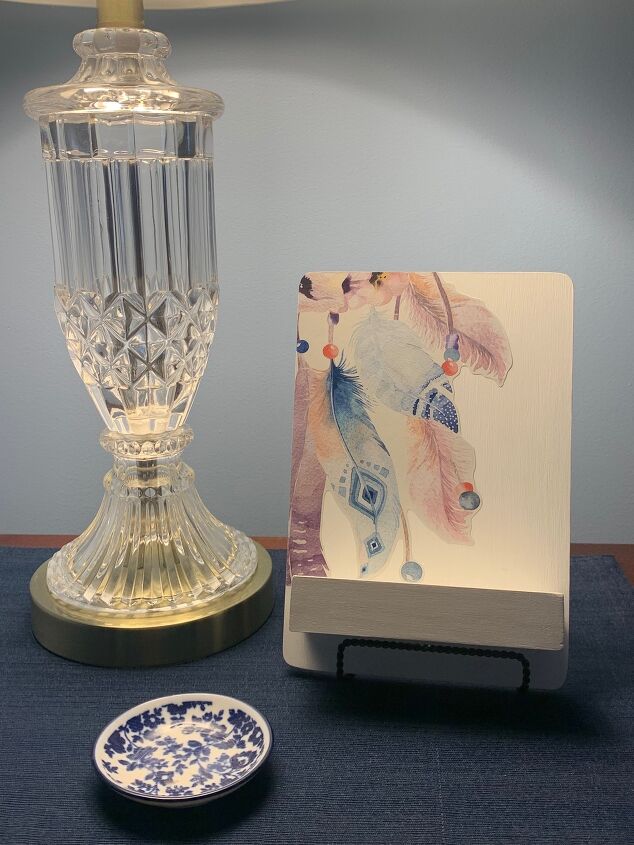
Best phone stand!
Here are 4 great reasons to give this a try:
1. It’s quick! (Most of the time is spent waiting for things to dry.)
2. It’s easy!
3. You can be as creative as you want with the decoration!
4. The whole project cost me $2!
 As I was developing this project, I discovered 2 things:
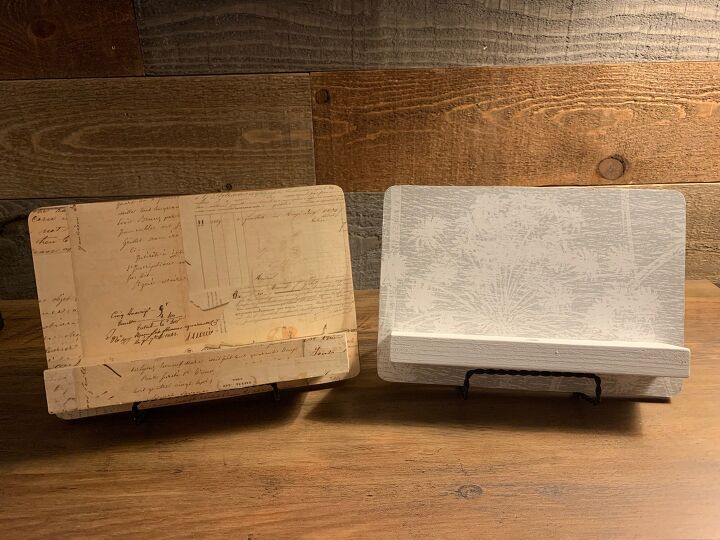
First, I constructed versions of the stand using the boards situated vertically as well as horizontally and happily realized that both orientations support my phone very well.
Second, I realized that because my phone case is rubberized, the addition of the “lip” to the phone ledge was not absolutely necessary, which is why the gray and white stand has none. I must say, however, that the lip does provide a little extra protection from accidental bumps, so I plan on putting it on any stands I make in the future.
The instructions below will cover these scenarios; you can choose which you prefer to follow based on your preferences.
Let's get started!
 Supplies
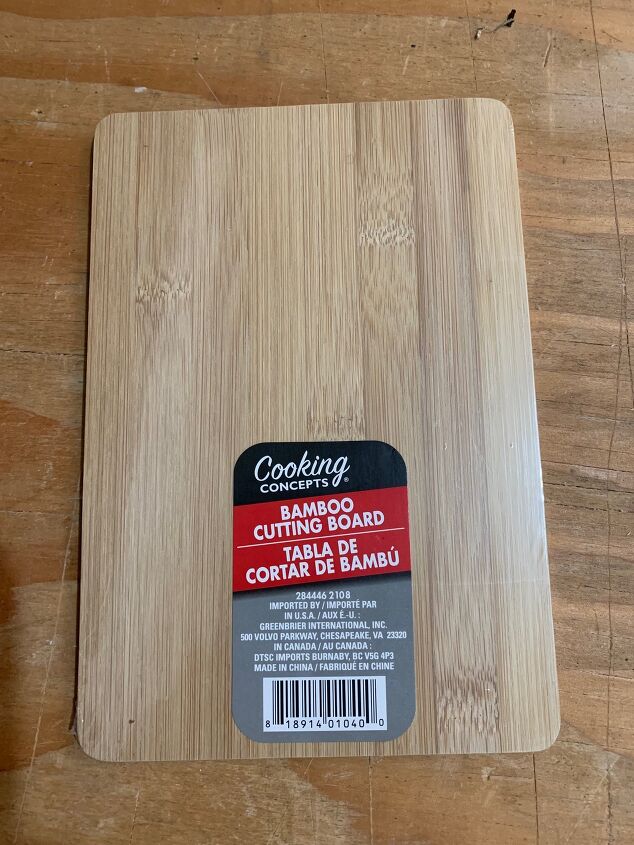
- [1] bamboo cutting board (measures approximately 8 ½” x 6”) Dollar Tree
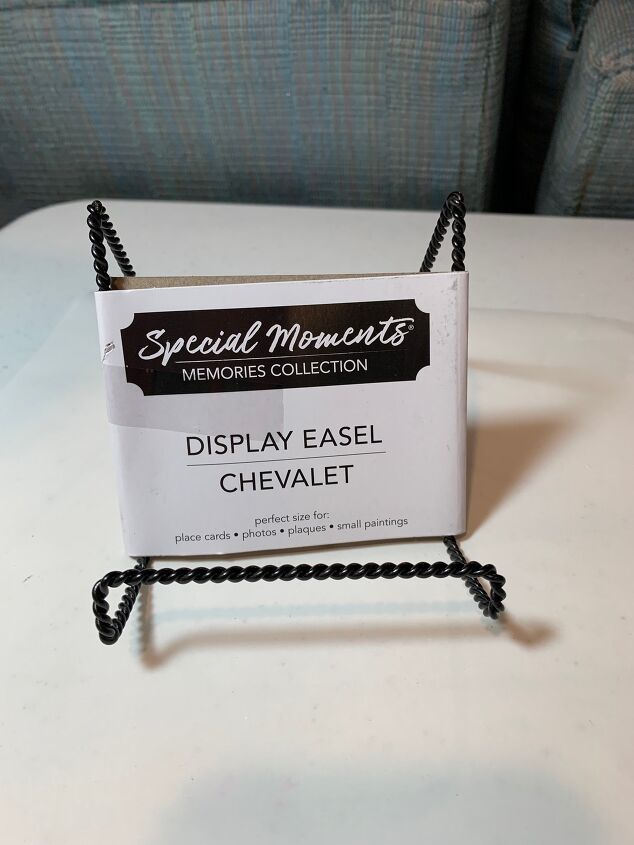
- 1] display easel, medium size Dollar Tree
(These were the only things I purchased for this project. I had the rest in my scrap wood pile and craft supplies. I bet you do too!)
- Piece of wood* for the ledge
[*I used a piece of pine board 1 ½” wide x ¾” thick.
This will be attached to the cutting board with it’s thin (¾”) side flush with the cutting board and the wider (1 ½”) side used for the ledge.]
- Clean paint stir stick [it needs to be slightly wider than the thin side of the board used for the ledge]
- Saw (can be a chop saw or handsaw; no need to get fancy)
- Wood glue/strong adhesive
- Clamps
- Sandpaper
- Tape measure, pencil
- Supplies for painting & decorating
- Drill
- ⅜” drill bit
- [2] ¾” screws
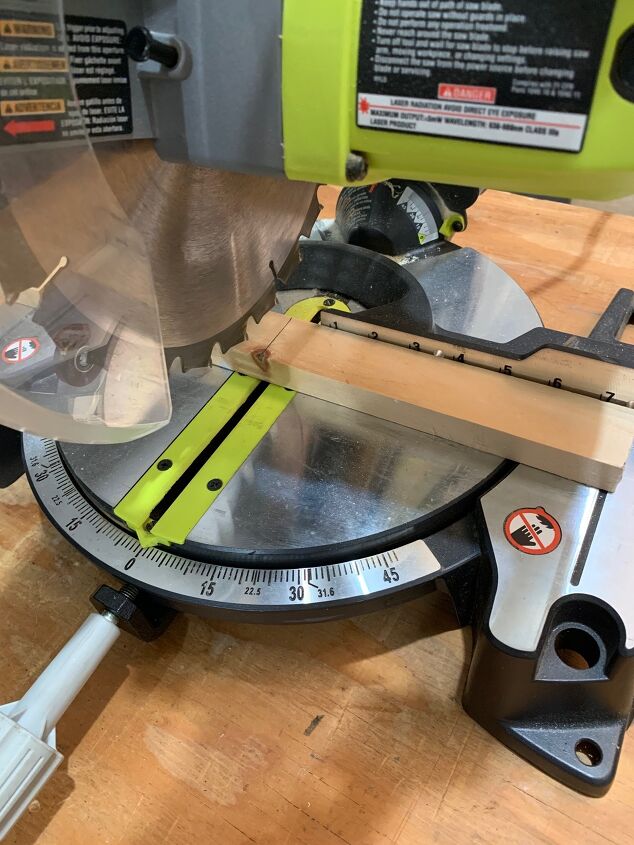
Cutting the Ledge
Using the 1 ½” wide wood, cut a piece that measures:
-7 ¾” - 8” long for a horizontal orientation of the board –or–
-5 ¼” - 5 ½” long for a vertical orientation of the board.
Access to Charging Cords : 2 Options
OPTION A: My original answer to phone charging using the stand was to simply position the phone horizontally on the ledge and charge. The cord is exposed, but it works. If you are happy with that, you are good to move on to the next step, Making a Small Lip for the Ledge.
OPTION B: If charging the phone as it sits vertically and/or hiding cords is important, here’s a fix for that.
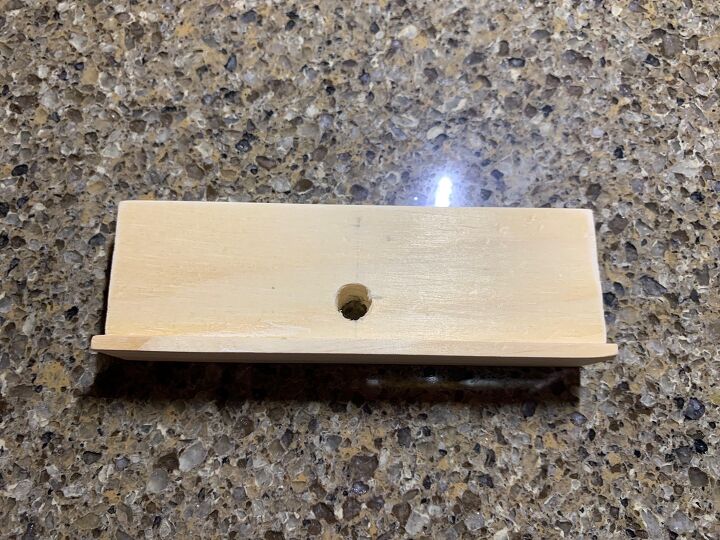
Step 1. Position the ledge right to left, with the wider side (1 ½”) facing up.
Step 2. Use a ⅜” drill bit and drill a hole in the center of the ledge approximately ¾” from the back edge.
[ Suggestion: drill a hole in scrap wood first to be sure this size accommodates your chargers.]
Step 3. Sand the rough edges.
The phone can now charge while sitting vertically on the stand and
-- BONUS!-- the charging cord will not be as visible.
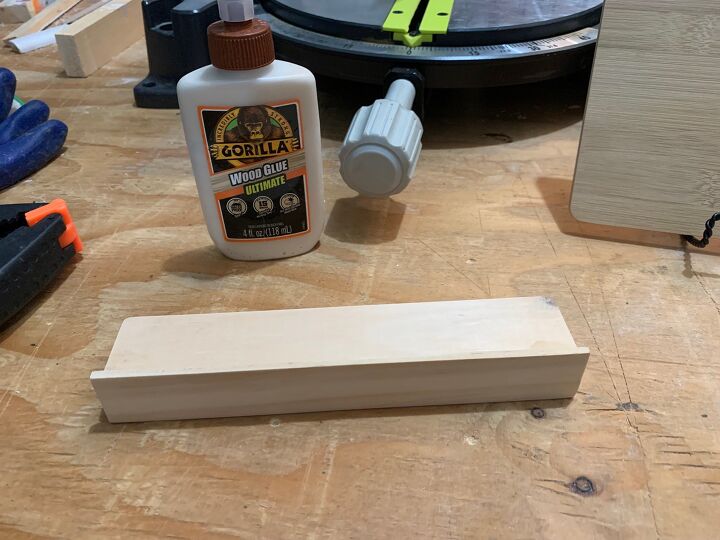
Making a Small Lip for the Ledge
[If you prefer to not include this step, you are good to move on to Attaching the Ledge to the Board].
The ledge has a small lip on it (this is where the paint stir stick comes in). It provides a bit of protection from the phone slipping off.
Step 1. Cut the paint stir stick the same length as the ledge.
Step 2. Wood glue the cut paint stir stick vertically to the ¾” front side of the ledge, keeping the bottom and side edges square.
Step 3. Clamp and let dry.
Step 4. Sand the rough edges.
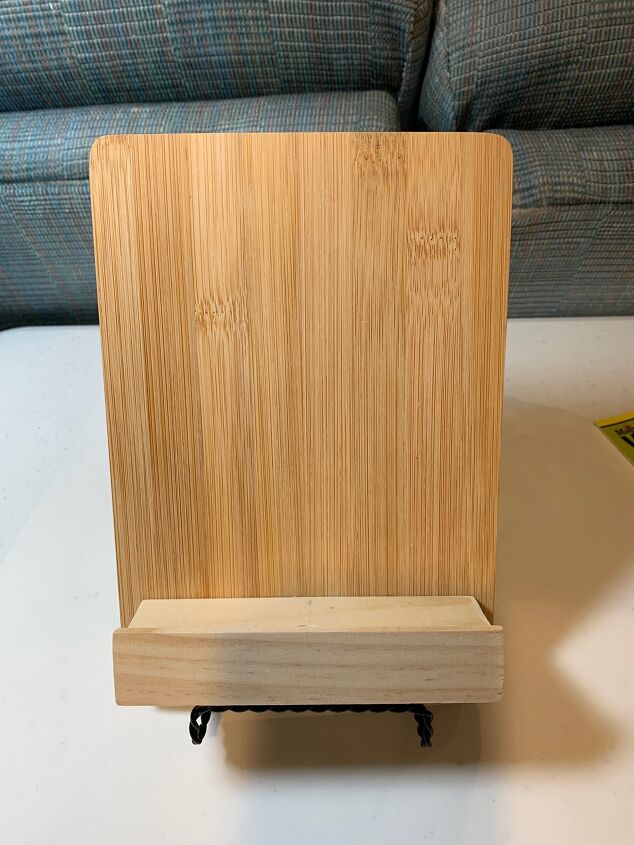
Attaching the Ledge to the Board
Step 1: Remember that the lip on the ledge is the front side.
Step 2: Center the ledge approximately ¾” -1” from the bottom of the board, regardless of its horizontal or vertical orientation.
Step 3: Use wood glue or other strong adhesive to attach the ledge - be sure it’s level.
Step 4: Clamp and let dry.
 Once the glue has dried, the fun stuff can begin: painting and decorating!
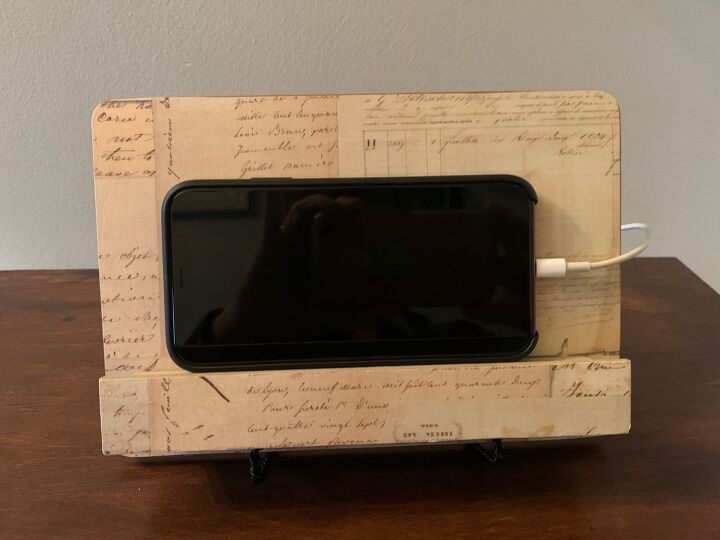
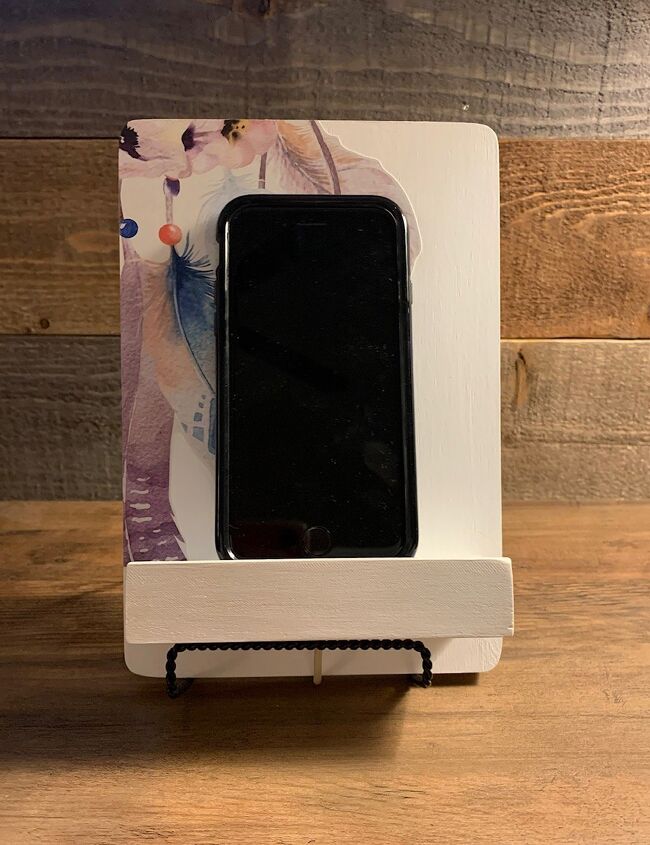
I painted this board and used adhesive wall stickers (Dollar Tree) for decoration. (ok- this stand didn’t cost me $2; it cost me a whopping $3!) I first gave the sticker an extra adhesive layer with ModPodge, and then positioned it on the board.
Once that is completed to your satisfaction, place your new phone stand into the display easel and begin using it.
Project complete!
OPTION: for additional support, 2 display easels can be used with a horizontal phone stand.
Attaching the Ledge to the Board : ANOTHER OPTION
I decided to apply leftover wallpaper and decoupage to the entire front of these boards before I attached the ledge.
However, because there was now a layer of material in between the wood of the board and the wood of the ledge, I felt it would be best to secure the ledge with [2] ¾” screws.
Here's how:
Step 1: As stated prior, the bottom edge of the ledge should sit approximately ¾” - 1” from the bottom of the board.
Step 2: On the back of the board, mark a point approximately
1 ½” -2” from each side and ¼” above where the bottom edge of the ledge will sit on the front of the board.
Step 3: Drill a small pilot hole at these 2 points.
Step 4: Center the ledge on the front of the board with the lip edge forward (the ledge should completely cover the pilot holes), screw in ¾” screws from the back. [I had help with this part; I had someone hold the board and ledge together while I set the screws.)
Place your new phone stand into the display easel and begin using it.
Project complete!
OPTION: for additional support, 2 display easels can be used with horizontal phone stands.
UPDATE
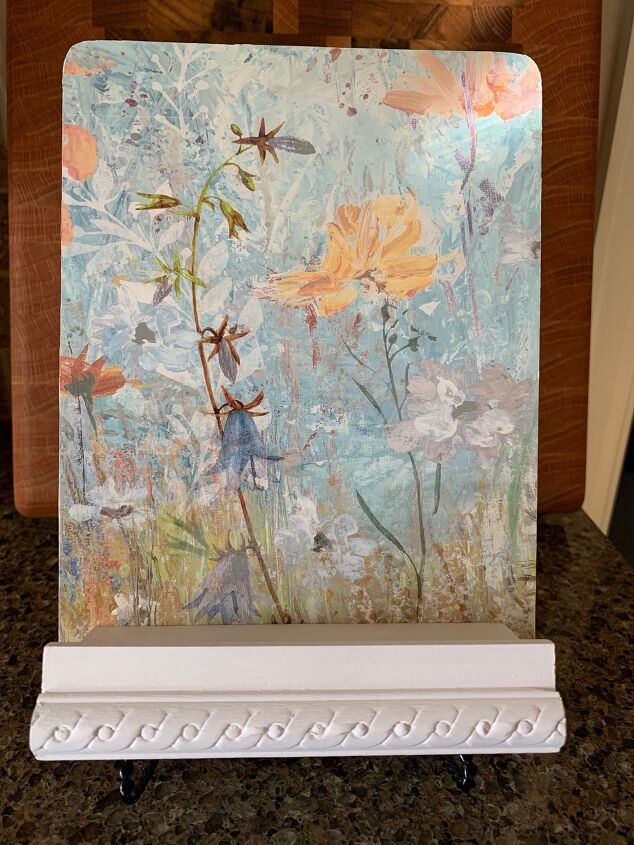
With a little scrap moulding, you can add another decorative element to the ledge.
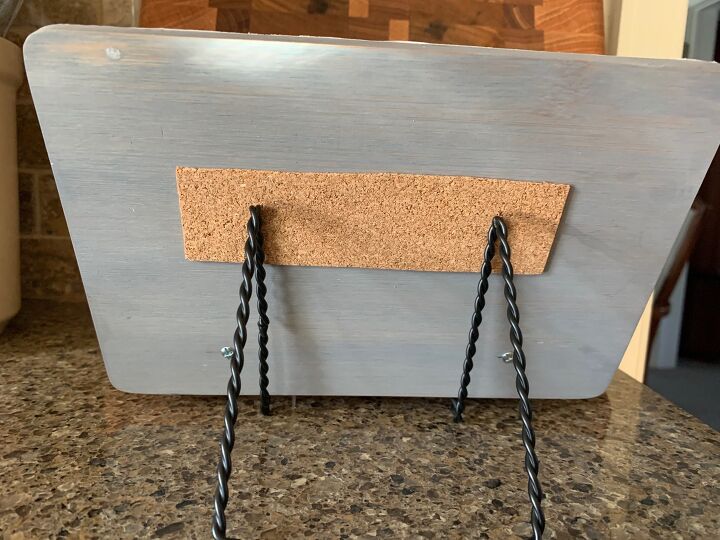
UPDATE
Adding a strip of adhesive cork (Dollar Tree) on the back where the board comes in contact with the display easel will add more stability from left-right shifting.
A Concluding Note 
I have been using the stands for a few weeks now, and I have been very happy with the result. In the beginning of this post, I gave you 4 reasons to give this project a try. Now, after using the stands for a while, I can give you several more.
1. They are sturdy enough for my needs.
2. They are lightweight.
3. They are portable.
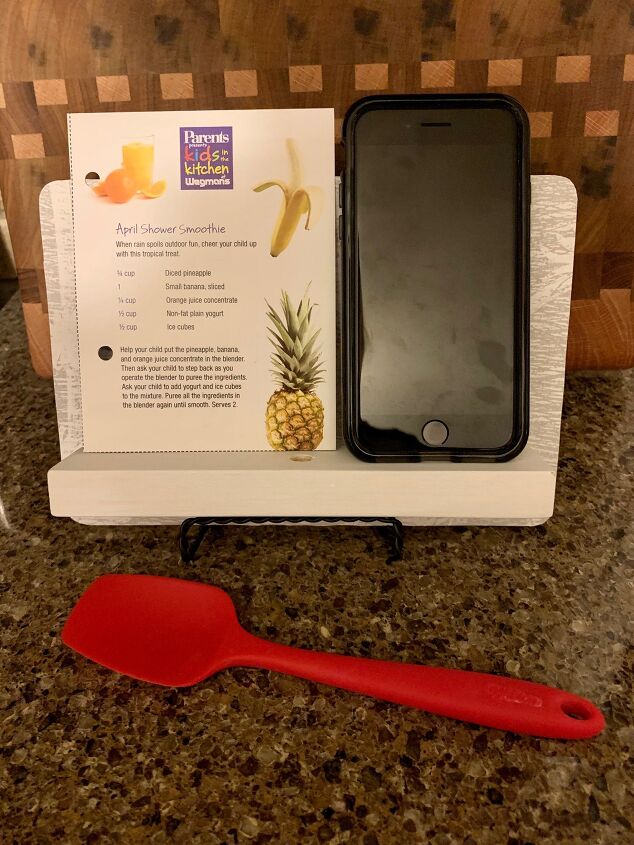
4. They are versatile: they are great for face time calls & streaming, I have used them to prop a recipe while cooking, and have used them to support my tablet as well.
5. They elevate the phone from the work surface therefore providing a bit of protection from spills and mess.
6. By having phone stands in different places around the house, I find I can keep better track of where my phone is because it is propped up and visible vs. lying flat.
7. They are personally designed to meet each creator’s design preferences.
Best of luck creating yours!
Comments
Join the conversation
-
Just sell me one of them.
-
😂Happy to😉!


Frequently asked questions
Have a question about this project?
Love this, could you use a scrabble letter holder for the ledge?
This would be great for holding recipe cards in the kitchen, too!
Why not simply use the easle?