


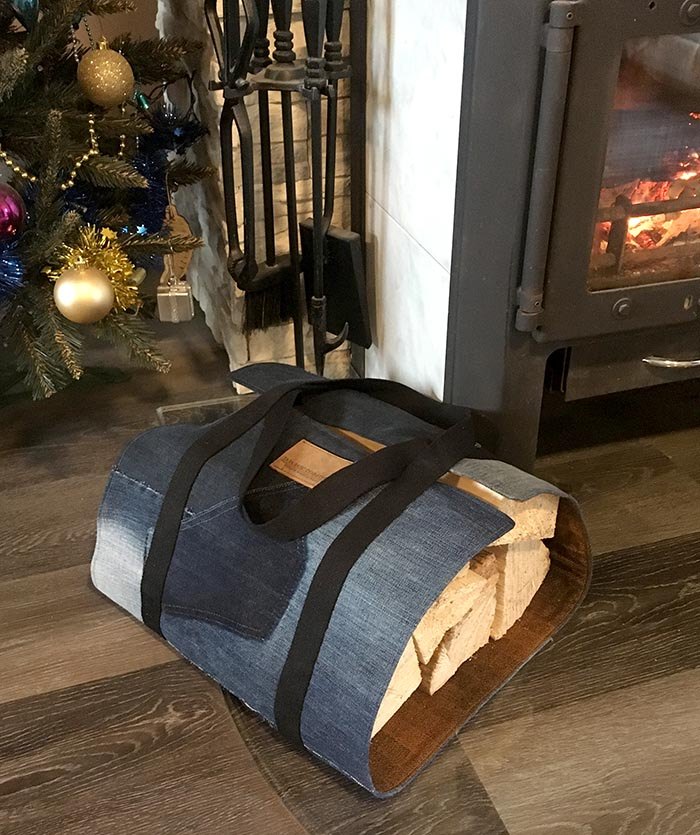
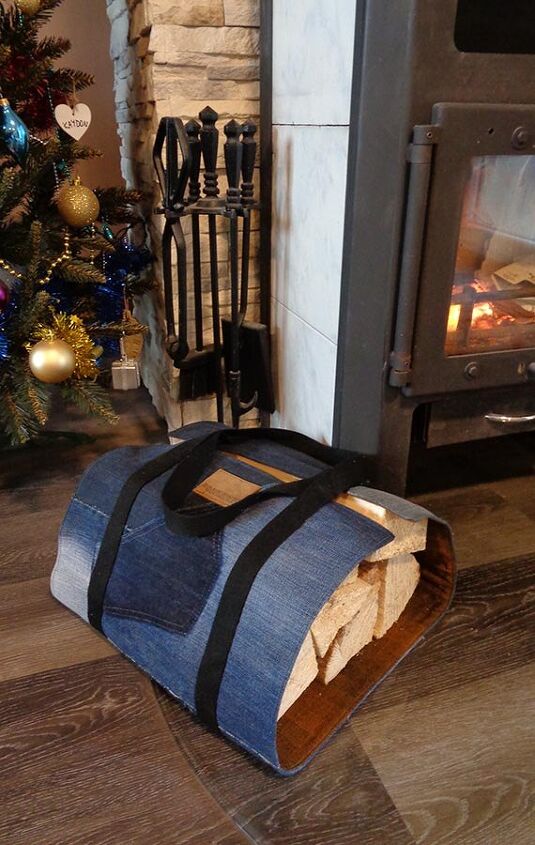
Simple Wood Carrier

This wood logs carrier is very simple, easy to make, but it is strong enough to carry a good few logs. It will also make a great looking addition to your fire accessories or an eco-friendly handmade gift.
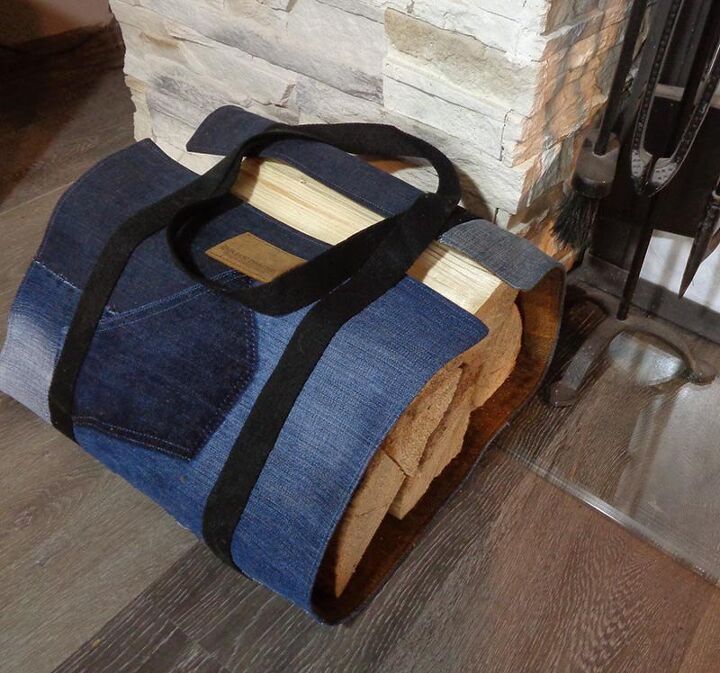
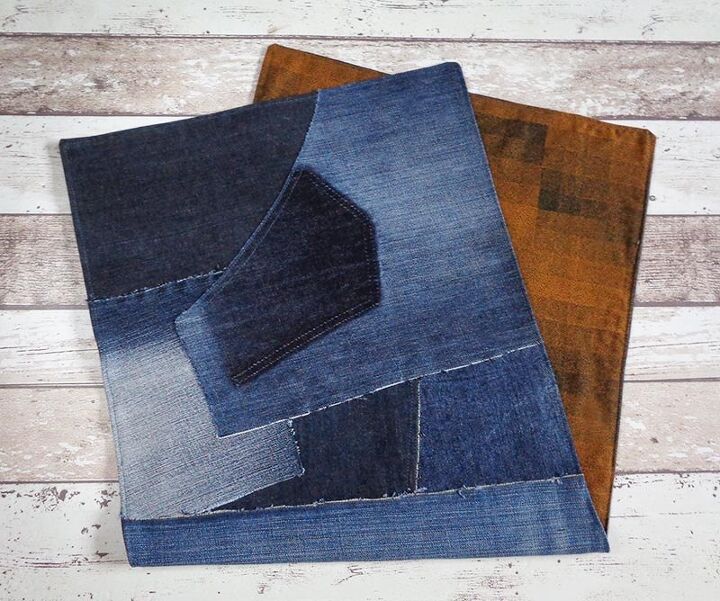
I think it is a very good idea to DIY this wood carrier using denim scraps. Denim is very strong and durable and making it in this crazy patchwork style brings a bit of “cowboy” feel to your wood burning corner.
Having the strap go all around the bag makes it super strong to carry logs and allows us not to worry about the strength of the fabric we are using for the body and the lining.
What you’ll need
Some scraps of old jeans, some fabric for the lining (or more scraps to make it double denim) and min 264cm (104″) of webbing.
Making the body
For the pattern all you need is a paper rectangle. I have chosen the size of 40X90cm (16″X35″). It is not very big, but just enough for my logs. Check before making, maybe you’ll decide to change the size. Prepare the paper rectangle and lay it out in front of you.
Choose some scraps and iron them. Start laying denim scraps onto the paper. At the short sides try to lay the denim pieces parallel with the edge to avoid stretching. The rest of pieces can be placed randomly, but overlapped. See this article for the full tutorial about this crazy patchwork technique >>>.
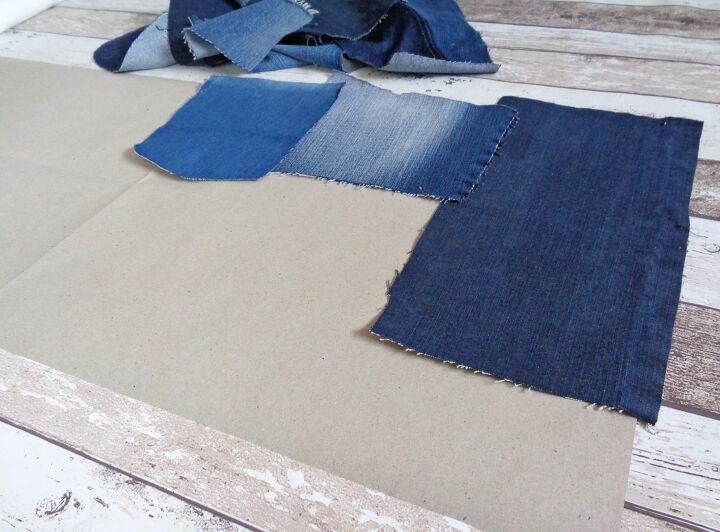
Cover the paper pattern with denim scraps completely.
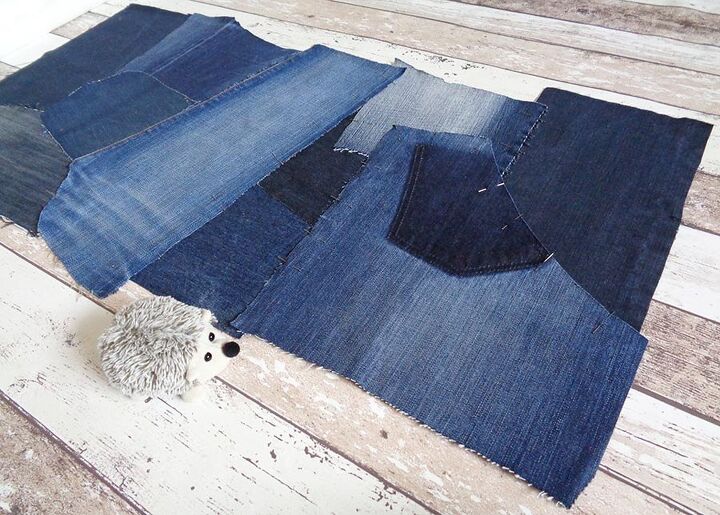
Pin at the edges of every piece, but not to the paper! Pin only the denims. The more pins the better. If you see that in some places there is too much excess – cut it off underneath.
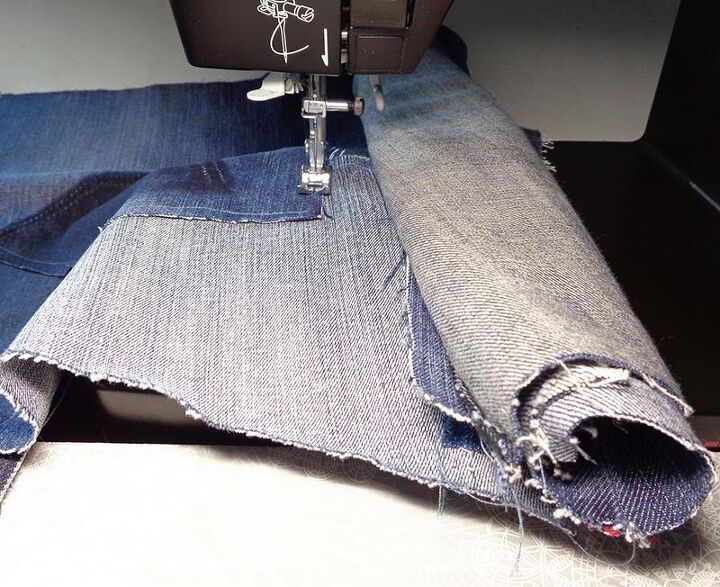
Stitch along the visible edges of all the pieces to hold them together. Remove the pins as you go. Pay attention and keep all the denim layers flat (they sometimes intend to fold) so that they are sewn without any bulk, you can feel it by your fingers. For your convenience start with the pieces nearer the edges of the whole thing where you can get it under the sewing foot easier. When it comes to having too much fabric at your right, roll it up as on the picture below.
Stitch with a 7mm seam allowance. Then stitch again with a zigzag stitch, cut off all unneeded thread ends and rough up the edges as described here – Crazy Patchwork.
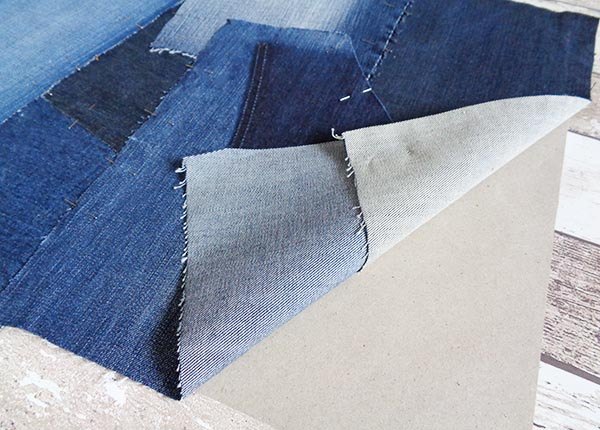
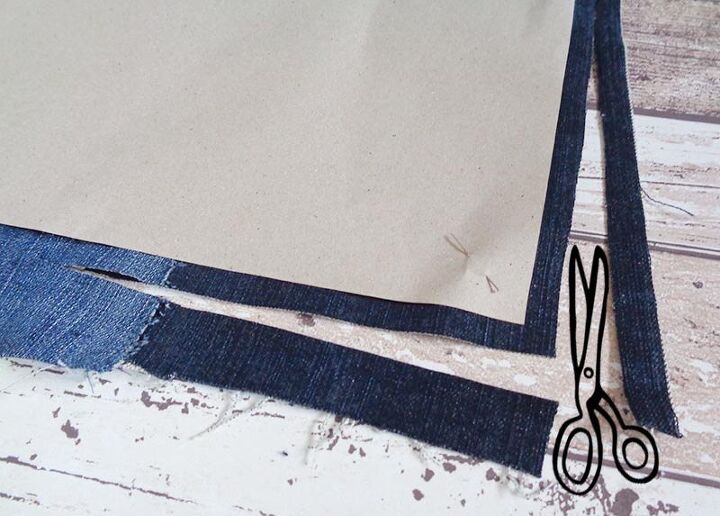
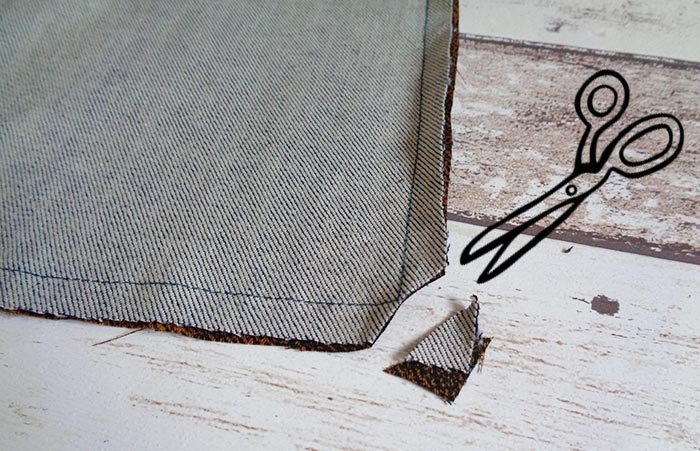
Iron it all. Put the paper pattern on top, pin and cut the shape with a seam allowance you have used to.
Adding the lining
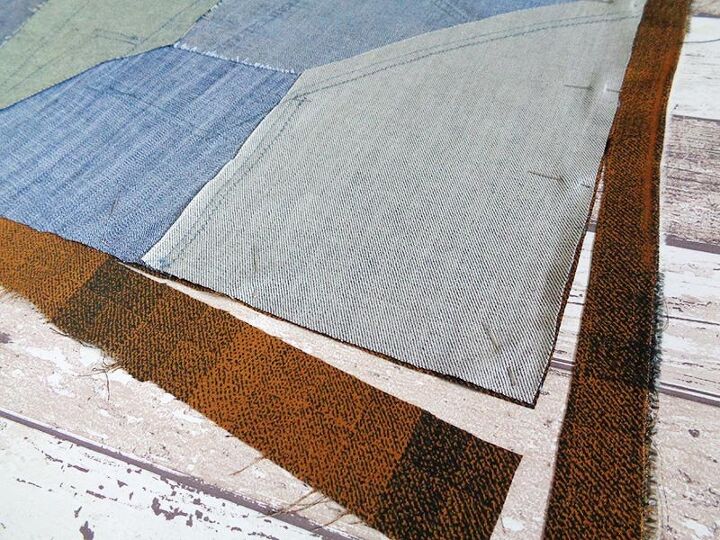
The inner side of the wood carrier should be made with such fabric which will not be easily scratched by wood logs. Originally I was going to make the crazy denim patchwork for the both outer and inner, but then I came across this brown fabric which I have bought for peanuts at some charity event. It’s quite “slippy” so I thought it will do the job and make the job faster. So you can consider both ideas for the lining, but the denim option will add thickness and strength.
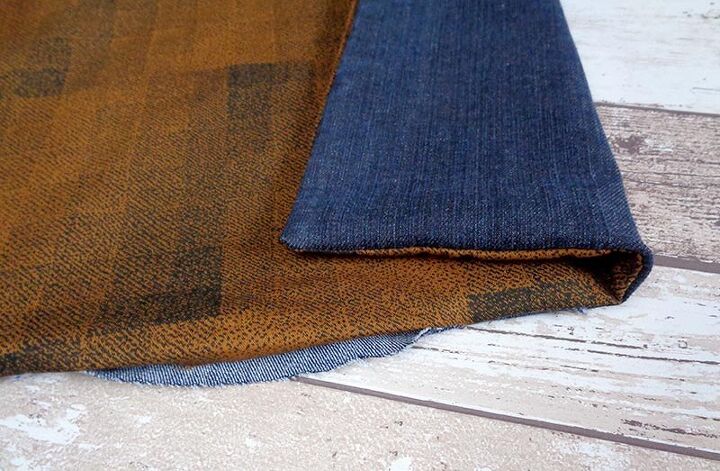
Right sides facing place the outer on top of the inner, pin and cut exactly.
Stitch the two rectangles together all the way around leaving a gap of appx 15cm (6″) somewhere on the longer side. Trim off all four corners.
Turn inside out through the gap. Push out the corners and along all the sides with your fingers. A kitchen sponge to wet your fingers and a screw driver can help.
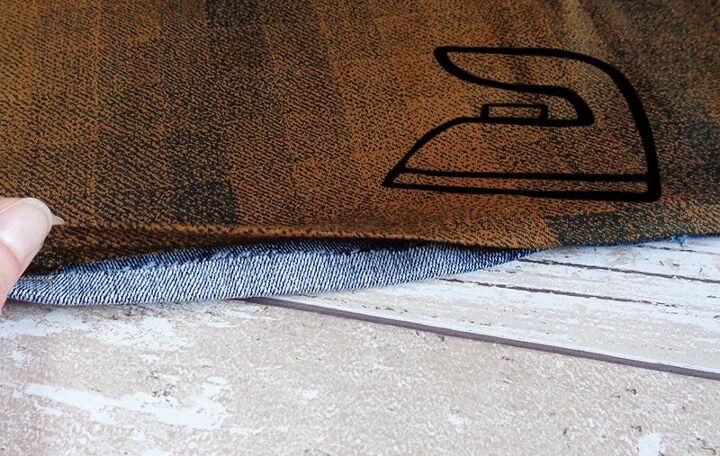
Iron along the sides. When you get to the gap, fold the seam allowances in and iron over so that it looks like the rest of it.
Topstitch along all the edges. I usually advise to play it safe and use matching threads for the top and the bottom sides of the stitching, but for this wood carrier it will be awesome to use a contrasting thick thread if your sewing machine can handle it. If the machine is jamming at the corners, help it by moving slowly and lifting and lowering the machine foot.
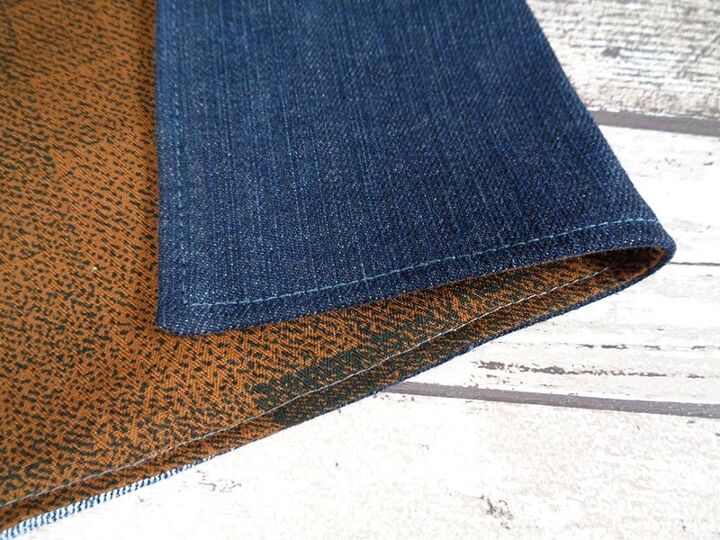
The base is now completely ready. Just need to add the straps.
Adding the straps
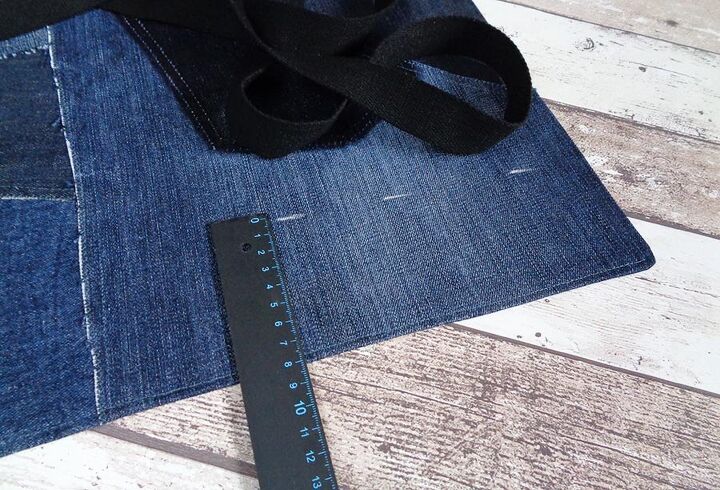
The straps are made using one long rip of webbing. The length will depend on the size of your carrier and on the length of the handles. In my case I needed 264cm (104″) and each handle is measuring 41cm (16″).
At both longer sides mark the distance for the strap to sit on. Approx 8cm (3″) from the edge.
Lay the strap onto the body starting somewhere in the middle and mark the places where the strap becomes the handle (1 and 2). It’s up to you how long you wish for the handle to be, I have it 41cm (16″).
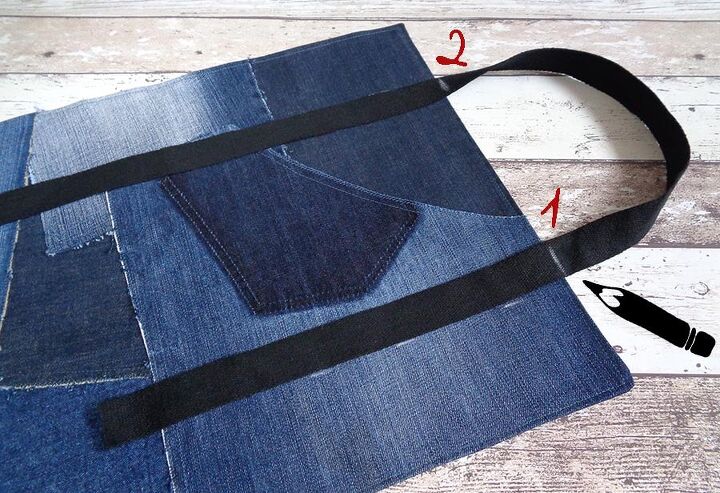
Then lay the strap all the way to the other side. Mark 3 and measure to find where to mark 4, the handles need to be the same. Mark 4, then continue laying to join with the start of the strap.
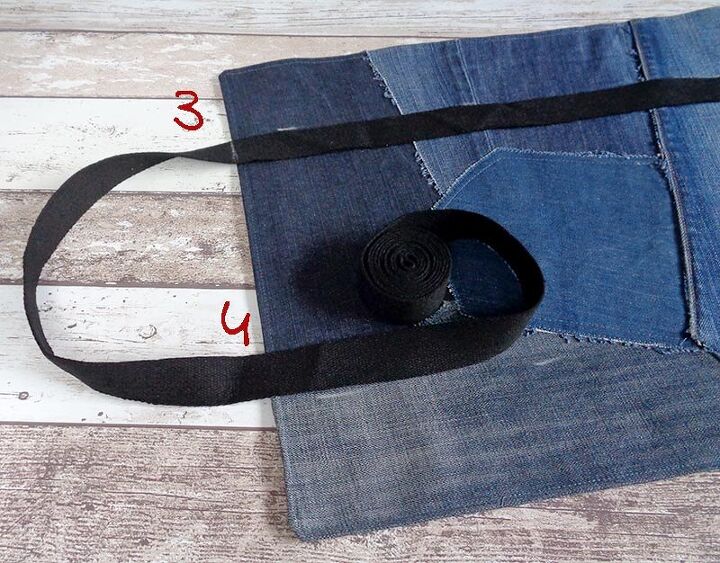
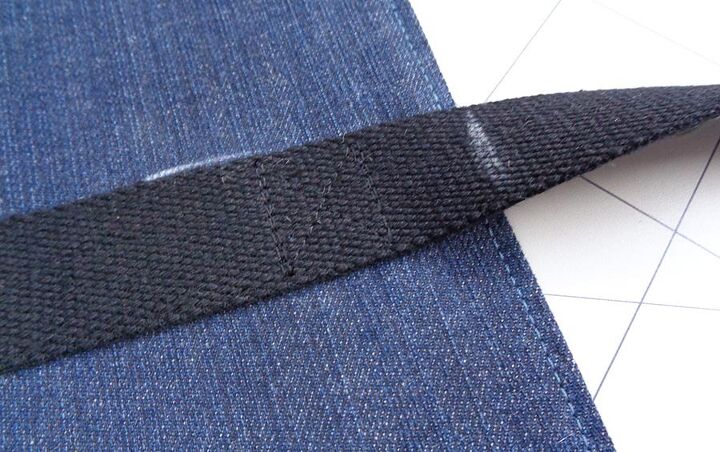
When the strap ends meet, cut the webbing leaving an overlap of appx 4cm (1,5″) to be able to fold one end under.
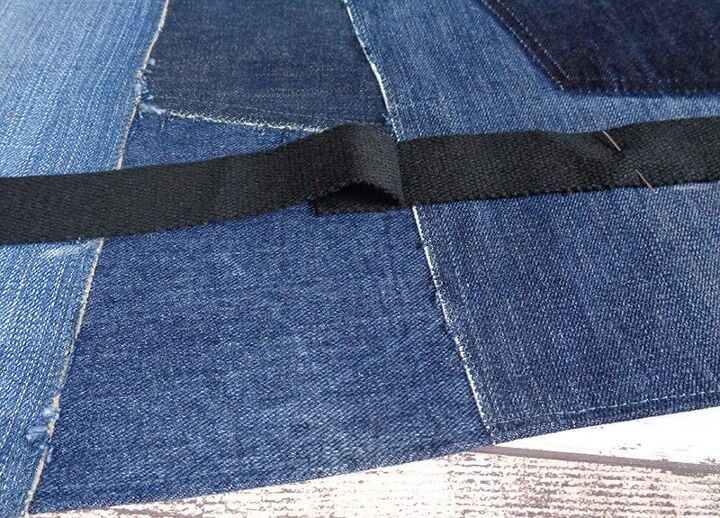
Pin the whole strap in place and sew it on along both edges. When you get to the overlap, fold it under and continue.

As you sew near the handles, you can stitch right at the edge or leave a small distance, like I’ve done. You can also add more stitches for extra strength, but I’d say it is not necessary because the straps go all around the carrier and there is no extra pull at this point of the handle.
Voila! The wood log carrier is ready! Let’s add a jeans label for some “jeans” look.
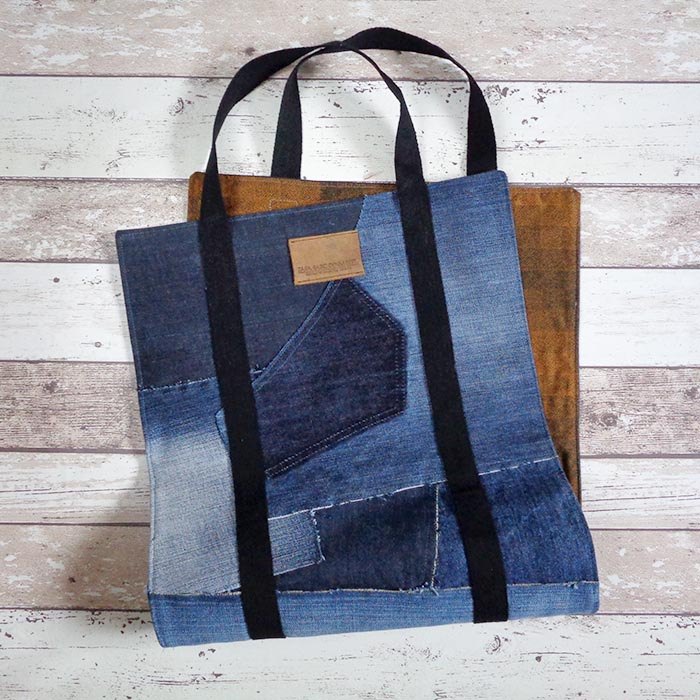
I bet this denim wood carry bag will make a perfect match to some other denim home accessories which you already have or planning to make 😉
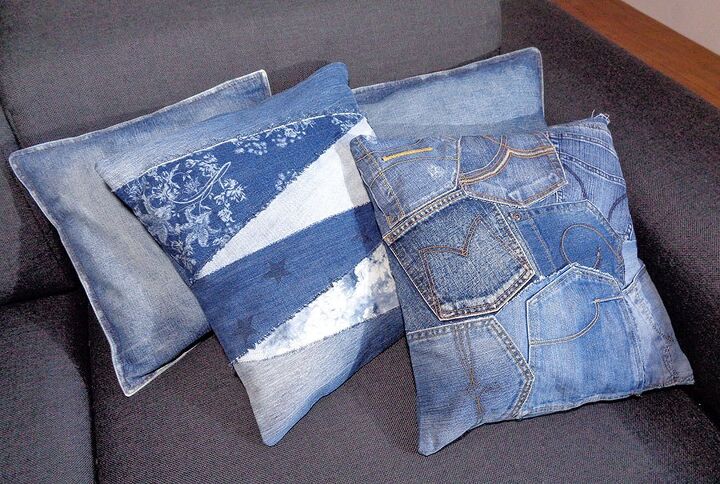
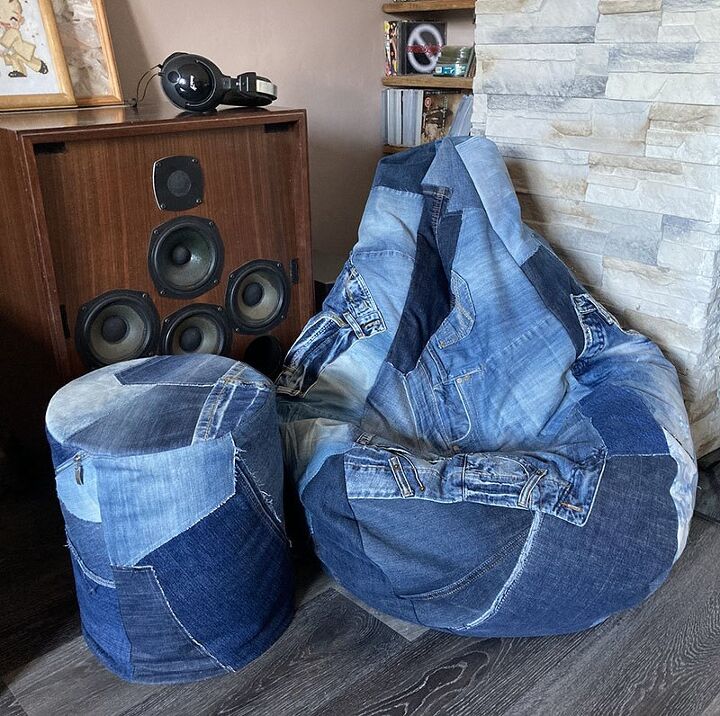
More old jeans projects can be found here >>> and sewing denim tricks are here >>>
Comments
Join the conversation
-
That's a great pattern. I bet it would look fabulous on a wall somewhere.scrape the strapes
-
I love it when someone besides me comes up with ways to recycle jeans....


Frequently asked questions
Have a question about this project?
Great idea! Do you have instructions on how to make the denim covered poof chair??!! Love it!!