


DIY Door Awning
With a little inspiration, you can DIY an inexpensive awning.
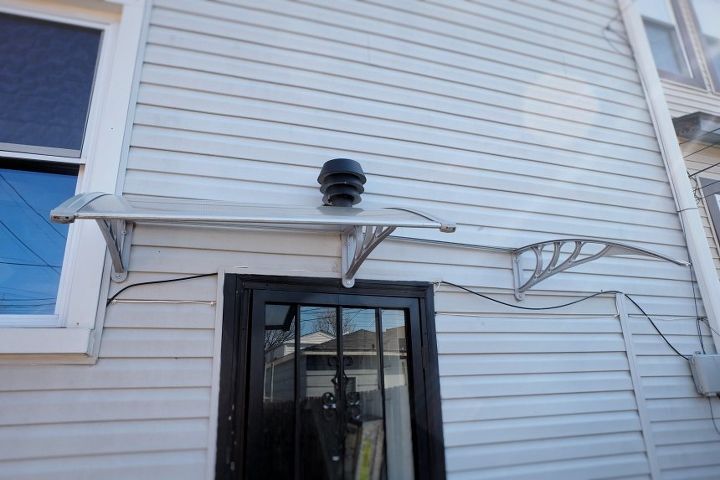
Sooo I bought this one. It broke in less than a year. Plus Mike didn't like it. Who can blame him really, it's not the most attractive thing in the world.
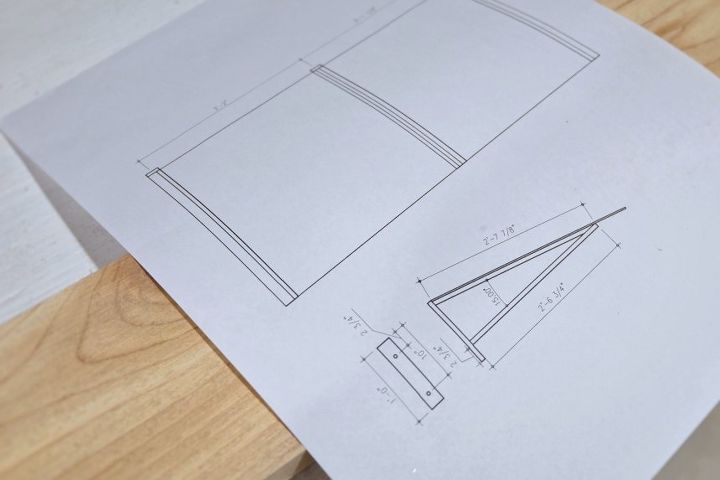
Sooo I had this grand idea, see, and drew one up on the computer planning to reuse the plastic sheeting material from the old one and building new parts from fancy pants cedar.
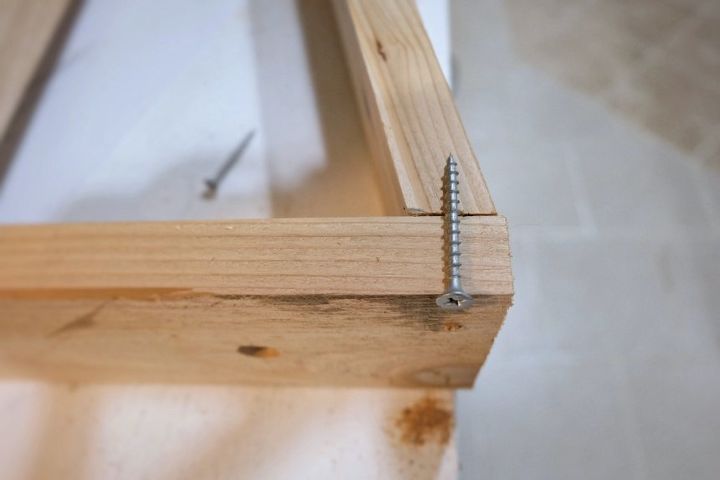
It was all going so smoothly too, it was odd. Murphy's Law is my middle name, see. I used 1x4 cedar for a backing piece and the top piece, then 1x2 for the cross support. Using galvanized nails and Gorilla glue, assembly was easy.
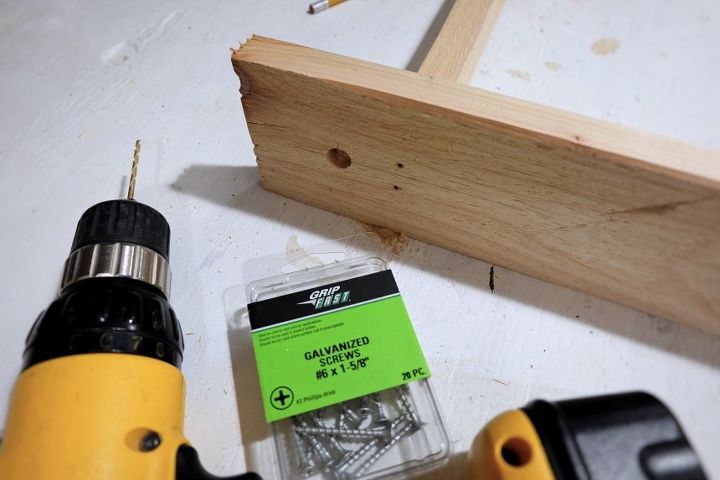
Here's a handy tip: use one of your screws to line up where you should pilot drill your holes to avoid the wood splitting.
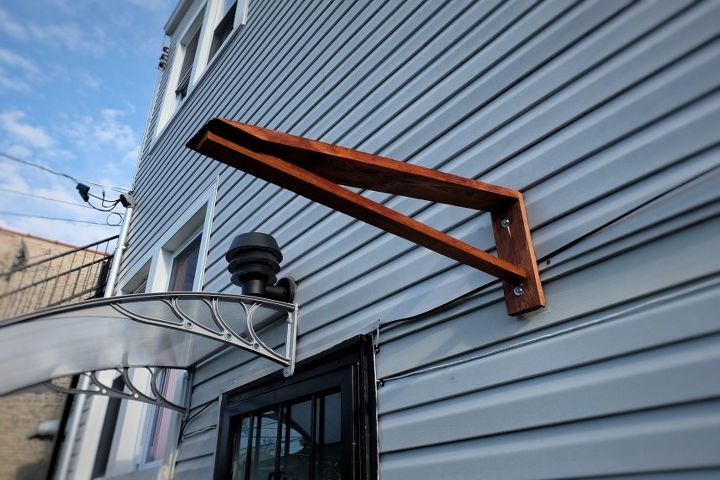
Sooo I built three of these brackets and stained them with the stain I didn't like on the deck, hoping I'd like it here. Nope. Did not. Too much contrast.
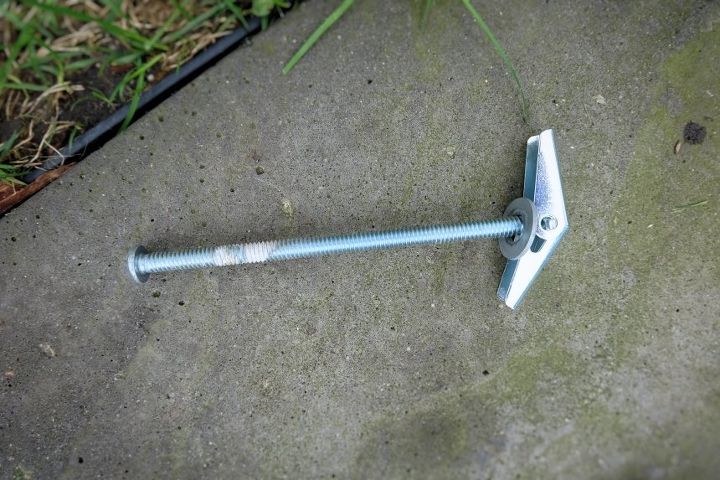
And by the way, when using these toggles, save your sanity and always remember that this is the direction everything goes. Otherwise you'll waste an hour of your life and be far too frustrated and feel like a dope. FYI.
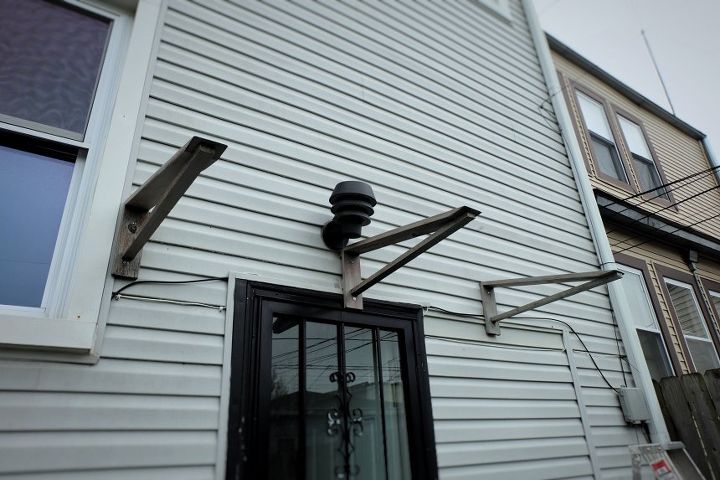
Soooo, heh, not liking the stain, I picked up a solid stain in a gray. Which is where my mood was going, gray, as this project was taking shape. This was not looking as good as it did in my head.
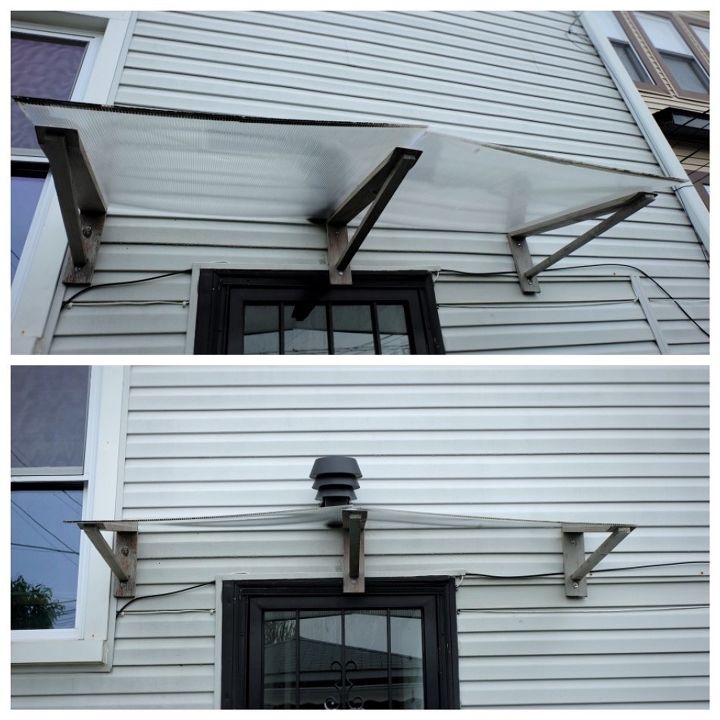
And here's where everything went to poop. I attached the plastic sheeting with small screws and fender washers and holy cow, this turned super ugly super fast. Wow, it looks terrible.
I seriously was contemplating never DIY'ing anything again.
Be sure to swing on by my blog, Flipping the Flip, for more on this story and a whole slew of other (hopefully more successful) ones!
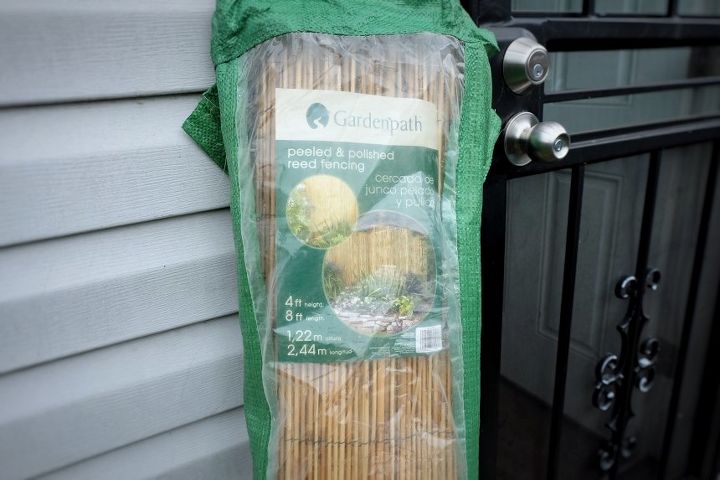
Already anticipating that the plastic was going to be a disaster, I picked up this 4'x8' roll of reed fencing. Hesitantly. Thinking it might look too tacky island theme but, I couldn't leave the plastic as is. Up it went.
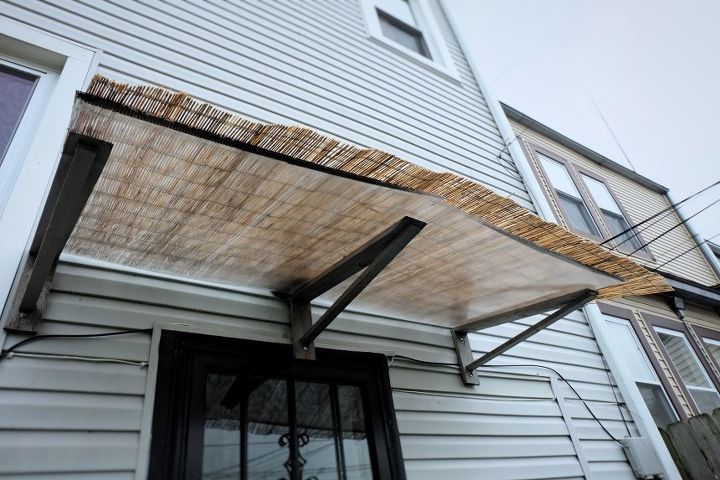
Ooooh my gosh, it's so bad when viewed from underneath.
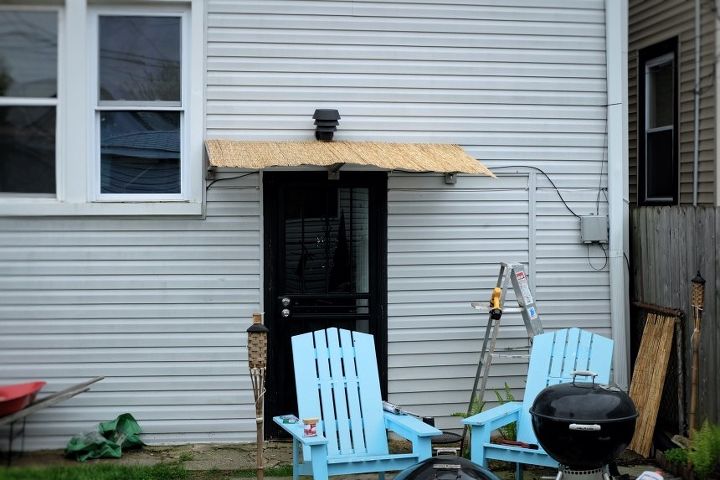
Viewed from the deck, it's possibly maybe not as bad but it definitely reads island tiki hut theme. Not the look I was going for.
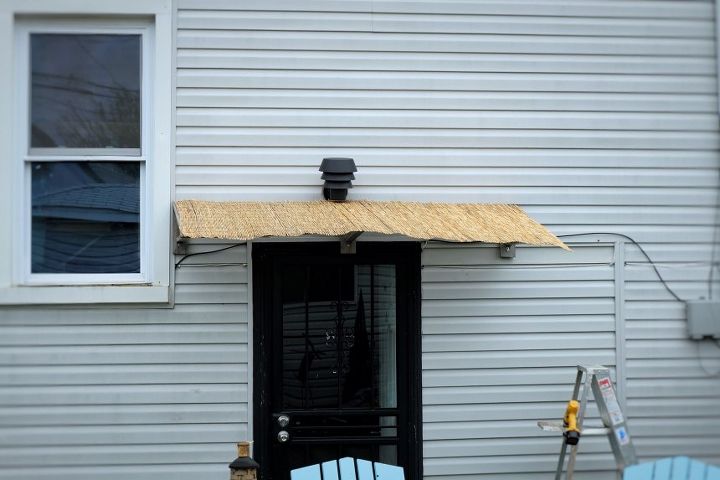
Sigh. Ok, I'm going to have to revisit this for sure. Plus the plastic isn't terribly strong so no doubt it'll crash at the first heavy wet snow. Put on rethinking cap now, I've got the summer to rework this.
Why did I share this with you if I'm unhappy with it?
Several reasons:
1. There are DIY fails. Pick yourself up and redo it. This is how we learn and learning is good.
2. To give you inspiration to try this project yourself and come up with a better solution.
3. To let you know that something like a door awning is totally DIY-able.
4. And lastly, to give you a laugh at my pain and suffering.
Be sure to click the link below for more on this and so much more over on my blog!
Edited to add: I have since changed this out -- check out my other projects on Hometalk or swing by the blog!
Resources for this project:
See all materials


Comments
Join the conversation
-
Just loved the honesty of this piece,..."when everything went to Poop...." that seems to a major step in all my design processes. It's those times you look at that first or second coat in a refinish job and think this looks like....Some sand paper and a few more coats and it is all worth. And sometimes a major mess up leads your to a more creative solutions.
-
We didn't want to build an addition over our plain front door on our low ranch home. We bought a large vinyl pergola, installed it even with the fascia board (front of overhang) on extended wooden anchors in the ground. We used heavy clear tape to attach heavy weight clear plastic sheeting over the top. We finally have a shelter from rain and snow, with minimal investment and no permits. It looks pretty nice, too, making our front door more obvious. It has just come through the first winter of wind, rain, snow, freezing--with no damage to it at all.


Frequently asked questions
Have a question about this project?