


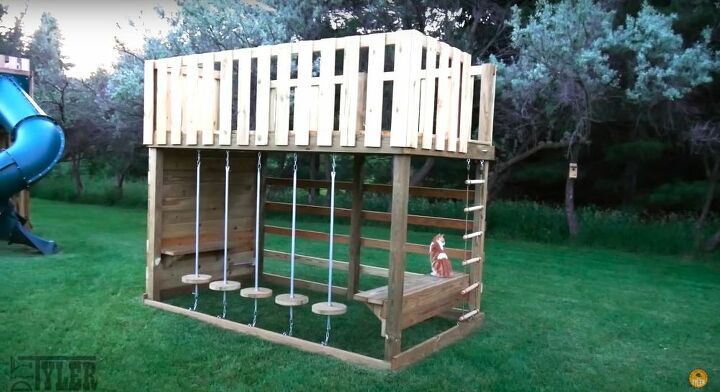
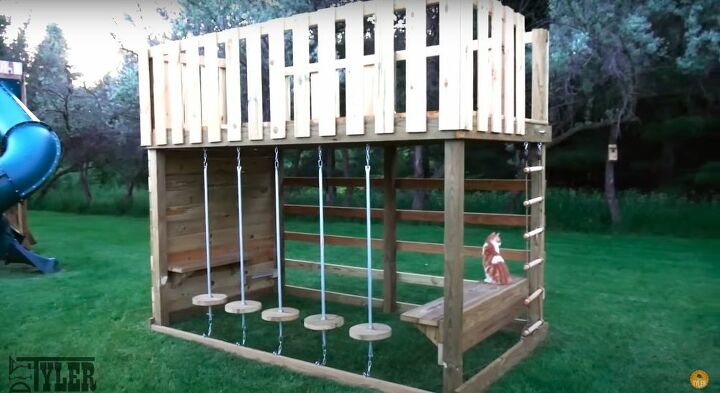
Build a DIY Jungle Gym That Will Make You the Talk of the Town

Recently I built what I dubbed “The World’s Greatest Swingset” for my kids. Always wanting to one-up myself, I embarked on a journey to create the world’s greatest obstacle course and came up with this four-sided jungle gym with endless activities. From a rock climbing wall, to island swings, to a spacious deck on top, this jungle gym has provided my kids with hours of fun and exercise. So what are you waiting for, check out my step-by-step guide for a DIY jungle gym!

The specific amounts of lumber that you’ll need will vary a bit depending on the dimensions you choose to make your jungle gym, but I’ve provided a rough list below.
Materials:
- 4”x4”x 10 ft lumber
- 2”x6”x 10 ft lumber
- 2”x12”x 10 ft lumber
- Deck boards
- 2 ½” deck screws
- 4” structural screws
- ¾” EMT conduit
- Rock climbing handholds
- Dog ear fence boards
- Chain - I used about 35 links for my project
- 10 chain bolts
- Rope ladder
- Gate handholds
Tools:
- Cordless miter saw
- Circular saw
- Electric drill
- Screwdriver
- Allen wrench
- Level
- Reciprocating saw
- Band saw
- Circle cutting jig
- Angle grinder
- Channel lock
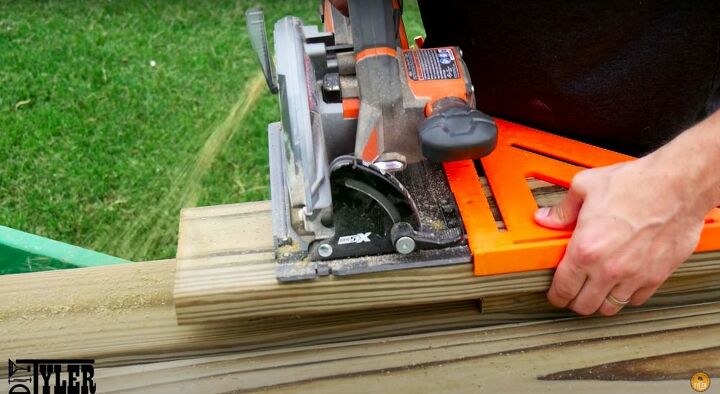
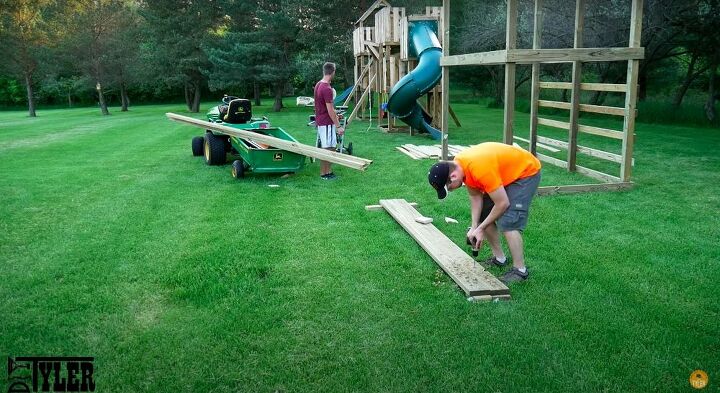
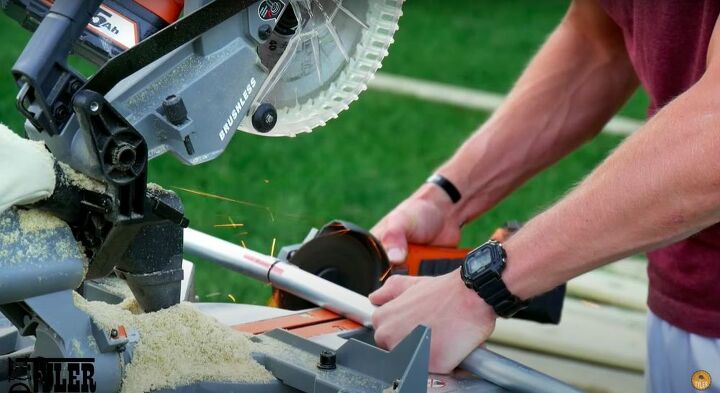
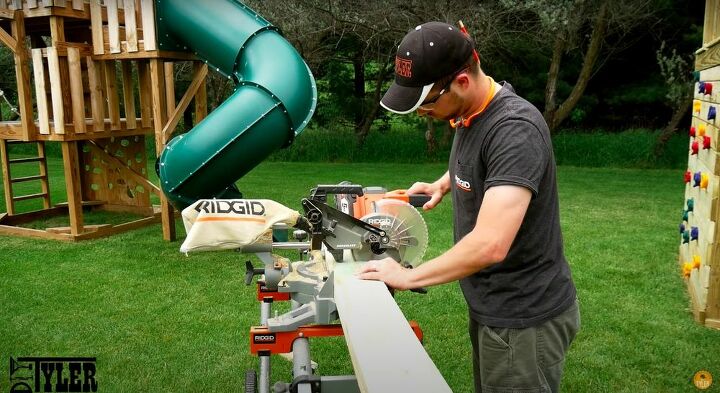
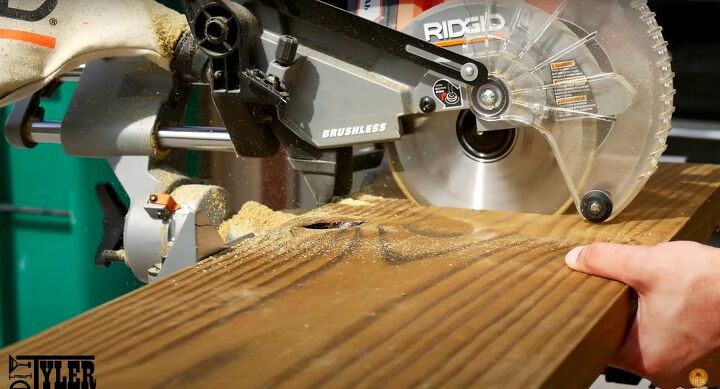
Once I had all of my materials assembled, it was time to cut my lumber to size. Often, ten foot pieces of lumber are a bit longer than ten feet, and you don’t want to be part way through assembling a project and have to go back to the workshop to cut lumber. I used a cordless miter saw, but you can make the same cuts with a speed square and a circular saw. I found it easier to actually use a speed square and a circular saw while out in the field. It was quicker and easier than lugging lumber over to a miter saw.
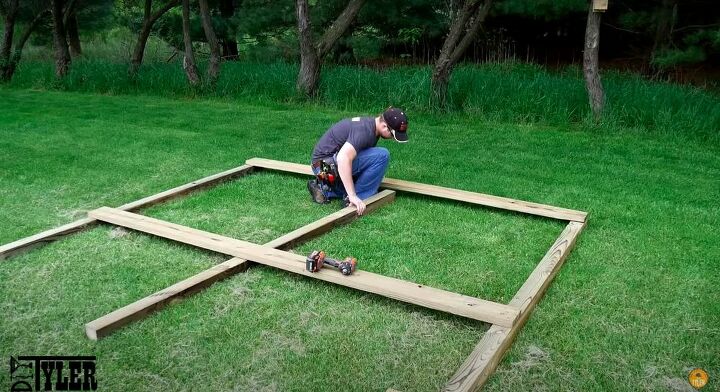
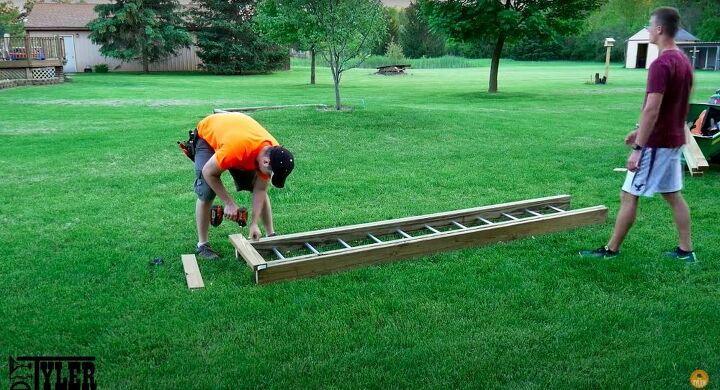
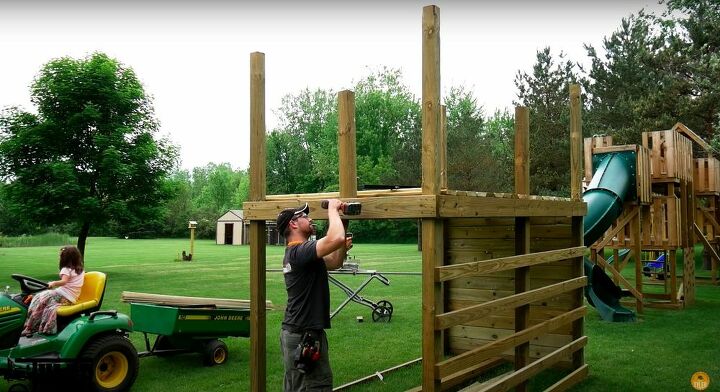
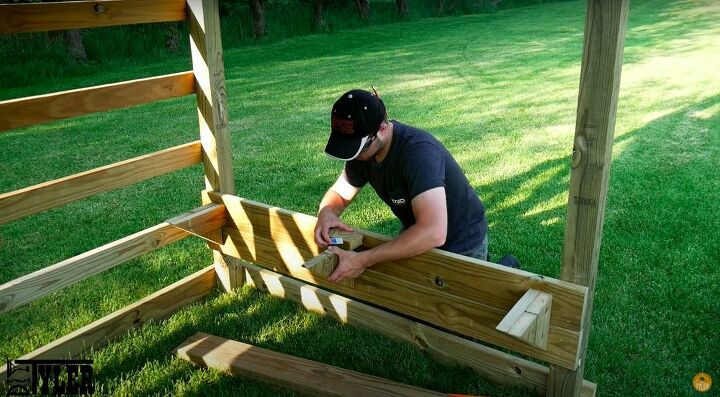
The first side I framed was the side with a ladder wall. This wall is made of three 4”x4”x10’s and two 2”x6”x10’s, fastened together with six 2 ½” screws and two 4” structural screws. Lay out the lumber as shown in the picture, then add multiple screws to each corner.
The other side is built in a similar manner to the ladder side, but instead of using a 2”x6” I used a 2”x4” for the bottom beam to minimize the object in the way if the kids fall off the islands. I added a beam to hold the islands in place along the bottom of the wall.
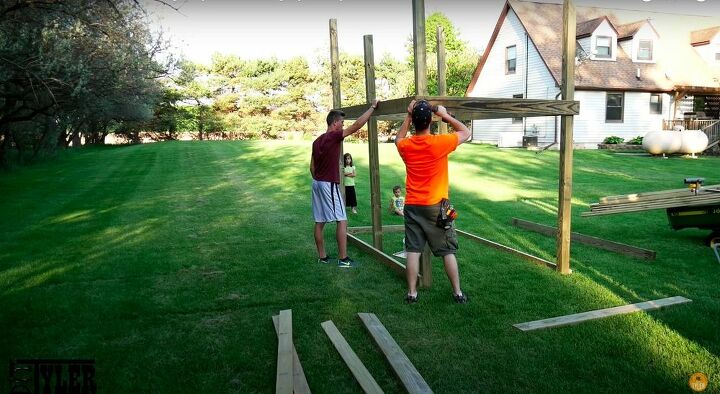
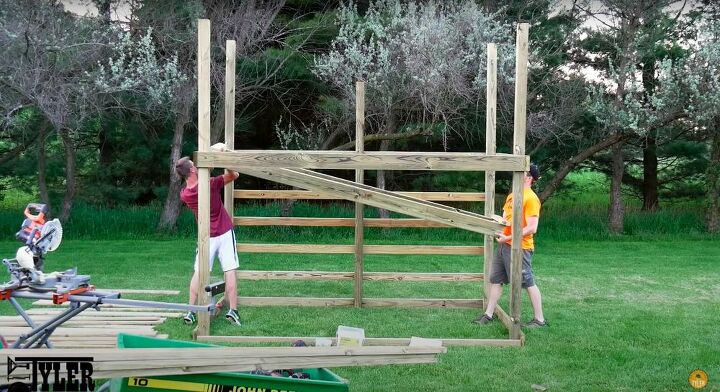
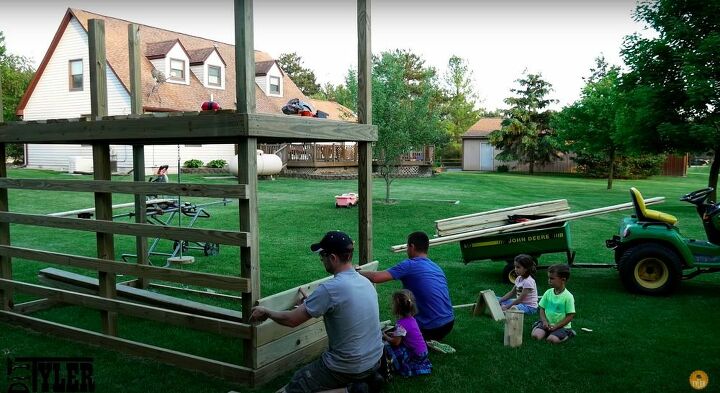
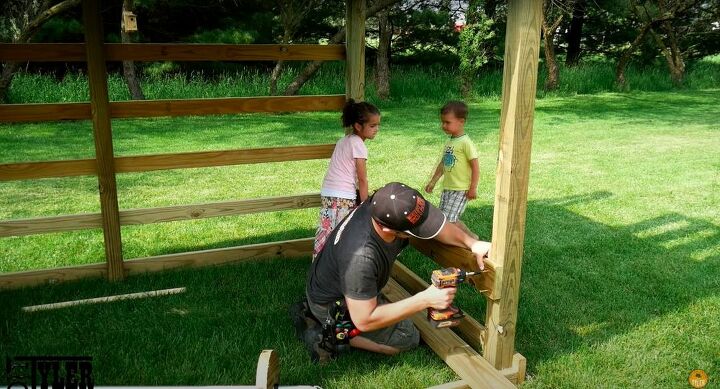
Using my brother’s help, we stood up each wall and secured the rim joist on either end to attach them.
Then I added a second set of beams from the inside of the structure to secure everything in place.

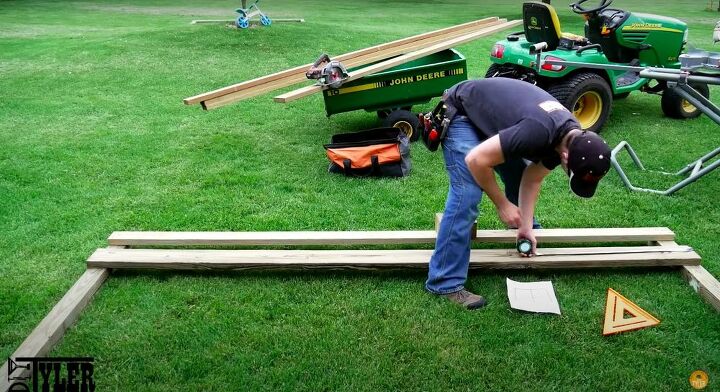
Using 2”x4”x10’s, build the ladder wall. As I said before, make sure to measure your lumber to ensure that it is actually ten feet long, and cut if needed. First I measured four equidistant spots going up the wall.
Once again, I enlisted my brother’s help, and we each held up once side of the 2”x4” and screwed it into place using 2 ½” deck screws. We repeated this three more times and then let the kiddos try it out.
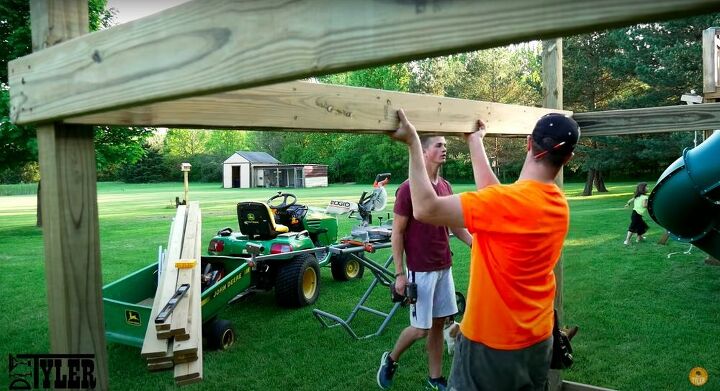
The monkey bars are made using four 2”x6”x10”s. On two of the 2”x6”s I measured and drilled holes to accept a ¾” EMT conduit. I was surprised by how strong the ¾” EMT conduit was and thrilled that I was able to put it to use as monkey bars in this jungle gym.
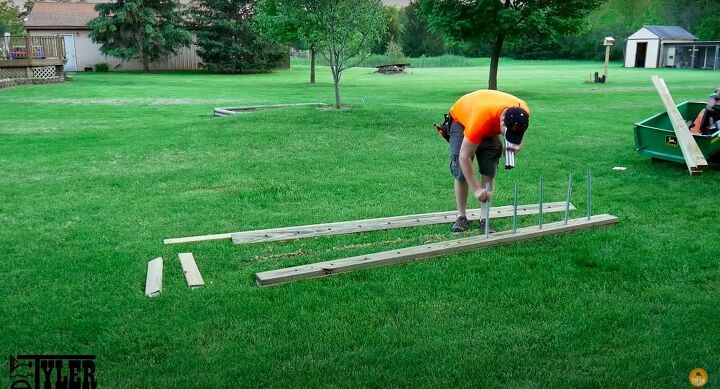
With the conduit cut, I inserted them into the holes and attached the beam with holes in it to a 2”x6” without holes in it with 2 ½” deck screws. This will stop the conduit from sliding out the side of the beam.
I then repeated the process with the remaining beams and then attached them to the other side of the EMT conduits.
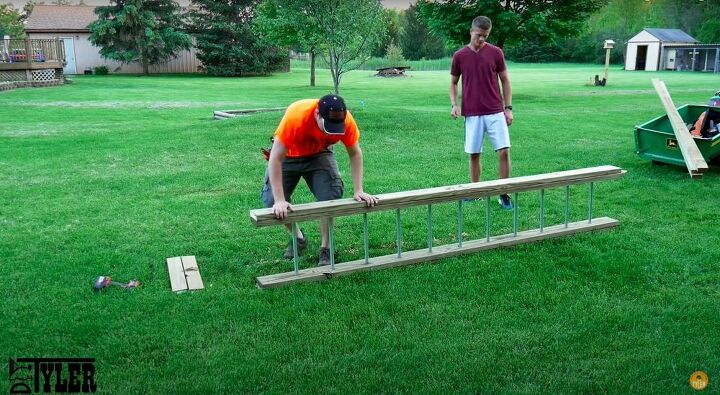
To help with installation, I attached a temporary board that overlaps each end of the bars. This is important because there is nothing holding the two sides of the bars together until they are installed onto the structure.
Once again I enlisted my brother’s help to lift the bars into place and fasten screws from the outside with eight 2 ½” deck screws on either side.
I added a 2 ½” screw up against each end of each EMT conduit to stop them from rotating when the kids played on them.
I added angle brackets with four 1 ¼” deck screws per bracket to make sure everything was sturdy. The last thing you want is one of these failing and causing someone to get hurt, so err on the side of caution and use as many additional screws as you feel necessary.
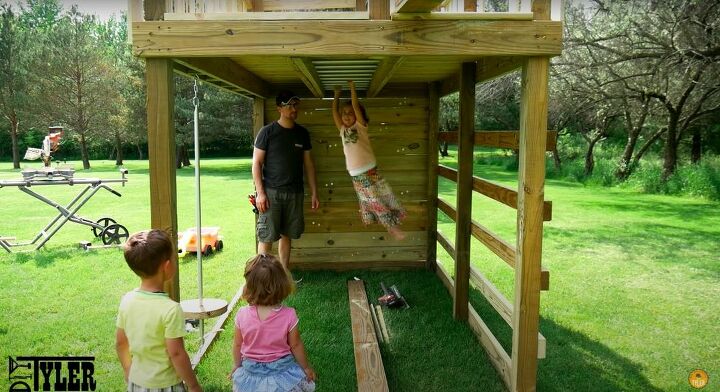
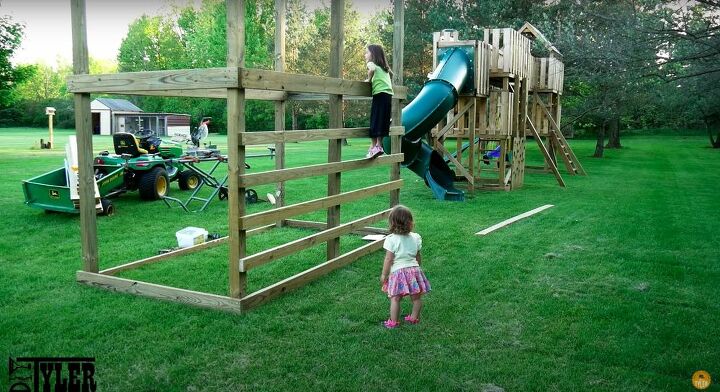
As usual, I had to give my kids a chance to test it out and make sure that it worked properly. I think they approved!
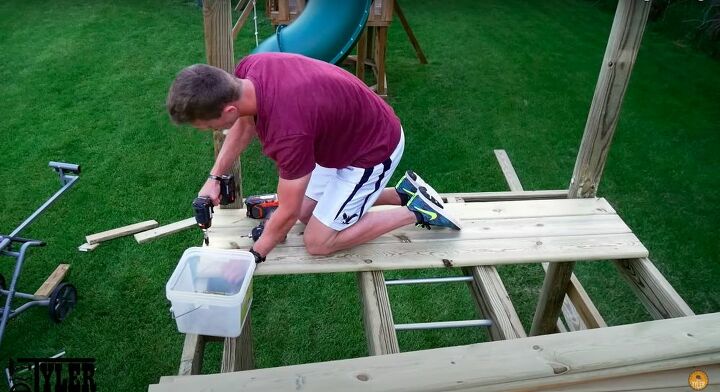
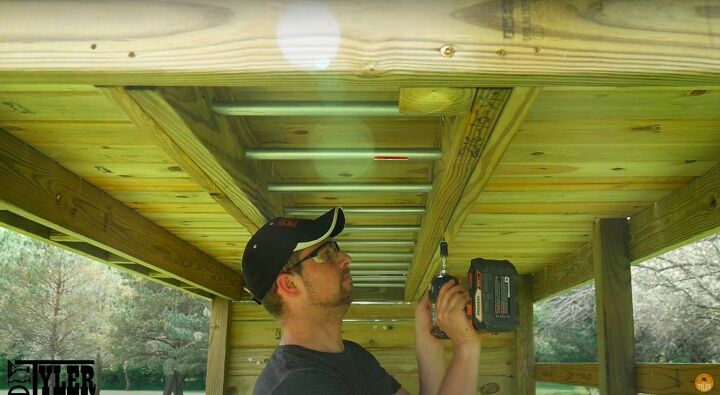
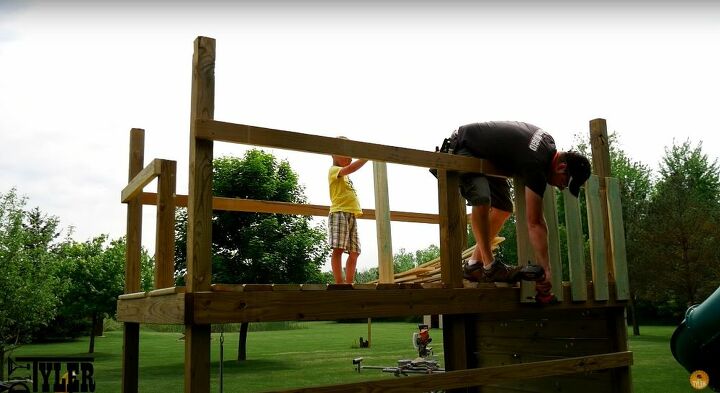
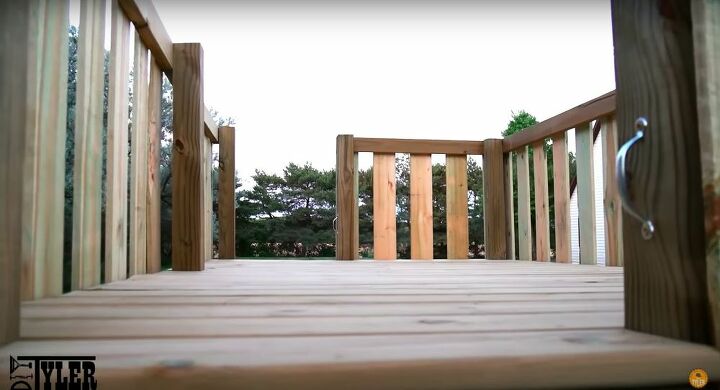
Now it’s time to build the deck at the top of the jungle gym. I cut the planks to length to fit the deck and fastened each one in place using two deck screws per rim joist. The deck boards at either end of the deck will need to be cut to accept the railing post, which I’ll show a little later in my tutorial.
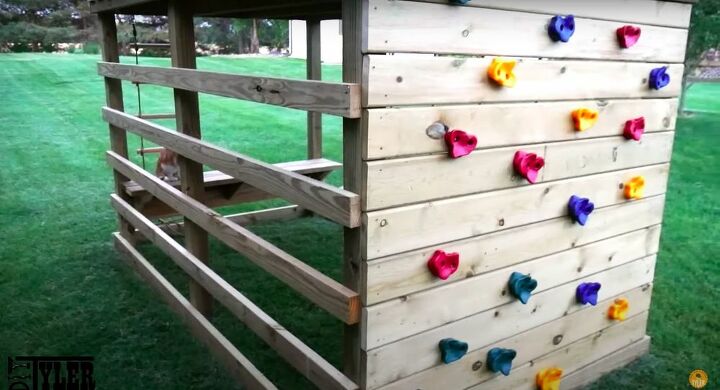
I assembled the rock wall using deck boards fastened with two 2 ½” deck screws on either end.
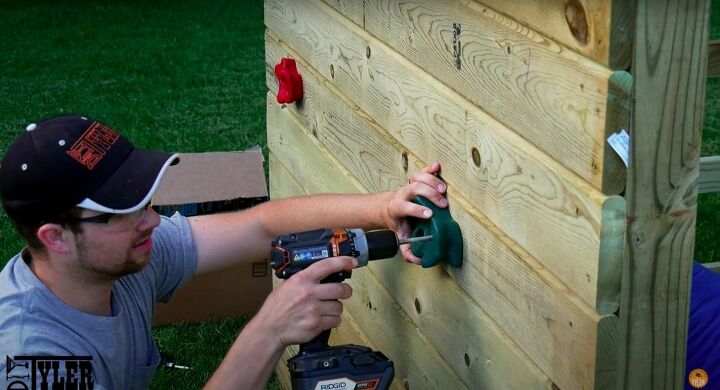
Once I had screwed in all the boards, I attached rock climbing handholds in a random fashion, making sure that it was still challenging for the kids to keep them playing for hours.
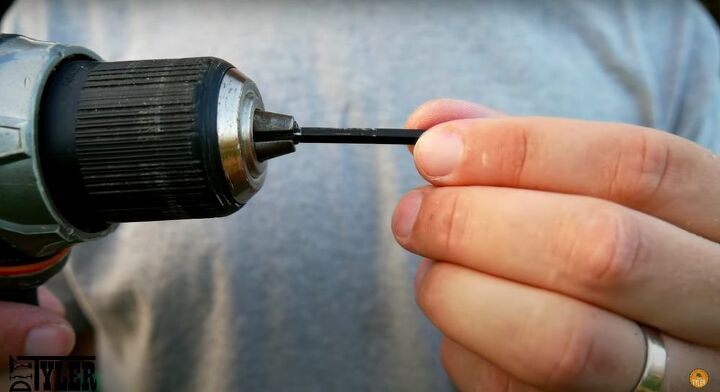
I attached a cut off allen wrench to my drill, which made attaching the handhold go much faster than if I had done it by hand.
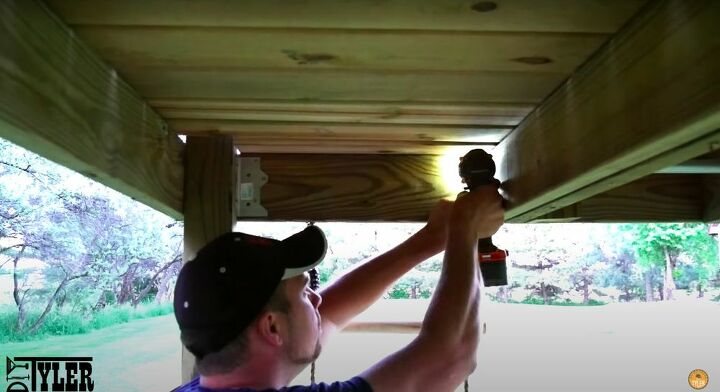
I bolted the railing beam into place just to the right of the monkey bars using 4” structural screws.
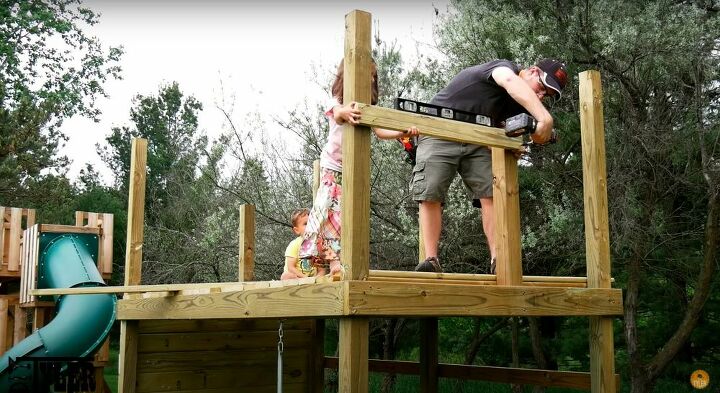
Then I assembled the rest of the railing. I used the beams from building the original structure as support, and I was able to make sure that it was all level with the help of my daughter.
I used dog ear fence boards from my local home center. I got two railing boards out of each fence board, which cut down on cost.
I fastened them to the railing using 1 ⅝” deck screws with 3 ½” spacing between them. I found it useful to drill the tip of the screws into the boards before I took them up to the top of the jungle gym to install.
Starting from one corner, I worked my way all the way across on the long sides. On the short side, where the railing post was added, I started from the railing post and made my way to the corner.
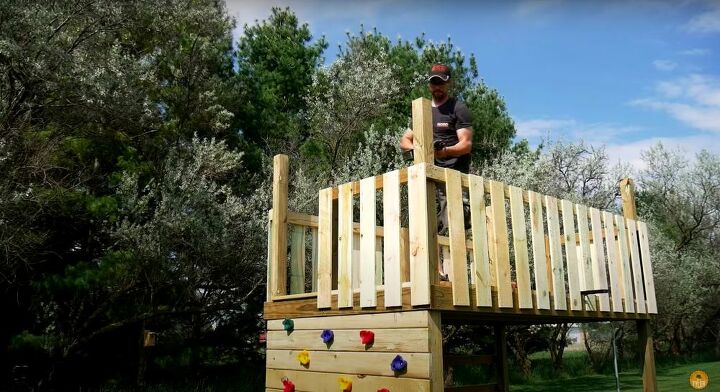
While I was up there, I took my reciprocating saw and sawed off the excess railing posts above the railing.
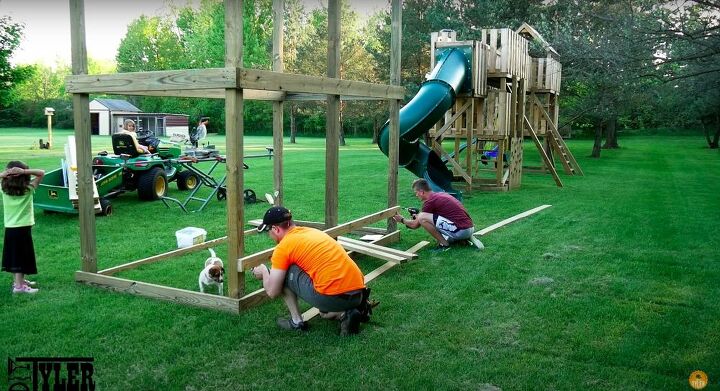
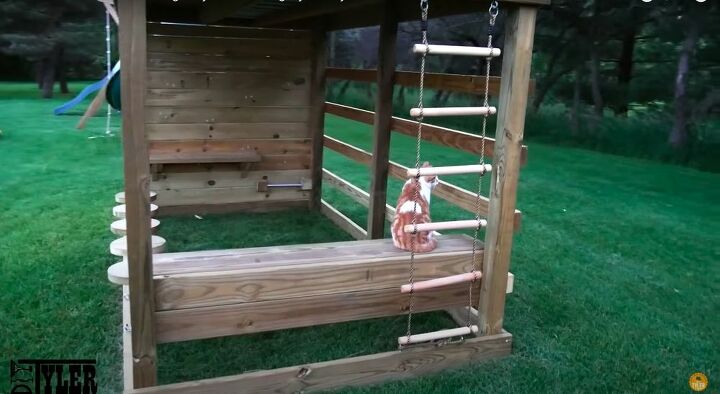
I wanted to add benches to either side of the obstacle course to enable the kids to use them to safely climb up to the monkey bars. I assembled the benches using 2”x6” materials and brackets that I made by cutting the boards diagonally.
Cut two triangles for each support, I used three supports for each bench.

Install them into the wall and then screw two boards on top of them.
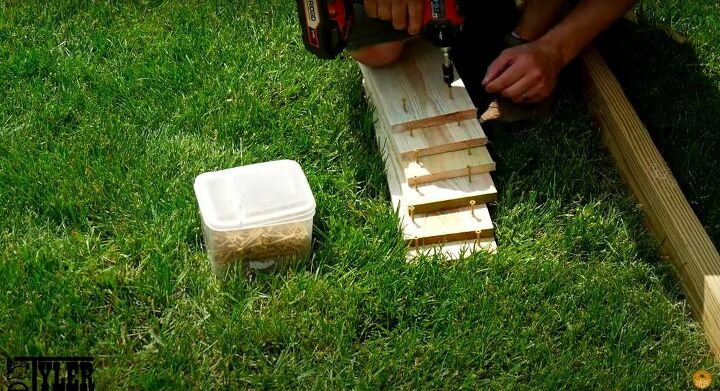
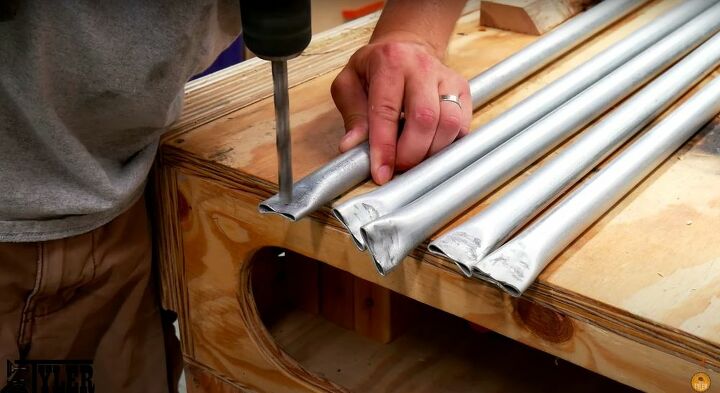
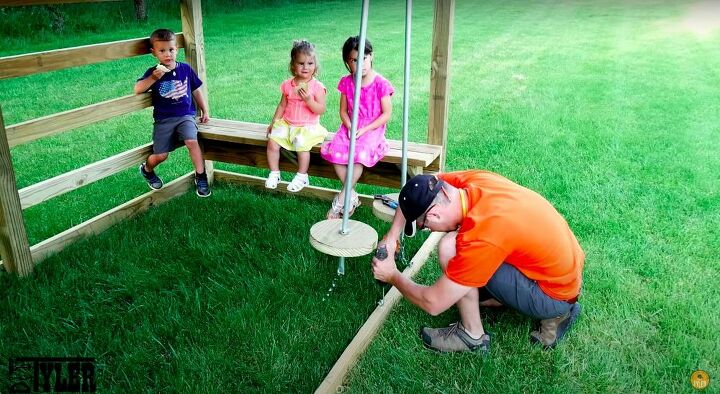
This is one of my favorite parts of this build. I cut the bases from the swings from 2”x12” lumber. Using a miter saw I cut the board into pieces that were 11 ¼” inches long. Once I had 5 of these pieces, I moved on to cut them into circles.

I used a bandsaw and a circle cutting jig to cut my circles, but you can use a jigsaw to achieve the same results if you don’t have access to a bandsaw.
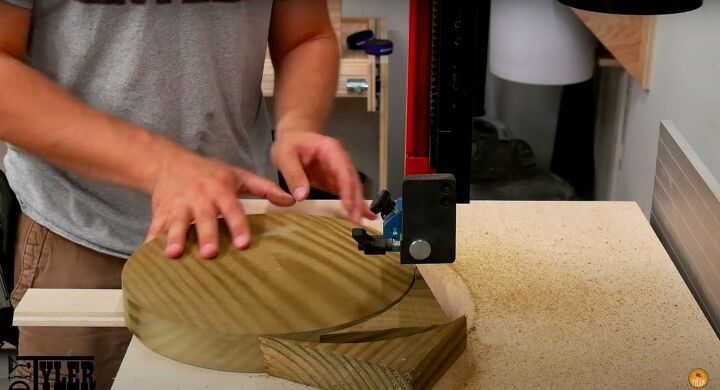
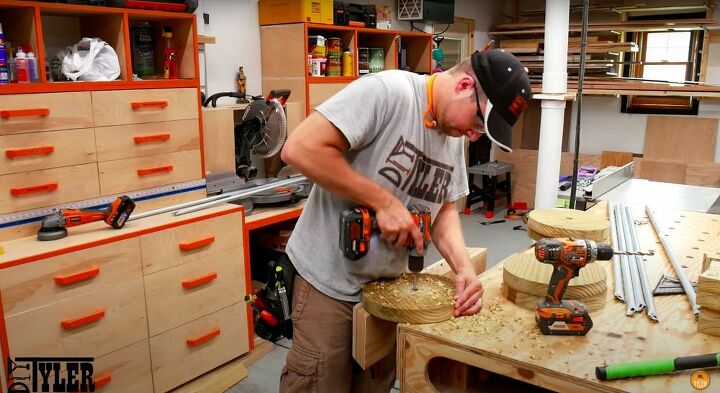
With the circles cut out I used a 15/16” drill bit to drill a hole in the center of each circle. This creates a hole big enough to accept the ¾” conduit that I’m going to thread through it.
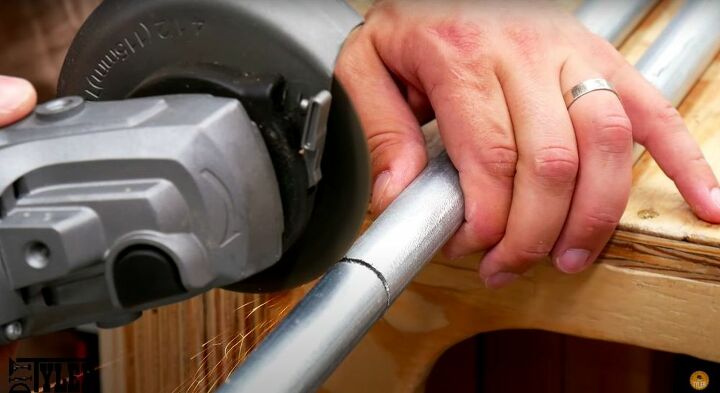
Next I cut the EMT conduit into 5 pieces using my angle grinder.
Now it was time to start assembling the swings. I flattened the EMT conduit on one side only. Then I drilled a ⅜” hole, installed the shaft collar.
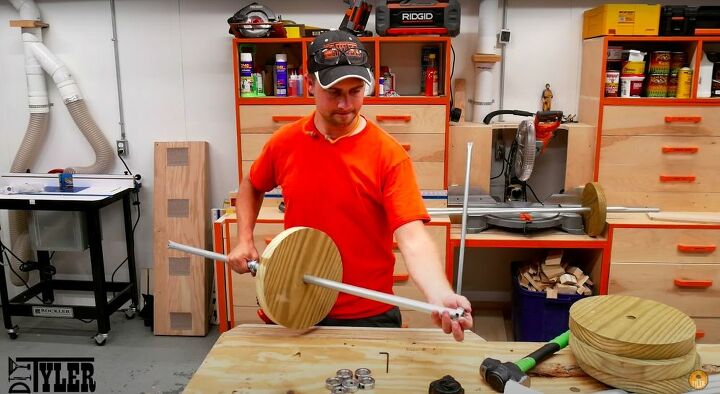
I added the swing base and another shaft collar. Then I flattened and drilled a ⅜” hole on the other end.
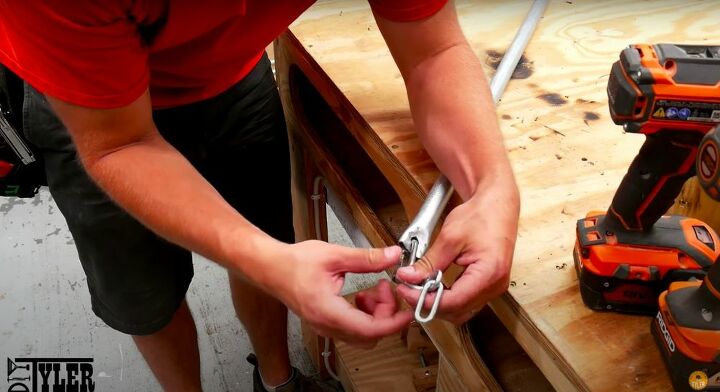
On the top I added a chain that is 3 links long and a chain bolt through the hole. On the bottom I added a chain that is 5 links long and a chain bolt through the hole.
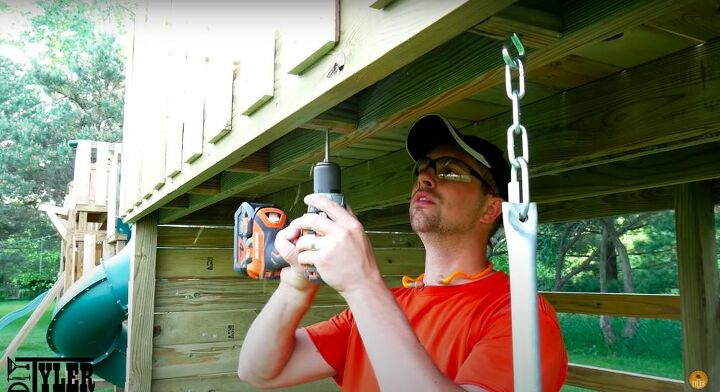
I used ¼” drill bit to drill a hole to accept the eye hook. Once again, I used a cut off allen wrench that I inserted into the drill to make things go a bit faster.
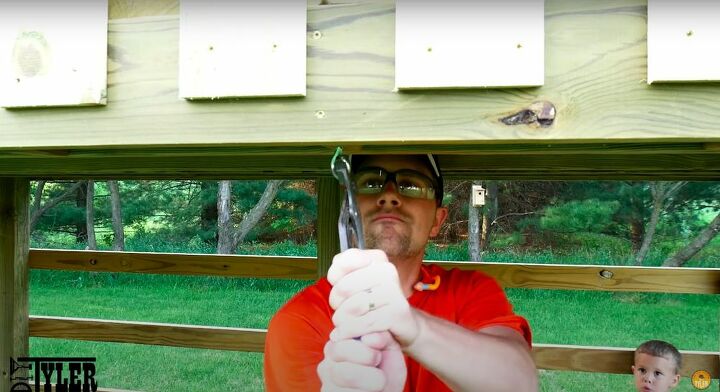
I used channel locks to open the hook and install the island. Then I tightened it back down, securing the top of the island swing in place.
I repeated the process on the plank underneath the islands. And then again with all four of the remaining islands.
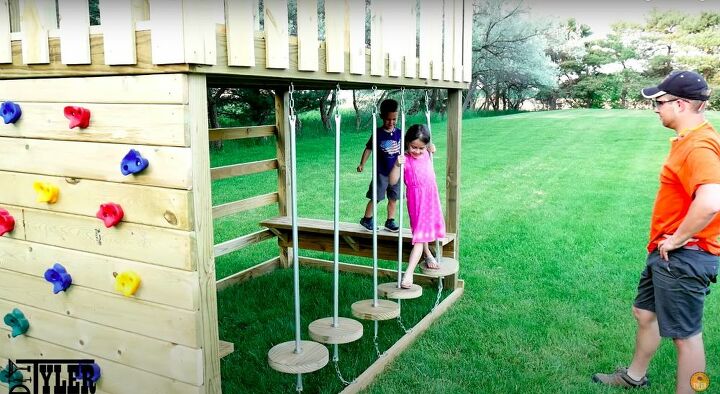
Then I gave my kids a chance to test it out. I think they approve!
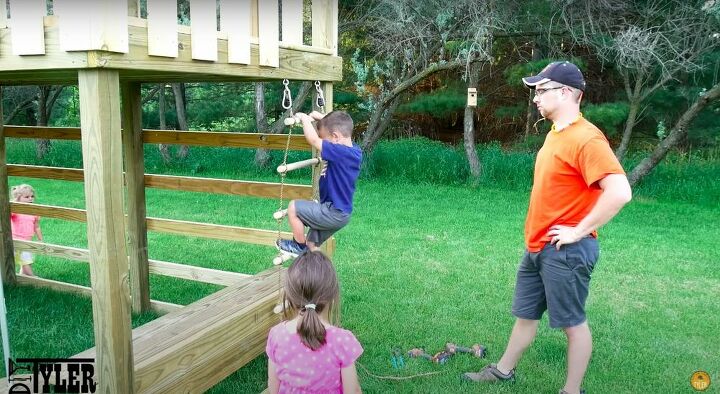
I installed a rope ladder on one end using the same eye hook technique. You can find rope ladders at sporting goods stores and they only cost around $20.
I added a few gate handholds here and there to allow the kids places to help themselves get up onto the platform.
My kids have had endless hours of fun on this jungle gym. If you’re not up to recreating the entire project, you could just pick one or two pieces of equipment to build yourself. Make sure to properly stabilize it, as this project relies on having four sides to keep it stable. Let me know what you think in the comments down below!
Comments
Join the conversation
-
Wow, that sounds like an amazing and fun project for your kids! And now this four-sided jungle gym is truly impressive. Not only are you giving your kids a fantastic play space, but it's also a great way to encourage them to stay active and engaged with all the fun activities you've included. I love how you prioritize both fun and exercise for your children, and I can imagine they must be having a blast on the island swings and the rock climbing wall. It's so important to instill a love for physical activity at a young age, and you've done just that with this incredible jungle gym. Thank you for sharing your step-by-step guide for a DIY jungle gym. It has inspired me to build the mini gym I've been procrastinating on building. I desperately want it in order to make sure I never skip my upper butt exercises, I guess I'll just have to start working on this gym I so want.


Frequently asked questions
Have a question about this project?
what is the length and width of the finished size of this jungle gym
please and Thanku
Also is there a link to buy the plans or is this what I send to my contractor to build ?