


How To Make A Small DIY Living Gallery Wall
Summer is my favorite season, so I try to stretch it out as long as I can. Entertaining outside is one of my favorite ways to accomplish this! To add a bit of interest to our patio area, I created a small DIY living gallery wall. Read on to see how!
Gather materials.
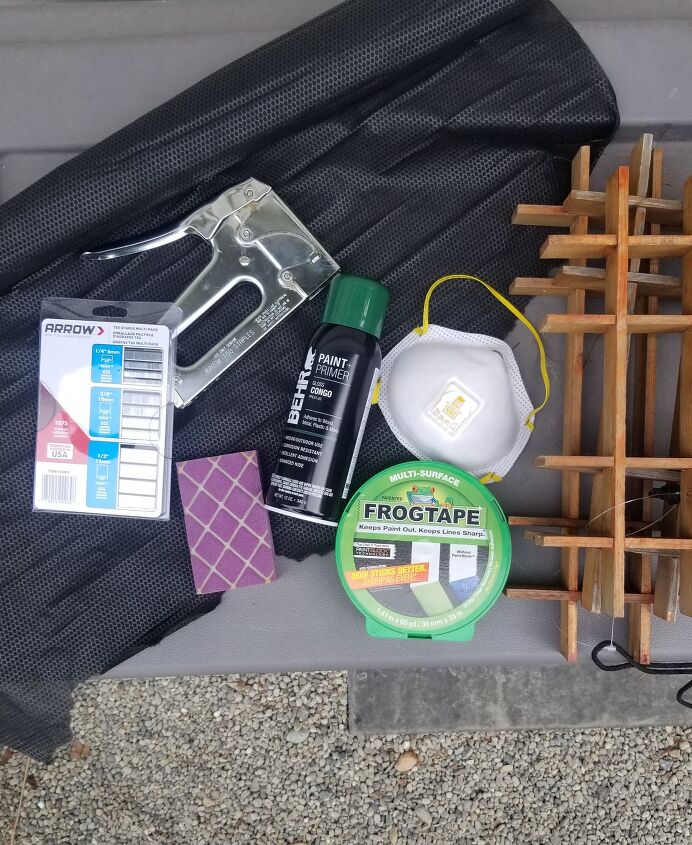
Inspiration struck when I went to a thrift store and found these wood squares. I figured I could turn them into cool plant hangers.
Sand wood.
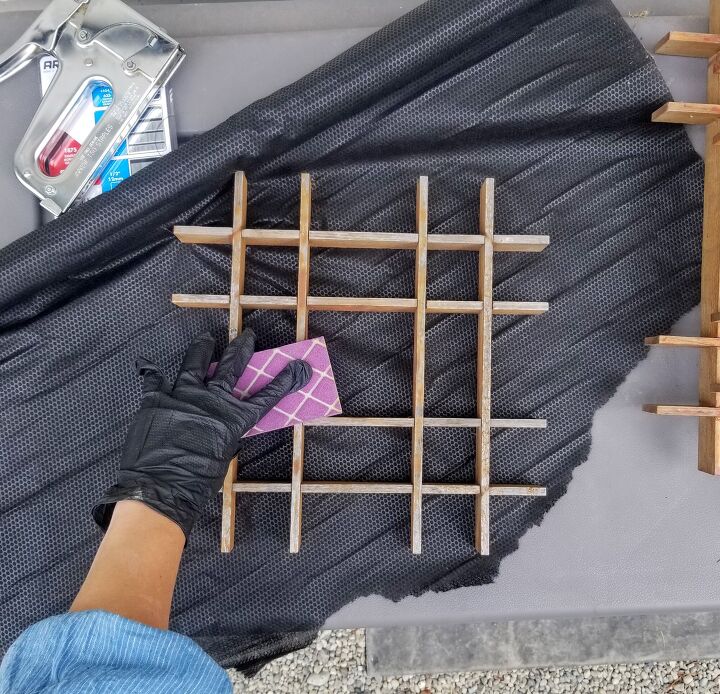
I have no idea what this piece was originally. There was some glue residue like the three pieces were attached. I sanded off the glue, remnants of what looked like a cedar color stain, and the general roughness. Make sure to wipe down a piece after sanding.
Tape off for a two-tone paint.
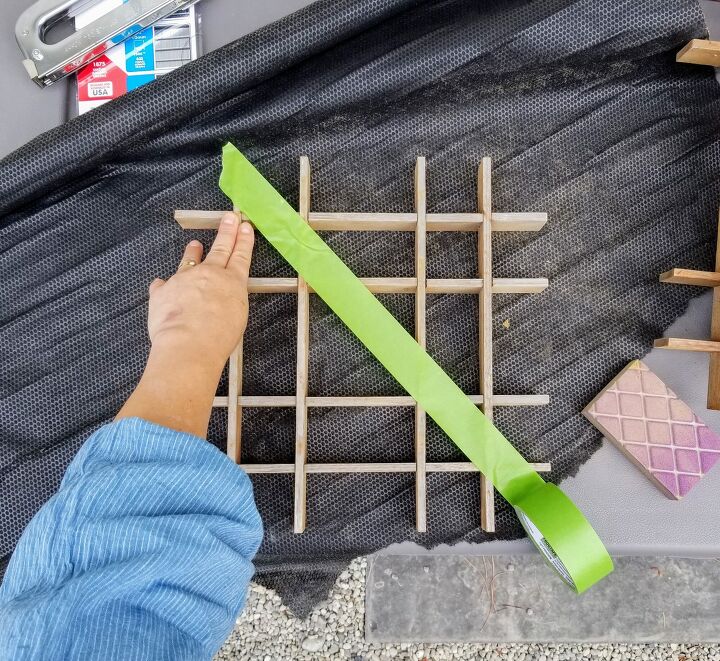
I decided to tape on the diagonal to add further interest to my two-tone paint. I ended up adding plastic to prevent any overspray.
Apply spray paint or other paint.
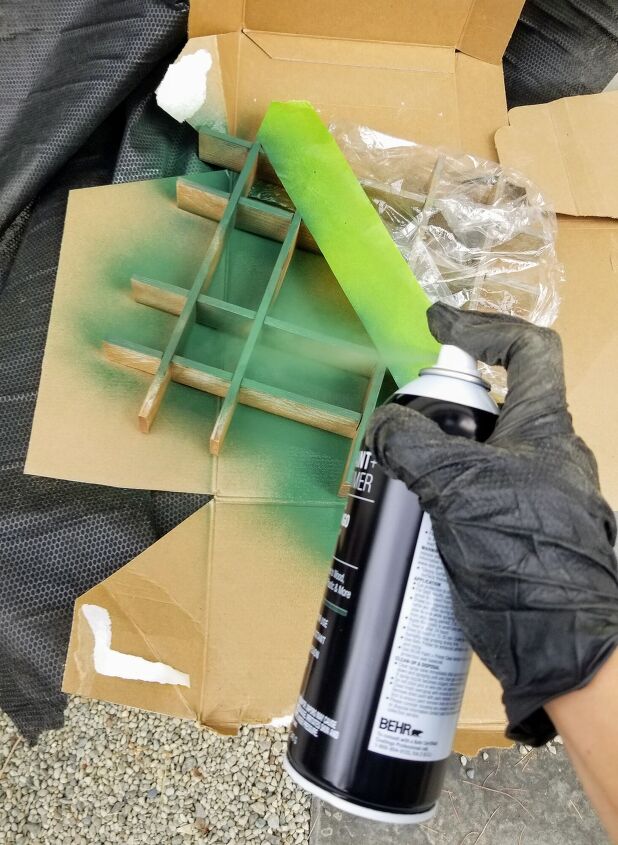
Spray in smooth sweeping motion.
Read product instructions before applying.
Paint second color if desired.
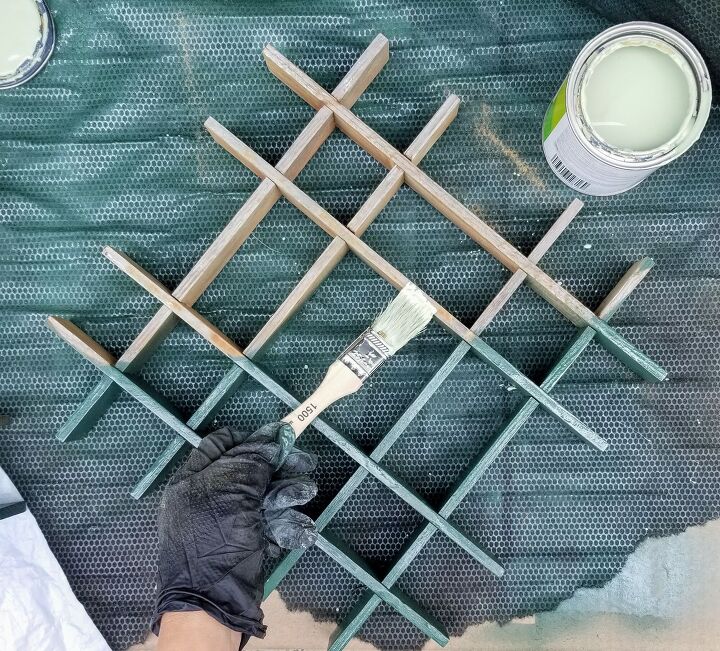
We have a bunch of samples from our exterior paint trim and I picked one of these for the contrasting color on this project.
Cut weed barrier fabric to fit your piece.
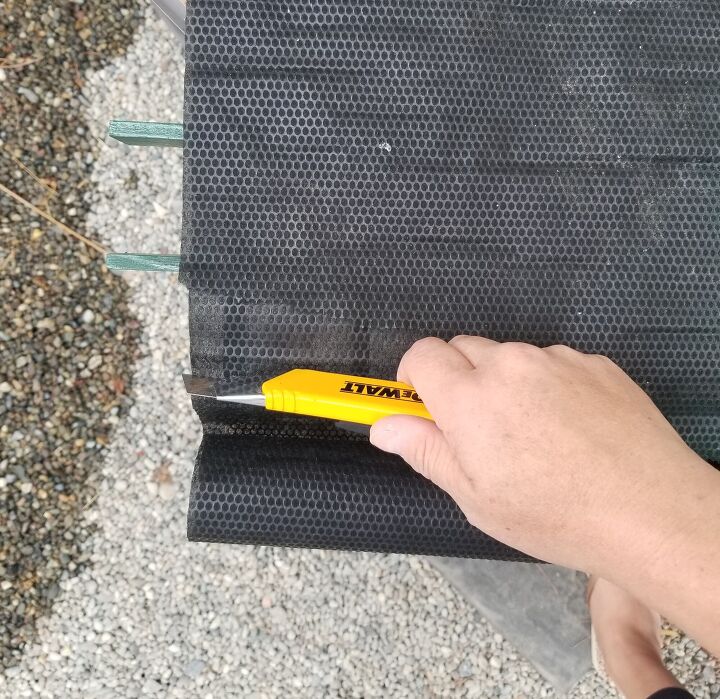
To transform this salvaged piece into a planter, I decided to use weed barrier fabric to hold my plants.
Fold the fabric into a pocket to hold your plant.
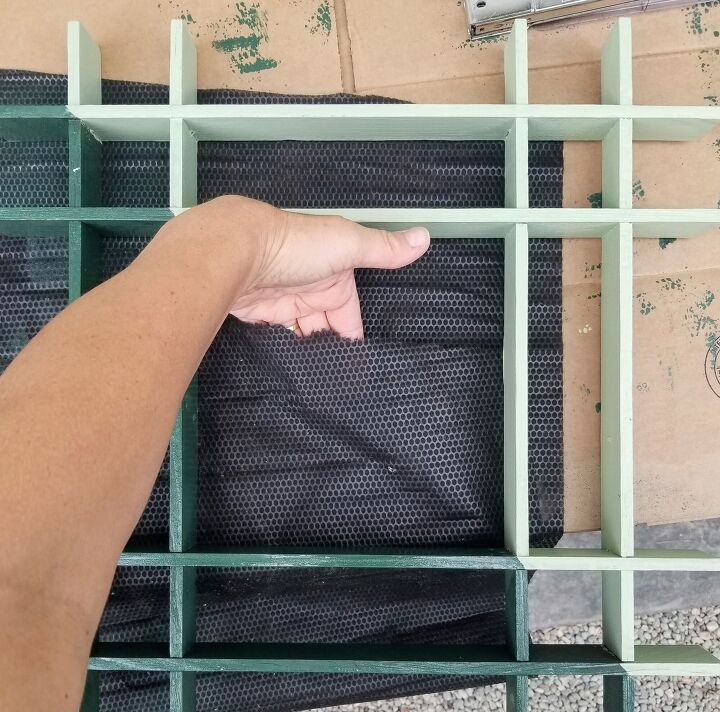
Create a large enough pocket to hold soil and a small plant.
Staple weed barrier fabric to wood.
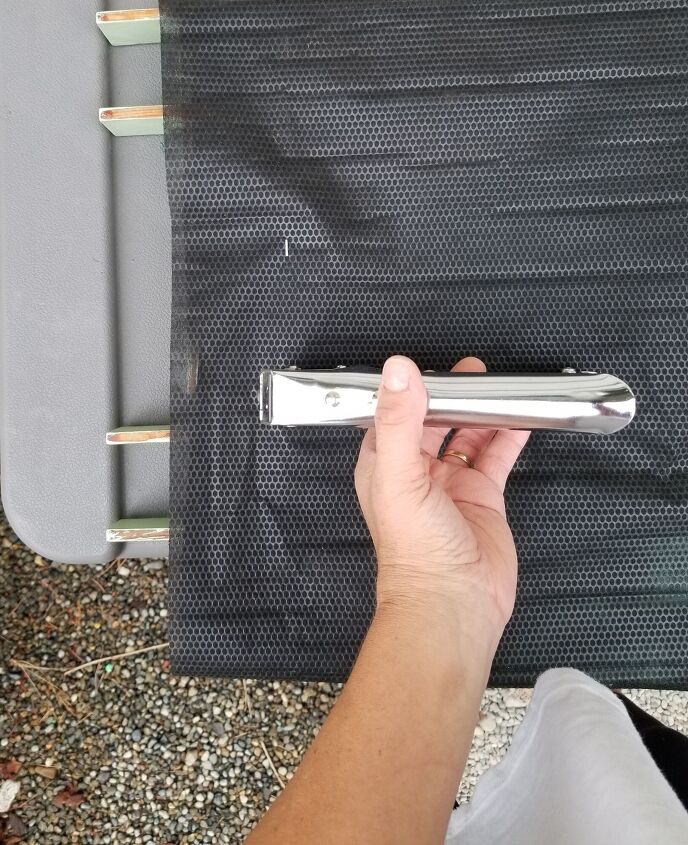
To provide more support, I cut a piece of cardboard to wrap inside the fabric, and stapled both to the wood. Plywood could also be used for further support.
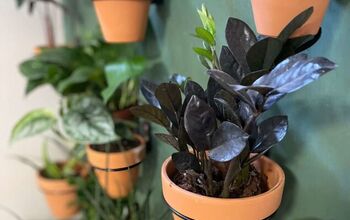
Fill pocket with soil and your plant.
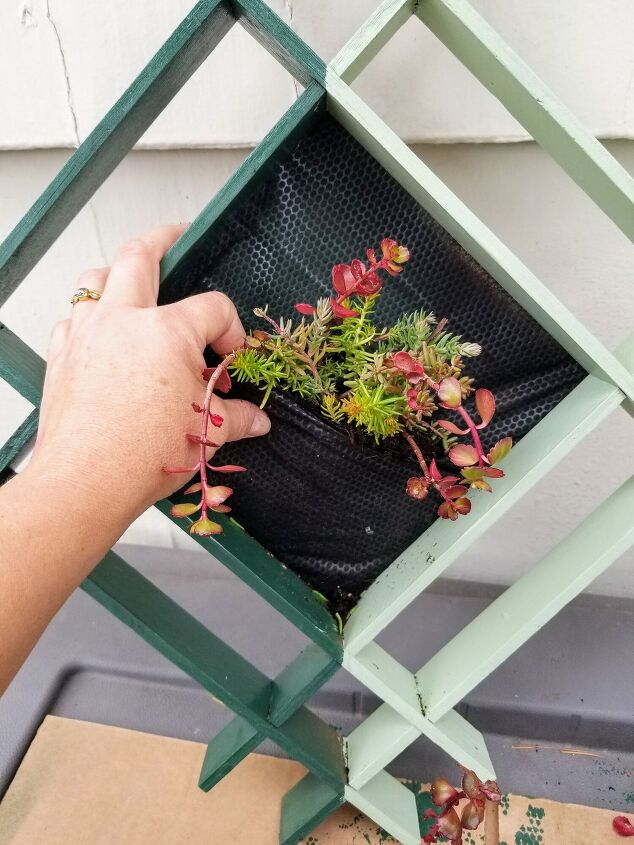
I used smaller plants so the roots systems would fit well. These wood pieces were sold with black ropes that must have been used for hanging, so I repurposed them to hang on to our diy privacy screen.
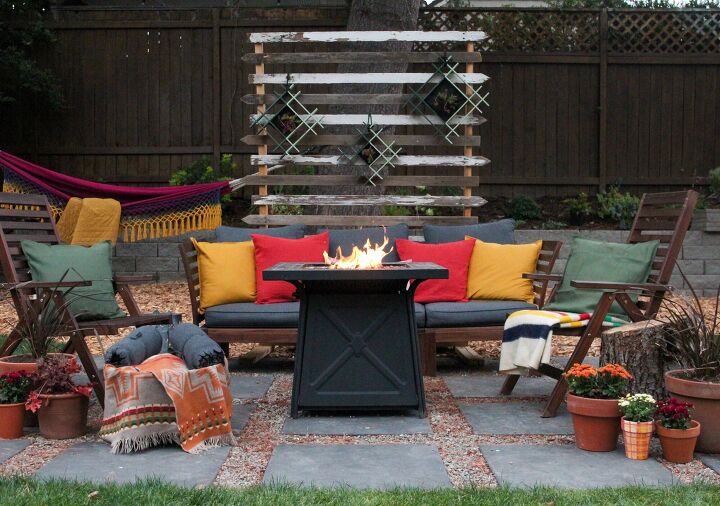
Ta-da!
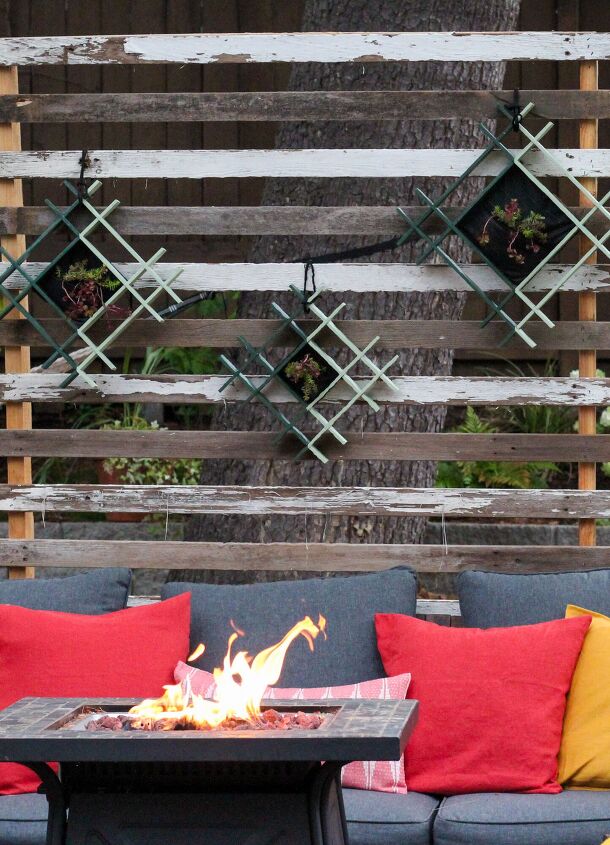
Small living gallery wall on our privacy screen.
Thanks for reading!
If you like the privacy screen shown here, read how we used salvaged picket fence parts to create it.
For more fun projects, make sure to subscribe to my site This Dear Casa.
Resources for this project:
See all materials


Comments
Join the conversation
-
How cute are those?? Love it!!
-
Excellent!


Frequently asked questions
Have a question about this project?