


Flower Box With a Tall Back for Privacy

7 Materials
$50
2 Days
Advanced
I've had a lot of comments from Hometalkers on my previous post, the privacy project. It was mentioned by many, 'we need a simpler solution'. 'Maybe something light weight and manageable'.
So I sat down and thought of an easier project. I came up with this flower bed/box and tall backing. This privacy solution is light weight, uses minimal lumber and can still help reduce a nosy neighbor's view.
As always, you can modify the project to fit your needs. This may give you some ideas of your own too. Check out the video for inspiration...
{
"id": "3816272",
"alt": "Video for inspiration and ideas",
"title": "Video for inspiration and ideas",
"video_link": "https://www.youtube.com/embed/xp4ZYL0EL-E",
"youtube_video_id": "xp4ZYL0EL-E"
}
{
"width": 634,
"height": 357,
"showRelated": true
}
In the video I take you through the steps. I just made this with you all in mind....I didn't have time to go to the home center and add the flowers. But the arrangement possibilities are endless.
So, this video will give you a good idea of what's involved. The key here is to inspire.... Some may feel they can tackle the project, other might modify it to suit their needs....
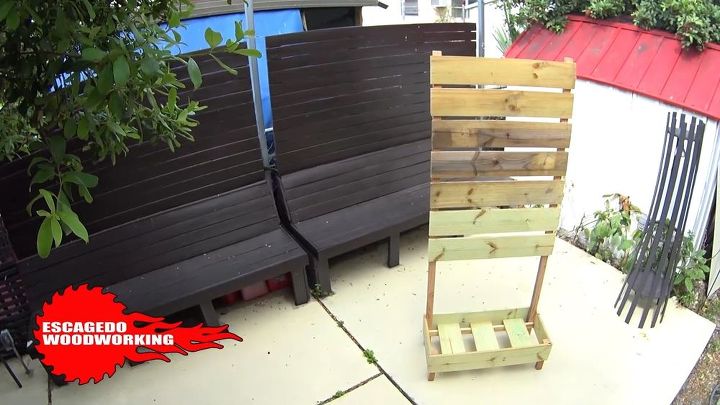
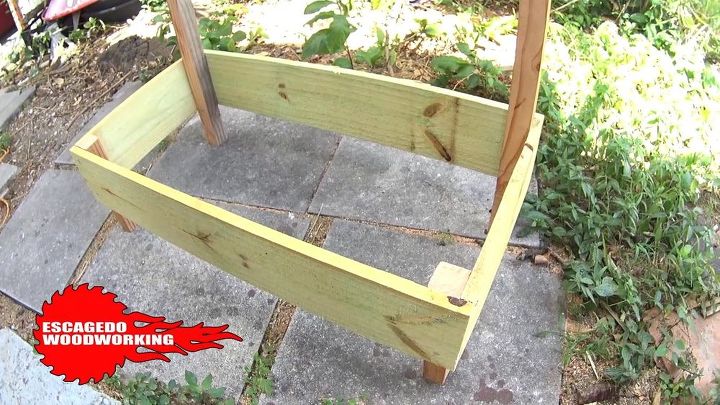
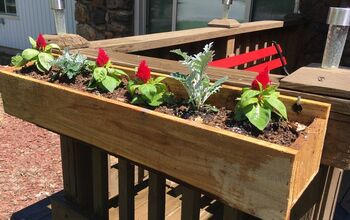
Flower box with privacy back
I use minimal lumber here. I went as primitive as I could. Again, my thinking was to create a project that could be at reach for as many possible.
The base is a 'box'. it's made from fence boards. I'll break down how I made this...but just a note before moving on...A heavy flower pot sitting inside the box will help anchor and add weight.
With that, you can then add your hanging flowers and design your layout.
Let's move on...
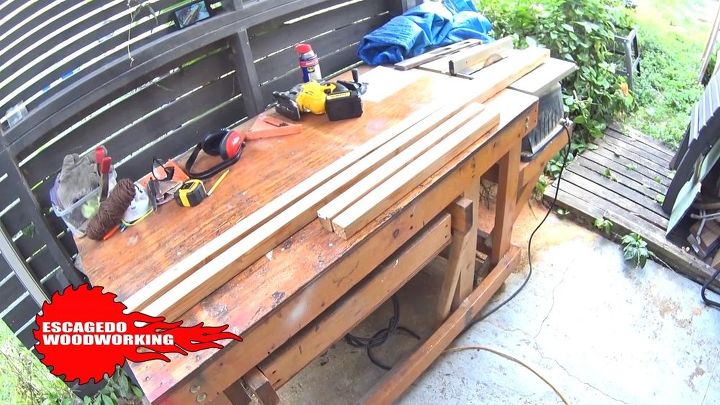
pressure treated 2x2x8 cut down to 6ft
To build this privacy solution, we only need 2 types of boards. They can be found at the home center.
In the photo I have two 2x2x8s. Buy them pressure treated for outdoor use. These will become the legs and posts for our flower box.
I cut the two 2x2x8s down to 6 feet. The 6ft posts will become the back and the two 2ft leftovers will become the front legs of the box.
Btw, you're going to need at least 3 of these 2x2x8s. Let's move on...
pressure treated fence boards for the flower
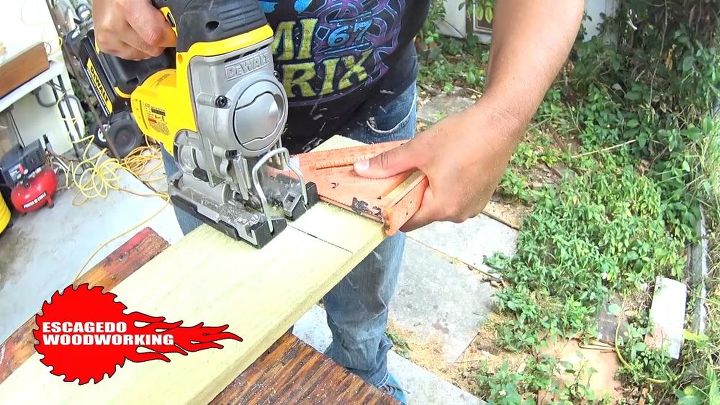
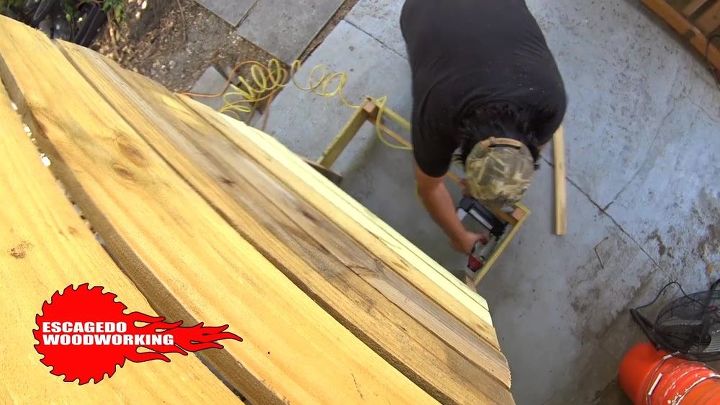
The only other type of wood board you will need are fence boards. These are also inexpensive and can be had at your local home center. They run under 2 dollars.
I'm making the box out of these. You will need some type of saw. I'm using a jig saw and a a square here.
A jig saw can be bought for as low as 30 dollars.....and a speed square is cheap...plus it's a great little tool to have. Check out the video for more details on the step by step.
So anyhow, I made the box out of fence boards. I cut them down to 14in for the sides and 30in for the front and back. ..but let me show you with another pic...

only 2 types of boards needed for the project
Ok, this is really easy. I just fastened the fence board to the post as shown. I made two of these and finished it off by adding the front and back. The front and back boards are 30in. Let me show you a photo with the dimensions for better reference....
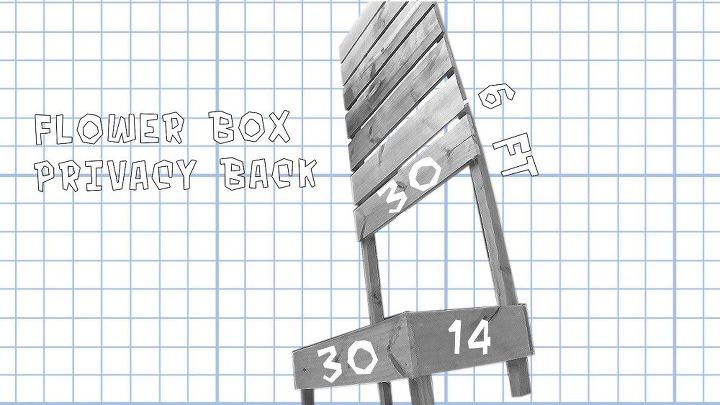
Project measurements for reference
The measurements in the photo are what I used......Really you can adapt this to your needs. if you have a wider area to cover...you can build these larger.
Or, you could build a few of these and butt them together. The key is to add a larger pot of plants or flowers at the base. This will allow you to hang plants along the wall and keep the wall balanced.
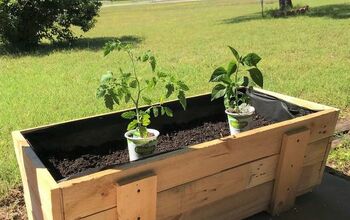
I still have to go get flowers for mine....but that's another adventure, for another day. Let's continue....
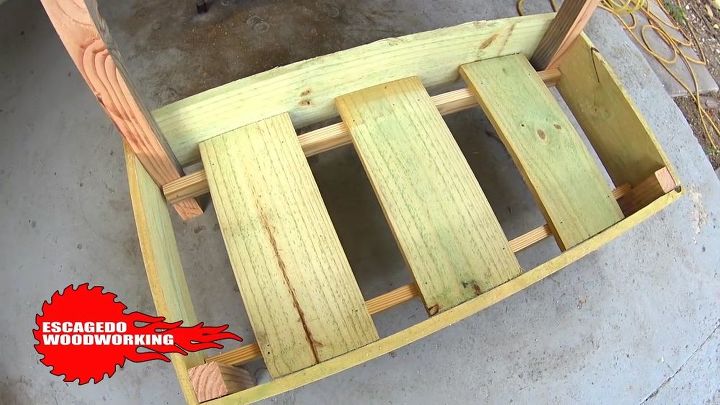
Flower box almost finished
So here's the box....again, just two types of boards.
We need to make a bottom to the box so the flower pot can sit inside. So let's do that...
Finishing the box
I'm adding 2x2s I cut down to fit inside the box. These 'cleats' for lack of a better word, will support 3 boards. These will make up the base of the box.
For a better reference, check out the video instructions. Let me show you a close view of the box with the bottom added....
Easy Flower box and bottom
So here you can see what I did. Now the box can carry a pot of plants or flowers.
Let's add the horizontal privacy slats next! We're rounding home...
adding horizontal slats for privacy
I cut down about 7 fence boards. They were cut to 30in in length. I attached them to the two posts and now our project is just about ready for flowers. Let me mention a few more things below....
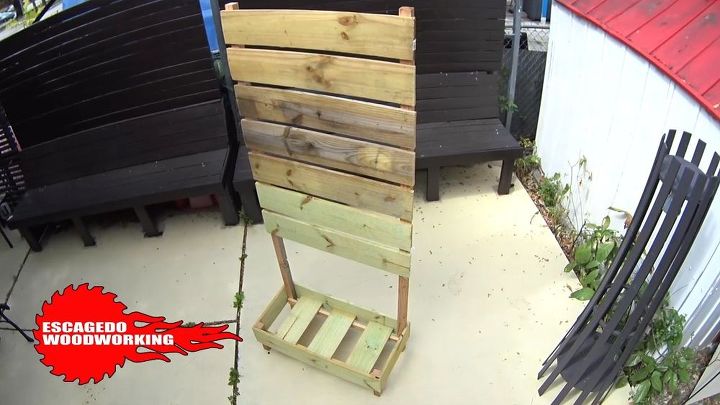
Privacy, an easy solution..just add flowers
I hope this project gives you some ideas of your own. I designed this for Hometalkers. I was asked so many questions and had so many positive comments...I'm overwhelmed by the love. So I wanted to give back!
Use this video as a reference too. It should fill in the blanks if you decide to build it. Again.....you can modify the project to fit your needs!
Catch you next time....

Fences make good neighbors
Comments
Join the conversation
2 of 31 comments
-
Love this idea.
-
Love your work and your ideas. Instead of bemoaning your small yard with little privacy, you came up with an ingenious solution. Also appreciate the work you put into the prep and pour of that slab as a one man show. Your privacy projects are well explained and very much in the skill range of this gramma! Two thumbs up.


Frequently asked questions
Have a question about this project?
I don't understand how a panel only 30 inches wide could offer much privacy. Does it go in front of a window?
Good idea. This would look cool in between the lattice I have up. Or even in between fence posts. Good job. Thank-you.
Thank you for being so receptive to your readers' requests and needs. Have you expanded this flower box privacy fence since this article? Have you done other yard furniture projects? Best wishes 😇