


Concrete Stool DIY Oh My
Hi friends! Happy Spring! It's patio, deck and fire pit season - time to think about uncovering the deck furniture and washing down the Adirondack chairs. This time of year I always feel like a little refresh for my outdoor spaces.
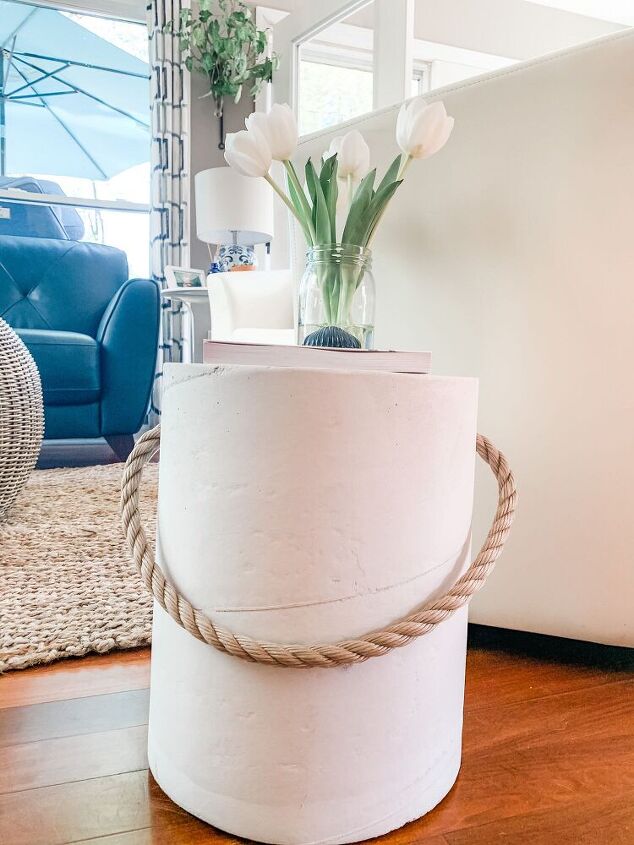
I spotted these at Terrain and loved them, but not the $228 price tag. So I'm going to show you how I made my own. This was my first attempt and I learned some lessons, but I'm super excited about making more!
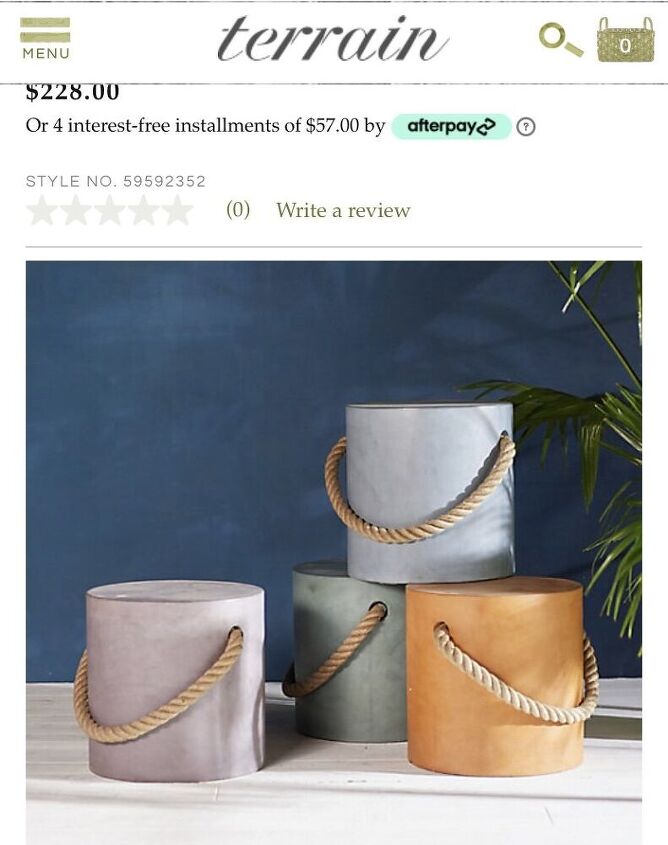
Are they not the cutest? I love the colors, the size is 15.75 x 15.75 The blues and greens work perfect for my outside spaces.
My first challenge was to find something to use as mold. Most things around the house are tapered and that wouldn't look the same. Think 5 gallon tubs from Home Depot and Lowe's, kitty litter containers, wastebaskets, I hunted all throughout the house, garage and the shed. Nothing.
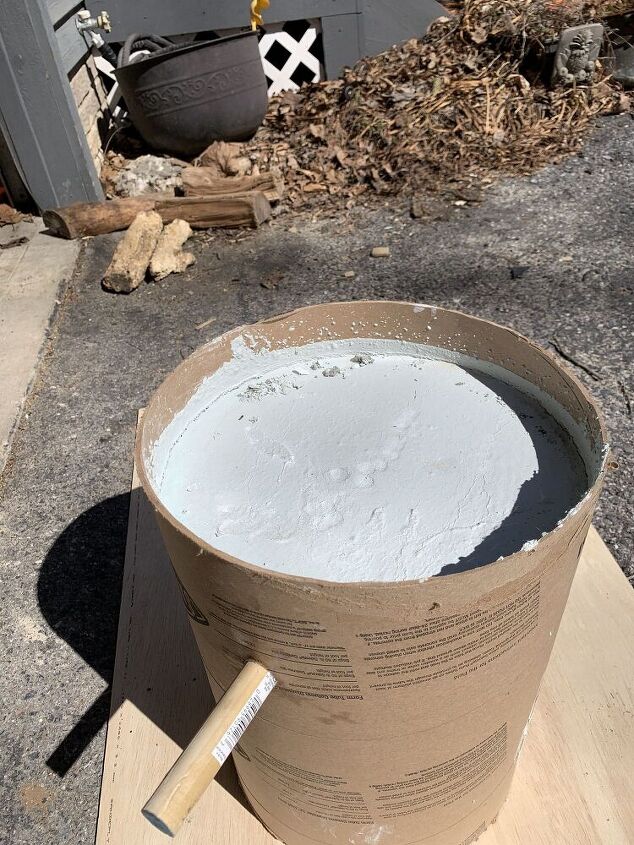
Lucky for me Carmine suggested the concrete footing tubes at Home Depot. Who knew?! I bought two sizes, 12 inch round and 16 inch. I decided to start with the smaller 12 inch size since it was my first time (less concrete). I also bought some rope by the foot.
Next was to decide on the concrete. I used the Zform countertop concrete for my white concrete bowls, it's very white and fine so I decided to use that for my first attempt. I used 2 whole bags of it. But it's smooth and takes color well.You can find colorants at Lowe's and Home Depot too but I tried chalk paint. It worked fine.I got my large dowel rod from Walmart to make the hole for the rope.
Steps
1. Gather all supplies.
2. Measure the form/tube 16 inches down from top, then mark with a sharpie.
3. Cut down the tube/form. I used a circular saw and followed the sharpie.
4. Mark where you want the dowel rods and cut the holes. I used a drill and large bit.
5. Cut the dowel rod so it sticks out on both sides
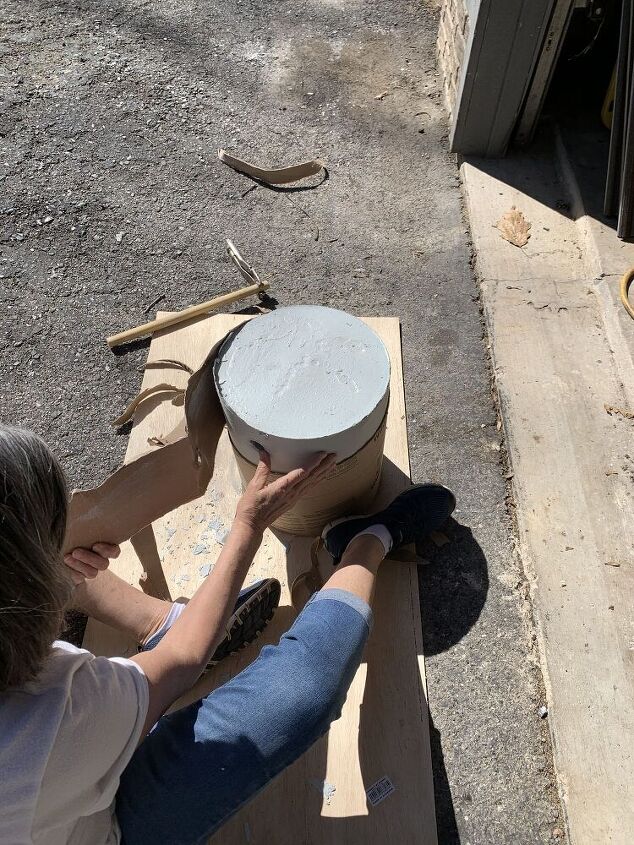
6. Cut some scraps of wood from 2x4's to create a frame.
7. Attach the boards to a piece of wood or hard cardboard.
8. Attach boards to the base and sides.
9. Run a bead of silicone on the bottom of tube (mold) and place on base.
10. Attach boards on the top, make sure they are snug to hold down tube tightly agains the base.
11. Grease the dowel rod, I used vaseline liberally.
12. Get two 5 gallon buckets and fill one with water, we used 2 gallons to start.
13. Add paint if you want color. I used 3/4 of the quart by the end, using a blue Kilz chalk paint.
14. Add concrete and mix, adding water or concrete until you have the consistency of cake batter.
15. Pour into the mold.
16. Let it sit 24 hours.
You don't have to make a frame, it was Carmine's idea. I think the silicone was enough to secure the tube to the base but...Here I am drilling holes for the rope.Below putting the silicone around the rim to hold to base.Me mixing....messy.Our first pour - we had to mix more (2 bags) to fill the mold / form.Can you tell we stuck our fingers in it like a million times :)
I un-molded it after about 23 hours, I was so excited. I'm super happy with how it turned out for the first time. Because of the mold / form, you have lines on the outside. I could sand them or maybe use something to line the inside that is thicker than a kraft paper - maybe next time.
I'm going to use a sealant for them. I haven't decided if they are going on the deck or around the fire pit. They are heavy so I won't be moving them all around like I normally do with furniture.
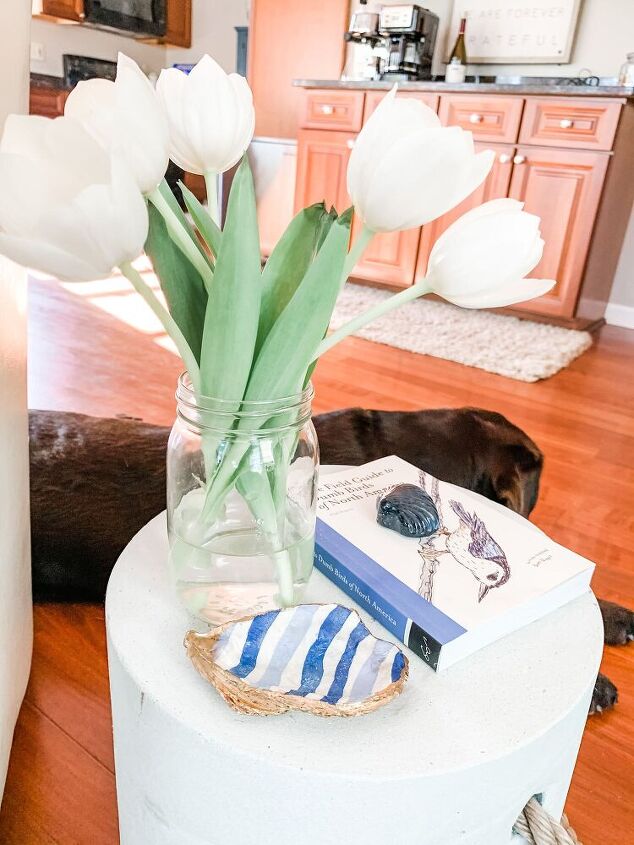
I decided to put felt on the bottom and keep it inside for now.


Comments
Join the conversation
-
Awesome idea! To reduce weight I wonder if you could insert empty water or soda bottles while adding the concrete? Something hollow to help it weight less. That thing has to be over 100 pounds!
-
Maybe add wheels.


Frequently asked questions
Have a question about this project?
Could empty, capped water bottles be used in the cement to take up space, requiring less concrete, and lessening the weight of the finished piece?
Just concerned about the finished weight.
What a great idea. After you ran the rope through the hole, how did you secure the ends together
Do you have a video?