


How To Make a 3 Legged Wood Stool (Milking Stool)
by
W
$20
4 Hours
Medium
In this Woodworking project tutorial I'll show you how to make a easy 3 legged wooden stool. This wood stool is a great project for the beginner woodworker.
Once in a while I like to build things just to see how they go together and what they look like, and this Milking Stool is one of those projects. I used Arbutus wood for the legs and Red Alder for the seat and Purpleheart wedges for the splines, a great combination of a few contrasting and interesting woods to work with to make this old-time favorite.
We'll be using a jointer, drill press, band saw, lathe and router in this DIY woodwork project.
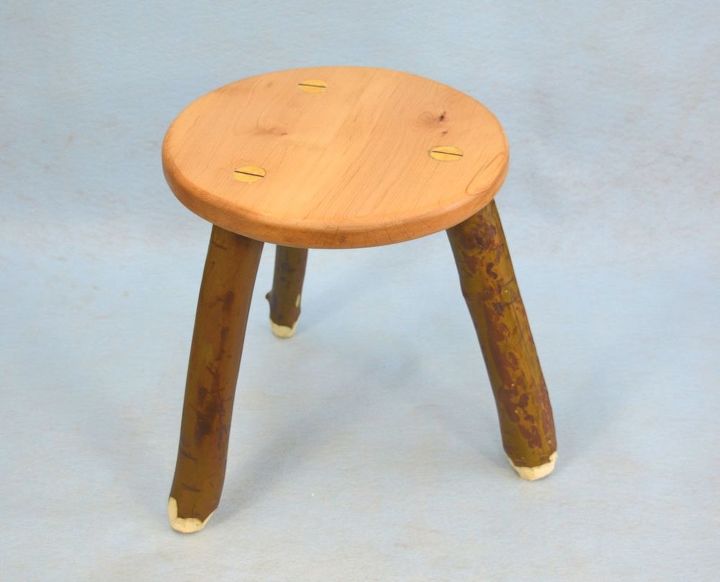
For this project you need to start off with the seat which should be at least one inch thick. Next, cut the seat into a circle about 12 inches in diameter.
Drill 3 holes, evenly spaced around the edge, about 2 inches in from the edge of the seat, and at a 12 degree angle outward. The holes will want to be 3/4 inch to accommodate the legs.
For the legs, you can use 3/4 inch oak doweling, or larger, and turn the ovesize part down to 3/4" to fit the holes for the legs.


Frequently asked questions
Have a question about this project?