


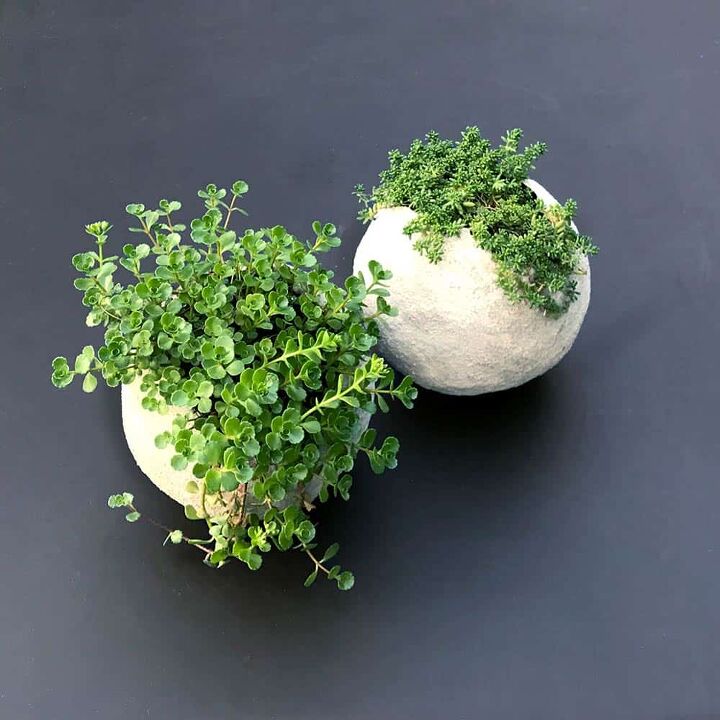
Cement Balloon Planters
Learn to make these cement balloon planters the easy way, and that works! Use a balloon as your mold. Cement (not concrete) is the key.
I started this project out feeling really frustrated.
Originally I tried to make these round cement balloon planters using concrete like other tutorials show, but it was a complete fiasco.
Even though I sifted the concrete to get out the gravel, it just didn’t work. I must have popped 5 or 6 balloons in the process.
I also was working outside and accidentally polluted the environment with 4 runaway balloons I was never able to catch- it was really windy that day.
Aargh. I watched a million videos and read tutorials of people making these with concrete and I’m feeling like they have to be faked a bit, because it just doesn’t work.
–Palm slap to the forehead for the “ah ha” moment!– Cement! That was the key.
You can probably use any brand of rapid set cement, but the trick is, make sure it is cement, not concrete and that it sets quickly.
Watch The DIY Cement Balloon Planter Video Tutorial
When planning the size of your round DIY cement planters you’ll have to consider your balloon size.
Make sure the balloon package says “round”. I used round balloons that said 7″.
You can use bigger ones in place of the 7″ and just blow them up with less air to be smaller, but be careful because they may end up being more oval than round.
Make sure to have everything set up and ready to go because once you start mixing the cement, you won’t have much working time.
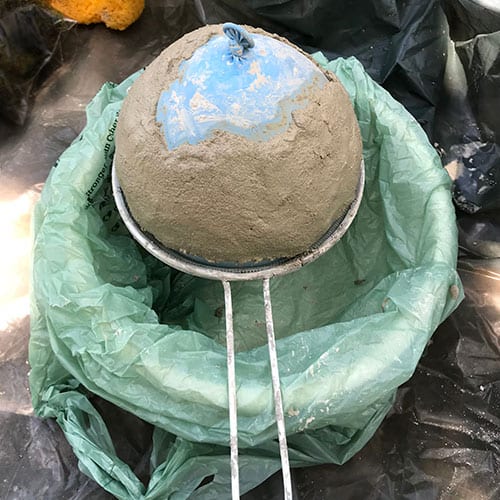
Use a small mesh strainer that has hooks allowing it to sit over a bowl. This made making these so much easier.
Otherwise a container like a cup or bowl that has a mouth the right size to support your balloon will also work.
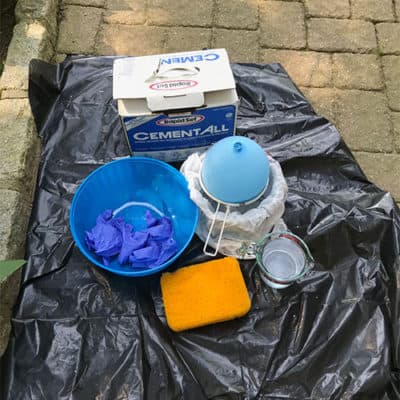
If you use a container, fill it with sand or stones to weigh it down so it won’t tip over while you are working on it.
As always, please ask me any questions you have about how to make these in the comments at the bottom of the page. Comments welcome.
What Not To Do:
Don’t use concrete (refer to the intro above to see what disaster ensues).
The type of cement you use for this project is very important. The reason this works is that this cement is smooth and quick setting.
Note: The measuring cup and mesh strainer will get cement on them, so only use these items for crafts.
In place of the mesh strainer and mixing bowl, you can use a container such as a cup but you will need to weigh it down with stones or sand.
Also, I needed to use the strainer because I did this outside and it was kind of windy out. You may be able to get away with just using the sponge to hold it in place.
Also, Ssome people have found it helpful to use blue painters tape to help hold the balloon in place.
**If you love making concrete projects, then check out my Pocket Guide to Concrete Mixes! I tested 6 mixes and made a handy reference chart. It's a FREE download. 😉
Note: In this written tutorial I started applying the cement to the tied end of the balloon.
But in the accompanying video above, I switched it is that I applied the cement to the non-tied end of the balloon first. It really doesn’t matter which end you start with.
Cement Balloon Planter Tutorial Steps
Step 1 | Inflate The Balloon
Inflate your balloon but keep in mind, the finished piece will end up being larger than the balloon because of the thickness of the cement.
So make the balloon smaller than what you want your finished planter to be.
The round planter size I wanted was about 6″ and I have one of those 5″ round globe light bulb covers, the common ones you see at every big box store for probably 9 bucks.
So I used that for reference and blew the balloon up to be the same size as the globe. The finished planter ended up being the perfect size.
Step 2 | Set Up The Balloon
(See pic in Step 4 for how this looks) If you are using a mesh strainer, then take a mixing bowl and cover it in a plastic grocery bag to protect it.
Otherwise, use your weighed down container. Have the cup of water next to you, along with a rag for clean up.
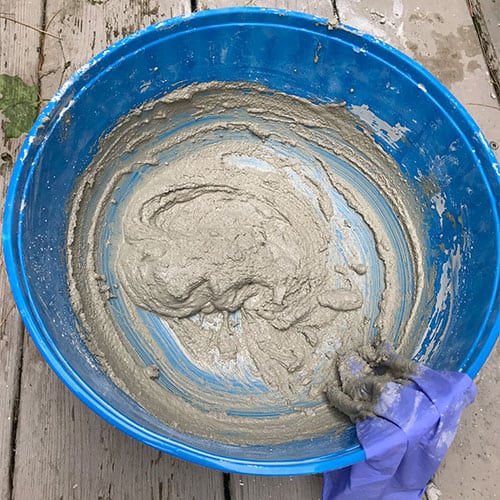
Step 3 | Mix The Cement
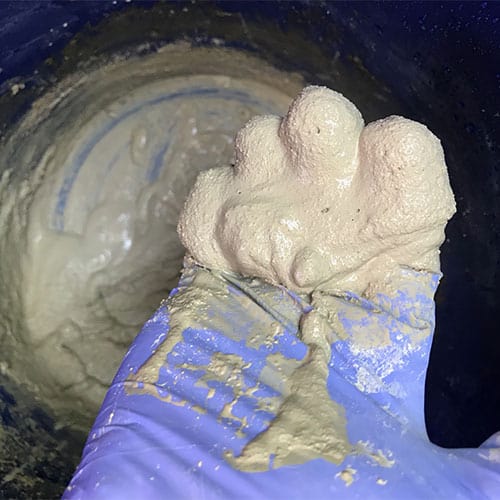
In the big disposable plastic bowl, pour in about 1/2 a cup of water. Add a little bit of cement and mix with your hands. Make sure you wear gloves!
These newer gloves I found since I originally posted this tutorial are amazing and have yet to tear.
They aren’t the least expensive option, but last longer so you use less of them, making them still cost-effective.
Mix the cement slowly, adding more cement as you go. You will do this a few times until the cement is the consistency of cake frosting.
This doesn’t have to be an exact science, just play with it.
If it feels too thick when applying it to the balloon, take the cement off, put it back in the bowl and add a tiny bit of water. If it’s too thin, add cement.
Step 4 | Mould The Balloon With Cement
** I have 21 other unique concrete planter tutorials all in one spot. You can see those here. 😄
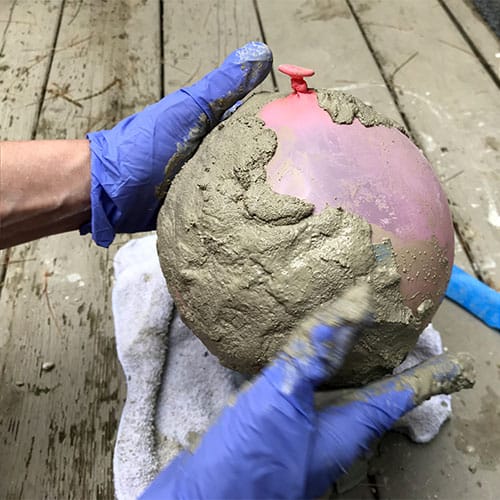
Start with the tied end of the balloon facing upward. Scoop the cement onto the top balloon, but leave the tied area free of cement, this is where you will leave the opening for the plant.
Leave it large enough to get your hand inside for ease of planting. If you get it too close together just push it apart.
Start molding it and work your way around, shaping and smoothing as you go.
You can keep wetting the cement or your hands as you are sculpting, and also add cement to any areas that it may need to be built up.
Be careful not to let the cement touch the edge of the container or strainer.
Doing so will cause a bump and even more importantly, if the cement pushes against the strainer, it can cause it to crack.
So keep the cement free and clear of everything except the balloon.
The second side will be easier, so don’t worry about trying to get the first side fully covered, a third will be good.
The cement will cure within an hour or two. Be sure to keep this out of the sun while it’s curing because the balloon may expand and pop.
Keep it somewhere where the temperature won’t vary widely over this hour or two period.
Step 5 | Mould The Other Balloon End and Create Drainage Holes
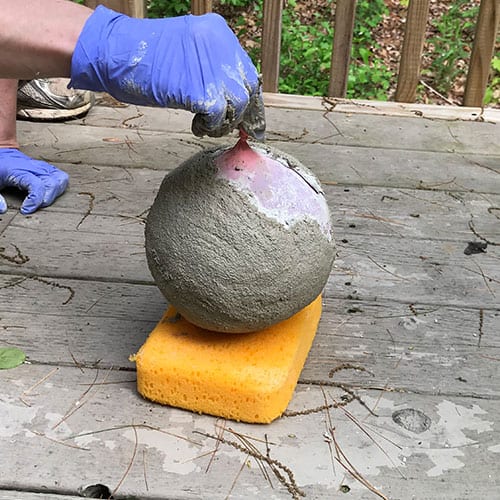
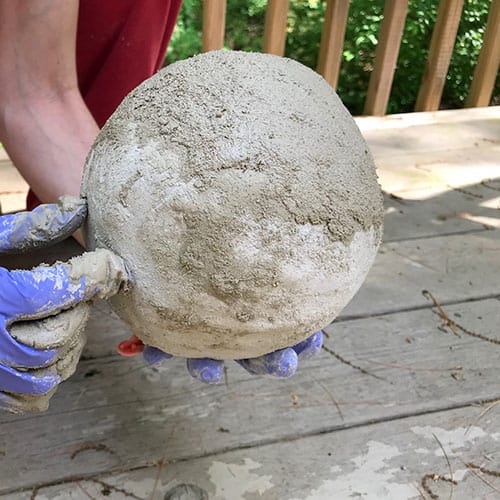
Once the first side has cured, you can flip it over and rest it on the sponge to work on the other side. The sponge will alleviate pressure while you are working on it.
Continue adding cement around the 2nd half of the balloon. Pay special care to the edges where the two ends meet in the middle and smooth as best you can to give it continuity.
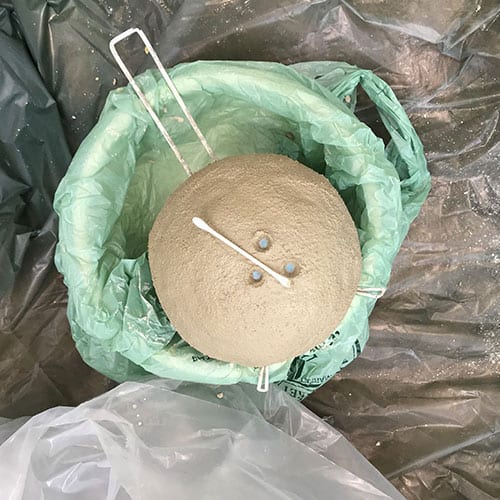
After you are done, carefully use a Q-tip to press a few small holes for drainage, just sort of spin the tip to create the space. You may need to wet the Q-tip to get the holes free of cement.
Step 6 | Pop The Balloon
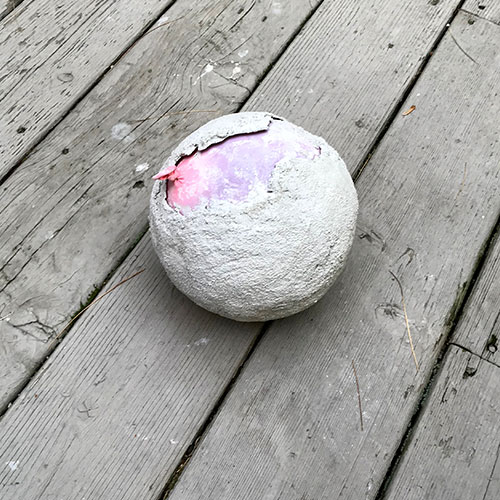
Let the cement dry, you can just let it rest on the sponge, or in the strainer.
It should take about 1-2 hours depending on climate conditions, then you can pop your balloon.
If you wait too long to pop it, the balloon may be more difficult to pull out and could stick to the cement.
To pop it, just use scissors and snip the spot where it’s tied, then pull the balloon out of the cement planter.
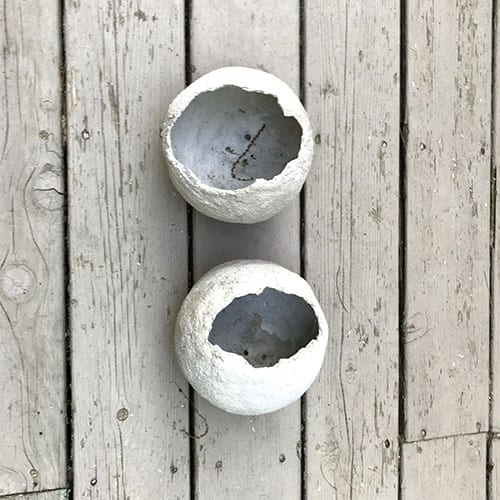
Step 7 | Reinforce The Cement Balloon Planter
You should reinforce the balloon by adding more cement inside.
Mix up some more cement and pour it into the sphere, make sure to keep your drainage holes clear, use the Q-tips again if you need to.
I made mine about 1/4-1/2″ thick on the bottom, then built up the sides just a bit.
Your planter may be durable enough without this step, but better safe than sorry.
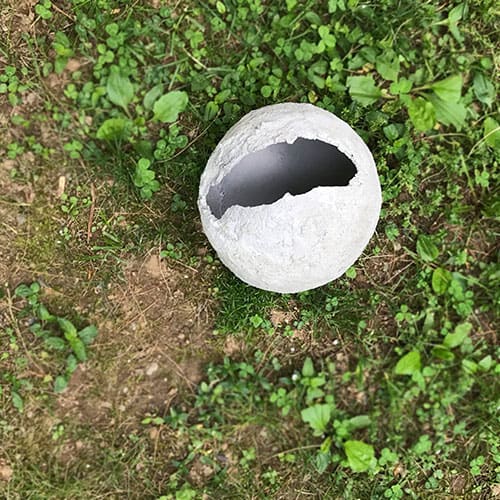
Final Step | Plant Your New Cement Balloon Planter
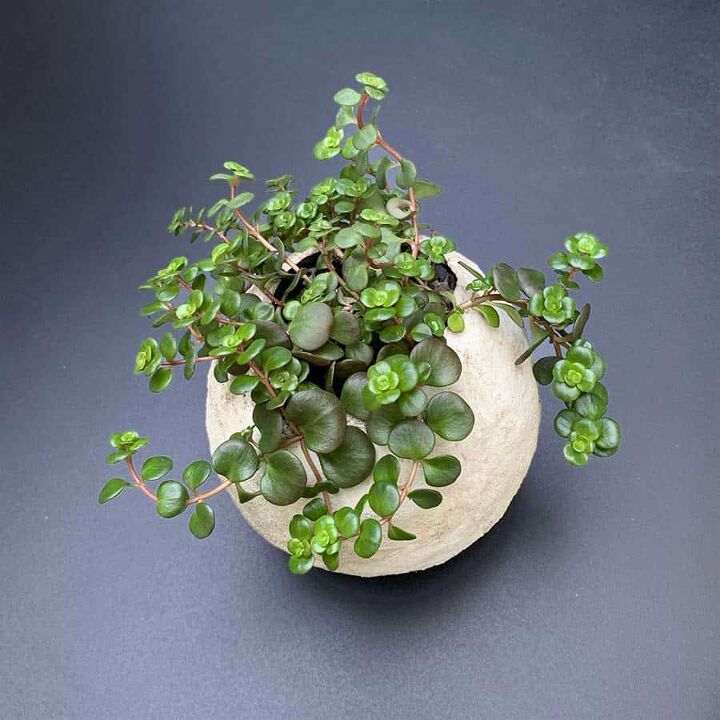
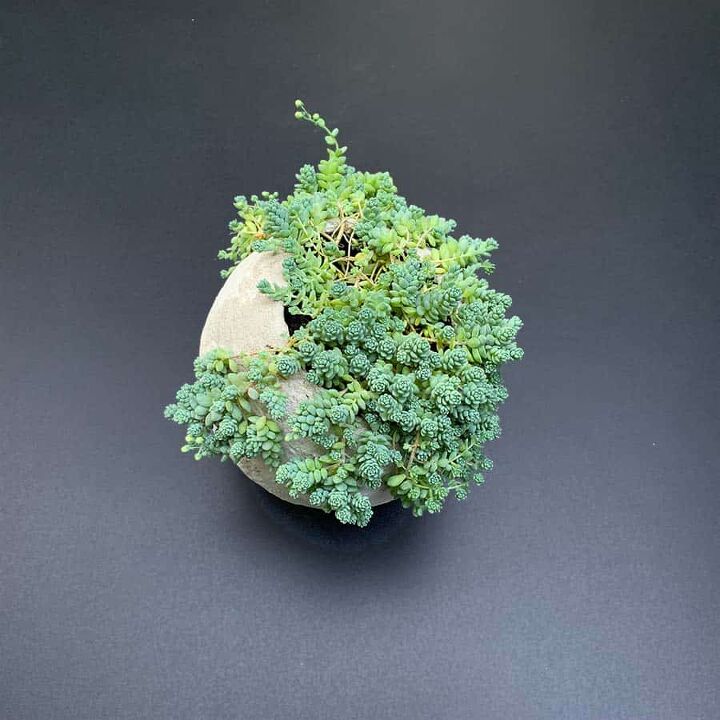
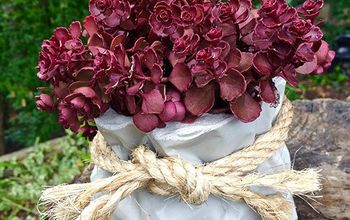
Add soil and then your plants! What types of plants will you use? Succulents?
Resources for this project:
See all materials


Comments
Join the conversation
-
Maybe try this. When adding the cement to dry cured area spray water on it first as the dry area will suck the moisture right out of the new concrete you are adding. Will spread and adhere much easier. I use this all the time for concrete sculptures. Cures in 1 hour. Sets up very quick. About 10 to 15 min.
Rapid Set
Cement All Multi-Purpose Construction Material
-
Great tutorial, the planters are adorable. I’ve been inspired. Before the cement dries You. Outdoor roll it in sand, crush glass, press sea shells or moss into it. Thank you!


Frequently asked questions
Have a question about this project?
Are these okay to use outdooors? Once done with cement layers, is there anything else to apply to help these last longer?