


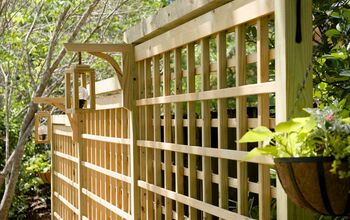
Easy Espalier Trellis
While remodeling the interior of our house, the exterior was severely neglected. The backyard was in especially bad shape as it had been the dumping spot during demolition. Warm weather, completing inside projects, and my son's longer naps encouraged me to get cracking on the backyard! Our first summer in the house was all about clearing debris and overgrown plants, with some time dedicated to planting along one side of our fence. The second summer we focused on creating flower beds, a walking path, and more planting. As the bed and path shaped up, the fence was looking pretty shabby in comparison. I decided to stain the fence, but was worried it wouldn't turn out good. As a back up I figured a trellis with vines on the fence would be a good way to disguise any of my mistakes! Luckily the stain looked fine, but I was still determined to try a tutorial I came across from Megan Pflug's site, meganpflugdesigns.com, called Espalier Garden Redux. It is so easy and pretty budget friendly. Keep reading for my lessons learned.
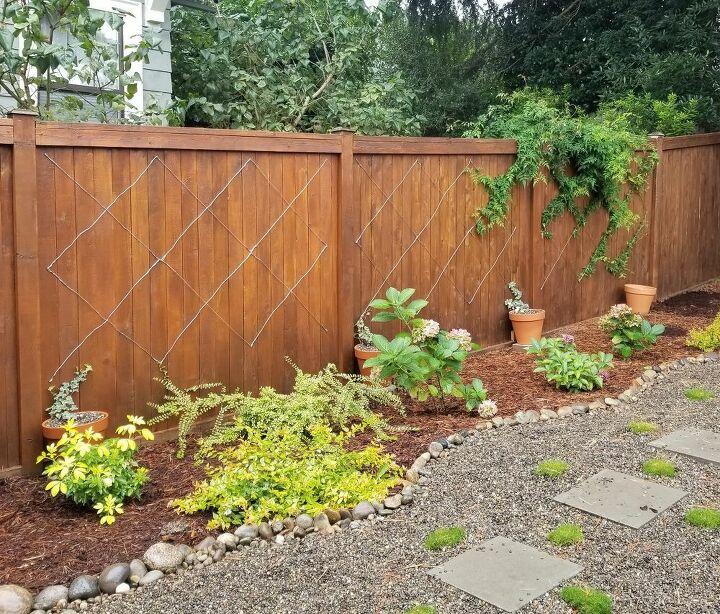
I started with this section of the yard because it was the easiest. The back section of fencing is on a slope and at the top of an eroding rockery. The other section of fence is chainlink and is next to a very overgrown open lot. Okay, on to the juicy bit.
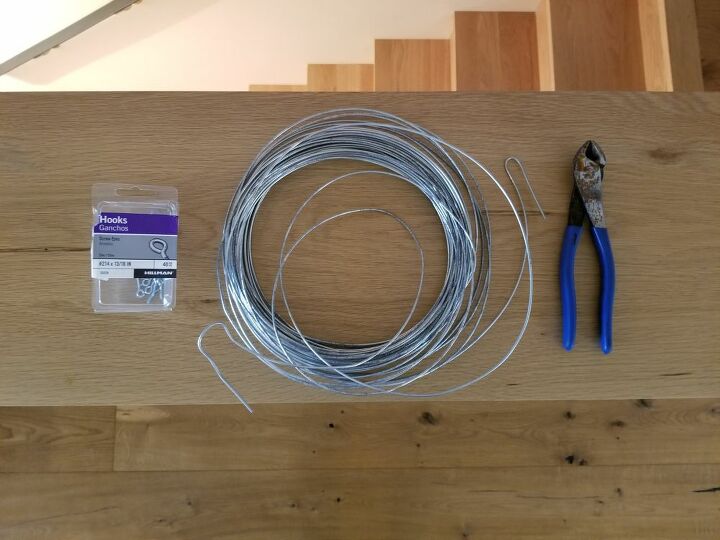
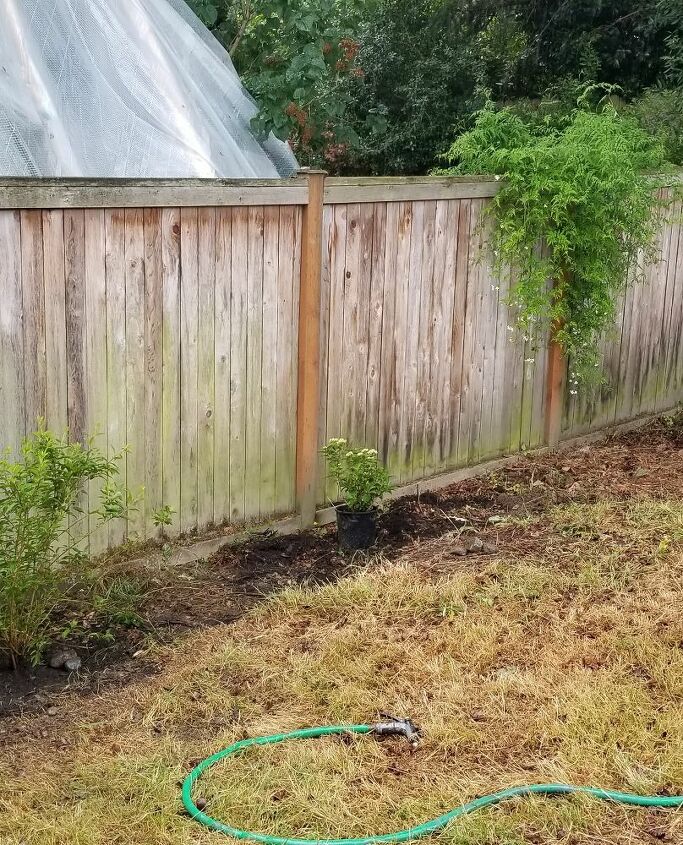
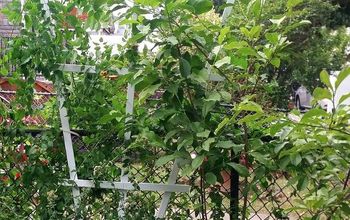
My sister-in-law liked my trellis so much she wanted to try too! We used just three materials on her fence. The in-process shots are from her yard because I forgot to capture my own. Her fence wood was soft enough that we didn't need to drill holes for the hooks. However, when I installed my espalier I had to drill holes. I would suggest testing the hooks in your fence to see if a drill is needed. Twist the hook as you would a push pin on a cork board. Once you determine your method, decide on your pattern. I did the diamond grid pattern because I was worried I would need to camouflage my poor staining ha ha. My sister went for a more simple zig zag. This took less hooks and doesn't cover as much of the fence.
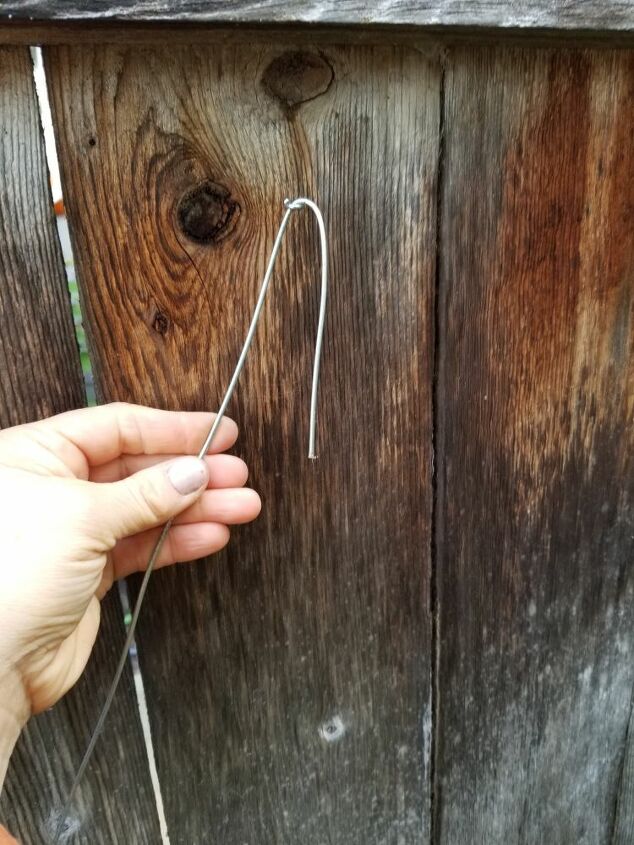
Once a hook is in place, thread the wire through the hole. Connecting to the next hook can be done a couple ways. I tried two different ways, maybe there are more!
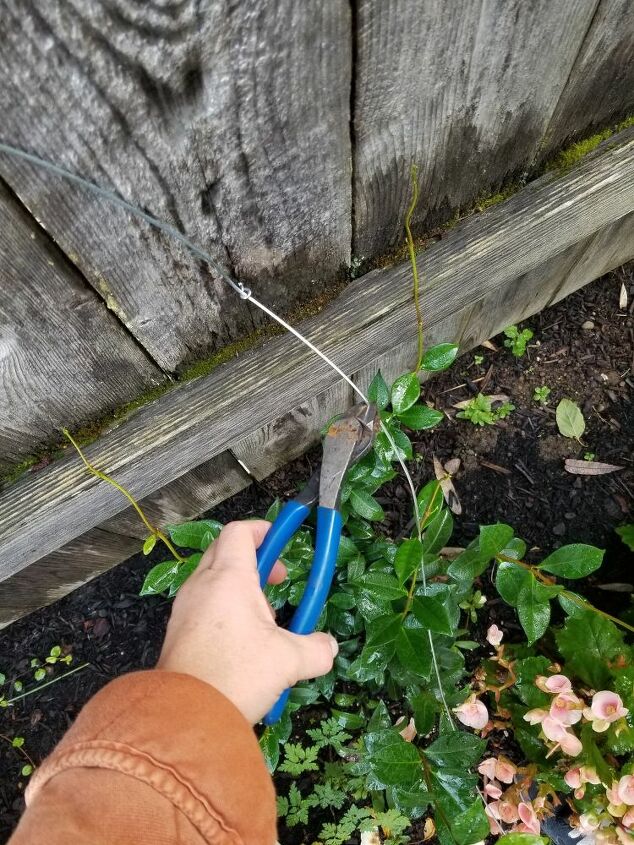
At first I cut the wire to fit from one hook to the next. I did this because the wire was kind of unruly and I found it was more manageable in shorter lengths. My husband watched me do a few sections and asked why I didn't string longer sections of wire through multiple hooks. I demonstrated how the wire "fought me" when I unravelled large sections. As the bundle of wire got smaller, his method was more doable and saved wire. Another thing my husband noticed is I was using the wrong wire cutters. Sigh, I had used wire crimpers. They definitely were not as sharp and it took me way longer to cut wire compared to the proper tool!
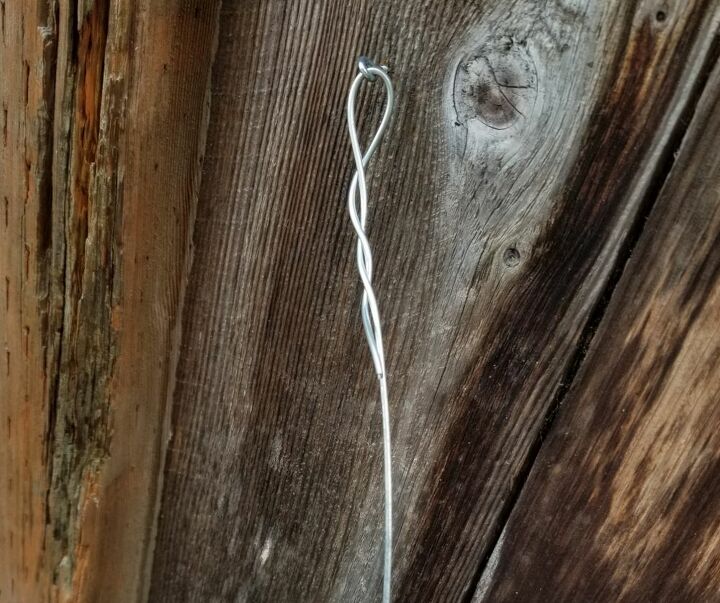
Whether your wire is strung through two or more hooks, once cut you will bend it into a loop and wrap it back around itself. Wire cutters or wire crimper can tighten the loop if desired. Continue threading, cutting and wrapping until your pattern is complete.
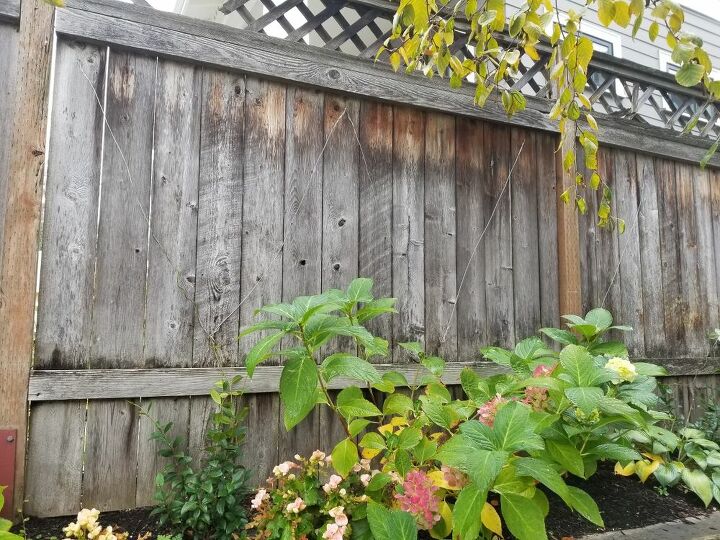
The silver wire definitely blends in to weather worn wood more, which is nice considering the time it will take for vines to start climbing. Silver wire pops against my dark fence, which I don't mind. But I cant wait until the vines take off and fill in!
Have you used this technique before? How did it work for you?
Need more garden inspiration?
See how I created a planter bed out of a bland part of my yard.
Maybe container gardens are more your speed. Read about my steps and tips to pot succulents. Thanks!
Resources for this project:


Comments
Join the conversation
-
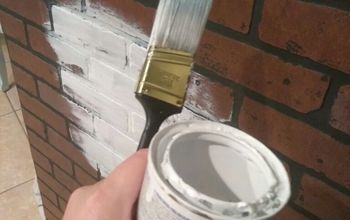
how to brighten and clean wood easily . get a pump sprayer and fill part way with water and then add 2 cups of bleach and a quarter cup of dawn dish detergent and spray on dirty wood and even your dirty vinyl siding and let it sit for 15 to 20 minutes and hose it off . Be careful not to spray the stuff on metal lights as it can discolor them . . I use it on my vinyl siding and on my gutters . I try to do it when it is cloudy . It gets rid of mildew and mold stains. Be careful of tender plants . Works great on fencing and decks . You can add more bleach to the mix if the deck or fence is extra dirty
-
Vegetation rots wood.


Frequently asked questions
Have a question about this project?
It looks lovely.......DO NOT put any Wisteria......they are viney wood and they will break your fence. That is a promise!! They also grow right threw the fence wood itself. Make sure all your vines are similar to Honeysuckle.....it is light and smells gorgeous.
What did you use to paint your fence?
I have a vinyl fence. Would this work using command hooks on the vinyl fence? Or do plants only attach to wood?