


Fan Blade Dragonfly: Mother's Day Gift Idea

Got some fan blades from a broken ceiling fan? Don’t toss them just yet! You can give them a new life as a fan blade dragonfly! It's super easy to make, the materials can be found at your local Habitat for Humanity or thrift store and it's easy to customize.

- Fan Blades for wings (I recommend shorter blades rather than longer for a sturdier design)
- Something for body (I used table legs, but something like spindles would be good too)
- Paint (I used Amy Howard Table for One, Lime Lime, American Dream and Aubergine Chalk-Based Paint)
- If you use this kind of paint, I also recommend using Amy Howard Clean Slate to clean the pieces.
- Sandpaper
- Screws (Sizes vary based on the thickness of your dragonfly body)
- Drill
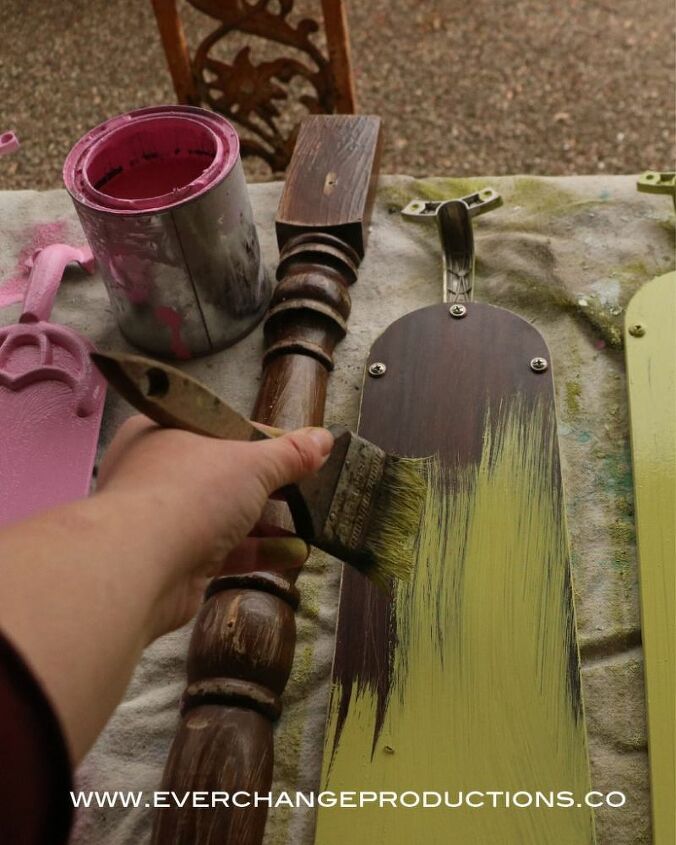
Sand the pieces as best you can in every nook and cranny. My fan blades were mostly plastic so I needed a surface for the paint to adhere. Even as much sanding as I did, I see now that I needed more, maybe with rougher sandpaper.
If you fan blades have every been used, there’s a chance they’re very dusty, also you'll want to dust after the sanding step anyway. This is probably the most important step.
So now that your prep work is done, you can start decorating your fan blade dragonfly. If you use the chalk-based paint, then start with a thin coat. You don’t need to worry about getting every spot covered. This paint can be kind of thick, so a thin coat to start will help your pieces look smooth when covered.
Once you’ve finished painting the first thin coat for your fan blade dragonfly, you’ll wait for the pieces to dry. Then lightly sand the paint and add a second coat. This is important for a smooth finish of chalk-based paint.
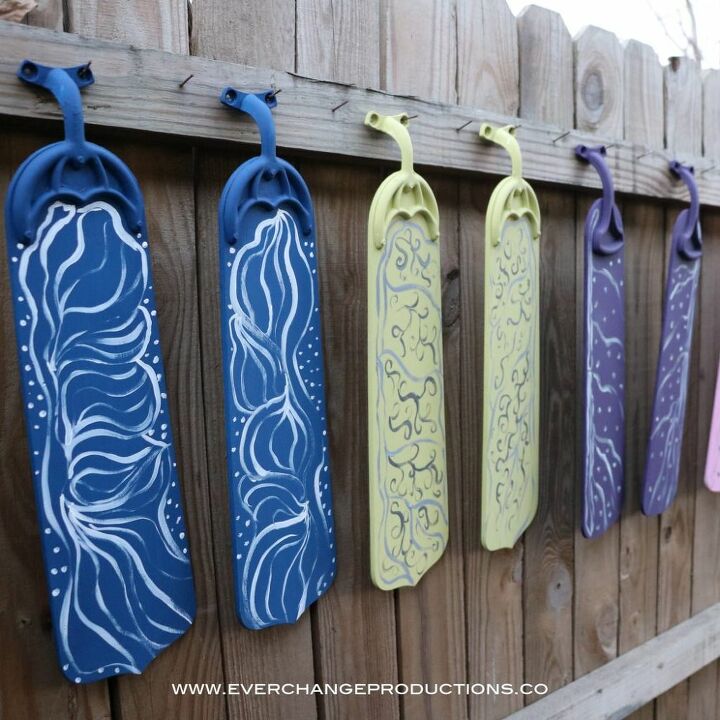
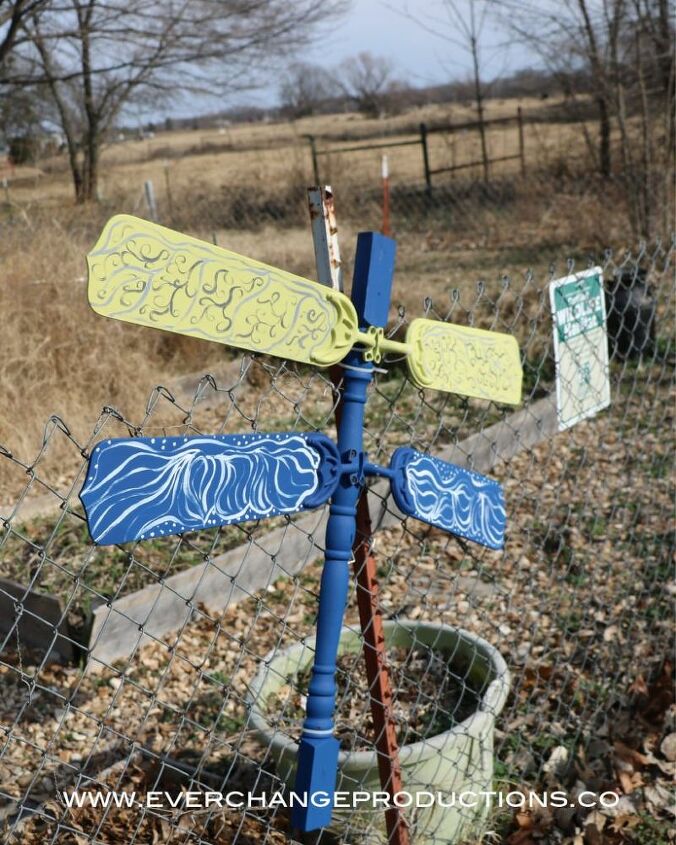
So once you are happy with the paint coverage, you can decorate the fan blade dragonfly with any additional designs. I used acrylic paint for this, and so far it's standing up outside.
We attached them to the chainlink fence with zipties and we also screwed some into a wooden fence. Both ways are sturdy and working well so far.
Resources for this project:
See all materials


Frequently asked questions
Have a question about this project?