


Make Cement Plant Label Stakes (Easy DIY)
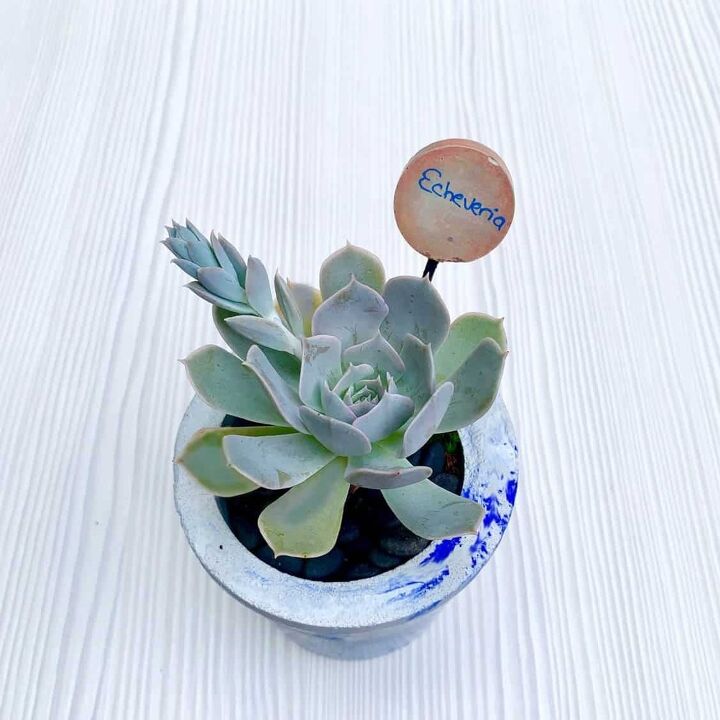
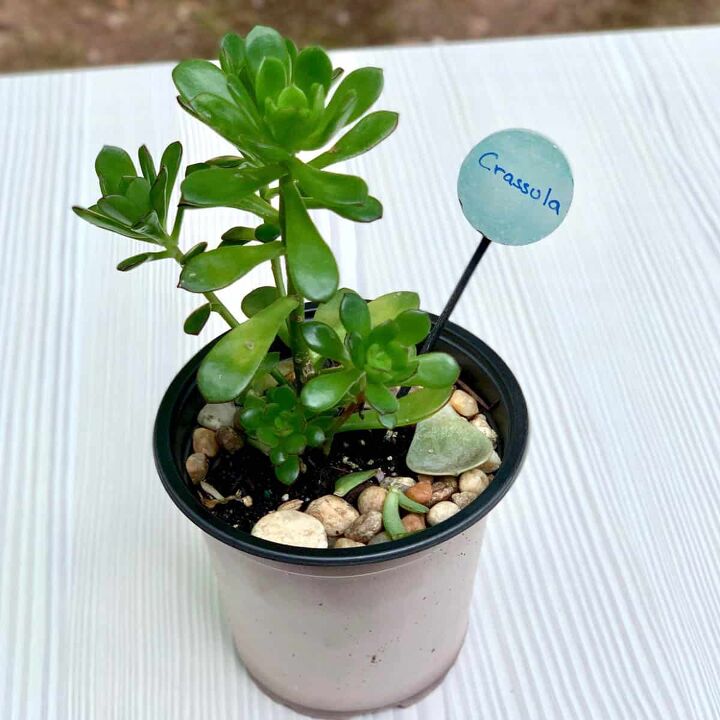
Make DIY cement plant label stakes for the garden that are waterproof.
These plant label stakes are another fun cement crafts project and really easy too.
So how do you make a name tag for plants that are waterproof?
When you think about it, cement is a perfect material to make waterproof labels from.
I mean if cement can handle holding your plants, with soil and water, then it can handle bearing the elements.
For this tutorial, I made sure to use a special marker to write the plant name with, as well as a varnish to add extra protection.
The varnish is really more for protecting the watercolor paints I used to decorate them-, so if you didn’t want to color these garden markers, you could get away with not using the varnish.
The other part of making these concrete plant tags waterproof is the actual stake you use.
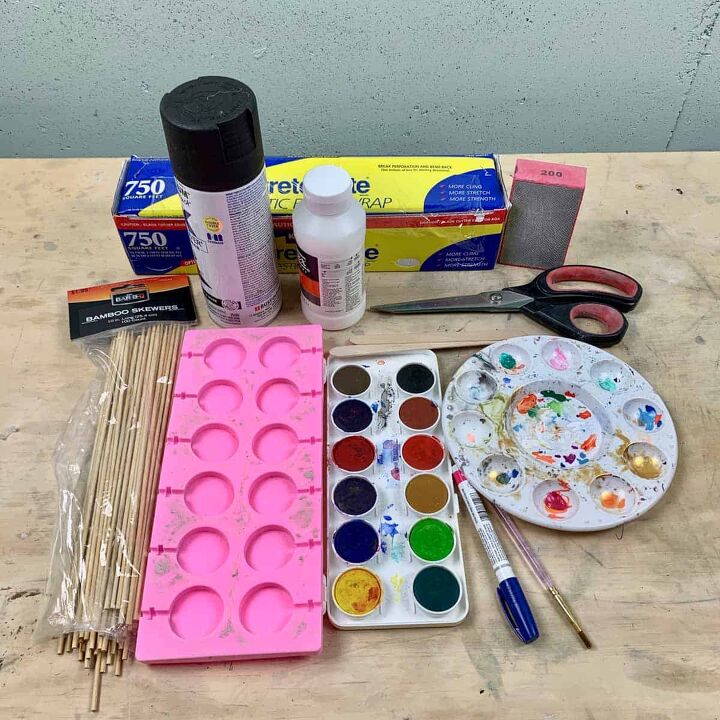
I used painted bamboo skewers, but for a truly waterproof stake, you would want to substitute the skewers for aluminum rods which you can get inexpensively at a local hardware store or Amazon.
How do I label my plants? Another way to create plant labels is by using corks.
The labels won’t fade because of the type of marker I used. You can’t use any ole Sharpie.
You can check out the easy DIY Cork Garden Labels tutorial here.
I used the wood skewers for the above mentioned cork herb labels, and they held up for at least a year.
I moved after that so didn’t get to see how they hello up beyond that time.
And for those, they were unpainted, so with the addition of painting the stakes, plus a bit of urethane spray, you should be in great shape!
Tutorial Steps For DIY Cement Plant Label Stakes
Step 1. Spray Paint The Bamboo Skewers
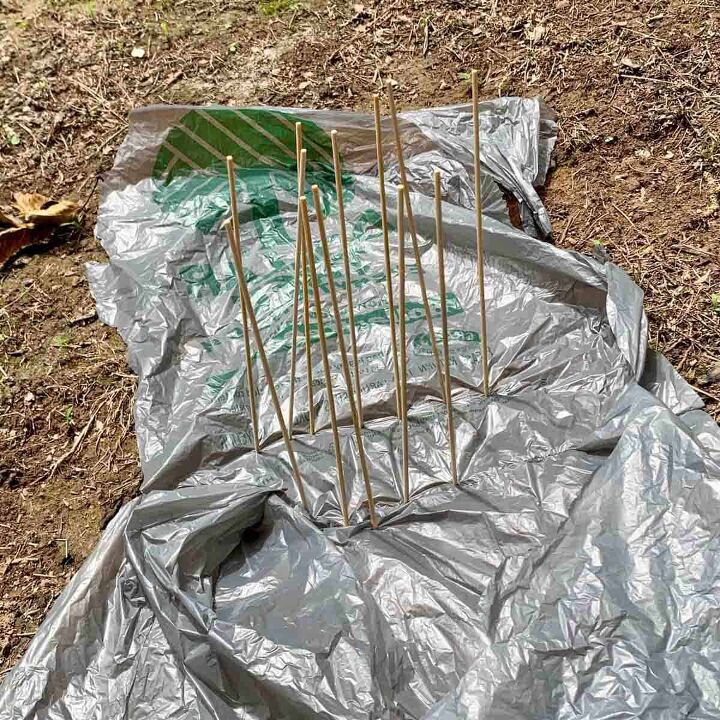
Paint the skewers. Stick the pointy side into the ground so that you can access them from every angle and not have to flip them.
Spray an even coat all around. Let these dry a couple of hours before inserting into the cement in the next step.
*To provide extra protection, you can spray these with an outdoor urethane spray. I chose not to.
If you are using the aluminum rods instead of these wood ones, you won’t need the urethane.
Step 2. Prepare For Casting The Labels
Place a rigid board on top of your work surface and place the silicone mold on top of it.
When I made these, I didn’t realize the cement would leak onto the neck of the skewer as much as it did, and I had to do a lot of sanding and touch up.
To avoid this, you’ll want to wrap the area immediately below where the cement will be, with plastic wrap.
So cut 12 strips of plastic wrap about an inch wide and a few inches long. This will be wrapped an inch below the top.
Since you will need a stopping point for when you insert these into the cement, you can use the wrap for this.
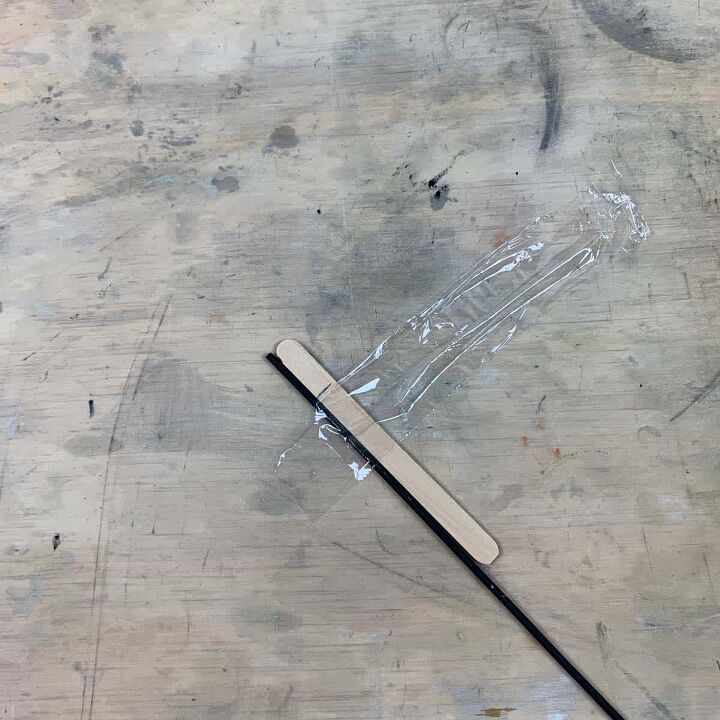
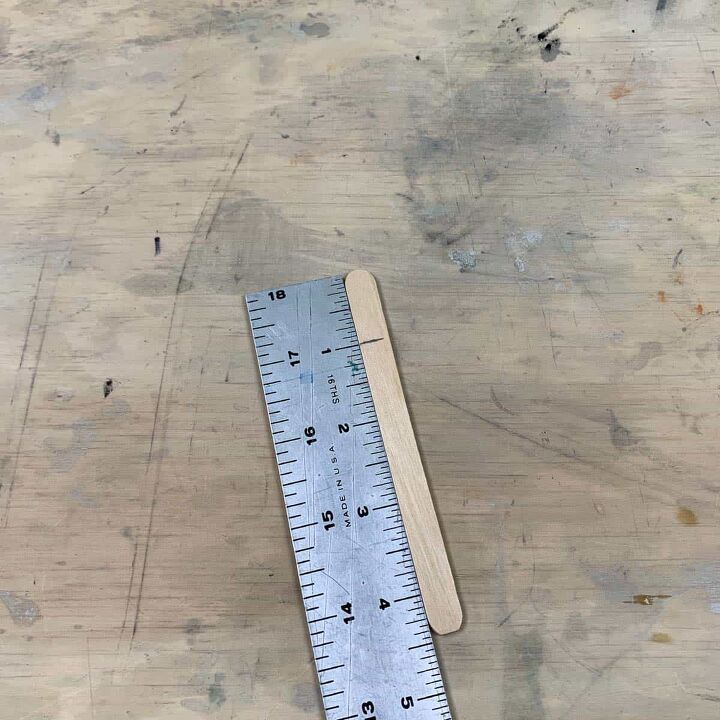
Use a craft stick and measure 1” from the end and mark it. Now use this as your guide for where to wrap the plastic around the skewer.
I’m demonstrating in the photo above how this will work, but you won’t be inserting them until after you cast the cement.
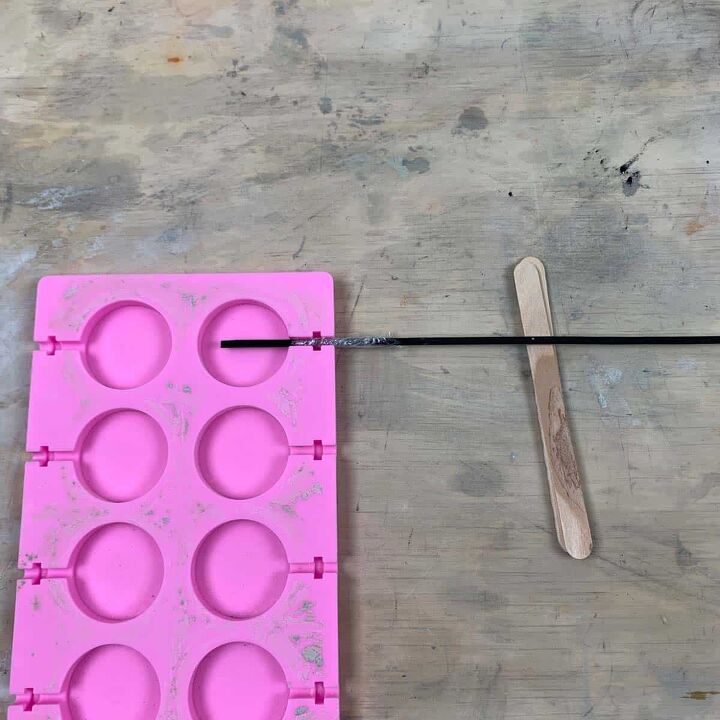
The sticks will drop down when they are inserted into the mold and since you need to work quickly with the rapid setting cement, you can prep ahead to keep them level when you cast the cement.
It turns out that two craft sticks are the right thickness that will keep them at a level height, so place two crafts sticks all around the mold.
Step 3. Cast The Cement For The DIY Plant Tags
**If you love making concrete projects, then check out my Pocket Guide to Concrete Mixes! I tested 6 mixes and made a handy reference chart. It's a FREE download. 😉
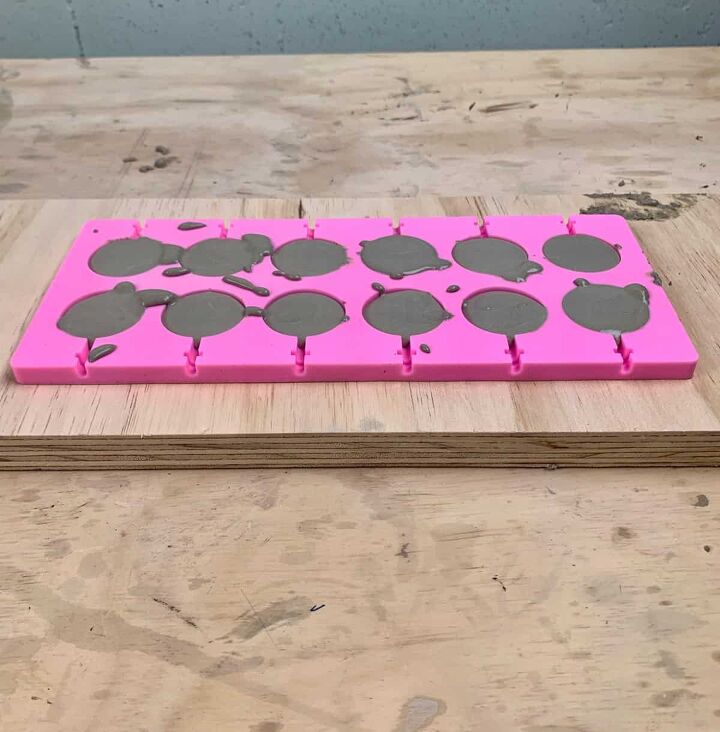
Mix dry cement mix with cold water to slow down the setting time. You will want this mixture to have a milkshake consistency.
Now use a plastic spoon to scoop the concrete into the molds. Try to get the mix flush with the top of the mold to make sanding easier.
You can use a craft stick to help level this by scraping off any excess.
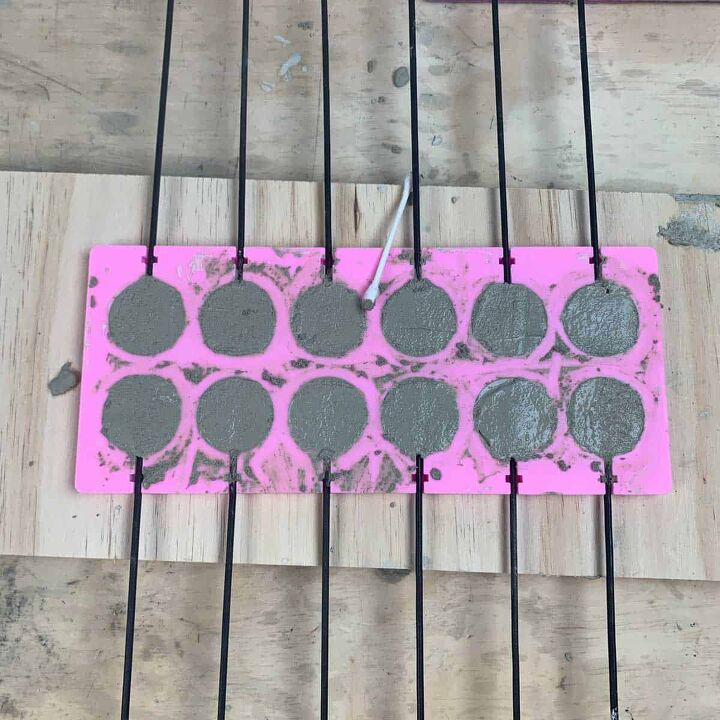
Once the cement is level, vibrate the mold by shaking and tapping the board to get the air bubbles out and to help level the cement.
Next, insert the painted skewers into the lollipop holes, make sure you have the craft sticks underneath them.
Use a cotton swab, or a craft stick to clean up around the edges of the mold. This will help you have less sanding.
Let these cure for a couple of hours.
Step 4. Clean Up The Cement
Demold the plant tags by gently pushing them up through the silicone and then go ahead and peel off the plastic wrap.
Use a diamond grit sanding sponge to remove any sharp edges.
Step 5. Paint The Concrete Plant Labels
Since the cement will retain moisture for another day, I recommend until it’s completely dry before applying the watercolor paint.
You should notice when you first demold these, that the fronts of the cement plant tags are kind of spotty.
You’ll know these are ready to paint, once those spots disappear.

I chose to make my colors subtle. To do this, dip your brush into water and then wet the color of your choice.
Apply the watercolor paint to the cement plant markers.
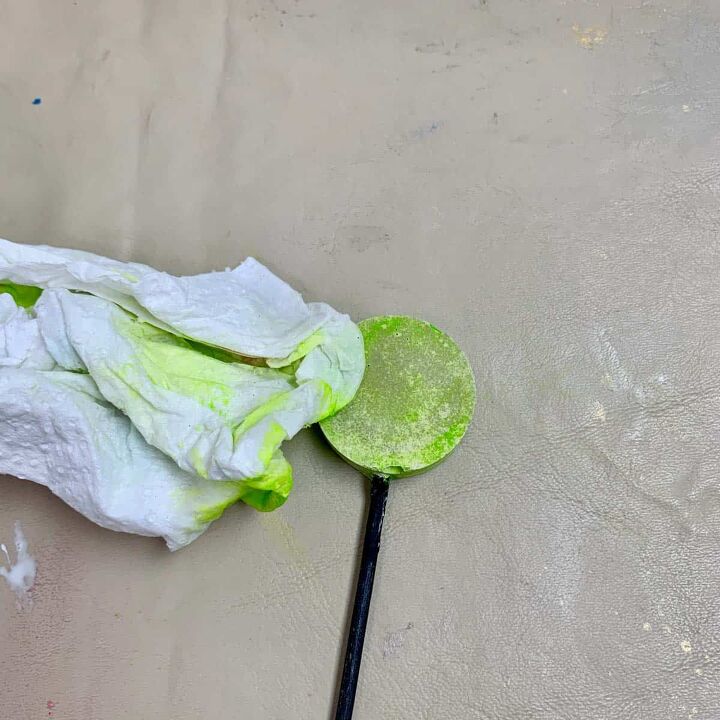
Since I wanted these to be subtle, I went back after about 15 minutes and re-wet the tag and then wiped some of it off.
I concentrated on getting the center even more subtle than the edges and rubbed them a bit more.
Some of the cement plant tags took the paint differently than others, so for some, I had to rub more.
You have a lot of control over this, so if you wipe off too much, just reapply. Don’t forget to paint the sides and back as well.
The back of the plant tag will take in much more paint than the rest of the DIY tags will so paint them with a light touch.
Step 6. Write The Labels For The Tags

Let the DIY plant markers dry before labeling them. They should be dry a couple of hours after painting.
Before labeling these, I recommend writing down the names of the plants you are going to label.
Then trace a few tags onto a piece of paper so you can test how big or small your writing will need to be to fit onto the marker.
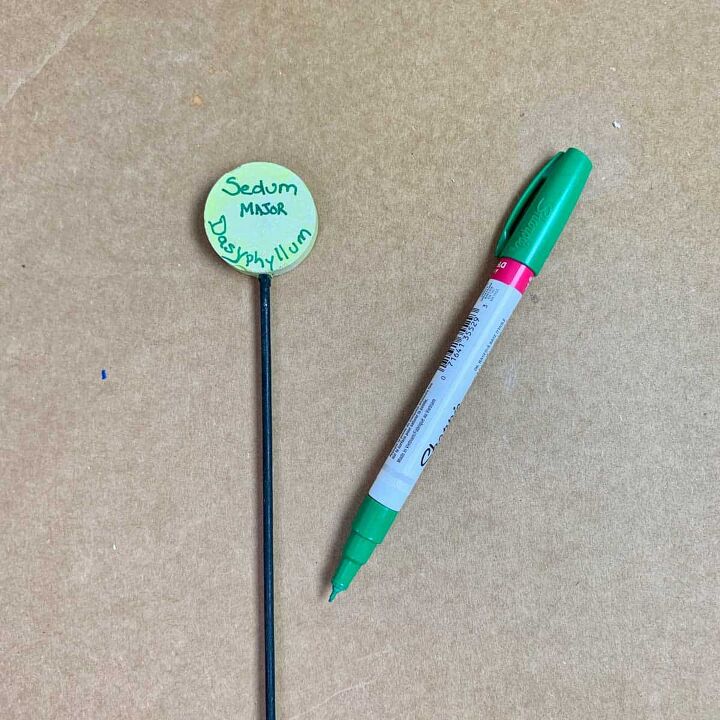
Now use the Sharpie oil marker to label the tags.
Step 7. Seal The DIY Cement Plant Label Stakes
After labeling, seal the tags with the matte varnish. Just use the paintbrush to brush on the sealer in a nice even coat.
I only sealed the front of the tags, but you can seal the whole plant marker if you’d like.
Resources for this project:
See all materials


Comments
Join the conversation
-
Lovely! And should last a very long time


Frequently asked questions
Have a question about this project?