


Spring Garden Makeover
This post was sponsored by Gardena; however, all views and opinions are my own.
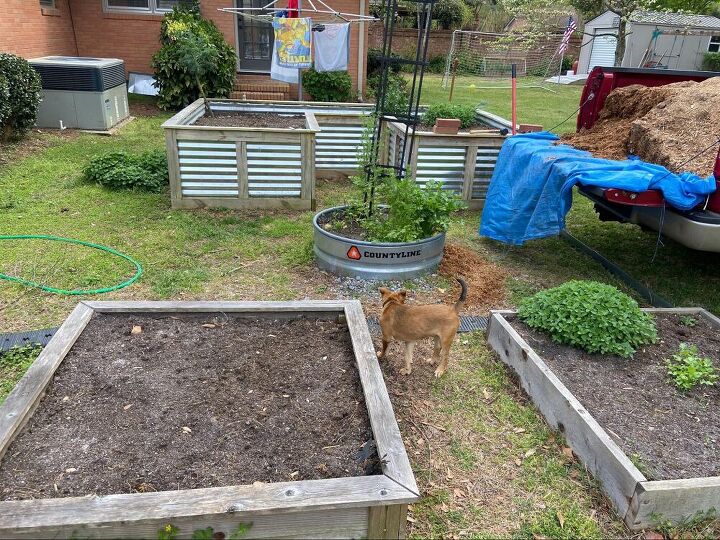
Come spring time each year, my garden can always stand a refresh. Last year’s mulch has broken down; weeds have broken through, and the entire area just looks a bit tired. Not to mention that coming out of the winter means garden beds are pretty bare.
There’s also the added challenge of making sure my garden is well nourished and watered, even when we are traveling or we are experiencing low rain amounts. In my spring garden refresh, I wanted to tackle all of these issues.
This year, I wanted to create an inviting space that was visually cohesive, sprinkler friendly, and easy to maintain. In order to accomplish this, I knew I needed to include a few things:
- Natural mulch (no dyes)
- Weed barrier
- Landscape Pins
- DIY weed killer
- Edging to keep the mulch in and the area defined
- An easy watering system
- A timer for watering
- New hose for leak-free watering
- Vegetables, herbs, and flowers to grow in combination with one another.
Choosing Garden Materials
Before starting on my garden makeover, I checked the weather to be sure the temps were mild enough for a few days of work in the garden and that the supplies were all on hand. No one likes to stop mid project because they have to go out for more materials.
For a project on this scale, consider buying your mulch of choice in bulk if possible. This will save money and create much less plastic waste from bags. While pine straw is the official mulch in my area, this year I went with a non-dyed cypress mulch.
A thick weed barrier is important for keeping your garden area weed and grass free. Thicker landscape fabrics work well for this job, but also consider using cardboard as your weed barrier to reduce waste and reuse materials you may already have on hand.
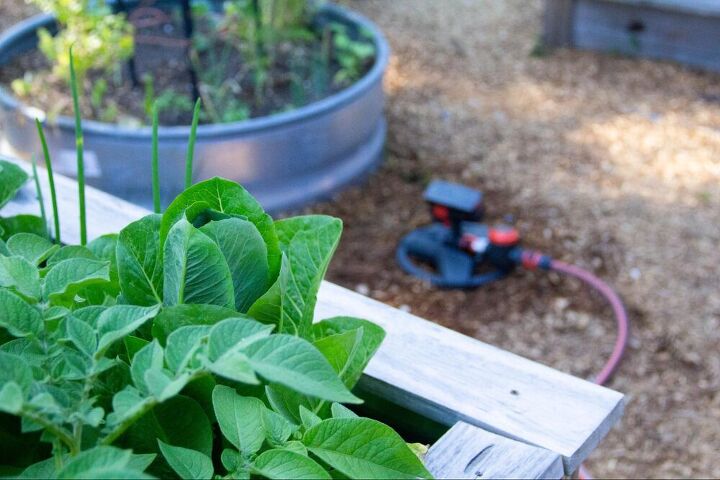
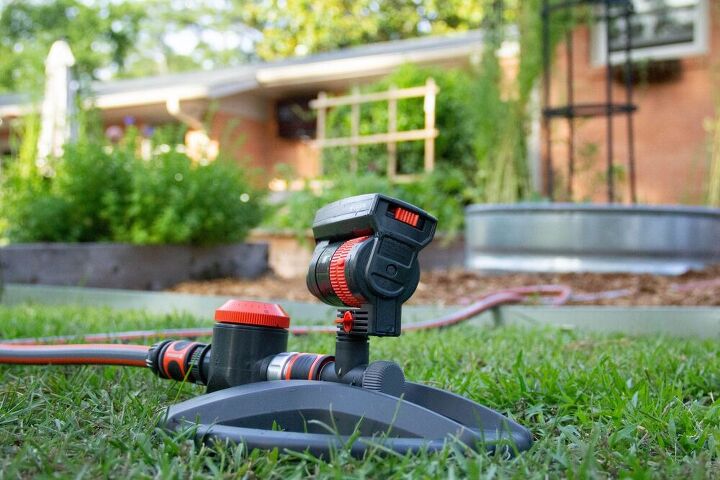
Watering systems come in many styles and varieties and for this project, I used the Gardena ZoomMaxx Sprinkler, which is set on a sturdy sled base for easy placement anywhere in the garden. This sprinkler model also included a timer, which was perfect for scheduling watering times without having to go outside and turn it on. And since we have worn out our hoses over the past few years, I also chose a new Gardena 60 ft hose complete with couplings and a thick design that should keep it from kinking up as it moves from place to place.

The Steps to a Garden Makeover
Let’s get started on a fresh spring garden makeover!
How to Refresh a Garden Space
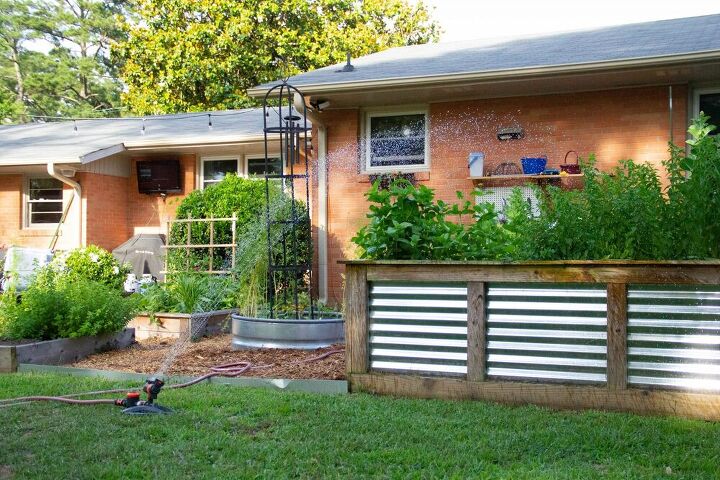
- Define the Garden Area- Decide where you want your garden area to begin and end. I chose to keep straight lines off of the corners of my raised beds as the boundary for my garden area. Also consider the length of your garden hose. You want to make sure the hose can reach your entire garden space. (Garden Tip: for a brand new garden space, consider using your hose as the edge of the proposed garden space. This will give you a visual without digging or marking.)
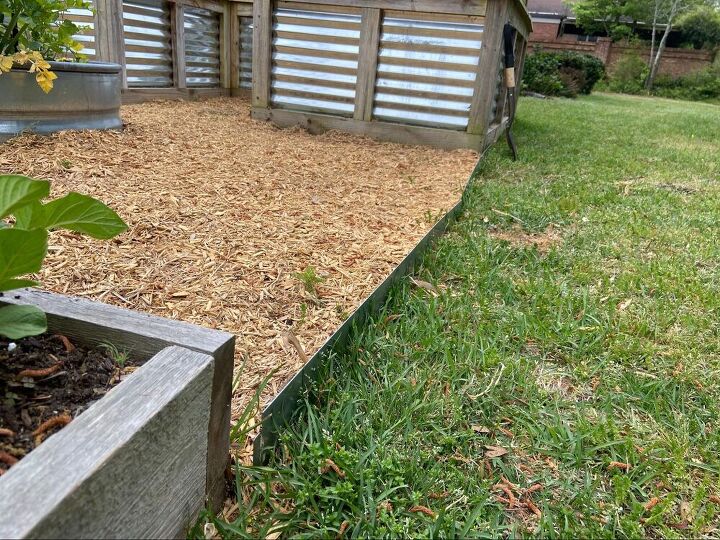
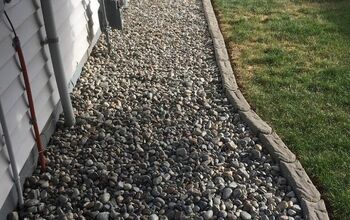
- Optional Edging- If you would like to have a clear, defined line separating the garden from other parts of the yard, use some type of edging. I chose a metal edging that was easy to install with a mallet. Plastic edging could also be used if that’s your preference or even try a brick edging like my DIY Brick Edging Tutorial lays out.
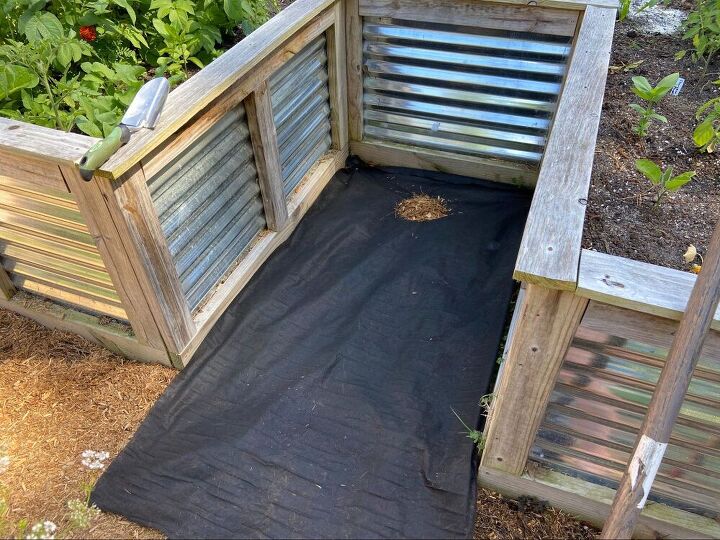
3. Use a weed barrier. When I first started this garden refresh, I thought that mulch would be enough, but after a week, grass and weeds were already breaking through. So, I raked up the existing mulch and used two different weed barriers. First, I used what cardboard boxes I had on hand as a barrier. Once these were used up, I switched to landscape fabric I had left over from a previous project.
4. Once the weed barrier was down, I used my homemade weed killer to get places that the fabric could not. This is also a helpful way to spot kill weeds that may eventually break through the fabric or cardboard barrier.
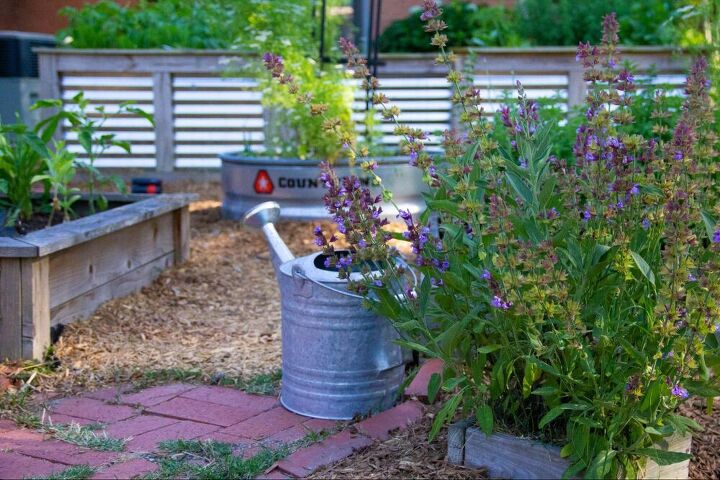
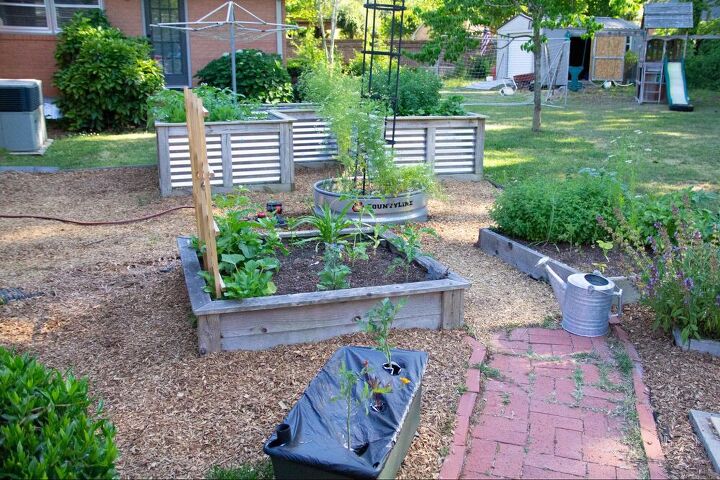
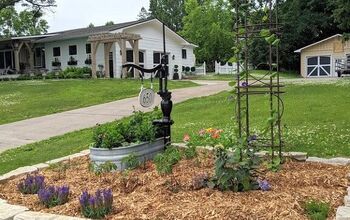
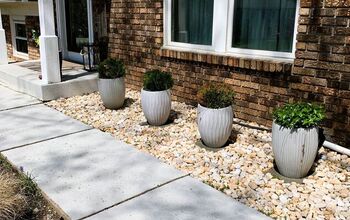
5. Once the fabric or cardboard is in place, use several inches of good-quality mulch to cover the garden area. I prefer un-dyed cypress mulch for a natural look, but every gardener can choose his/her favorite.
6. Plant your garden with choice herbs, vegetables, and flowers. Many flowers such as marigolds, zinnias, and nasturtiums work well in the vegetable garden and will attract pollinators to your other plants.
7. Set up a watering system. This is crucial for the success of your garden, especially if you have summer travel plans or are just generally busy. I love the ZoomMaxx sprinkler on a sled base with the 60 foot hose to water all areas of my garden. It’s reach goes far beyond my garden area, but it’s easily adjustable to only water the areas I need. The Gardena watering timer also allows me to water even if I’m not in the garden. The timer can be easily attached at the spigot or directly onto the sprinkler itself for hassle-free watering.
8. A week or so after planting, apply an organic granular fertilizer as needed and continue to water regularly. Check to make sure plants are getting the proper amount of water by pushing your finger down in the soil. If only the top layer of soil is moist from watering, then lengthen the timer on your sprinkler for longer watering.
Overall, I am incredibly pleased with how my garden refresh turned out. The new plants are thriving and I have been very impressed with the gardena hose, which doesn’t kink, and the sprinkler for many reasons. The Gardena ZoomMaxx sprinkler has an adjustable head, which means I can adjust both how far the sprinkler extend front to back, but also the width of the spray area. I’ve never seen this in a sprinkler before and I love that I can adjust this for each garden area in my yard.
I hope this inspires you to get out and freshen up your garden space with new mulch, fresh plants, and a watering system that will keep your garden hydrated!
Resources for this project:


Comments
Join the conversation
-
Yes !! Very nice.
-
F A N T A S T I C


Frequently asked questions
Have a question about this project?
Looks really cool. I like it. I was wondering if metal might get to hot in sun in July and august and harm plants