


How to Build a Livestock Fence

Earlier in the summertime, Mister & Master M built a new fence around our vegetable garden in the backyard. It’s inspired by traditional livestock fences but with a bit of an edge and character. Here are all the details on how to build a livestock fence. You can do this too!
It’s amazing how easily they built it and rather quickly too. Plus it’s super sturdy and actually much better built than the fence they replaced, which was professionally installed I might add.
Mister Masterpiece actually figured out how to do this all on his own. He started with the gate fences on the sides of the house. Then he built the front fence on our property with the help of Master M. And now the garden fence. He refines the process each time he does it, so I thought we would share here to inspire or help you build your own fence. Here’s another post on the fences in the front yard from last year {the Hogwire Fence Project}.
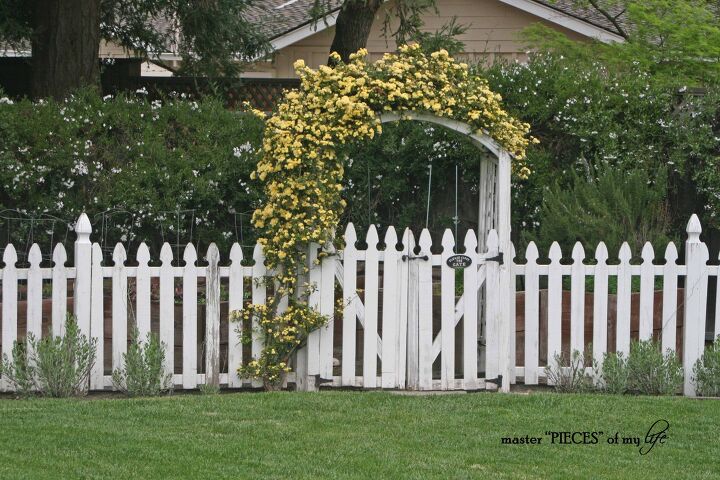
First, lets remember what the old fence looked like. It was a sweet picket fence, which gave the garden a cottage vibe. I loved it! I was extremely apprehensive to replace it, but it was worn and breaking down more and more each day. Finally, when we had it removed, we found out it had termites so it was a good thing we did it when we did.
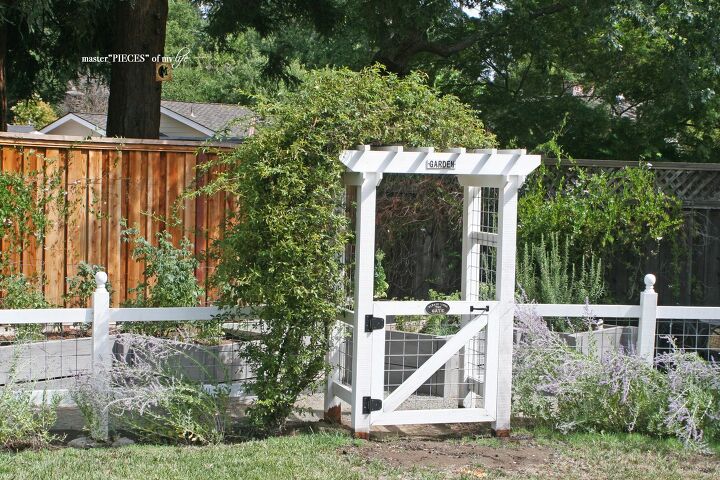
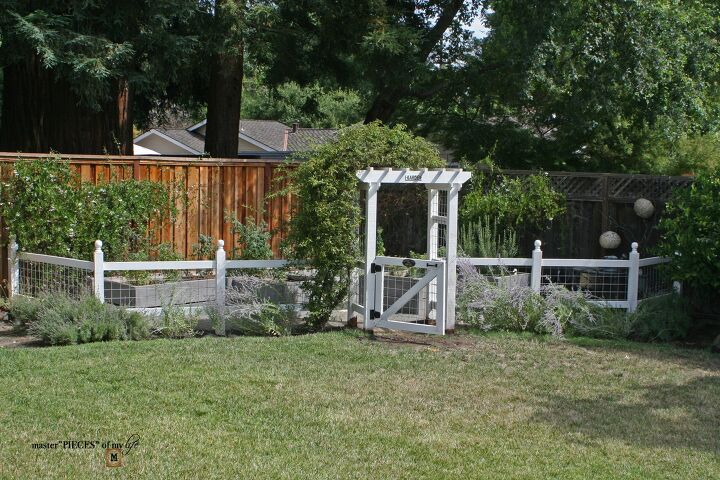
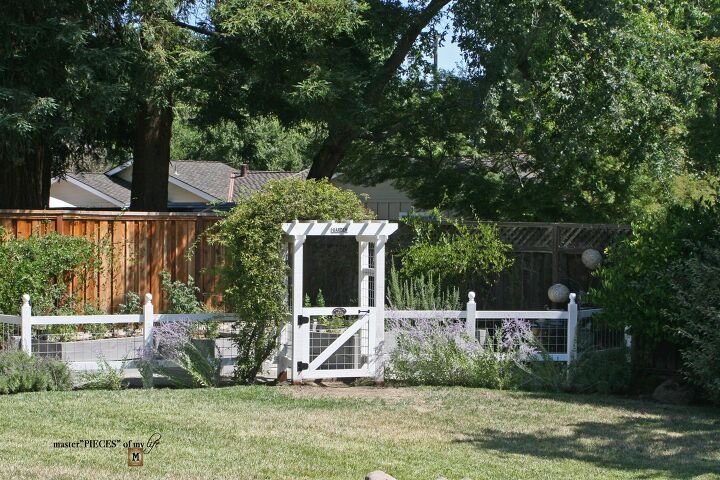
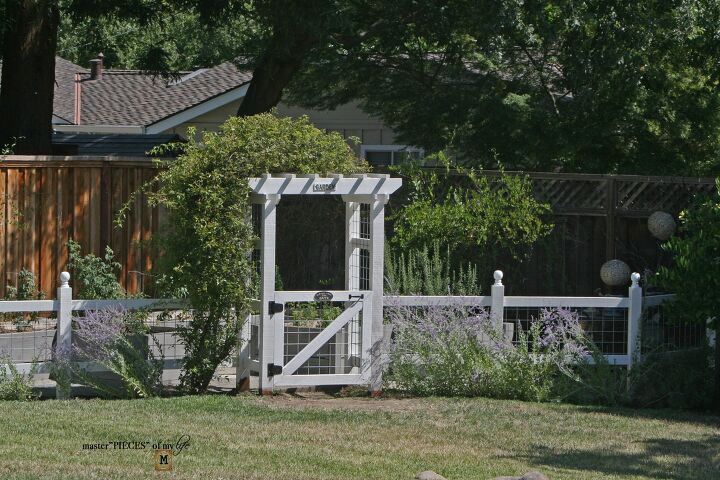
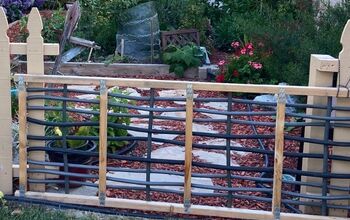
The new fence has more of a residential farmhouse feel to it, which is the perfect upgrade for our home right now. I love how it looks. It has updated the “look” of the garden and our backyard in general. And the best part? We did it ourselves. I call this a livestock fence although we actually don’t use it to corral any furry friends, rather we use it to keep critters out of our vegetable beds.
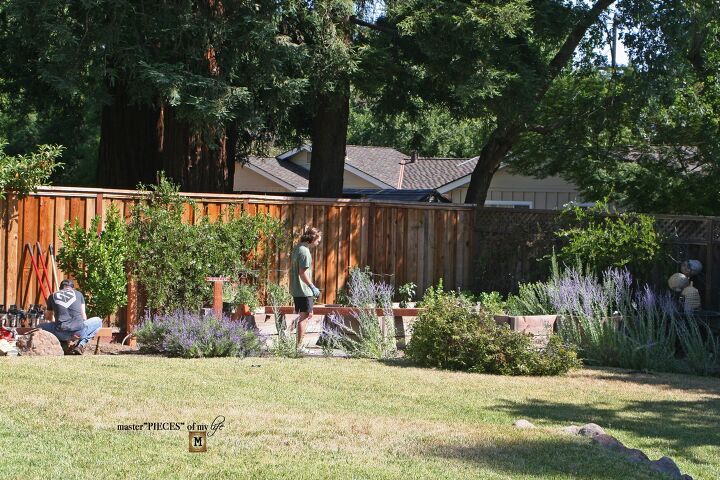
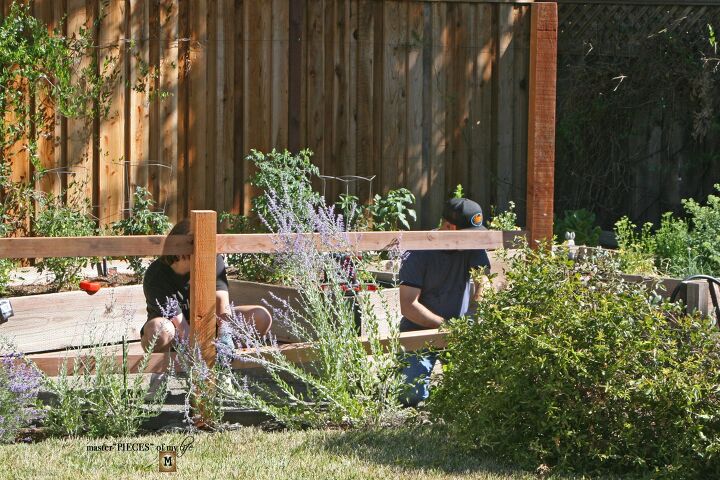
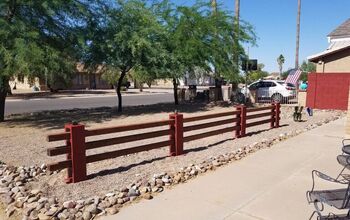
We used pressure treated wood for our fence since we were told this will prevent it from deteriorating like our previous fence. The first step is establishing where your main posts will be located. Each fence section here is spaced about 4 to 6 feet apart. We have variations on the lengths because of the footprint of the garden, following the organic shape. If you’re building a straight fence, I would recommend just deciding on a length that makes sense for your project. A length that’s divisible by 6-8 feet into the total length of your project is the easiest math-wise . Here are the boys making sure the posts are perfectly level.
We used 4×4-inch wood for the main fence posts. Each hole for the main posts are about 1-1/2 feet deep, grounding each post securely. The fence posts are about 40 to 36-inches tall {above the ground}, making each post about 4-1/2 to 4-3/4-feet tall before you stick the approximate 18 inches into the ground (hope that makes sense). We have variation because our ground slants where the vegetable garden is located. If you’re on a flat surface, I would just decide how tall you want your fence, determined by the purpose and look. The fence posts are secured into the ground using Quikrete, a cement concrete mix found at most home improvement and hardware stores.

While the posts sets into the QuikreteMake, sure the posts are perfectly straight using a level as shown in the previous photo. Once the cement mix is totally set and dry, you are ready to add your horizontal beams on the fence. We used 2×4-inch wood rails here. Cut each fence rail to fit snugly in between each fence post. The top rail is attached to the main posts about 4 inches down from the top, while the bottom trails are attached about 6-inches up from the bottom. Since there are plantings on the bottom of the fencing, the added space is visually more appealing.
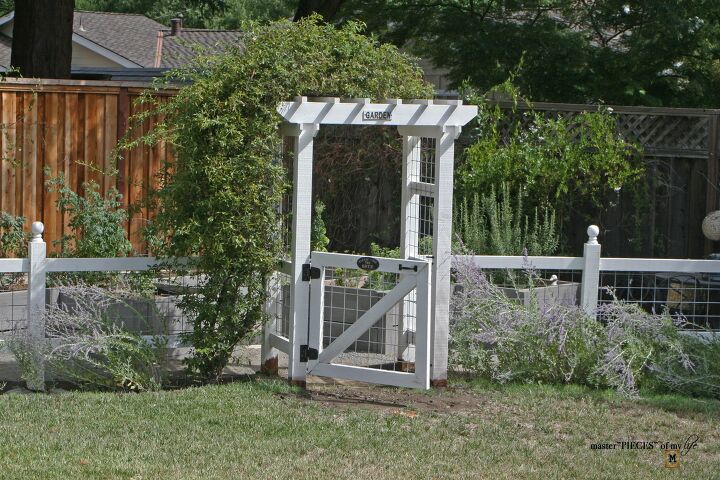
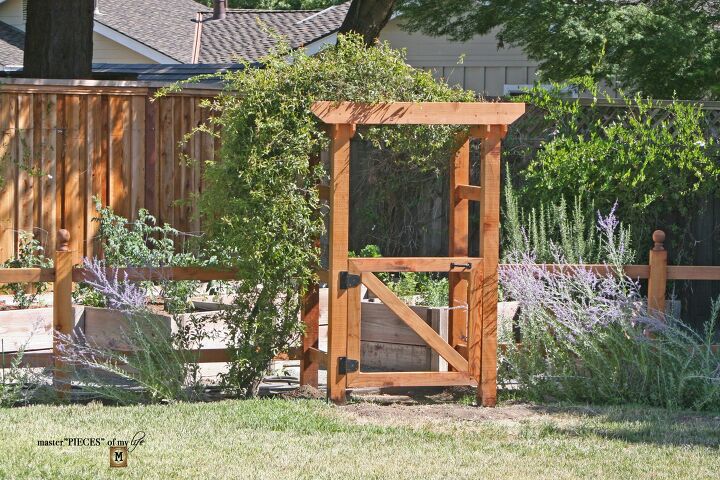
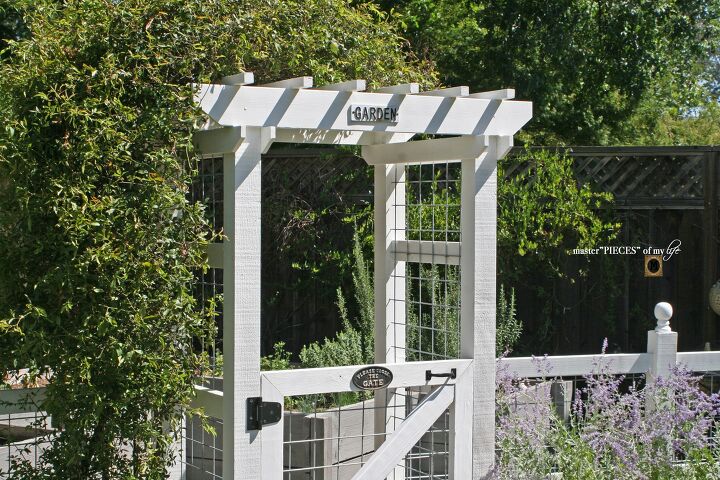
After the 2×4 railing beams are nailed into into the 4×4 posts, the boys added the arbor and gate to our garden fence. If you are interested we can give you all the details for the arbor and fence, following the same building principles used on the fencing panels. Let me know. I’d be happy to provide you with additional details for the arbor. I will leave all the final details for the arbor and gate for a subsequent post, since this post is chock full of details already.
If you don’t want to miss out on any of the upcoming projects you can subscribe to receive all my new posts to your in-box.
We found the finials on amazon here. The finials are purely decorative and not structural necessary, but they add a nice finishing touch. You can also use caps like we used in the front and side fences {the Hogwire fence project}. Unfortunately, I did not capture Miss M helping dad paint the fence, but it truly was a family affair. Once the fence was fully painted and the hardware and old signs were attached, it was time to add the wire, which is the “personality” of the fence.
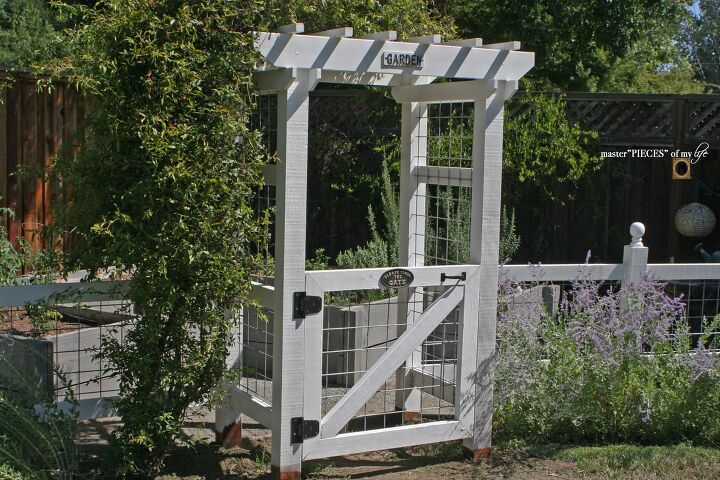
The wire come as sheet panels in different sizes, gauges and colors. We used silver wire panels in a 4×6-feet size with a 6-gauge thickness. First cut cut the wire panels down to size to fit within your fencing dimensions. Then attach them using industrial staples or fasteners to the wood. If you zoom in to our pictures you will be able to see how our wire is fastened to the wood.
We love the updated look the new fence gives the garden. Plus it feels even better that it was home grown. We hope this helps and | or inspires you to build a fence of your own!
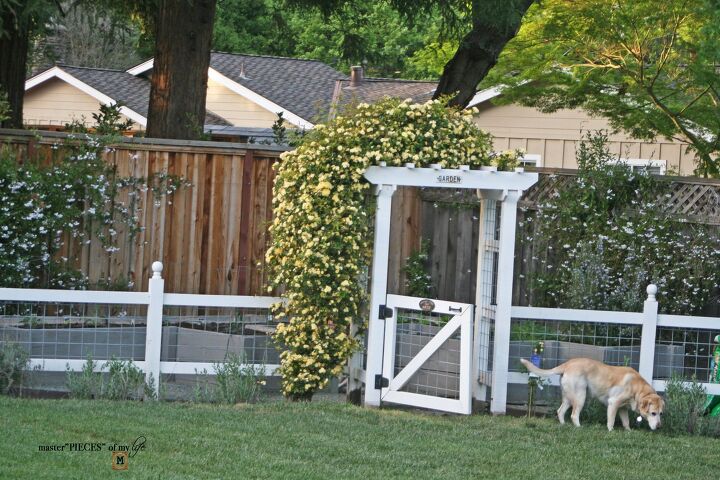
The boys built the fence last year and this is what to looked like this year earlier in the spring.


Frequently asked questions
Have a question about this project?