


DIY Farmhouse Chic: Painted Wood Lanterns
{Disclosure: This is a sponsored post from Zibra Brushes but the opinions and projects are mine all mine!} Calling all my bargain shoppers! Love those inexpensive wood pieces you find at mass craft stores but don’t like the color? Grab some Zibra brushes and create your own farmhouse chic home decor to brighten up any space!
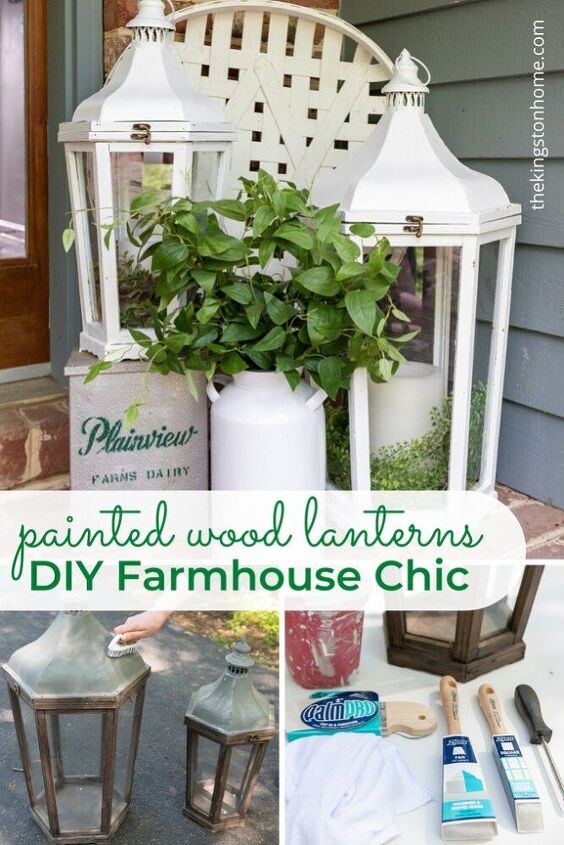
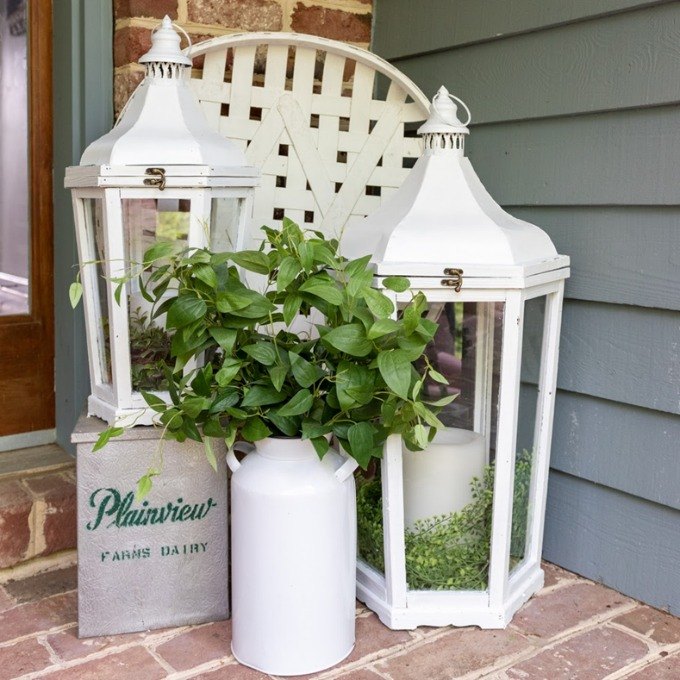
I bought these giant candle lanterns on clearance last year. I wasn’t in love with the brown wood (I am a bright white and lots of color girl) but couldn’t beat the price! I justified it by telling myself I’d paint them, but every time I thought about the process of taping off the glass and getting in to the nooks and crannies and curves of these intricate lanterns I just pushed the project further down my to-do list. Until Zibra Brushes came in to my life!
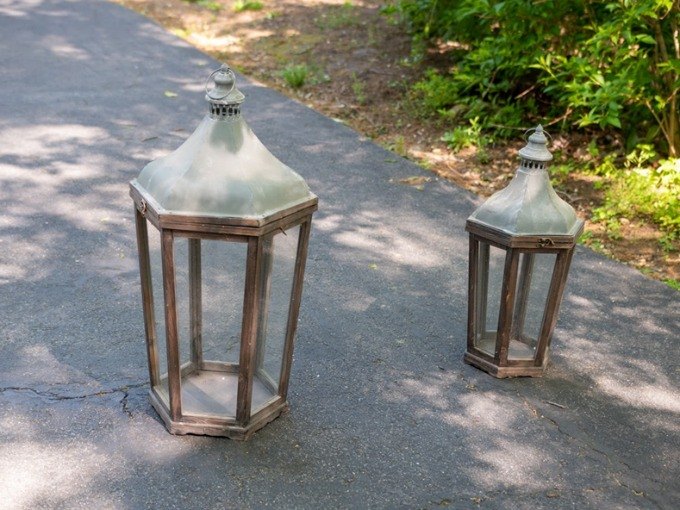
In the past I have been a spray paint girl (cough cough lazy painter cough cough) so have shied away from projects like this. When you have a piece with so many angles and curves it is hard to get even coverage in some spots without over-painting others. With these Zibra brushes I was able to choose the brush I needed for the shape of each part of the lantern and it was a total game changer. Now I can’t wait to paint all the intricate things!

SUPPLIES NEEDED:
- wood lantern
- paint of your choice
- scrub brush
- Zibra Fan Brush
- Zibra Square Brush (they also have a Triangle Brush that would be great for similar detailed work)
- Zibra 2” Palm Pro Cut In Brush
- screwdriver
- rag or towel (or painter’s tape if you want to tape off the glass)
- paint scraper
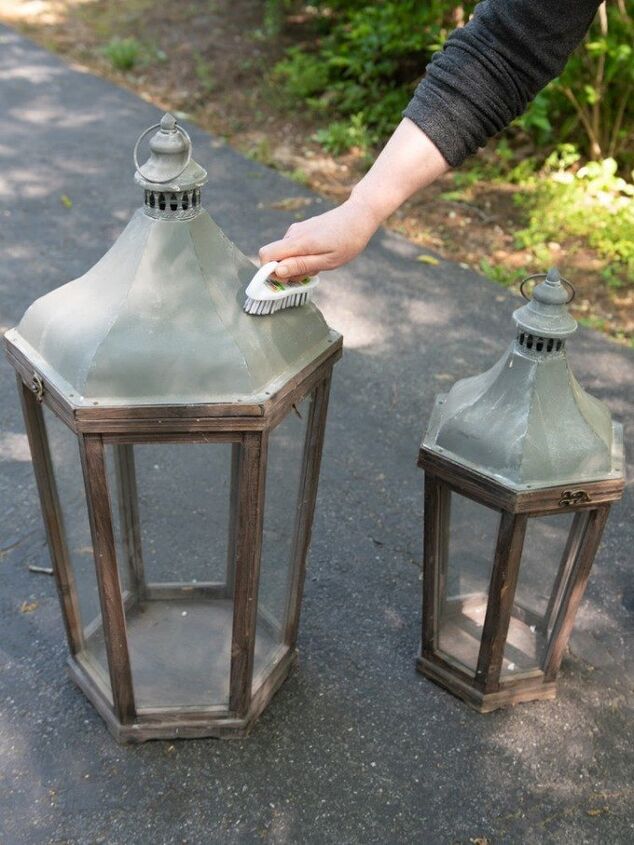
CLEAN LANTERNS
Lightly brush/clean the lantern inside and out to remove any debris. The surface was textured enough that I didn’t need to do any sanding, but if you are painting a lantern that has a super smooth surface (like metal) just give it a light scuffing with some sandpaper.
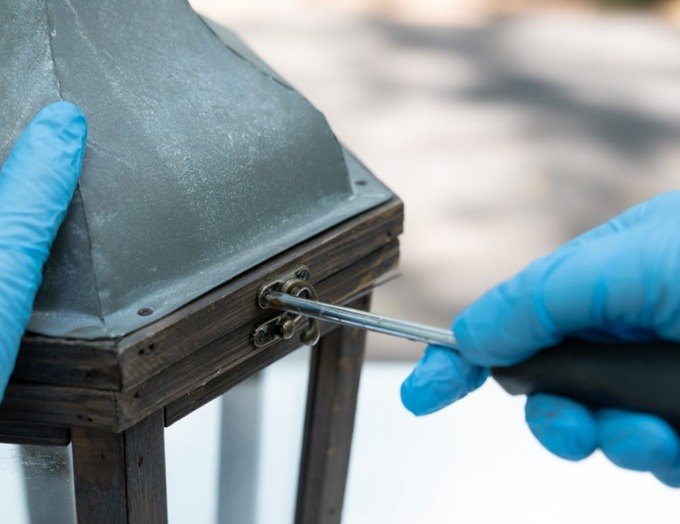
REMOVE HARDWARE
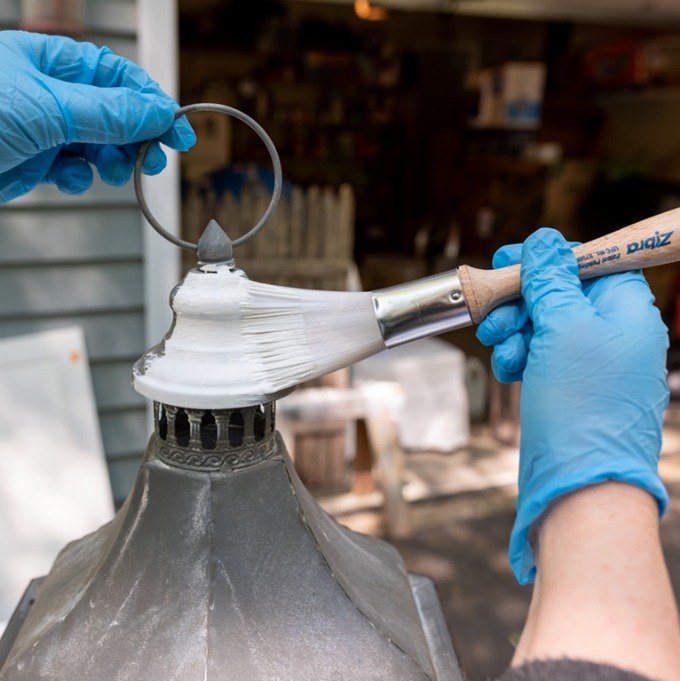
Remove hardware as desired. I wanted to paint the hinges on the back but leave the front clasps the original metal for a little pop of color so I took them off and set them aside.
PAINT LANTERN SECTIONS
Begin painting each section of the lantern. A few tips:
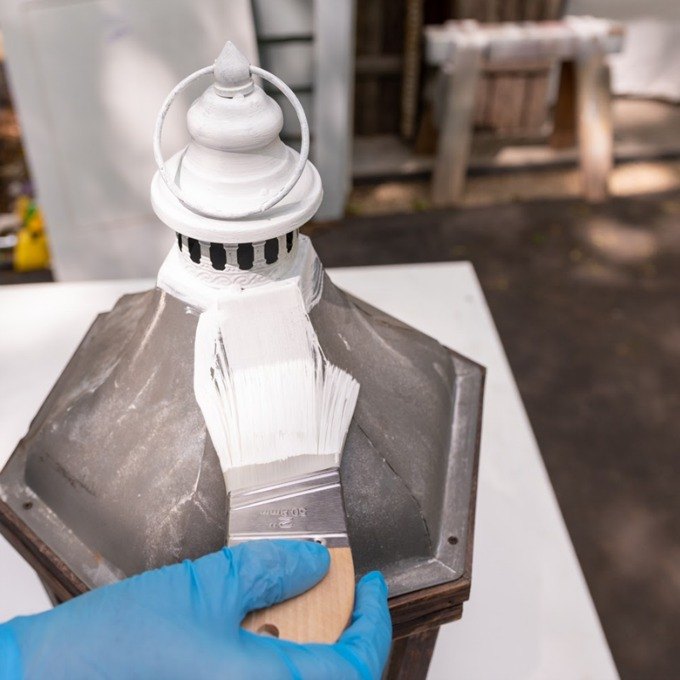
With each section you paint/brush you use, make sure you are painting in the same direction. For example, when I was painting the decorative/curved top I moved the brush horizontally around the top. When painting the broad part of the lid I painted top to bottom, and the angles/corners of the lantern I painted from bottom to top.
The Zibra Fan Brush was perfect for the molding and detail at the top of the lantern. It brushed beautifully over the detailed cut outs without “gooping up” (that is the technical term) in the openings. The coverage was perfect the first time around!
I’d never thought about the comfort level of a paintbrush – I just chalked up cramped fingers to “that’s just how it is”. So I was SUPER surprised with how much better the Palm Pro Brush felt in my hand! Rather than having to grip a thin handle I could rest it in the palm of my hand or across several fingers, and it made my painting a lot smoother too. Added bonus!
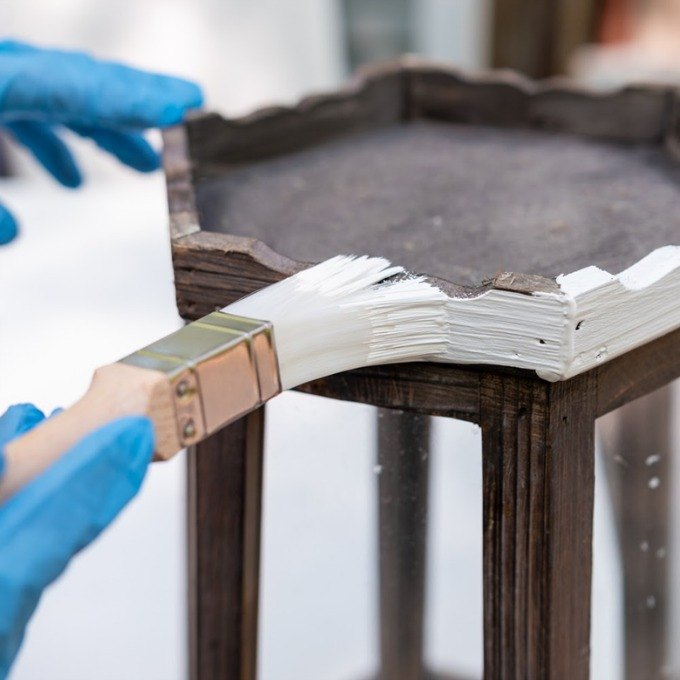
The Square Brush was AMAZING for the angles and corners of the body of the lantern. I worried about getting good coverage on both sides of the angled pieces and having to do twice the work – but the square brush actually cut my work almost in half. We are getting ready to repaint some of the rooms in our house and I can’t wait to try this brush on the corners.
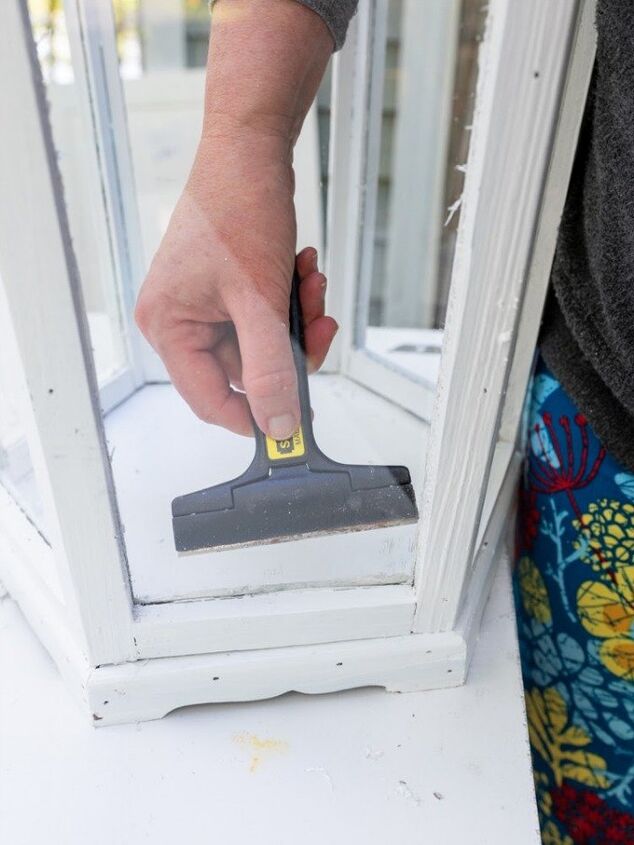
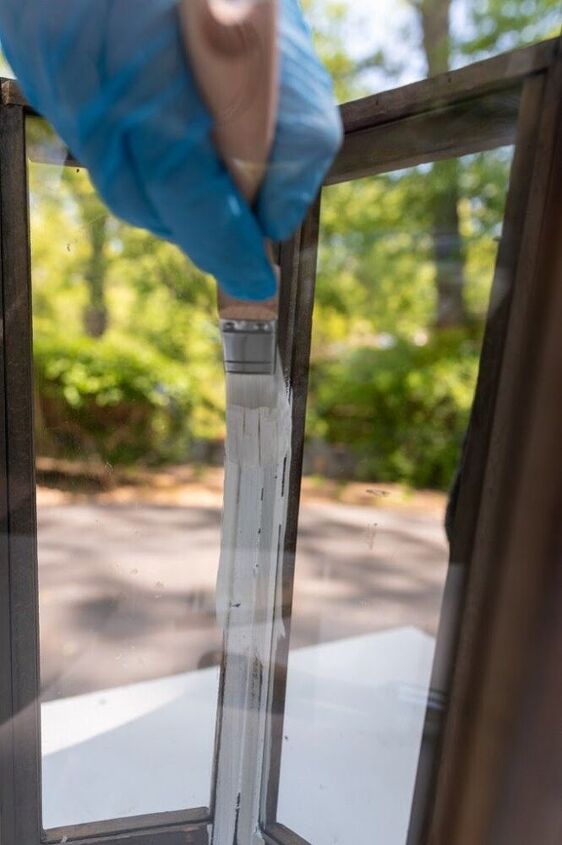
The brushes gave me so much control over the angled pieces of wood we didn’t even worry about taping! We used outdoor paint (since I think these are going to live on my front porch) so were able to easily scrape off any paint that got on the glass with a paint scraper.
Biggest lesson learned – when working on the inside of the lantern start painting from the bottom and work your way up. Your sleeves will thank you!
REATTACH HARDWARE
Reattach the hardware and enjoy decorating your home (or porch in our case!) with your newly painted lanterns. Can you believe the difference?
To get more project inspiration for every area of your home, stop by my blog!
Resources for this project:
See all materials


Comments
Join the conversation
-
OH my they are gorgeous ! I dont think I ever saw a wooden lanterns. I have a big metal light lantern with rare embossed glass . The fixture is no longer in use so I just put string of lights under the lantern on the floor. It really lights it up lovely.
- See 1 previous
-
Beautifully done! You are very talented!
Shalom
Wanda McCall


Frequently asked questions
Have a question about this project?