


Updating Lights for an Outdoor Space

An easy trick I came up with when swapping out light fixtures on a buddy's home. The vinyl siding made one of my challenges easy
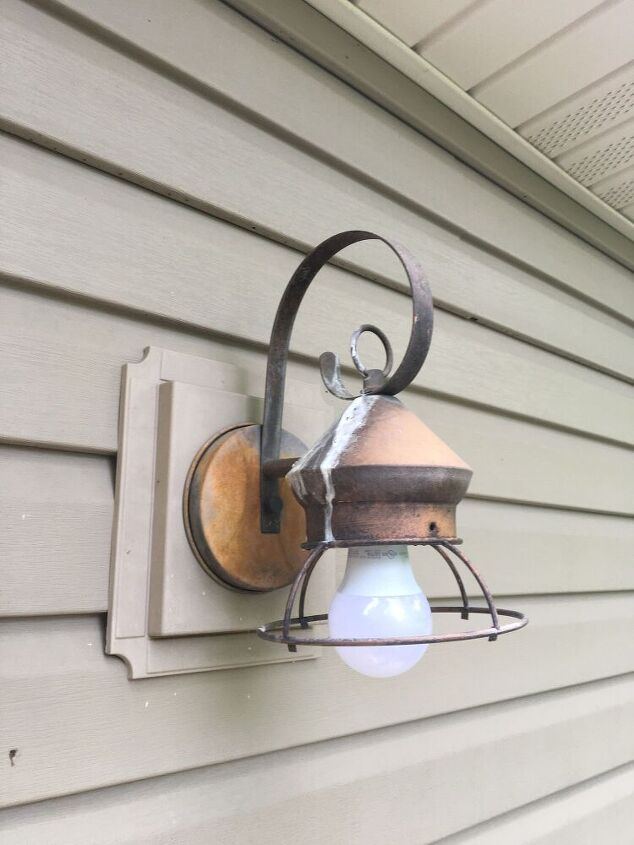
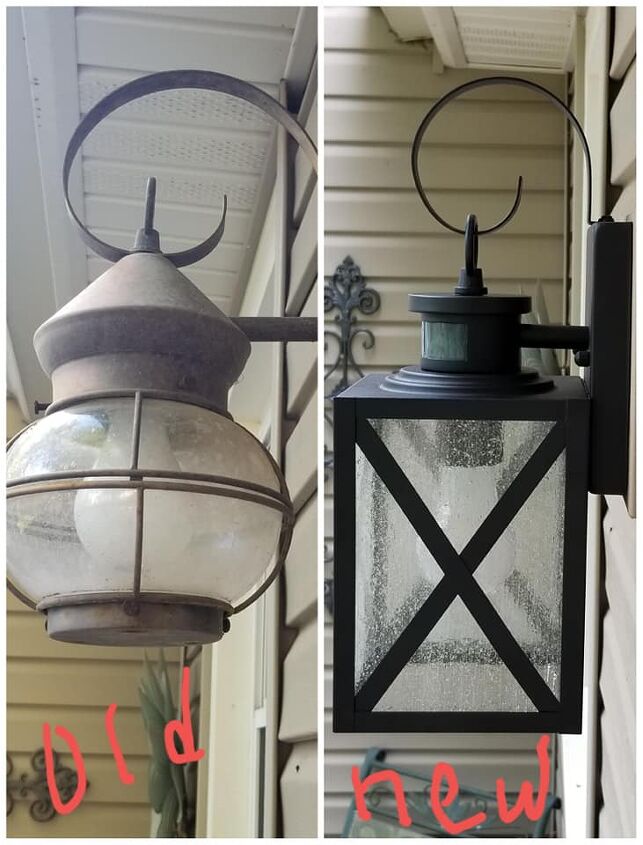
My buddy Karla ( with the headboard ) needed some electrical help. Her boyfriend broke a globe on this fixture trying to change the bulb. She didn't like the fixtures anyway, so this was an excuse to update them. For this little jewel we had to remove one thumb screw at the bottom of the hangar and the main fixture was loose. Before proceeding with any electrical project, turn off power at the BREAKER, and then try the light. If it comes on STOP and go back to the breaker box.
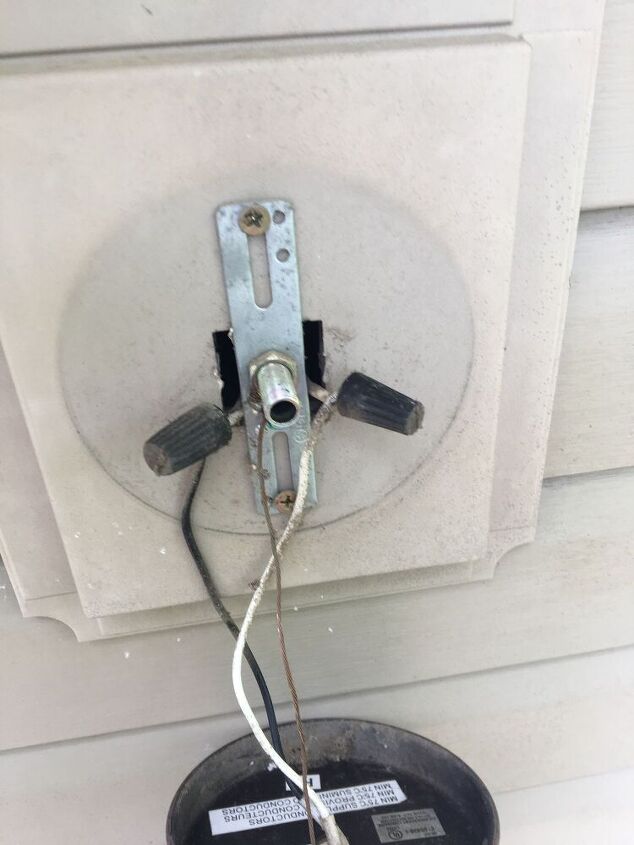
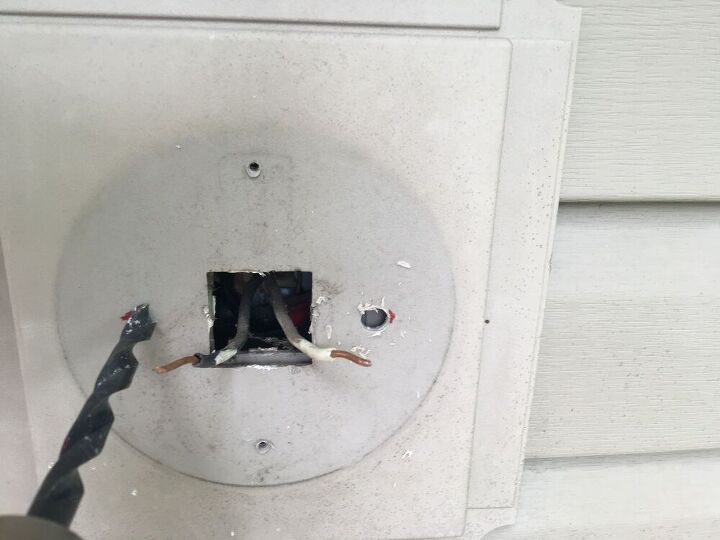
With the fixture loose I could see the two wire nuts for hot and neutral. When the home was re-wired there was no ground from the house used on the mounting plate. Hot on the left and neutral on the right. The bare ground from the fixture does nothing here because the plate is mounted into wood and plastic.

Here you can see I took off both wire nuts, and have already taken the white/neutral wire loose. I am disconnecting this fake ground with a flat blade screwdriver
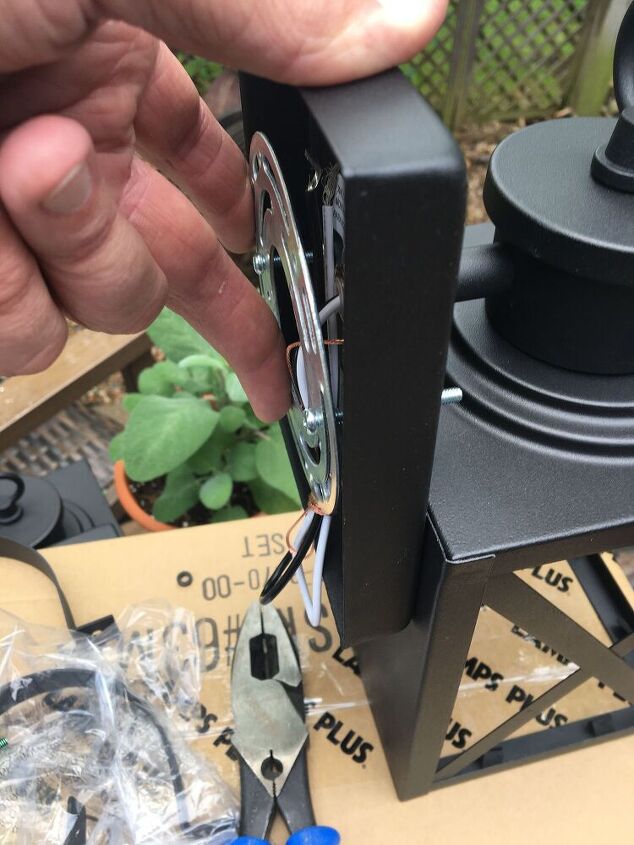
On Karla's house the mounting plate and fixture with be flush with each other. Here I inserted the plate and mounting screws thru the fixture before I took them up the ladder. Note that the screws are too long thru the front of the fixture
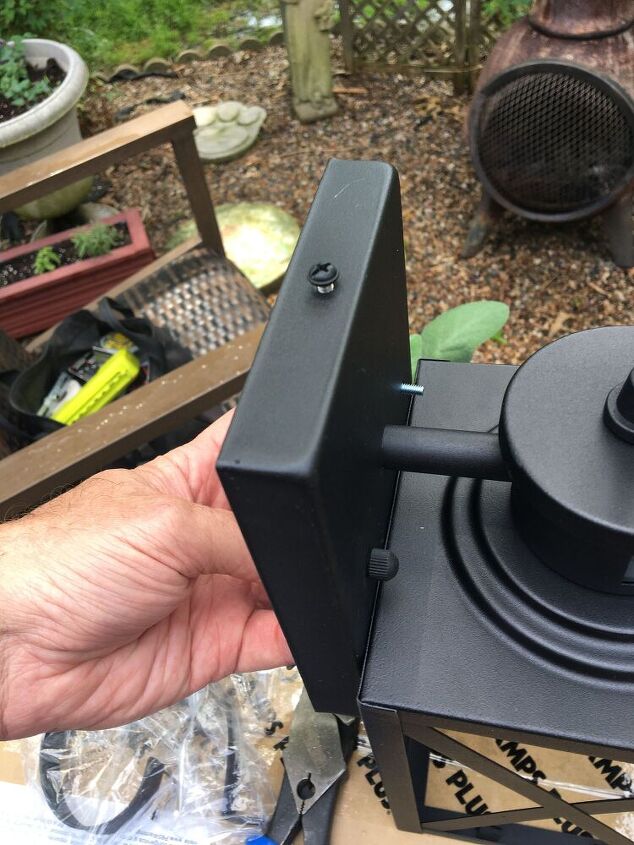
I backed out the mounting screws from the rear of the mounting plate until they were the right lengthy for the new black thumbscrews. The screw in the top is for a faux hook to hang the fixture
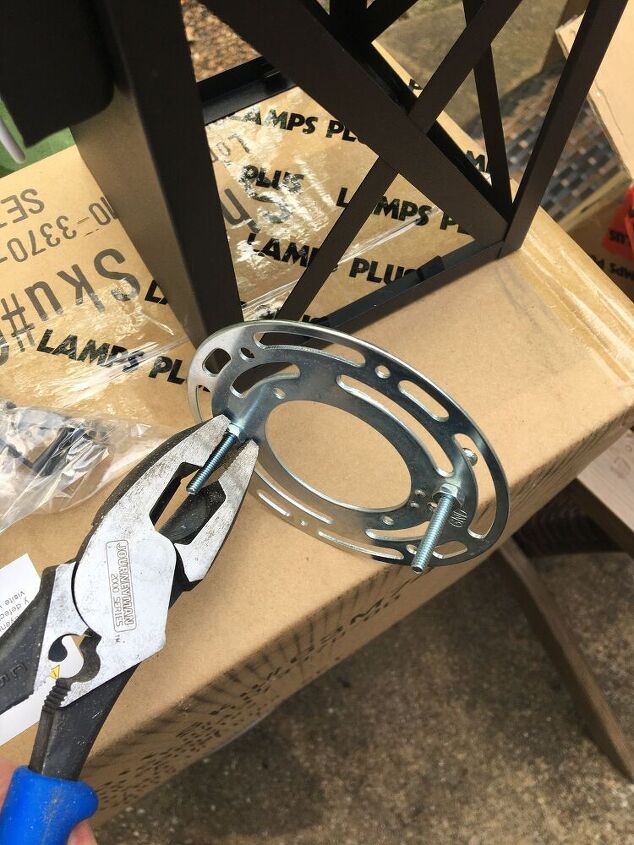
The screws came with a locking nut. Once they were correct lenght I locked them in place with the supplied nut.
NOTE: Sometimes when I install light fixtures I cut the screws to fit. As this was a friend's house, I didn't have spare screws on hand and didn't want to chance breaking something I couldn't replace immediately. If you don't know how to cut and re-thread machine screws, this will be a good tutorial for getting around the screw length issue
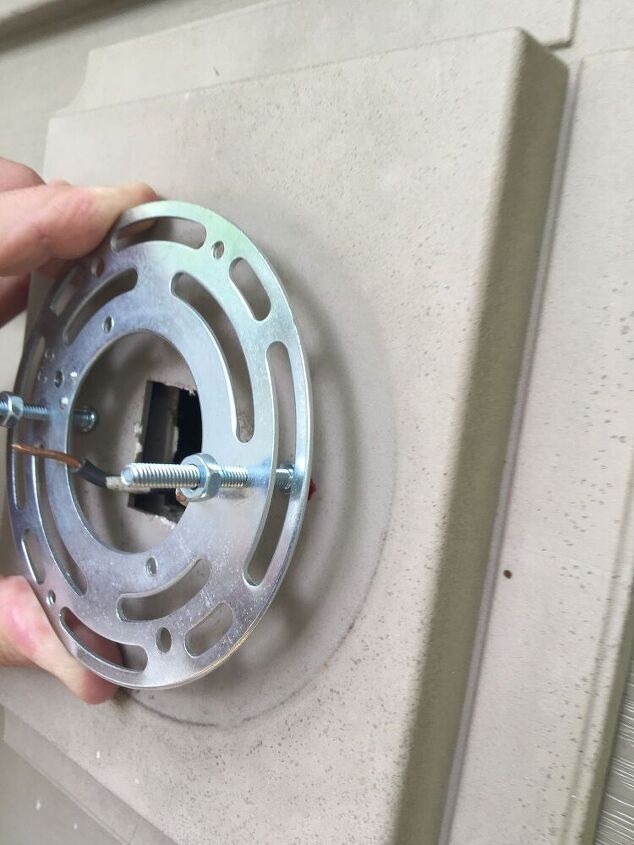
The siding lamp plate gave me an extra 1/2" or so of thickness to work with. I put the assembled mounting plate up against the siding plate and marked just outside each screw with a red sharpie
I then drilled a 5/16" hole just inside each red mark (still visible to the left of the drill bit) so the screws could recess into the siding
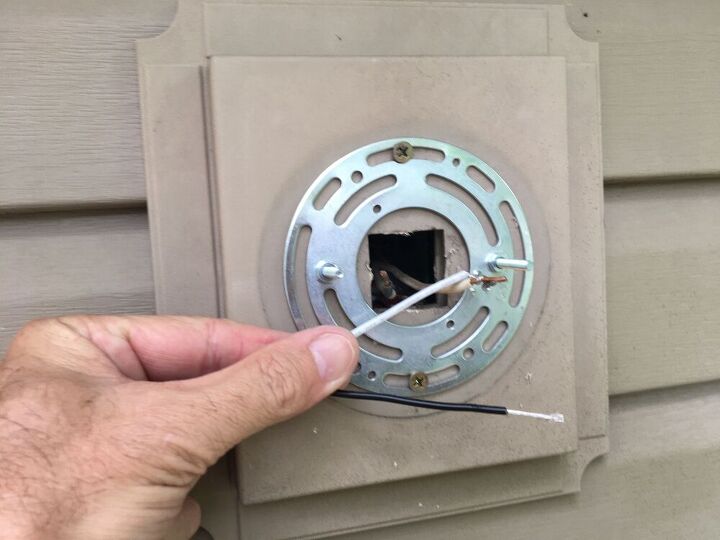
I attached the mounting plate to the house with the same two drywall screws that were holding the old plate on in the 2nd photo. Just below this shot Karla is holding the light fixture so I don't have any weight on my leads. Twist the white to white, and black to black (assuming correct polarity from the previous install, doesn't hurt to check yours with a no contact tester or a meter) then attach wire nuts over the connections. IF this house had a ground wire to the fixture I would have attached it to the mounting plate, and then a ground wire from the fixture to the plate as well. I do wish the house had a ground.
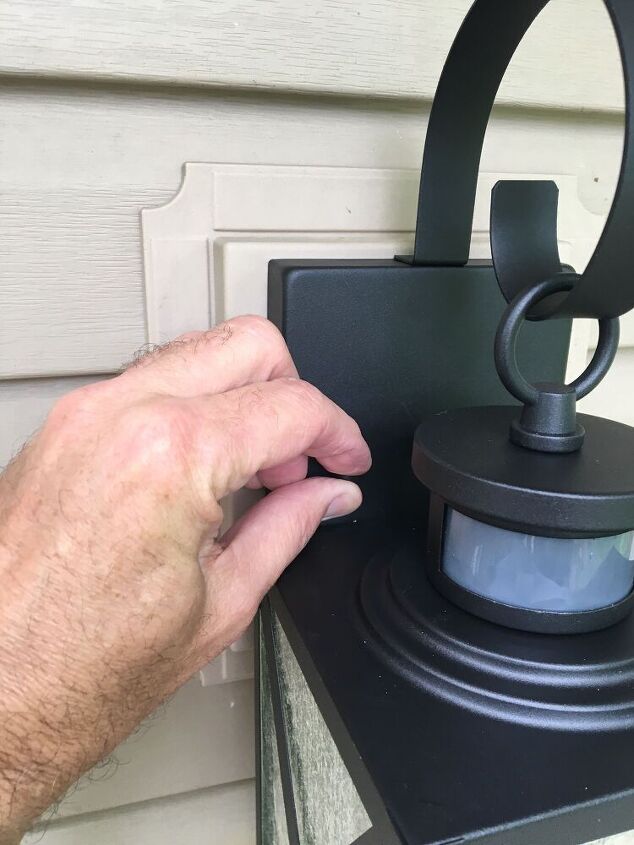
Here I am tightening the thumb screws onto the mounting screws. Two is all it takes for this lightweight fixture
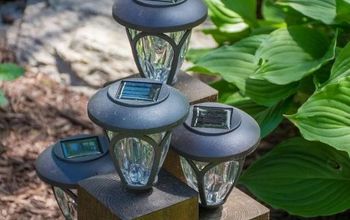
Ready to test the fixture. Note the white plastic insert. These have both light and motion sensing capabilities.
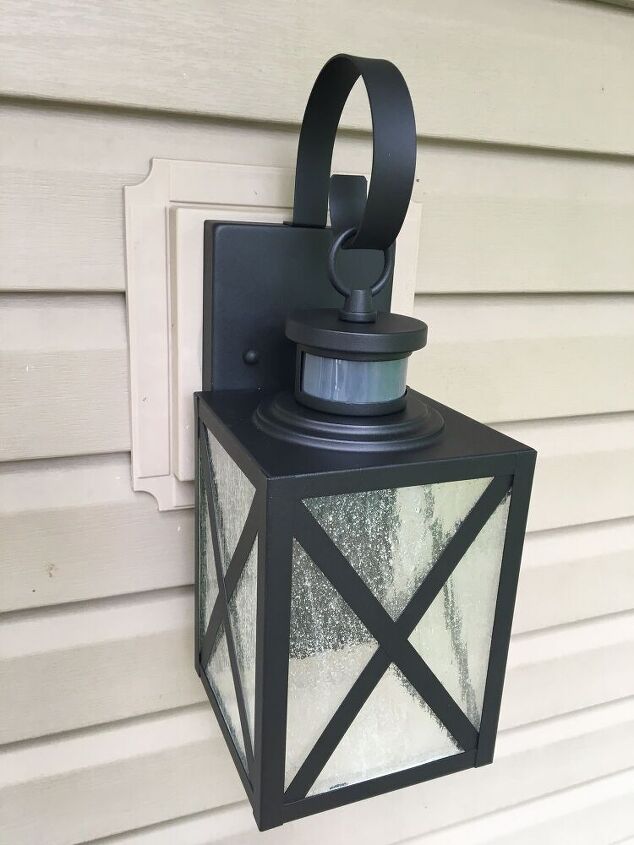
The completed fixture from the tutorial is on the right. I installed a total of four in under 90 min, so 20-25 min each
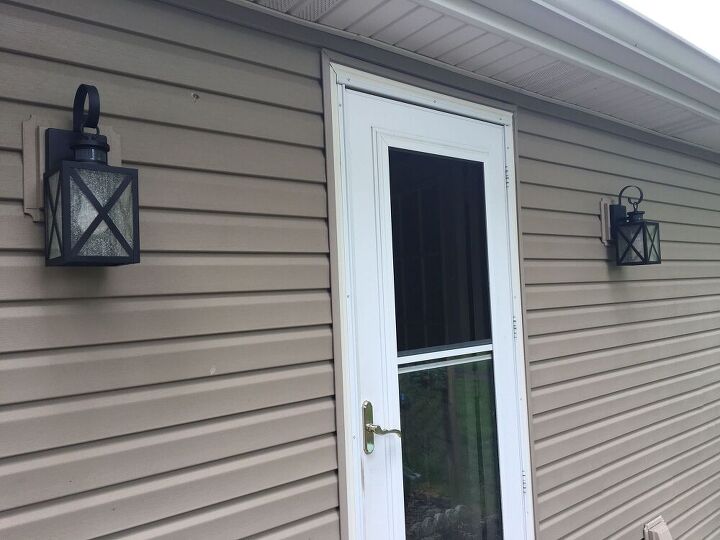
I stole this from Karla's facebook page ;)

These look nice at her place. I stole this picture too
I hope this helps someone get past any hardware roadblocks on installing light fixtures. I've installed about fifteen so far for 2020 for family and friends. Every house is different.
As always comment if you have ideas that will help others with their projects suggestions are welcome. Don't forget to SHUT OFF POWER!
Happy Hometalking!


Comments
Join the conversation
-
They look great. You did a wonderful job with the install. I know your dilemma with ground wires. All old homes didn't have ground wires and old fixtures didn't have to be grounded. Once polarization came into practice everything had to be grounded. If there's a short the fixture can become hot.
-
I love them!! Oh my gosh so beautiful and wonder!! Great job, great vision!!!!


Frequently asked questions
Have a question about this project?