


Front Porch Makeover
This post has been a long time coming – not that it’s taken us a long time to do the project, it’s just that we’ve been wanting to do it for a long time.Does that happen to you? Are you a procrastinator? Sometimes, I am.
If you read my last post, then you’ll know that I was invited to participate in a Front Porch Blog Hop. Basically, my blogging friends and I all did a makeover on our front porches, then we shared them onInstagram together. This gave me the push I needed to get on with this project. I should note that in this post there will be a lot of “coming soon” statements. If I shared all of the details of everything we did today, this post would be very long. Let’s take a look at the before, shall we?
Brace yourself.
It’s not pretty!
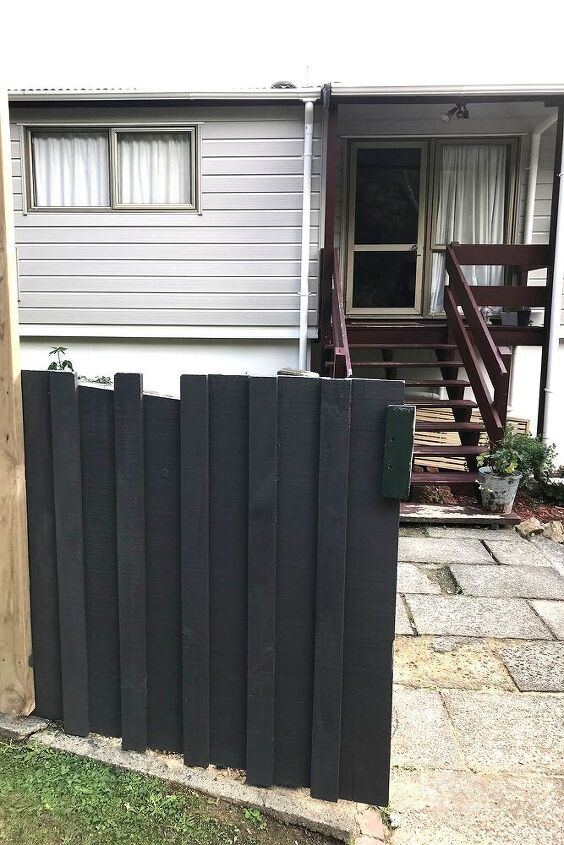
This was the only photo I could find before we started everything. It was taken during the fence remodel.
Paint
First, we painted the steps and deck! The above (before) photo was actually taken after we painted – that was about a year ago. The colour is a Dulux paint called Castlecliff.
You may be asking, “what on earth is going on with that window!” If you saw our kitchen reveal you will remember that we had to remove the window because we needed somewhere to put our fridge and freezer. It was a terrible window, it looks straight onto the street so everyone walking by could see in. We don’t miss it.
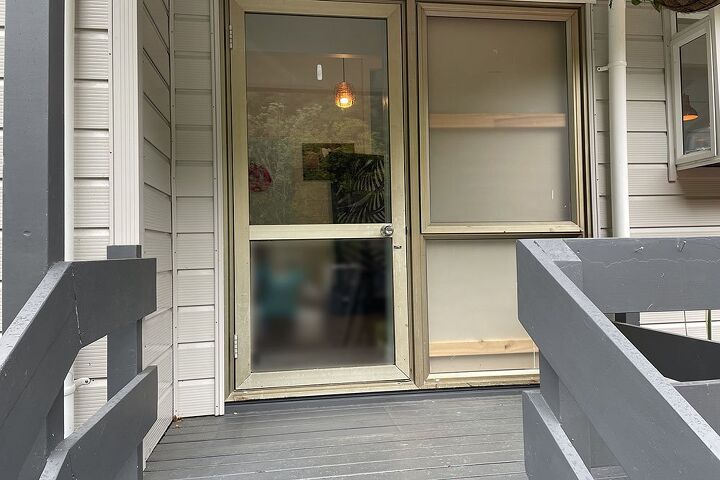
The Painted Door
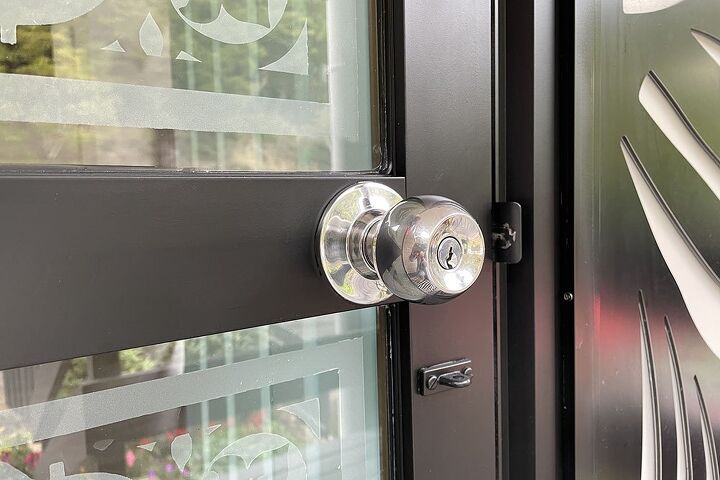
Our very old front door is made from aluminium. While I would have loved to replace it, that wasn’t in the budget this year, so we decided to paint it instead. I have only once painted aluminium before (in my bathroom) and I was terrified. It actually turned out to be pretty easy. Here's my tips for how to paint an aluminium door or window.
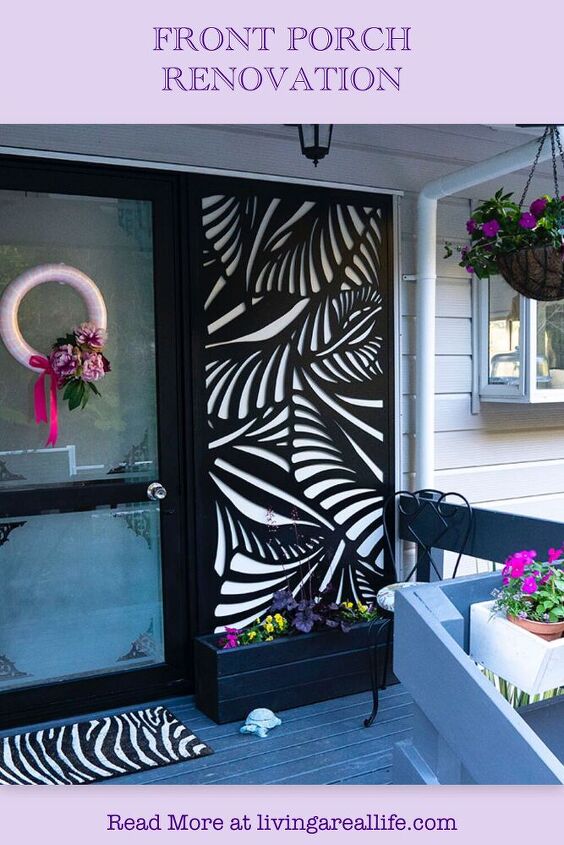
The Window Hack
We didn’t want to remove the window that we closed up because that would have meant we had to get Council consent, etc. (more money) so we decided to leave the window there. We came up with an ingenious plan (after months of musing) to cover the window on both the inside and outside.
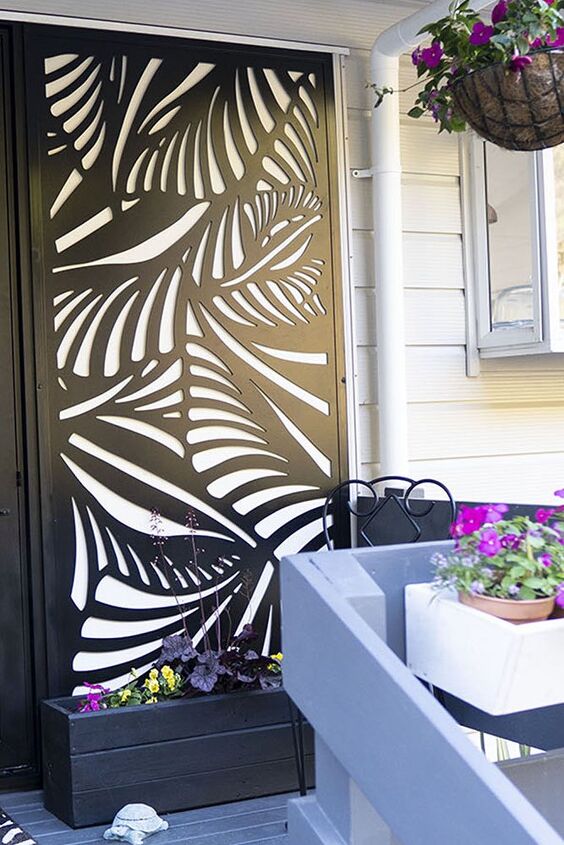
Enter the screen!
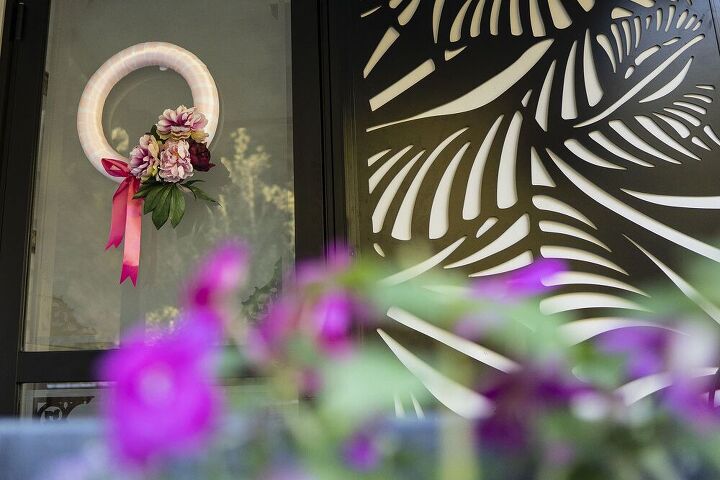
I was browsing my local Bunnings (virtually as it was during lockdown) and I came across this wonderful black aluminIum screen. It got my creative juices flowing – what if we used the screen to cover the window. So, that’s what we did. I’ll go into the ins and outs of how we did it in the coming weeks but for now – doesn’t it look great?
Frosting on the Top
Obviously, removing the window gave us some privacy but we still had a glass door opening out onto the front yard, so we decided to frost the glass in the window. If you would like to see how I created this design in the window you can read this blog post.
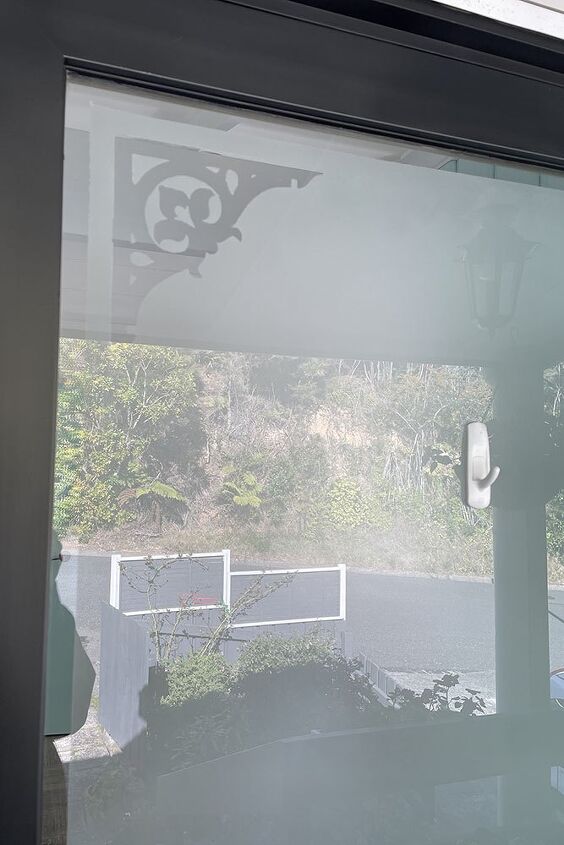
Note to self – figure out a way to take photos of a glass door without getting yourself in the shot.
Decorating
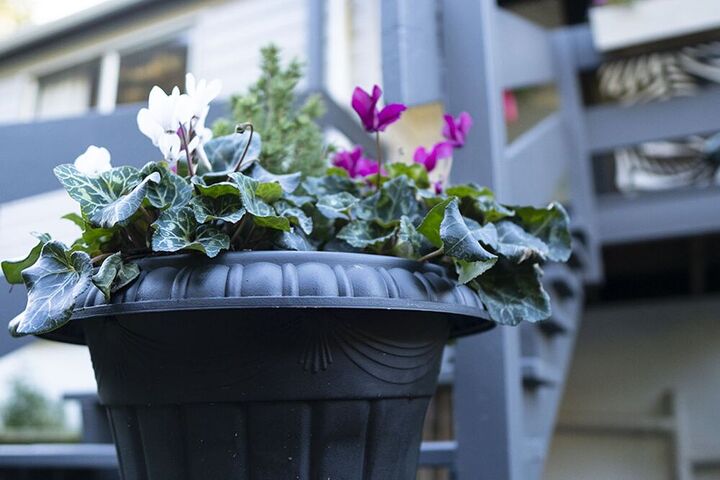
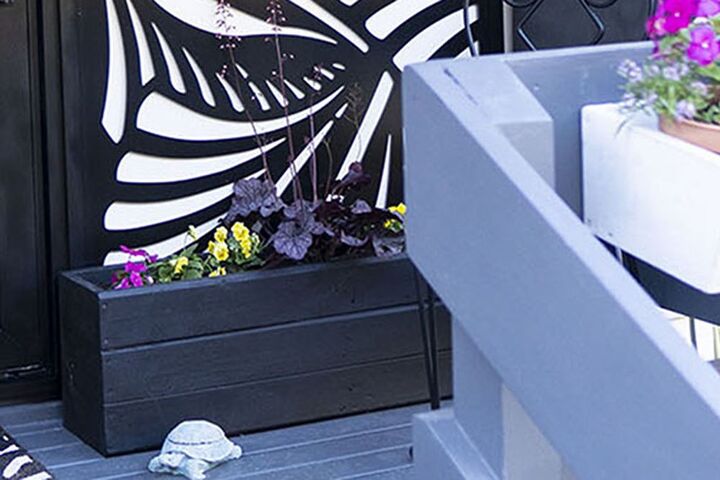
Now that all that hard stuff was out of the way, we had fun decorating. Andy made this cute planter box out of some pallets we had lying around.
We also added another planter box on the front railing.
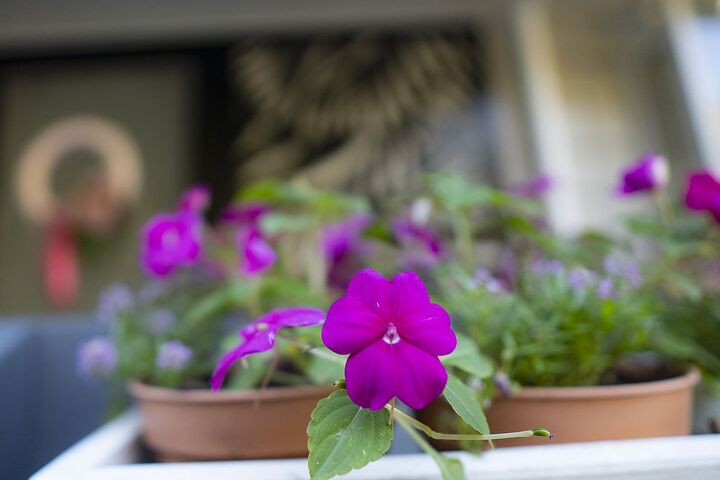
For the plants, we went with a hot pink and yellow theme to stand out against the black and grey paint.
Chair
I also made over this chair. I painted it black but I’m not sure it works here - it kind of disappears. What do you think?

Wreath
Of course, you already saw the wreath that I made for the door.
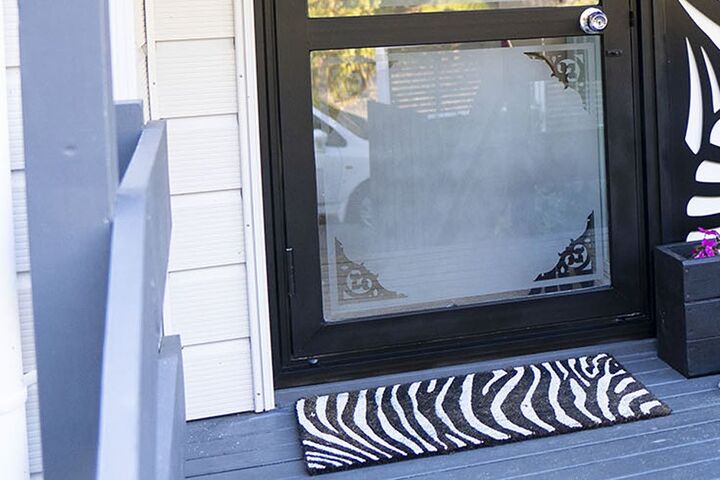
Lastly, we added the zebra door mat.
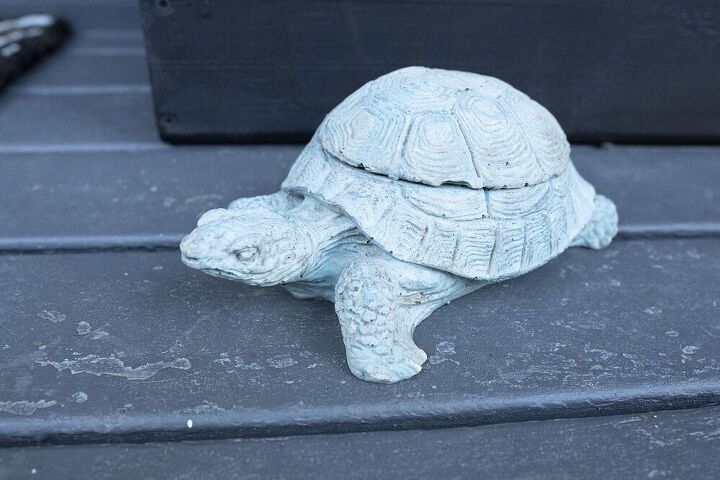
Oh, and I almost forgot, our faithful ‘Grumpy Turtle’ went back in.
Our turtle has been with us for a while now. We accidentally packed him when we left a rental property eons ago and he’s been with us ever since. Do you think he needs a paint job? Let me know in the comments below and tell me what colour I should paint him.
The Reveal
So, after all that, do you want to see it?
Here’ goes!
Our new front porch.
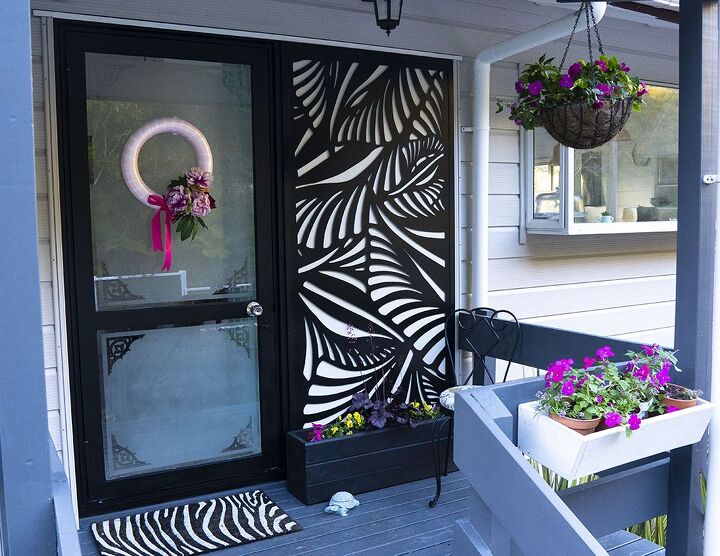
We are really happy with the porch. The frosting on the glass gives us the privacy we need and the colour scheme is wonderful. It now looks like someone loves our house and it matches what’s going on inside.
We’ve been so focused on working on the renovation inside, we had forgotten this little space that we use every day. We are so happy.
Let me know in the comments section below what you think of our new porch.

Comments
Join the conversation
-
GREAT job!
Paint the white box the flowers are in black that will make the flowers pop and blend in with your entire porch everything looks beautiful!
Kevin
-
Like your style...brightens up the space so nicely. That screen panel is brilliant.


Frequently asked questions
Have a question about this project?
The porch looks great! I love the screen cover up! But as you said, that chair kinda gets lost. May I suggest painting the chair frame white and change the seat cover to something more with the porch and rails color? Some kind of bold pattern would be nice.
Where did you locate the screen