


Rebuilding a Gazebo / Kiosko!

by
PhilCo
23 Days
Advanced
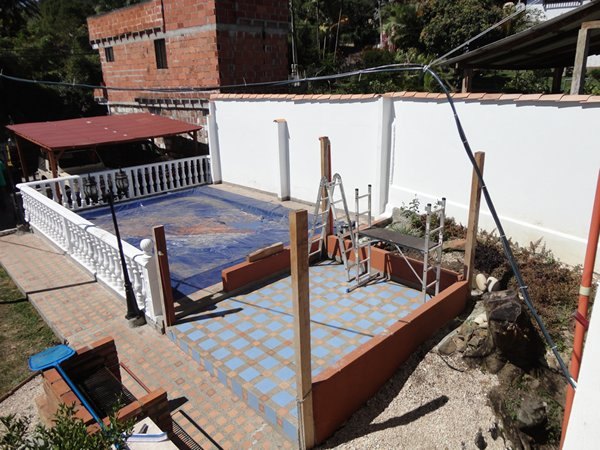
When we bought the house, it came with a Gazebo, but it was badly built and ready to fall down, which with my luck would have meant it was going to end up in the swimming pool, therefore at the end of last year, my project was to dismantle and rebuild it.
What I was looking forward to, was that I could build it in Mahogany, as here in Colombia, it is used widely at construction timber. When I lived in the UK and then Spain, I could only have dreamed of using anything but pine!.
What I was looking forward to, was that I could build it in Mahogany, as here in Colombia, it is used widely at construction timber. When I lived in the UK and then Spain, I could only have dreamed of using anything but pine!.
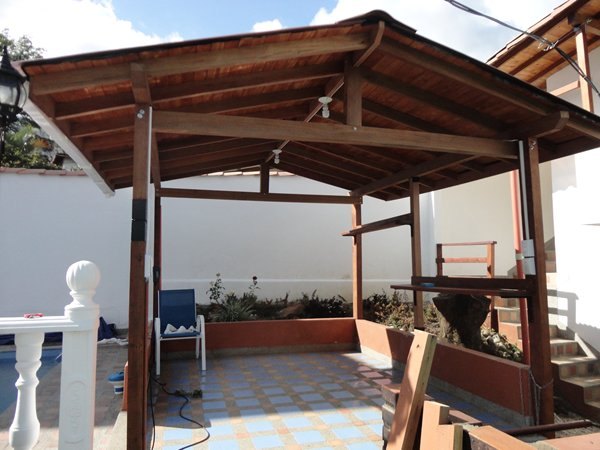
This is the finished article, but it took a while to get to this stage!
My Father-in-law came down for Christmas with the intention of helping, once I got started in the New Year. I think he enjoyed trashing the old one, and got a bit carried away, fortunately he is only a year older than me, so I was able to keep him in order ha!ha!
I had decided to cut the post off in the good timber, then have a metal collar made to insert new timber above, this meant a delay, because as you will see in future posts, Colombia does it's best to make everything as difficult as possible, so I had to go to a Steel Fabricators, and they cut the parts, but they don't weld, because this would put someone else out of work, once I had the parts, I then had to go to the man I use for all my welding, and wait for him to fit me in.
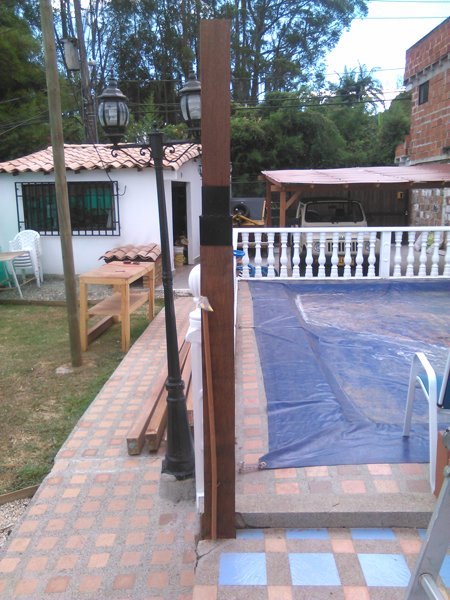
Once back, I cut the new post for a snug fit and it was time to get going.
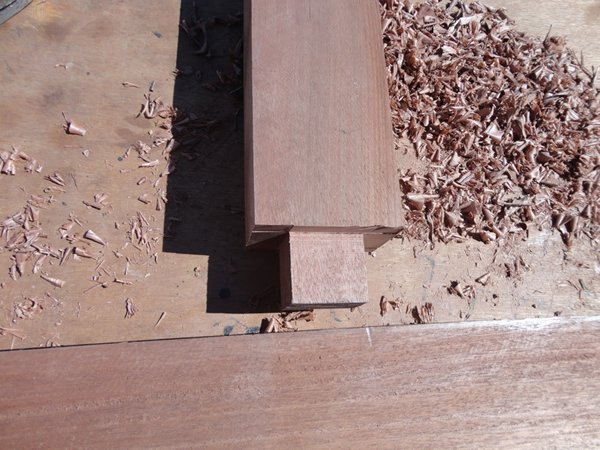
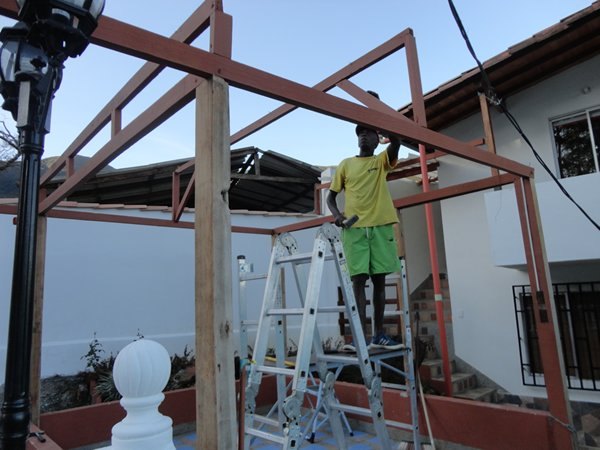
Hand-cutting mortice and tenon joints for the roof support beams.
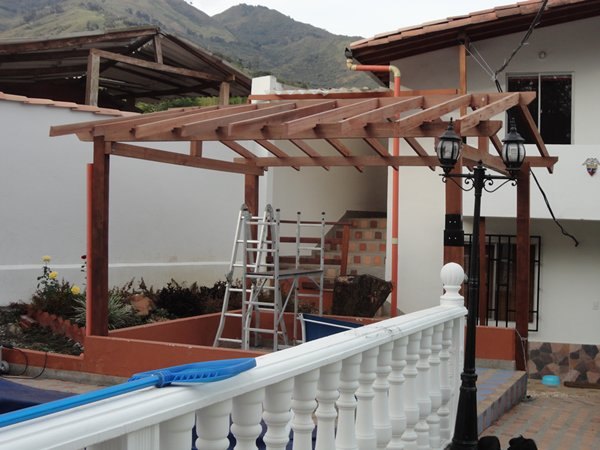
The heavy beams, I lifted using my ladders as support, and ropes with pulleys, it was a bit hairy at times, and I kept my wife well away, because the one time she offered to help, a rafter fell and just missed her eye.
The part I absolutely hated was roofing, I am scared stiff of heights, the planking used to line a roof, like here or even in a house is only 1/4" thick, so it won't take any weight, I had to keep an eye on the nails, so I only put my knees over a rafter.
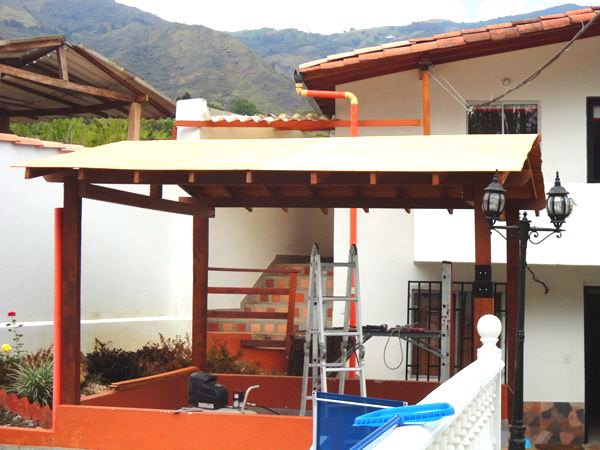
When it came to the felting and battening, I was petrified, because I could no longer see the rafter nails, and I spent nearly all my time crawling around like a baby, anyone passing would have thought I was barking mad!
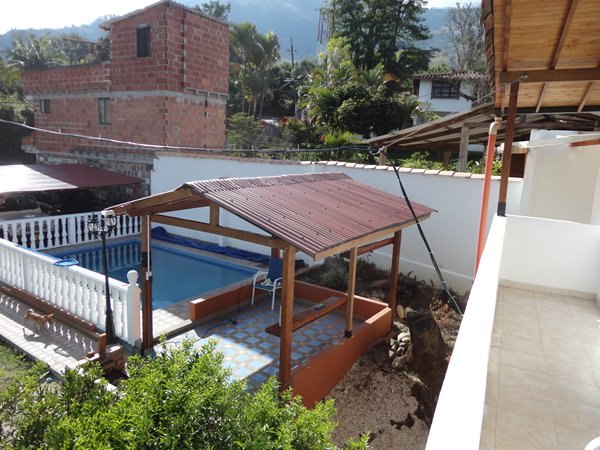
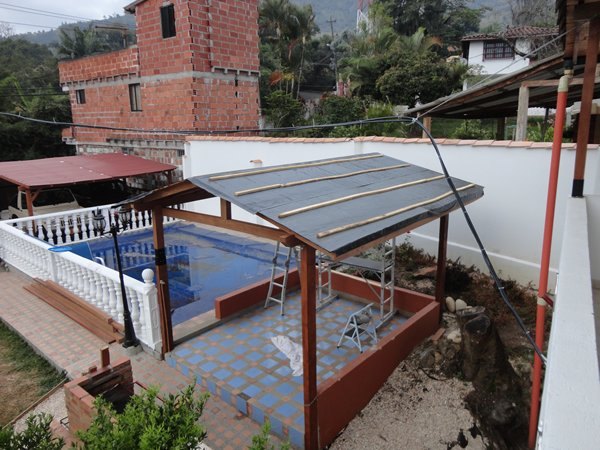
However once I had the roofing panels on, it was all worth it!, and that just left me with the electrics and the guttering which I was able to do from terra firma!
Want more details about this and other DIY projects? Check out my blog post!
Comments
Join the conversation
2 comments
-
This is amazing! You are super talented to be able to tackle this project!


Frequently asked questions
Have a question about this project?