


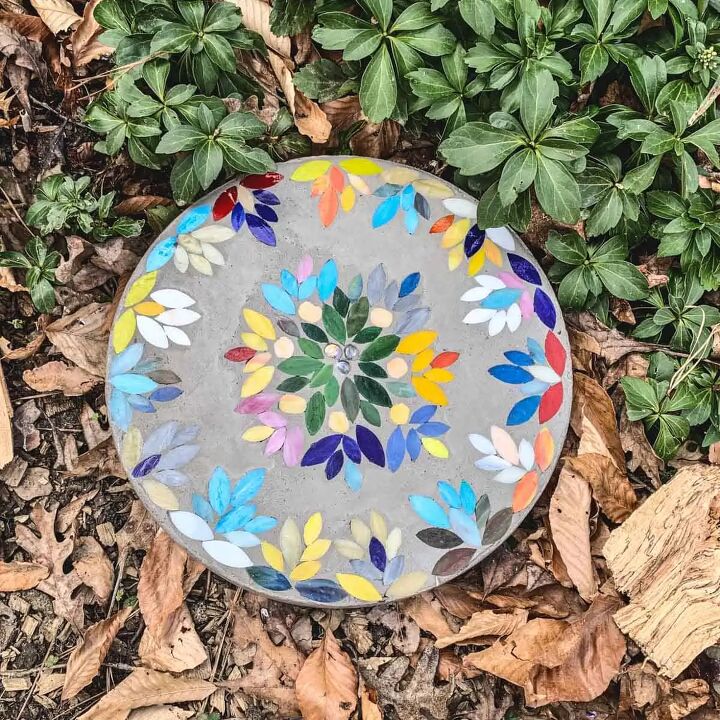
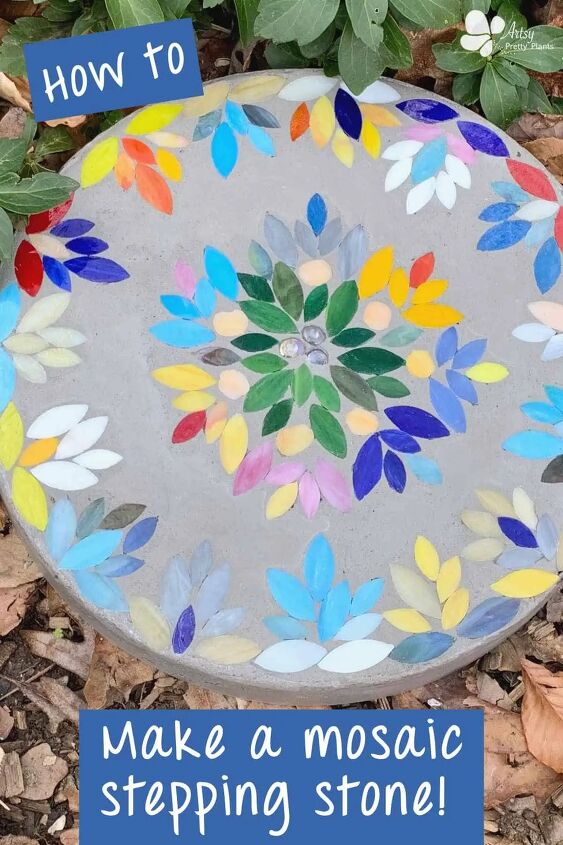
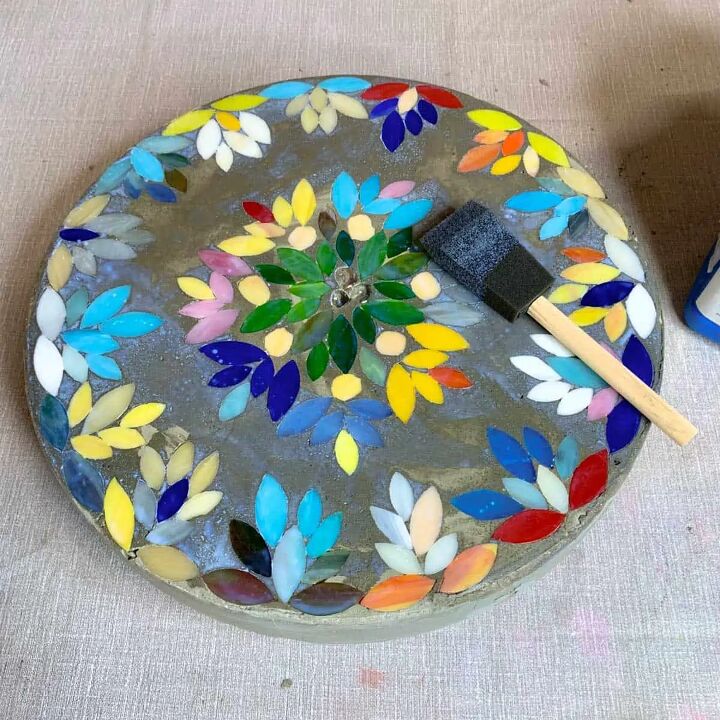
Make a Mosaic Stepping Stone: Fun DIY Garden Art!
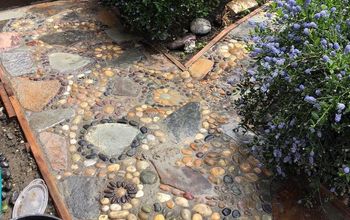
Looking for a little garden art to add some pizzazz to your yard? Or maybe you want to memorialize a pet? Well, a DIY mosaic stepping stone is perfect for doing both.
This is yet another concrete project that ended up being fabulously more fun than I expected, much like the concrete gnome girl.
There’s so much flexibility in mosaic projects, especially when it comes to the materials that can be used to decorate the surface. This makes mosaics perfect to be used in stepping stones.
Types of Mosaic Materials
- sea glass
- mosaic tiles
- ceramic tiles
- stained glass
- glass gems
- broken pieces of pottery
A really important consideration when making a stepping stone with mosaics, is which method to use. There are two methods and they will produce slightly different results.
Direct Mosaic Method
This is the one more people are familiar with where you apply the mosaic tiles directly to the surface of the stone.
You’ll start with a pre-made stepping stone, or one you made, then apply a mortar to glue the tiles to the stone.
Once it dries, you can grout or mortar over the top of the tiles to get in between them.
Indirect Method For Stepping Stones Using Mosaics
With the indirect casting method, you will place the mosaic tiles on the bottom of the stepping stone mold and work your way up in reverse.
The mold will be flipped over when you demold.
The design you see while laying it out is what you’ll see on the surface of the stone.
The trick to this is to use contact paper to attach to the tiles and secure them inside the mold pan.
Then you will be able to flip the whole set of tiles over so they are upside down when you do the reverse casting and when demolding they will be right side up again.
This indirect method is the one I chose because the benefit is that much like with concrete casting when you cast against a smooth surface, it results in a smooth, more finished-looking piece.
Since I don’t have experience working with tile mortar, I honestly didn’t know if this was going to work out the same way it does with concrete, but it did!
You can reference the photos in steps 3-5 to get a better idea of how the indirect method works.
If you follow my concrete planter or concrete candle tutorials, you’ll be familiar with this reverse technique, as I use it often.
Materials Note:
A few notes when shopping for materials. –When it comes to the mix for the stepping stone, looking for an actual “outdoor cement” is not important, it’s the mortar mix that needs to be rated for outdoor use.
Your mortar mix also needs to be outdoor rated.
People sometimes confuse this because of the popular stepping stone kit from Michaels that says “outdoor cement” on it.
All cement sold at a hardware store is going to be safe to use outside. Also, you do not want to use grout, that’s only for indoors.
Mortar mix on the other hand does come in an indoor and outdoor form.
Make sure it’s an outdoor polymer modified mortar. The package will say it has polymers in it and or that it exceeds at least one of these ANSI ratings: A118.4, A118.11 or A118.15- linked on my website.
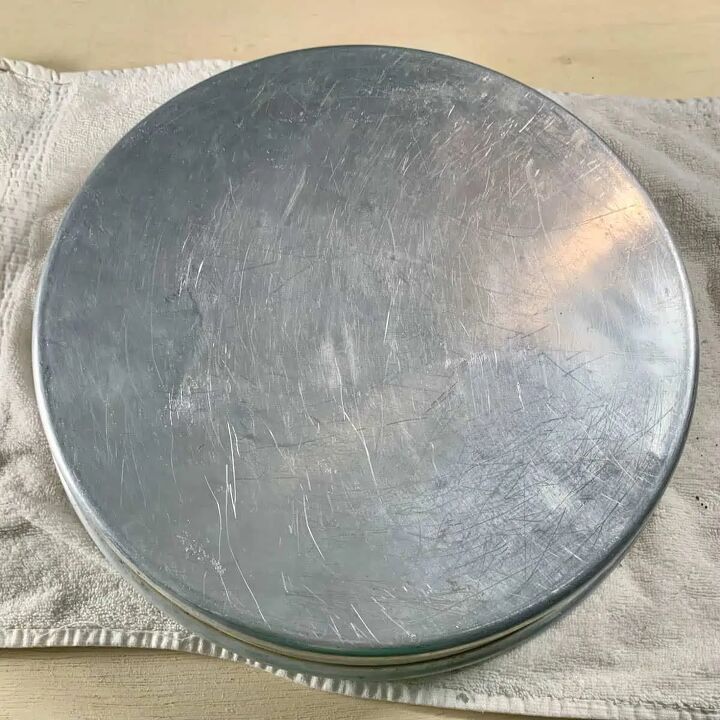
When shopping for a stepping stone mold, an aluminum cake or pizza pan is your best bet for a larger stepping stone. I was convinced I would struggle dearly when demolding this, but it actually slid right out –without effort.
If you want just a small stone, then a plastic mold will do the trick, but you may want it to have some rigidity so if you have to lift up the mold before your pieces are secure, the tiles aren’t flopping around.
There are many types of mixes you can use as a stepping stone mix. If you are just making decorative garden stones, then you can use almost any mix.
I used a portland cement mix with sand at a 1:1 ratio of cement to sand.
If you intend on walking on them, then you should use a mix labeled for applications of 2”.
The mix I have listed in the materials is ideal and inexpensive. You do not need to add reinforcement like chicken wire to that mix.
How To Make A DIY Mosaic Stepping Stone Tutorial Steps
Make sure you work on a flat surface, the glass tiles are a little slippery. You may also want to protect your work area from anything or anyone that can bump into it.
In fact, it’s a good idea to take photos during the process while you layout your mosaic design.
This is a precaution in case someone does knock into it, you’ll have something to reference. If you’re a cat person, you’ve probably already taken this into consideration. ;o}.
Step 1. Prep The Contact Paper
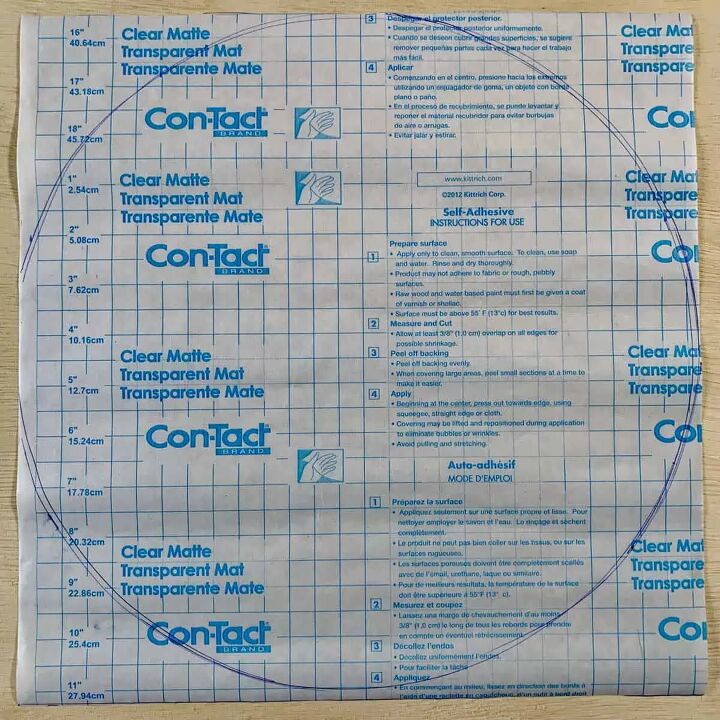
First, trace the bottom, outside of the pan onto a piece of contact paper and cut the circle out. Place it inside something flat to help flatten it to make it easier to position in a later step.
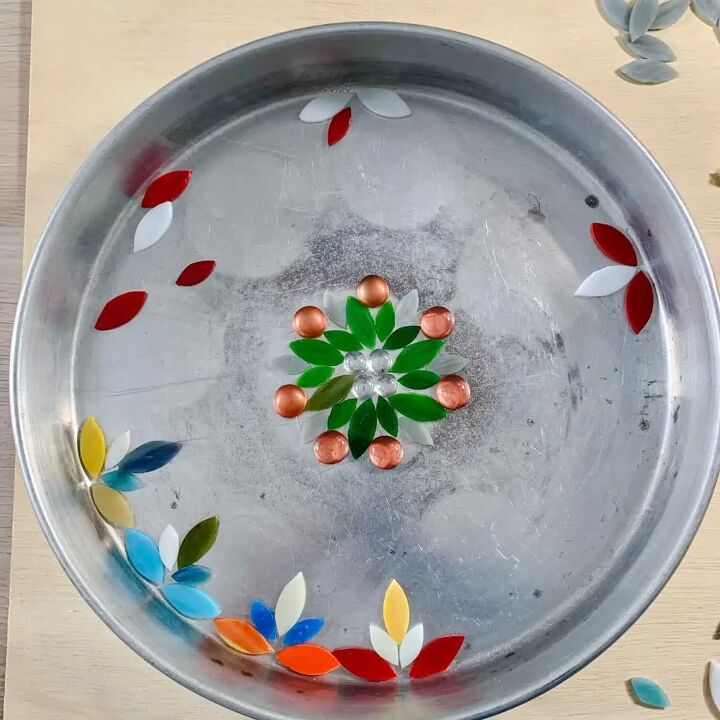
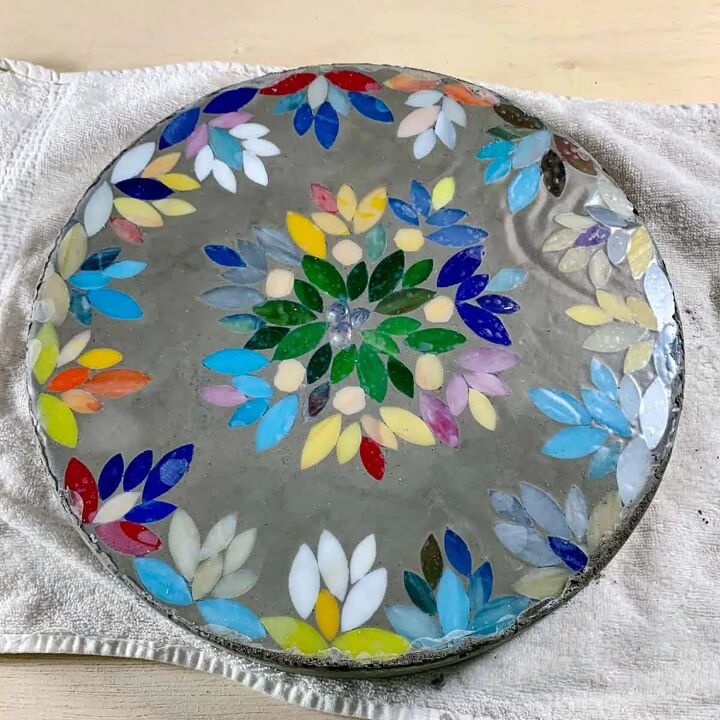
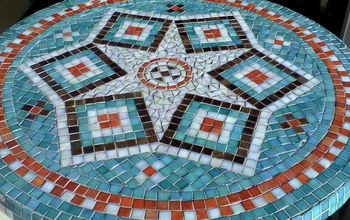
Step 2. Create The Mosaic Stepping Stone Design
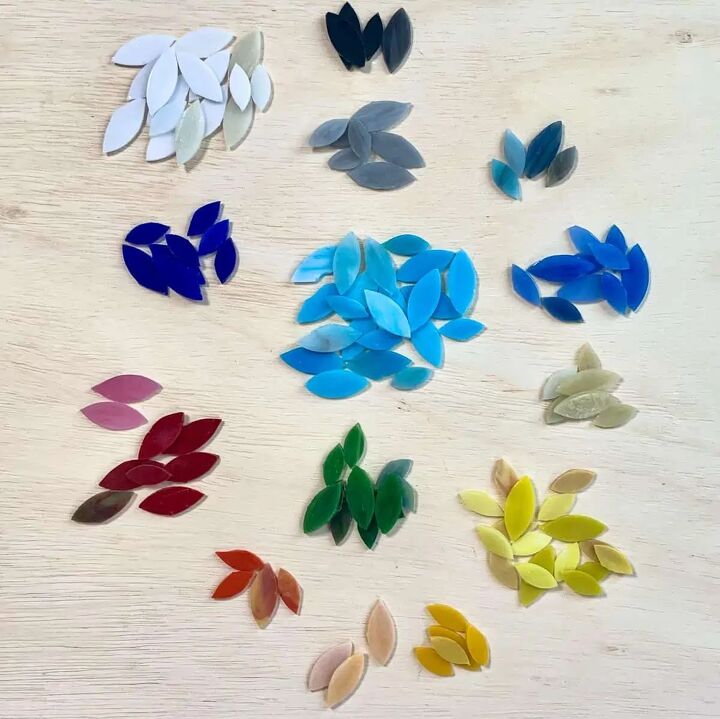
First, separate the tiles into color groups.
Create a mosaic pattern by laying the pieces into the pizza pan. You can choose to fill the entire pan with mosaic tile pieces or leave it so that you have some negative space.
If you would like to fill the entire space with tiles, this is better accomplished if you use a tile chipper to create custom sized pieces, however, this will take considerably longer.
Using a wider variety of shapes may provide more flexibility.
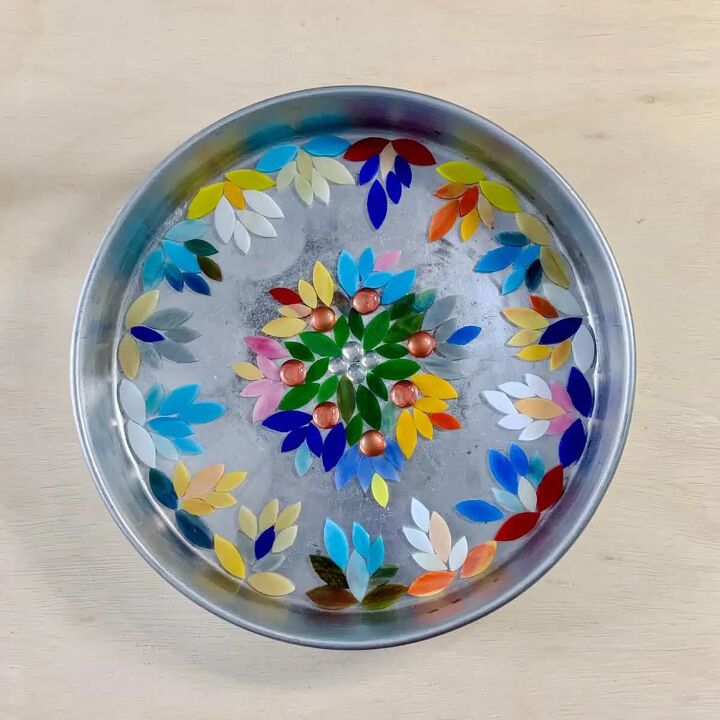
How long it will take for the first step takes will depend on how long you hem and haw over your design. ;0}
I redesigned it several times until I found the layout that I was satisfied with, which in the end was probably a little more than 4 or 5 hours.
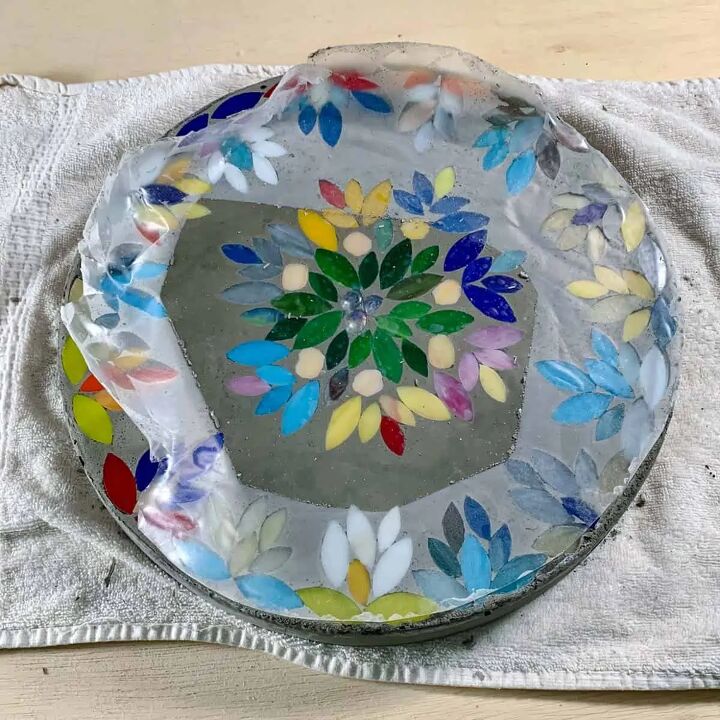
Step 3. Secure The DIY Mosaic Stepping Stone Pattern To The Adhesive Paper
I really thought this is where everything was going to fall apart on me.
I couldn’t imagine that all my glass pieces weren’t going to move around on me as I placed the contact paper, but they didn’t!
There were only a few pieces that slid slightly out of position and it was easy to reposition them afterward.
So take a breath, this should go smoother than you’re probably thinking.
Take the contact paper out that you cut. If it is still curling on you, then roll it in the opposite direction and then let it unroll and do that a few times.
It’s not a big deal if it still curls, it just makes it a little easier to start attaching the paper if it’s being somewhat agreeable.
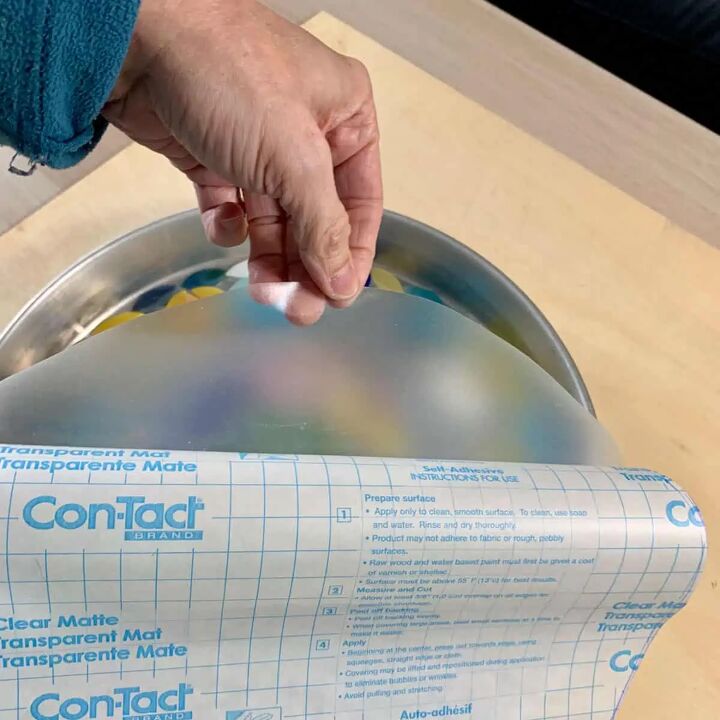
First, lift one edge of the paper and pull it away from the sticky side of the contact paper.
Pull it back only about 4 inches and then place the sticky side at the top edge of your design.
Try to lay the paper down evenly at one time across the mosaic pieces.
Now hold the roll with one hand while pressing firmly on the tiles to stick them in place.
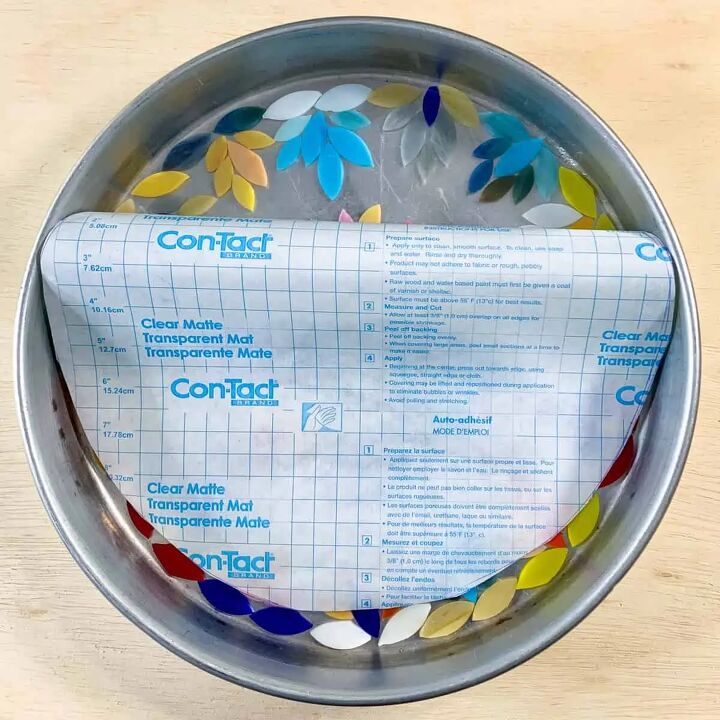
Once they are firmly stuck, you can slowly keep peeling back the paper, pressing down on the tiles as you go.
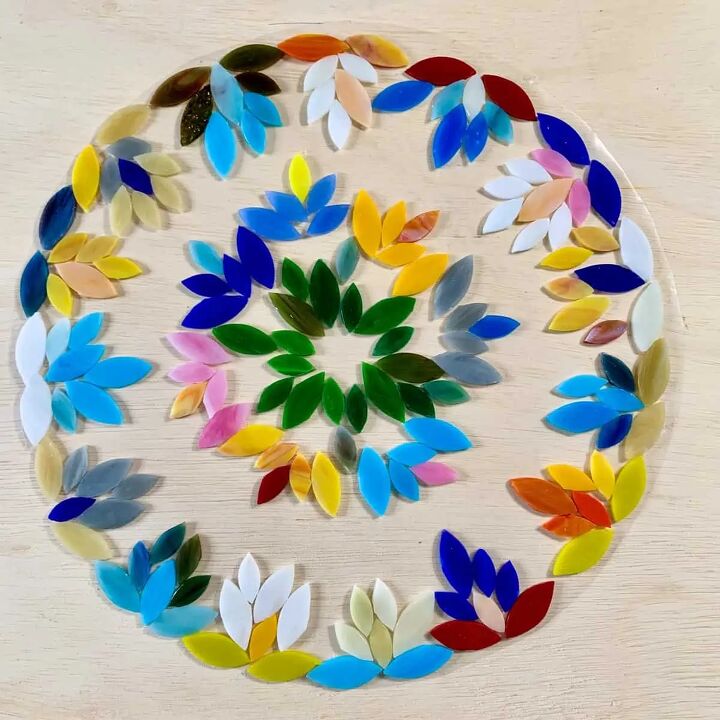
Now lift the contact paper with the tiles out of the pan and flip them over and place them tile side up on your table.
If you see that some of the tiles were moved out of place, just lift them off the contact paper, reposition them and press them back on the adhesive.
If you used the small glass gems, then remove them now and turn them over so that the rounded side is sticking to the paper and the flat side is facing you.
Keep the tiles on your table for now and move on to the next step.
Step 4. Prep The Pan For The Thin Set Mortar And Concrete
To help keep the sides of the stone smooth, as well as allow the stepping stone to come out of the pan easily after it’s cured, you’ll need to add a slick surface to the sides.
I don’t recommend using a lubricant because it can cause discoloration and create tiny bubbles. Instead, use packing tape along the sides.
Unfortunately, I forgot to do this before mortaring so I had to push the mortar away from the edges to be sure it wouldn’t stick.
This caused the concrete during Step 6 to cover some of the tile edges. Placing the tape now will prevent that.
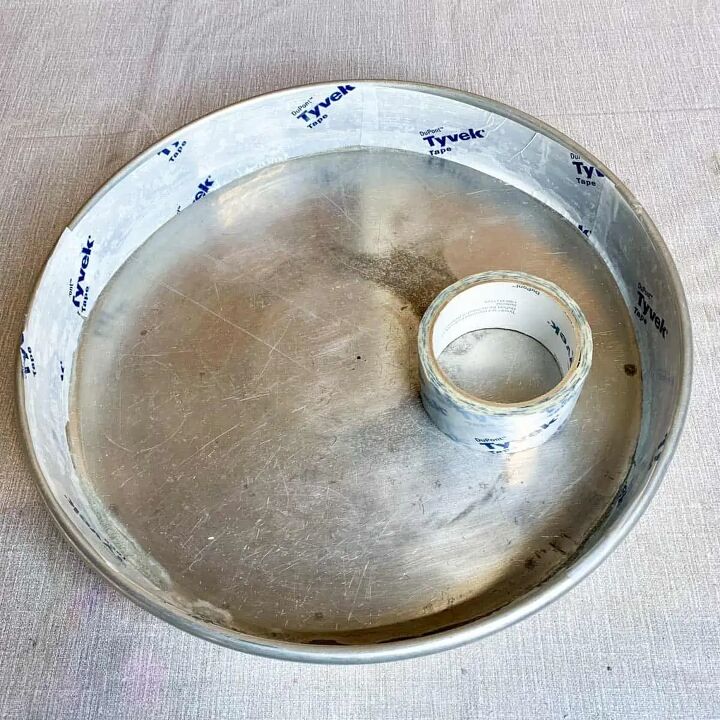
Cut pieces about 6 inches long and tape the sides, ensuring you meet the bottom corner and get close to the top.
Also, make sure you overlap at the seams a little and smooth any wrinkles in the tape.
The reason for only using 6” pieces is because the edges of your pan probably have a slight slope.
This allows for a tight fit, where if it was all one piece, there would be a gap between the tape and sides causing the stone to be lopsided.
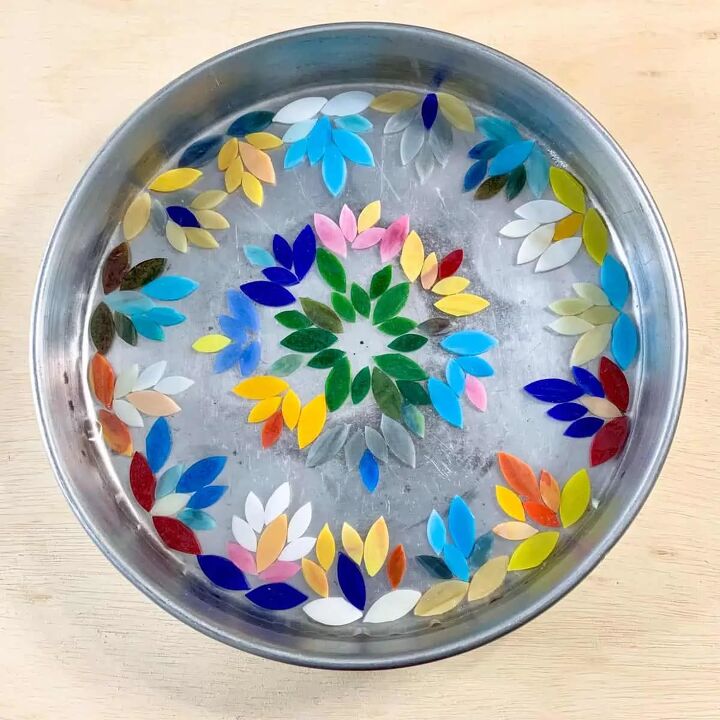
Now you can set the tiles with the contact paper back into the stepping stone mold with the contact paper touching the pan and tiles facing you.
And if you used glass gems, now is the time to place them back into the design, but make sure the rounded side is stuck to the contact paper and flat side facing you.
Step 5. Apply The Mortar Mix

**If you love making concrete projects, then check out my Pocket Guide to Concrete Mixes! I tested 6 mixes and made a handy reference chart. It's a FREE download. 😉
First, put on your protective gloves. Then add about 2 ½ to 3 cups of the thinset mortar to a large bowl, and mix the water in.
Blend them until the mix is lump free and the consistency is like brownie batter.
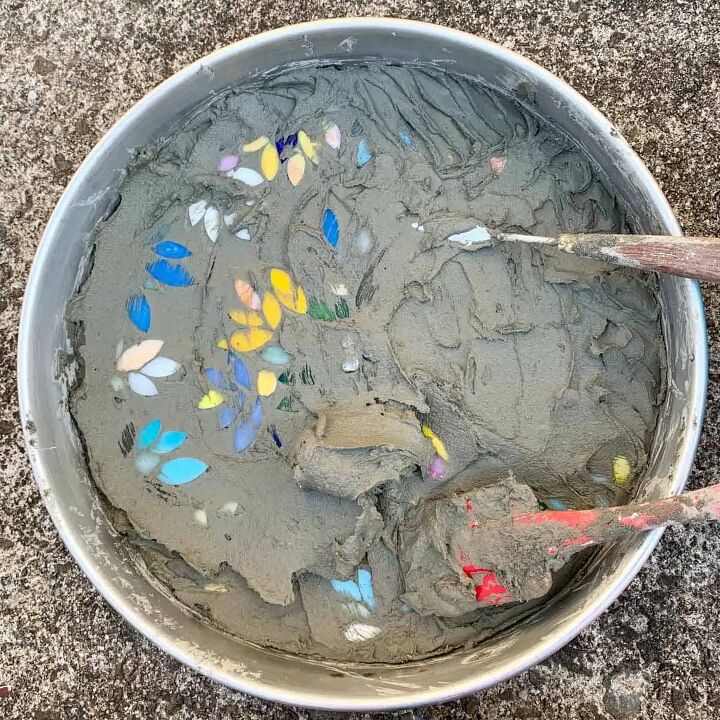
Next, spread the mortar onto the tiles using a spatula or putty knife.
The spatula does a good job of getting the mix into the spaces between the tiles.
However, if you are using a putty knife, then you may need to employ the help of a flexible palette knife to make sure the mortar gets down in between each of them.
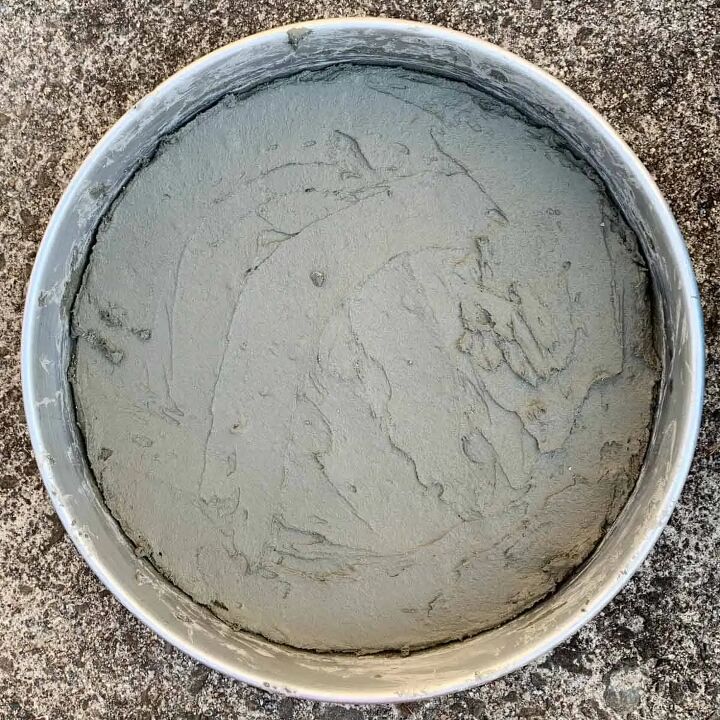
Be sure to get the mortar coated on evenly, you should have a ⅛” covering the top.
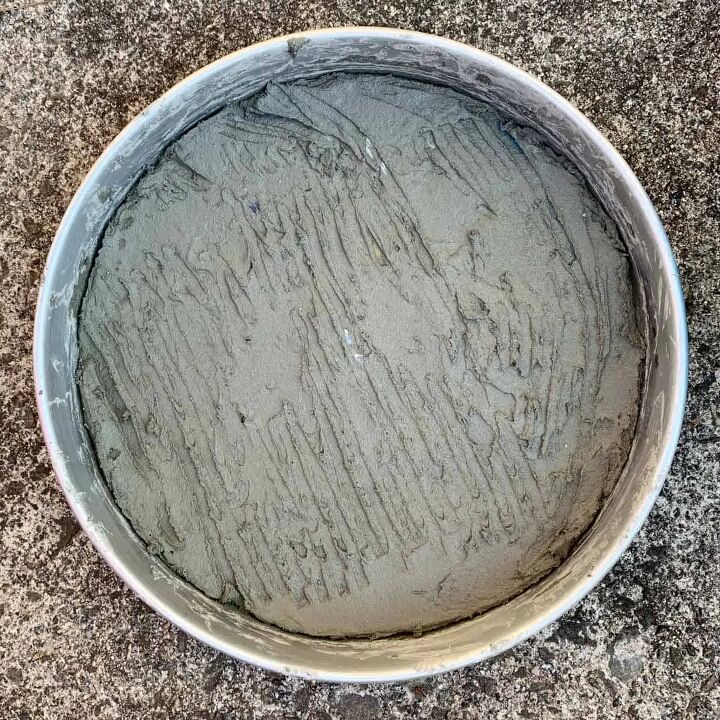
It’s helpful to create grooves across the surface so that when you pour the wet concrete in the next step it has more surface to grip onto.
If you have a trowel, use that to create grooves, otherwise, you can use whatever tools you have.
Set the mortared stone aside to cure as close to room temperature as possible, out of direct sunlight. It will need close to 48 hours, or more to cure.
* Tip: Don’t get tempted when it’s cured to lift it out to look at it.
It’s fragile, plus if you don’t get it back in the exact same spot, you’ll risk it not fitting perfectly and this will allow the possibility of concrete overlapping some of the edges of the tiles.
Step 6. Cast The Concrete
Place a soft cloth next to your mixing area, you’ll need it shortly.
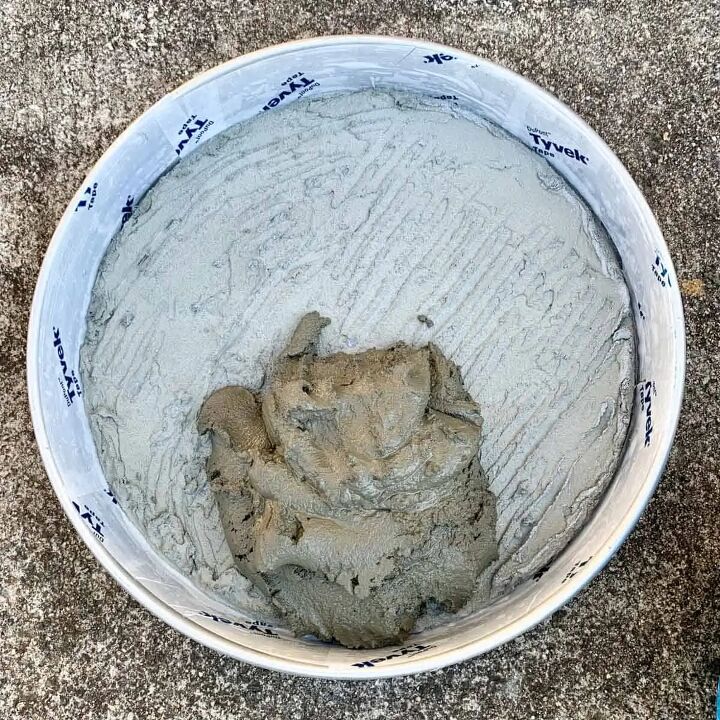
First, combine the concrete mix with water until there are no lumps. The right consistency is like a mud pie. Since I used portland cement, I mixed in a ratio of 1:1 or cement to sand.
I believe I used 4 scoops of cement and my scoop holds 2 ½ cups. If you are using the Sand Topping Mix, you may need almost double since the 4 scoops of sand account for half the volume of mix I had.
Pour half the mix into the mold to cover the cured thinset and then place the pan on the soft towel. Shake and tap it to vibrate it now while it’s not too heavy and is manageable.
The cloth will be a safety measure to protect the fragile mortared tiles. Once you see air bubbles rise and release, then add the rest of the mix and vibrate again.
You may not see many bubbles rise, but that’s okay, that’s why you did this with the first half of the mix.

Since the stone is about 2” thick, I recommend waiting at least 36 hours before demolding.
Waiting longer is safer because it allows for the concrete to gain more strength.
Step 7. Demold The DIY Stepping Stone
Gently push the sides of the pan away from the stepping stone, all the way around the pan. You should see the concrete release from the mold.
Next, place a soft cloth on a table and carefully turn the pan upside down while holding one hand over the stone so that it doesn’t slip out.
Once the pan is upside down, lift it away from the stone.
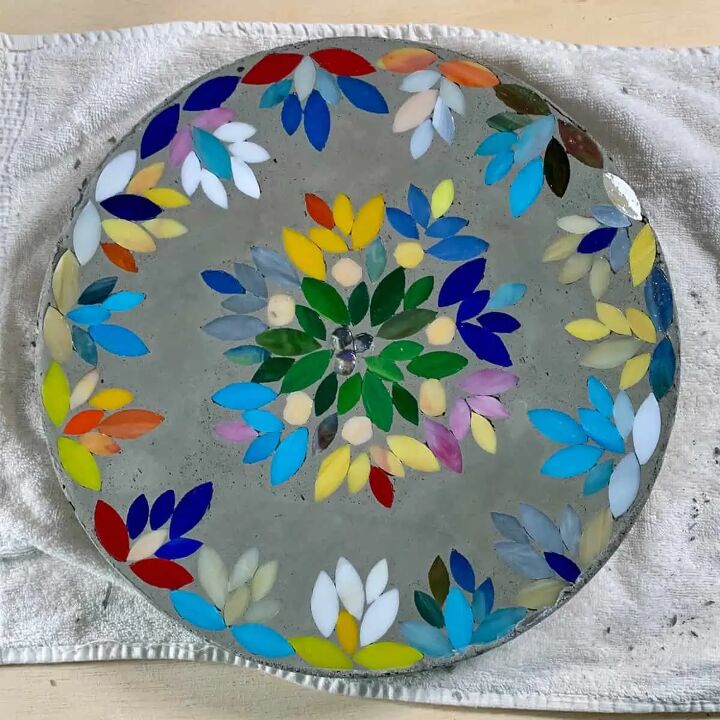
You should have the stepping stone free of the pan, so go ahead and peel the contact paper off.
It’s easiest if you lift it off starting from the edges, then pull it from the middle so that it all comes off in one piece.
Step 8. Sand And Seal The Mosaic Concrete Stepping Stone
If you have any rough edges, you can sand them with grit sandpaper.
I had one spot where the concrete didn’t fill in completely and left an air pocket hole.
And because it was at the edge of a tile piece, I was concerned it would become brittle.
To remedy this, I mixed up a slurry (a very thin mix) of cement and sand to fill in the hole.
To seal or not to seal: You may know that I don’t usually like to seal concrete. I discuss why in my post on my website about sealing concrete planters.
I sort of regret sealing this. The stepping stone really doesn’t need to be sealed, the reason for doing it is to help protect the face from looking weathered a little longer.
The issue with sealing this is two things. One is that the sealer will leave a little bit of a film on your tiles. You can remove most of it using acetone and a q-tip, but it’s tedious and you do have scrub a bit.
The other is that you’ll see brush marks from the sealer, which normally you can blend in some with a cloth but the nature of the design makes it difficult to get in between everything.
If you choose to seal the stepping stone, use a cloth to wipe the stone free of dust first.
Next, use a foam brush to apply a thin coat of sealer to the top. Before sealing the sides, wipe the sealer off of the top of the tiles with a cloth or paper towel, then you can seal the sides.
Now go back over the tiles if you want with acetone and a q-tip to remove the film from the sealer.
One coat of sealer should be sufficient, but if you want to apply a second (assuming you are using the sealer I listed in the materials), then you’ll to wait a day to apply a second coat. I only applied one coat.
Now place the mosaic stepping stone in your yard or garden and enjoy!
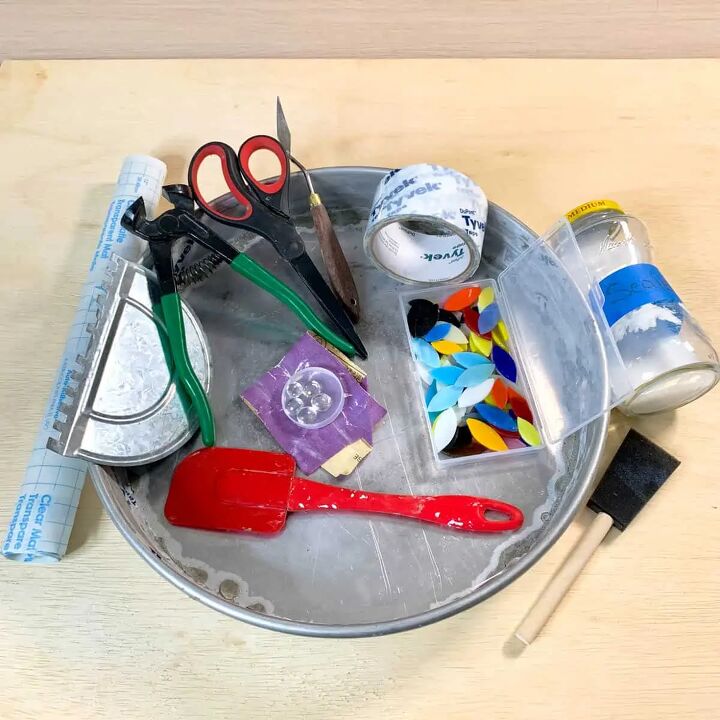
Resources for this project:
See all materials


Comments
Join the conversation
-
The contact paper is an excellent, excellent tip! I’ve been mulling over a project thats not concrete but has the same problem. I actually gave up. I will now go back to it.
-
Oh good! I hope it helps with your project.


Frequently asked questions
Have a question about this project?