


French Chair With Graphic
1 Material
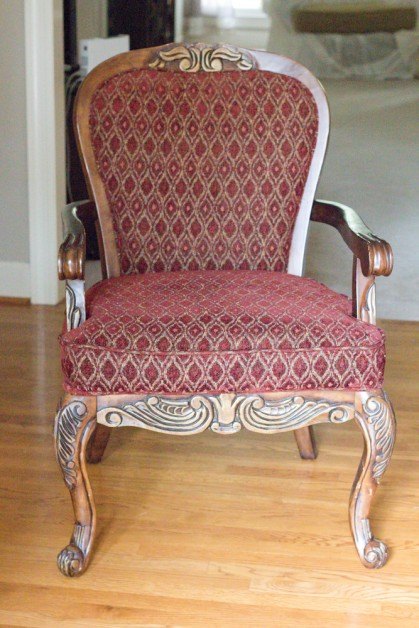
I found a $5 broken chair at a scratch and dent tent sale. I brought the chair home and nailed the leg back onto the chair. I added new fabric that I had found at my favorite thrift store. I also added a french graphic that I printed off free from my computer to the back of the chair.
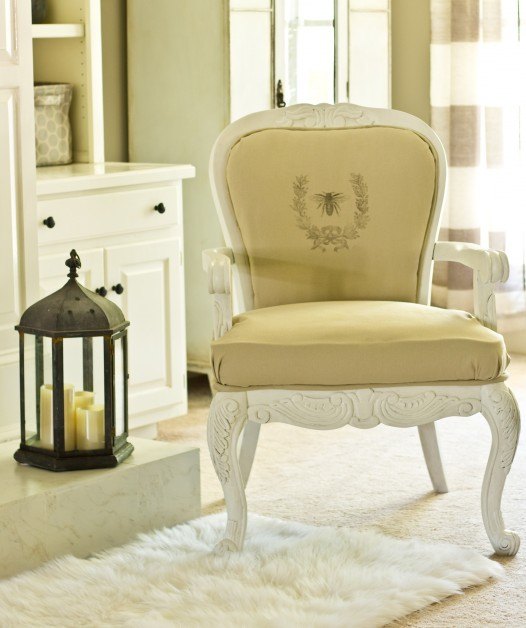
I first removed the chair cushions by using a screwdriver to pry them apart. I repainted the chair with white chalk paint. I slightly distressed the chair with sandpaper to give it more of a shabby chic look. I applied soft wax to the chair to seal and protect the new paint.
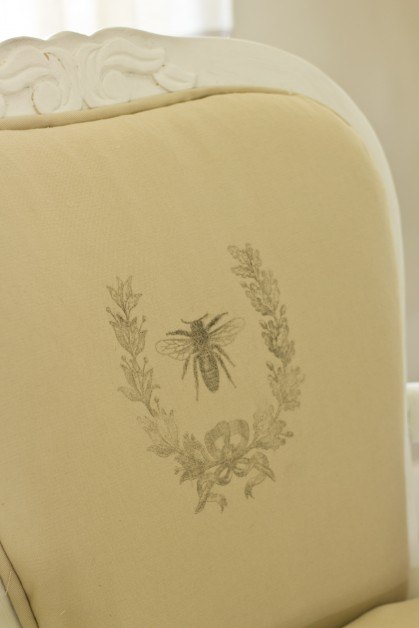
I added some fabric that I had found at a thrift store and attached it with a staple gun. I wanted to give my chair a whimsical look and found this bee pattern online.
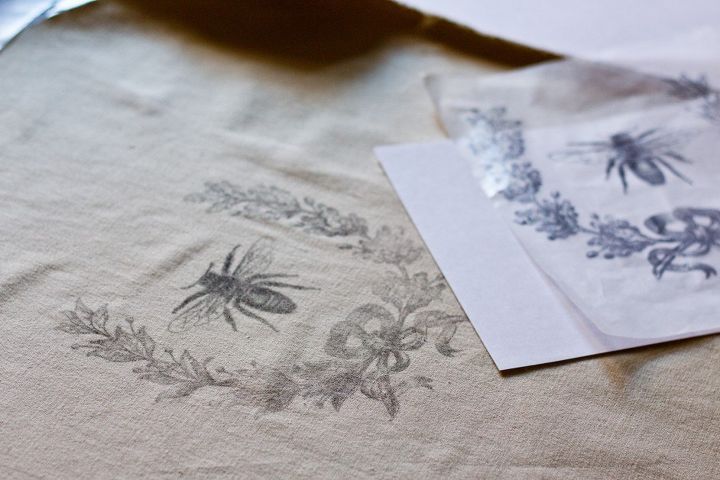
I downloaded the free graphic and used the wax paper technique to apply it to the back of the chair. This technique worked perfectly.
I was able to complete this project in one afternoon. This project cost me very little money. You can view the complete tutorial with more pictures on my blog post. http://www.savvyapron.com/diy-french-chair-with-graphic/

Want more details about this and other DIY projects? Check out my blog post!
Comments
Join the conversation
1 comment
-
Only one day?! WOW! Its beautiful! You did a fantastic job!


Frequently asked questions
Have a question about this project?