


How To DIY Cane Chairs - Farmhouse Style
7 Materials
4 Hours
Easy
Bought these Mid Century Cane Chairs off Craigslist for 60 dollars and painted & reupholstered them into gorgeous farmhouse chairs. Break down on how I did it & in under 2 hours each!
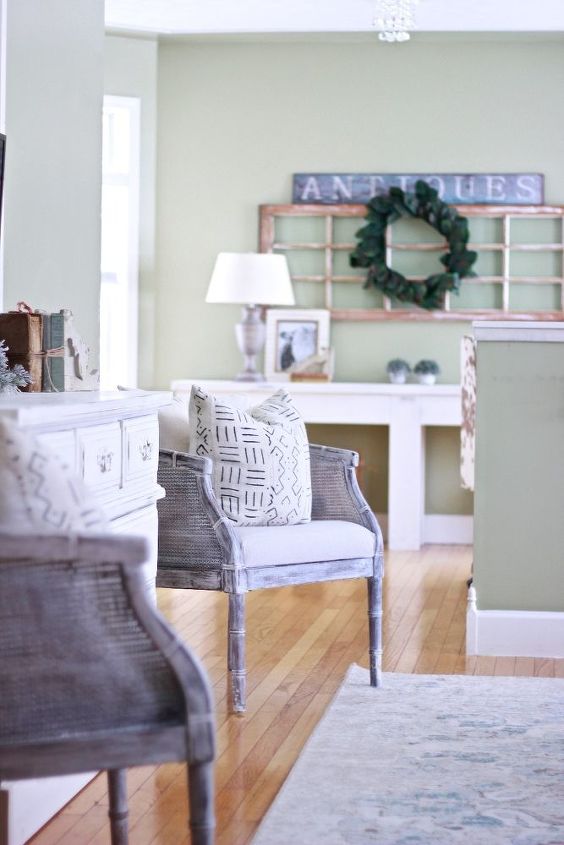
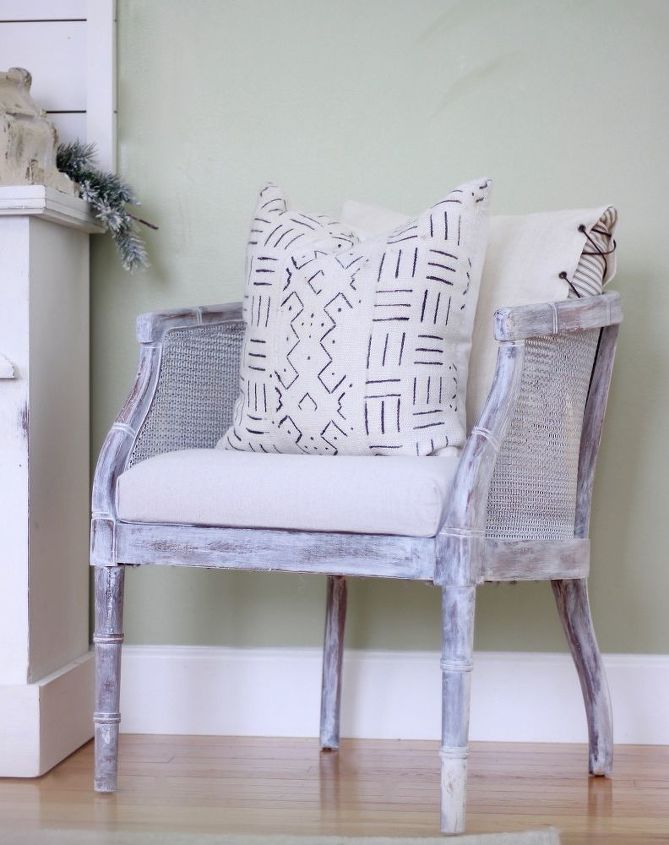
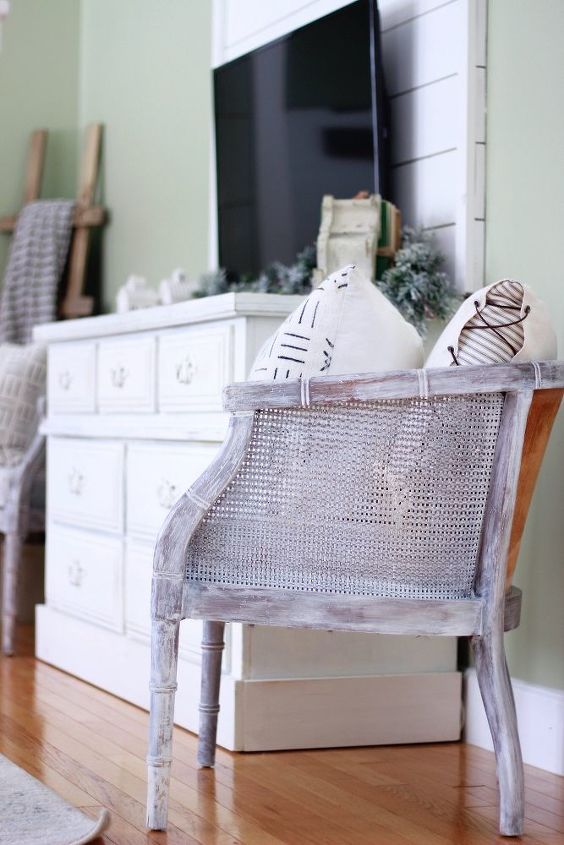
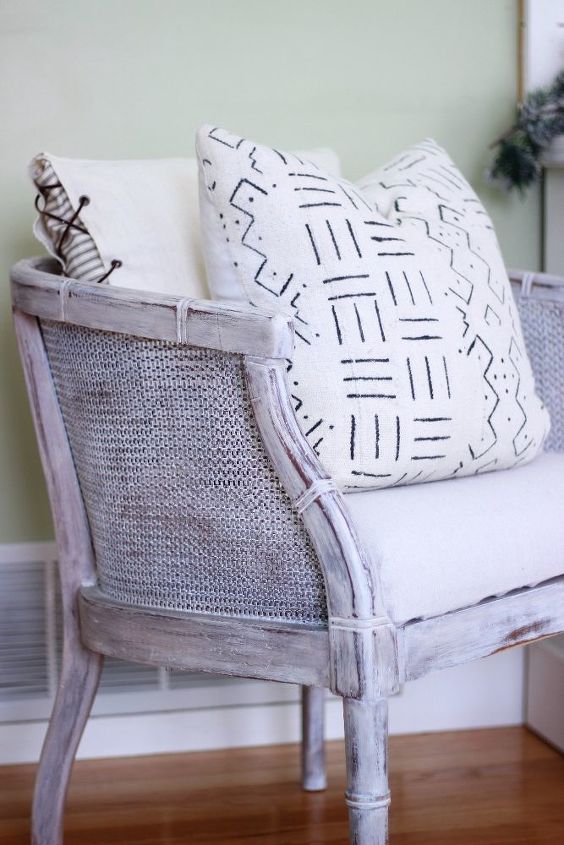
The chairs completed.
YOU GUYS.
If you have been watching my Instagram feed over the last few days, you will know that my parents scored a set of Vintage Cane Chairs from Virginia 69′ ( Orginal Owners ) a few days ago. Let me start by telling you, I LOVE CANE CHAIRS. Like, love. If you’re new to my blog, over a year ago I blogged about these cane chairs and how easy they were to paint. We still have one of them in our daughters room. They have so much character and they’re so versatile – they fit in so many different styles.
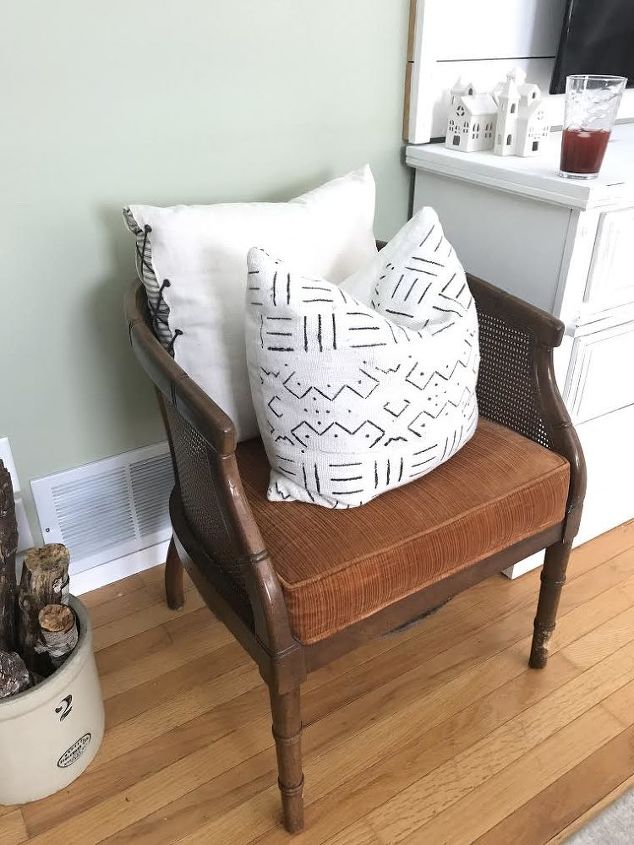
When I first grabbed the chairs, they were more mid century. I thought about keeping them as is, but the legs were a bit beat up and I really wanted to try to give the wood a wash and make them look beat up. You know me, anything beat up is my jam.
So yesterday I got to work. I sanded down the chewed up legs, but left the dints and dings in the arms because I knew that the more “character” this chair had, the more the wash would look more authentic.
Also, let me apologize for my before & process photos, they were taken by my iPhone and apparently I’m not good at painting & taking pictures at the same time
Before we get into it, for this project you will need:
-Paper Towel
-Paint Brush
-Antiquing Wax
-Clear Wax
-Sanding Pad ( the lighter the better 180+)
-Drop Cloth or Rag to Paint on top of
-Screw Driver or Drill to take off seat
-Staple gun & Staples
-Paint of choice. I used a cream Behr Paint.
We had all of these things in storage already, so these chairs cost me zero dollars. Yep, you read right, ZERO BUCKS. Isn’t it kind of fun when things cost zilch?
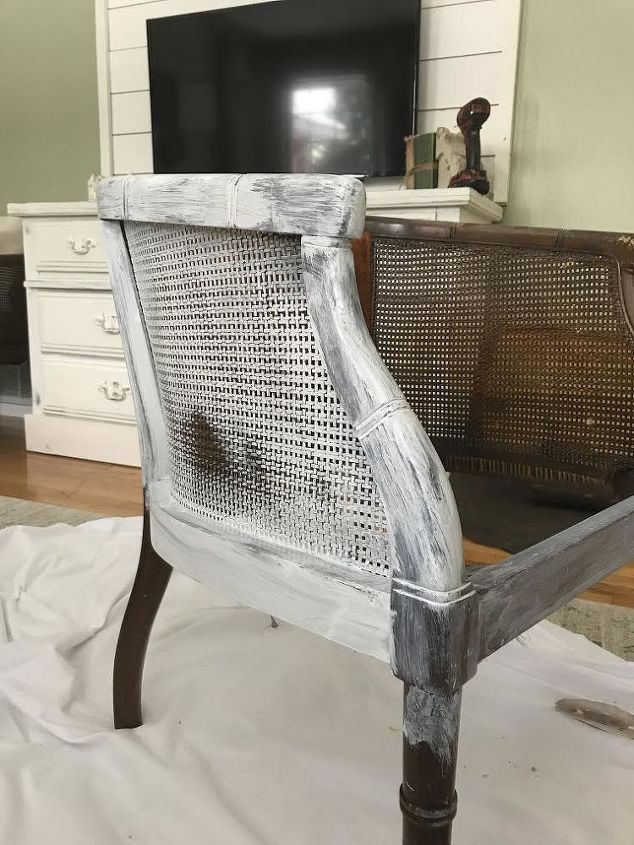
I started by sanding down the legs where they had some scratch/chew marks. But like I said above, I didn’t sand down other parts of the chair as I wanted the paint to adhere to the flaws to give it more of a farmhouse feel. The sand paper is mainly for distressing it between paint/wax.
Here I am painting the chair. I watered my paint down my 75% so it wouldn’t make my chair look painted.
I did the chair in four parts. Each side, back and front & here’s why. Once you paint part of your chair, you want to take a piece of paper towel or rag and lightly wipe it down to give it a washed look, also this helps blend in the streaks. This takes literally seconds.
I worked on all 4 parts of the chair, then once that was done ( it was dry by that time ) I took my dry brush, and dabbed a bit of paint on it ( wiped most of it off ) and then dry brushed areas that needed slightly more paint.
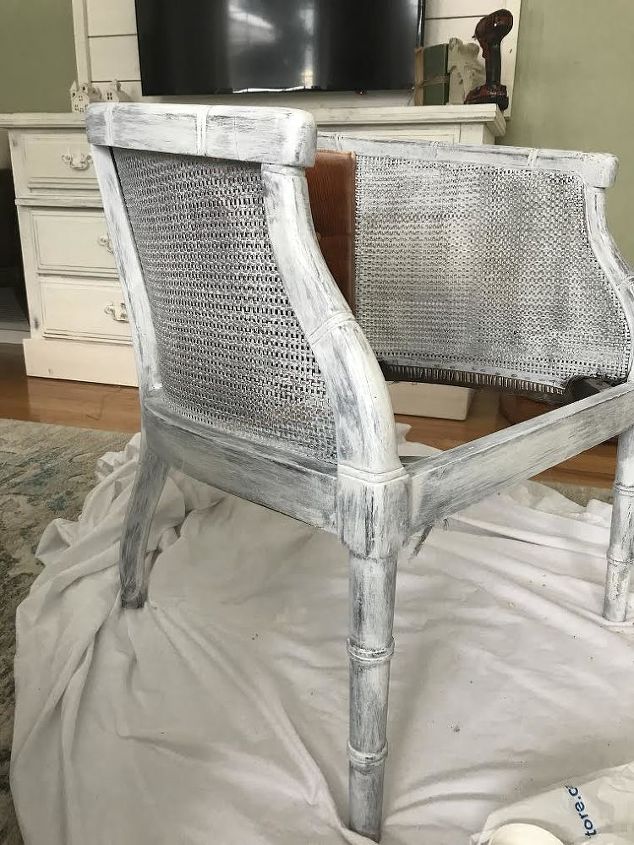
Let Dry & then distress with your sanding pad.
Once you’ve completed the painting and sanding, you can apply your dark and clear wax. I applied the dark wax first, then gave that about 30 minutes to dry and applied the clear wax over top. I used paper towel to apply it ( I know, so so so unprofessional ) but hey, I had no cheese cloth and this project was supposed to be free.
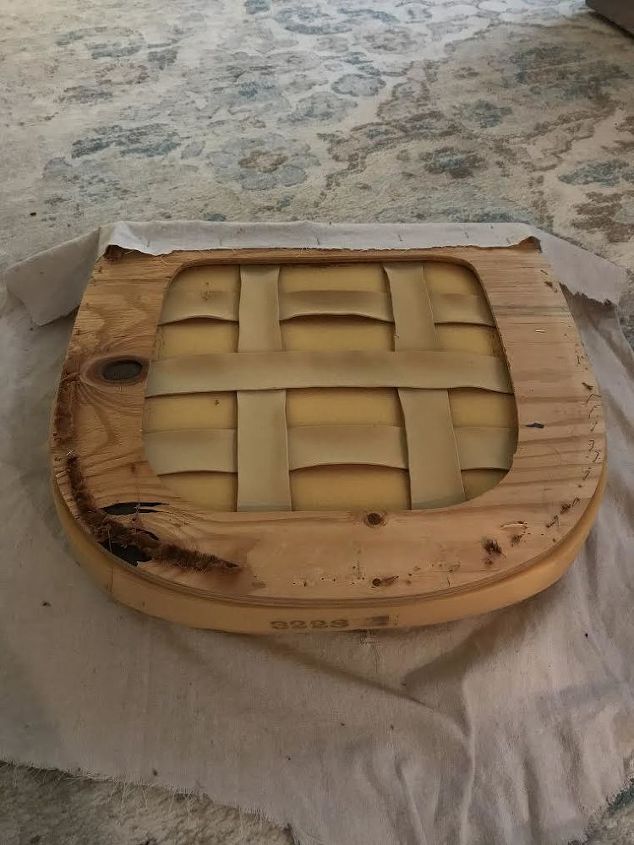
Take your seat that you screwed off in the beginning and rip the fabric off. You will need plyers to rip the staples out, and then we just ripped the rest of the fabric by hand.
The seat looked like this once bare.
Since I’m super on the ball, I forgot to take pictures of me reupholstering, but it’s easy peasy. Cut your fabric to size ( I used left over drop cloth to match our curtains ), and then staple on. You’ll want to make sure it’s on really tight as it might stretch over time.
Once on, attach your seat again – and you’re done! For clarification, I left the back of the seat the burnt orange and put one layer of pain on it to tone it down. It adds a ton of character, but down the road I might buy a cream fabric paint and paint over it.

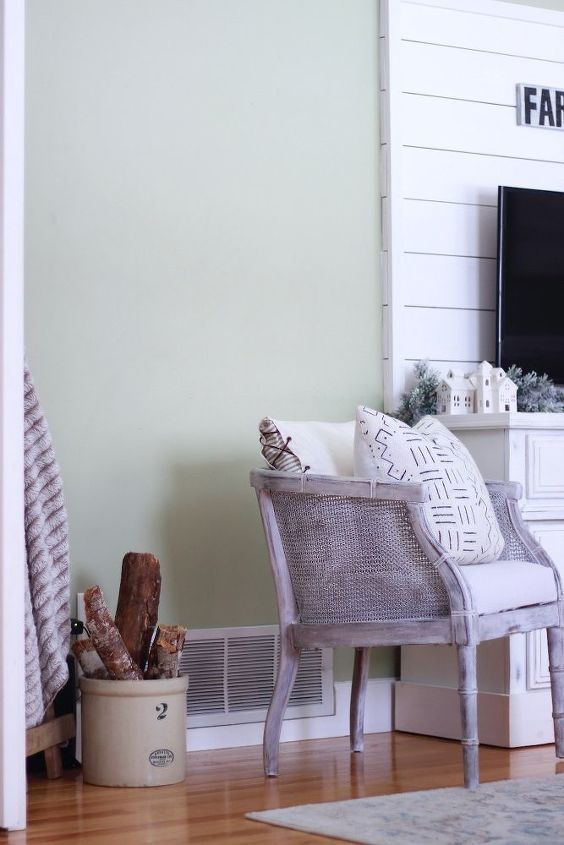
So, what do you guys think of these DIY’D Farmhouse Cane Chairs? I’m absolutely in love with them, but I know all of you don’t love the chippy beat up look.
If you do love them, I would be honoured if you shared on one of your social networks. When I was looking for a tutorial for Farmhouse Cane Chairs I couldn’t really find a ton. So that’s why I decided to make one.
I know a few of you have your own chairs to DIY, so let me know the results when you’re all done!
Head on over to my blog & subscribe for more DIY's.
Resources for this project:
See all materials


Any price and availability information displayed on [relevant Amazon Site(s), as applicable] at the time of purchase will apply to the purchase of this product.
Hometalk may collect a small share of sales from the links on this page.More info

Want more details about this and other DIY projects? Check out my blog post!
Comments
Join the conversation
2 of 8 comments
-
Nah!!
-
Good idea, but poorly done. This is not the right technique for what you are attempting to accomplish.


Frequently asked questions
Have a question about this project?
Just lovely! And, do tell...what is that color on your walls?
What did you use to cover the pillow with, the back pillow with sing going through the cloth.
Was the kilz all you needed to prep the varnished wood area areas?