


How to Remove Broken Veneer From Furniture

by
Jenni Ingram
2 Materials
$50
1 Hour
Easy
This was one of those goofy furniture projects that should have taken a couple of days and instead took about 2 weeks! But in an effort to help you learn from my mistakes, I'm discussing veneer removal and tips and tricks I've learned.
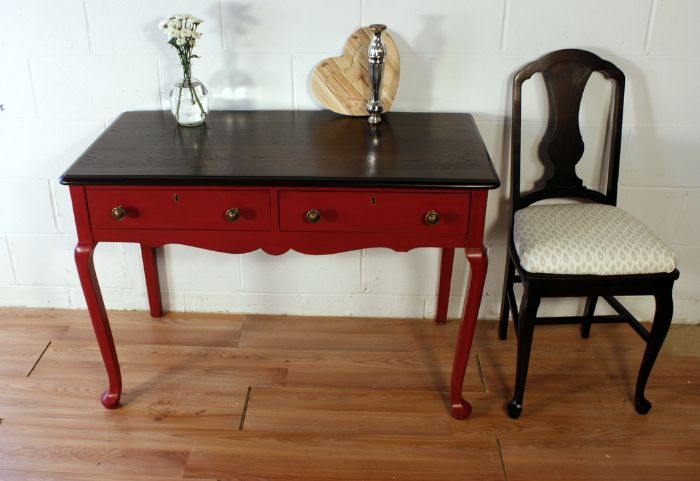
First off here is the quick before and after. I'll tell you this gorgeous red color and the glazes I used in my full blog post here. But now we'll get on to the furniture fix part...
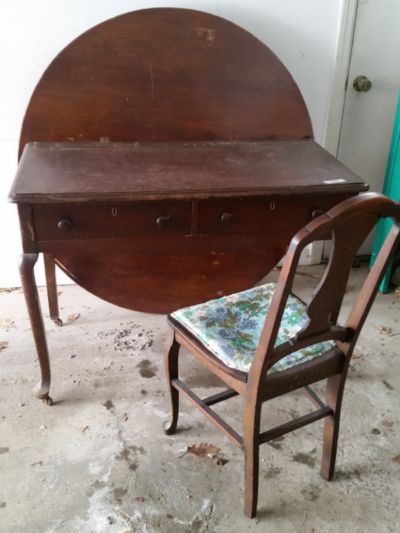
The veneer on this piece was loose in some places when I brought it home, so I first tried my first trick:
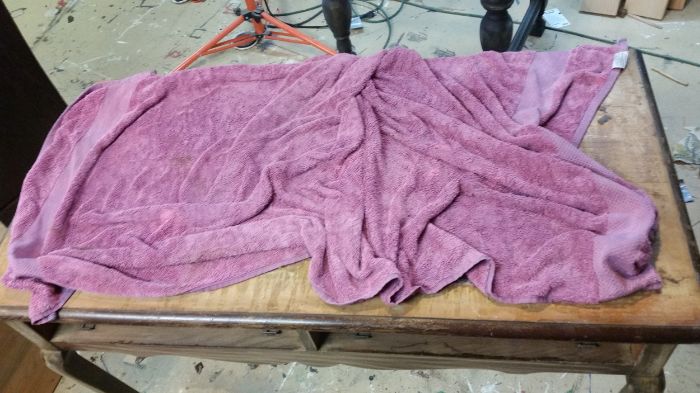
... the wet towel trick. Just wet a towel (more than damp but not dripping) and place it over the veneer you want to remove. Walk away - sometimes a few hours, sometimes overnight. Return and peel the loose wood away. Only mine was STILL STUCK after two wet-towel mini-spa sessions.
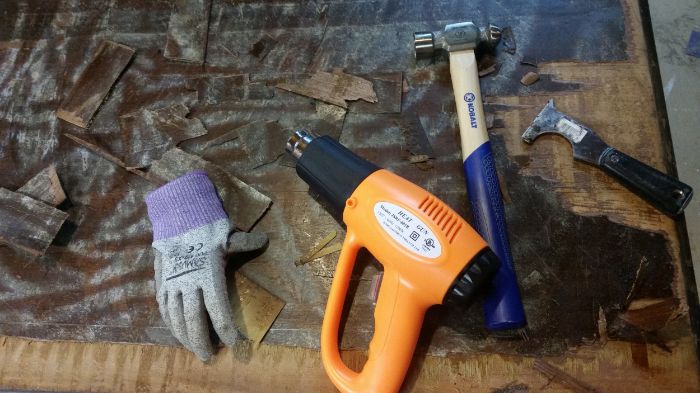
So I pulled out my nifty new Heat Gun and set to work! Now just start heating the veneer one section at a time, it will bubble and curl up as it's heated and as the glue underneath softens, then start scraping and peeling with your painters tool. Some spots you'll need to use the scraper and hammer to get off. Just work section by section until you are done. May take up to 2 weeks ;)
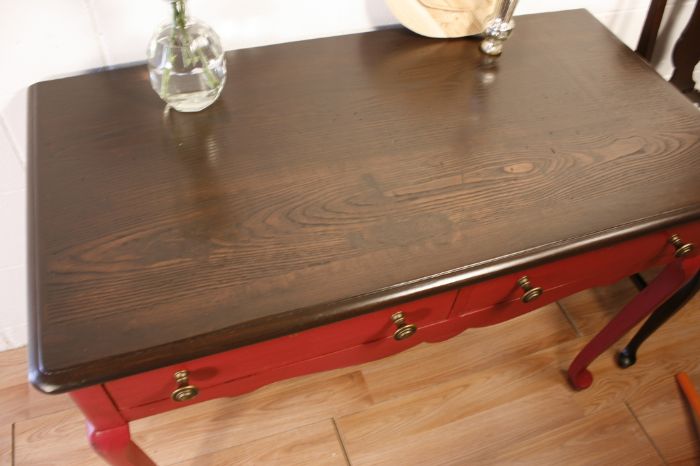
Once the veneer was removed, I let the wet glue dry and then sanded the top with 80 grit sandpaper before staining. The wood underneath was a bit more rustic looking, but still came out pretty nice.
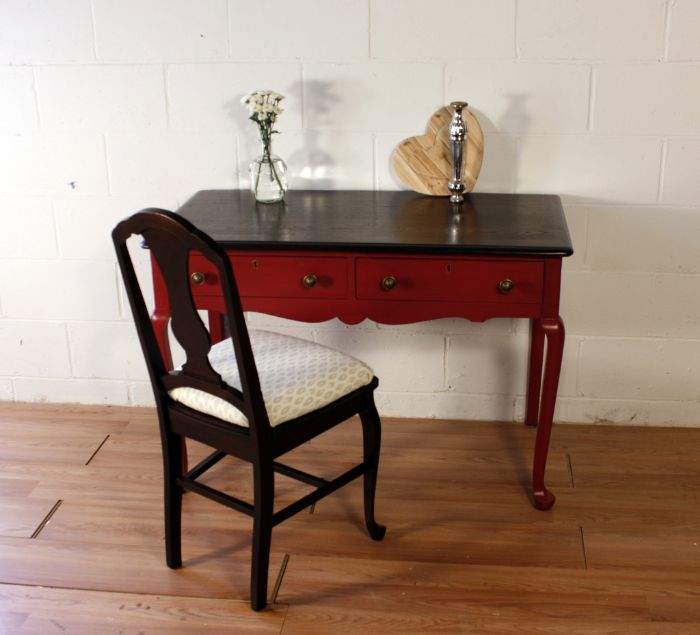
A little blood, sweat and thankfully no tears, and this desk is finished and off to my client! Let me know if you have any questions on removing veneer! For more furniture tutorials and paint ideas, sign up for my blog!
Want more details about this and other DIY projects? Check out my blog post!
Comments
Join the conversation
2 of 5 comments
-
Wonderful advice. Thanks for sharing!
-
you did a great job on this one!


Frequently asked questions
Have a question about this project?