


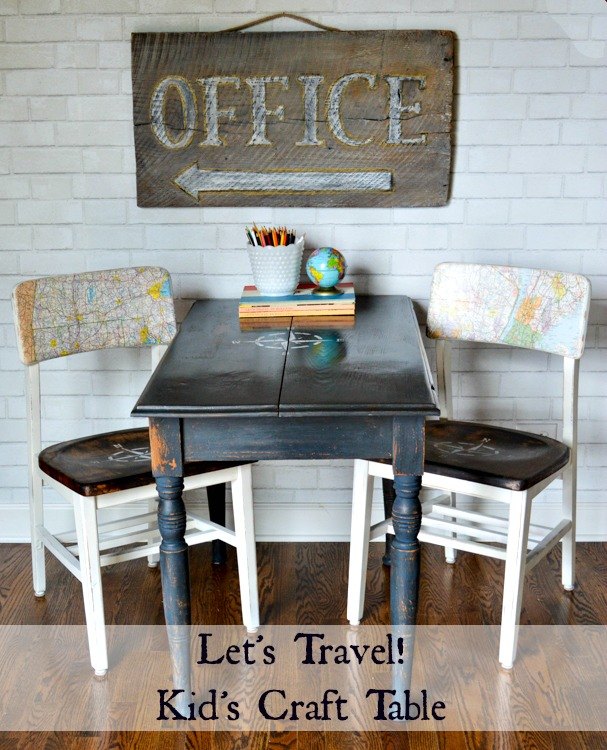
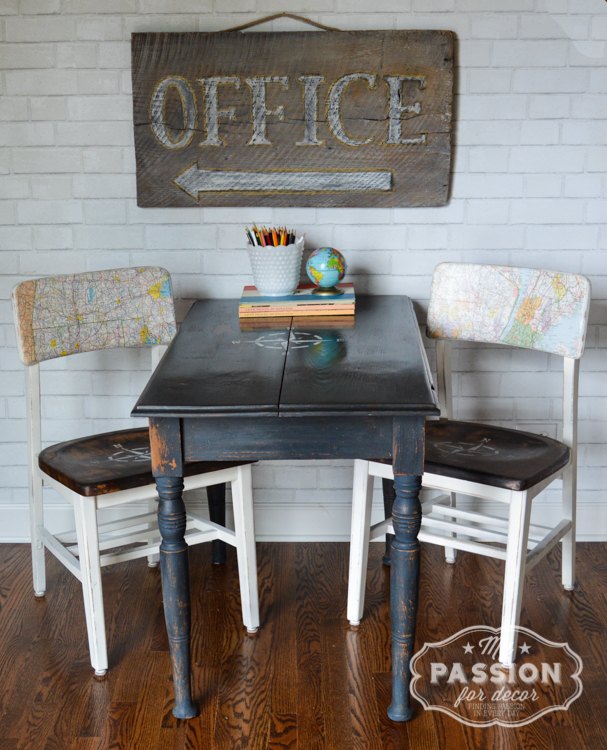
Travel Inspired Kid's Craft Table

by
Melody
2 Materials
I bought this drop leaf table at an estate sale recently. I hate to admit this, but I make mistakes....a lot of mistakes. You're not surprised are you? Well, this cute drop leaf table was stuck in a corner at the estate sale. The people running the sale were smart, they put the 'bad' side of the table to the back so it couldn't be seen without some Macgyver maneuvering. I love drop leaf tables and had to have this one. All I could see were the possibilities! I could see how great it would look all done with a stained top and off white legs. HA HA HA those estate sale people got me!
I didn't realize how much I'd been had until I got the table home. After careful examination, I saw the back leaf, that had been stuck in the corner, wasn't an original part of the table. It didn't even match the router edge.
That was only the beginning! I was dead set on staining the top of the table. Since the one leaf wasn't original I thought it would be best to take them both off. That took a lot of work and there might have been a few choice words spewed whilst doing this part.
After removing both leaves, I began sanding the table top. I started with 80 grit sand paper due the fact the top was pretty messed up. I then changed to 120 grit then 220 grit. I still had hope the table top could be saved.
Remember when I wrote earlier how the estate sale people were smart? Yeah, well they were smarter than I was that day! The top of the table had been burned by setting things on the top without trivets....at least that's what I think happened. Instead of realizing that perhaps I should give up on staining the top, I stained the top with jacobean and then dark walnut stain. I let the table sit overnight, hoping it would look beautiful when I woke up the next morning. I woke up and checked on the table, crossing both my fingers and toes, and the top was U G L Y. I let the table sit a couple more days until I finally came to the realization I'd been had. I was sad to admit it, but I had no other choice but to paint the table top.
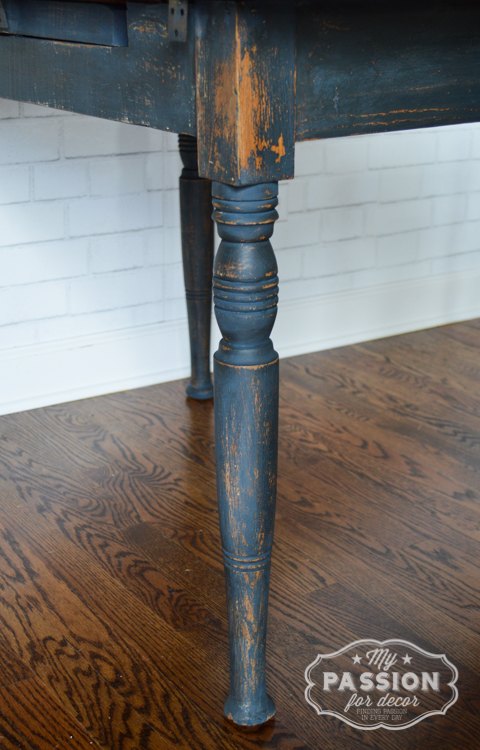
I painted two coats of Artissmo on the entire table. As milk paint does sometimes, it flaked giving me the look I was going for. I sanded and distressed the table top and legs. I used a putty knife to get all the flaking paint off and sealed the whole table with Miss Mustard Seeds furniture wax. This will always be my favorite wax.....it goes on like butter.
Once the table was done, I needed some chairs. I had two solid wood school chairs that I'd moved from Connecticut sitting in the basement. I had a vision for the chairs and this vision worked great with the travel inspired vision I had for the table.
I removed the chair seats and sanded them down, then stained them using a mix of jacobean and dark walnut stain. If the table top couldn't be stained, those seats would be!! I painted the rest of the chairs in an off white matte finish paint.
On the front of the chair backs, I decoupaged vintage gas station maps from NY and CT on each one.
To go with the travel theme, I added a nautical compass stencil on the table top and on each of the seats.
I didn't realize how much I'd been had until I got the table home. After careful examination, I saw the back leaf, that had been stuck in the corner, wasn't an original part of the table. It didn't even match the router edge.
That was only the beginning! I was dead set on staining the top of the table. Since the one leaf wasn't original I thought it would be best to take them both off. That took a lot of work and there might have been a few choice words spewed whilst doing this part.
After removing both leaves, I began sanding the table top. I started with 80 grit sand paper due the fact the top was pretty messed up. I then changed to 120 grit then 220 grit. I still had hope the table top could be saved.
Remember when I wrote earlier how the estate sale people were smart? Yeah, well they were smarter than I was that day! The top of the table had been burned by setting things on the top without trivets....at least that's what I think happened. Instead of realizing that perhaps I should give up on staining the top, I stained the top with jacobean and then dark walnut stain. I let the table sit overnight, hoping it would look beautiful when I woke up the next morning. I woke up and checked on the table, crossing both my fingers and toes, and the top was U G L Y. I let the table sit a couple more days until I finally came to the realization I'd been had. I was sad to admit it, but I had no other choice but to paint the table top.
I painted two coats of Artissmo on the entire table. As milk paint does sometimes, it flaked giving me the look I was going for. I sanded and distressed the table top and legs. I used a putty knife to get all the flaking paint off and sealed the whole table with Miss Mustard Seeds furniture wax. This will always be my favorite wax.....it goes on like butter.
Once the table was done, I needed some chairs. I had two solid wood school chairs that I'd moved from Connecticut sitting in the basement. I had a vision for the chairs and this vision worked great with the travel inspired vision I had for the table.
I removed the chair seats and sanded them down, then stained them using a mix of jacobean and dark walnut stain. If the table top couldn't be stained, those seats would be!! I painted the rest of the chairs in an off white matte finish paint.
On the front of the chair backs, I decoupaged vintage gas station maps from NY and CT on each one.
To go with the travel theme, I added a nautical compass stencil on the table top and on each of the seats.
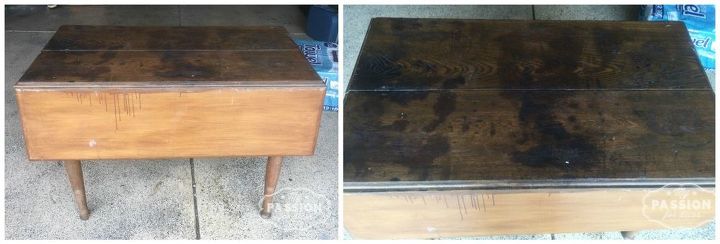
This is the table before, burn marks, and mismatched drop leafs.
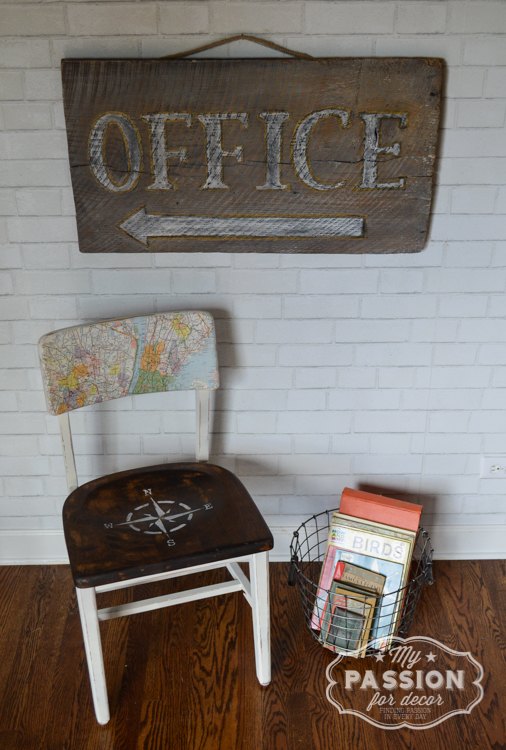
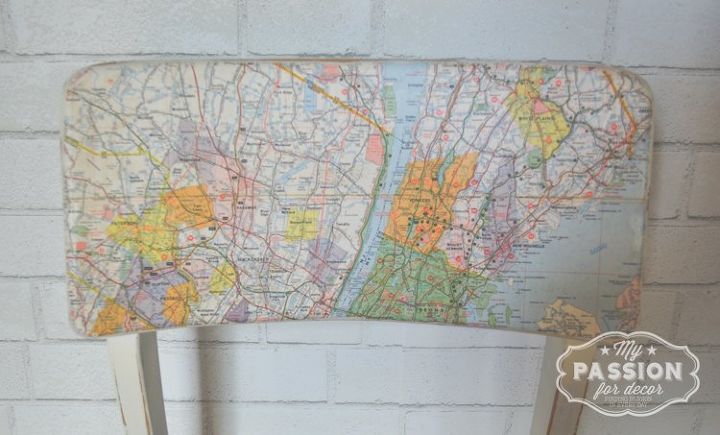
Decoupaged map back
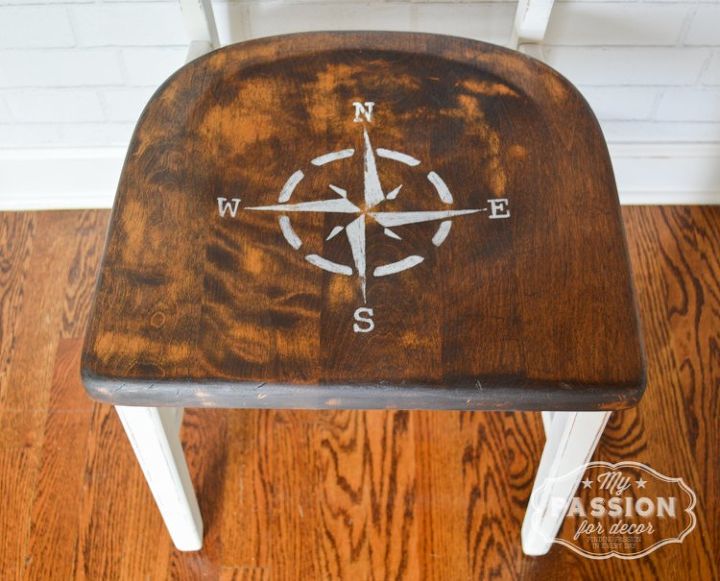
Nautical compass on the stained seat of the chair
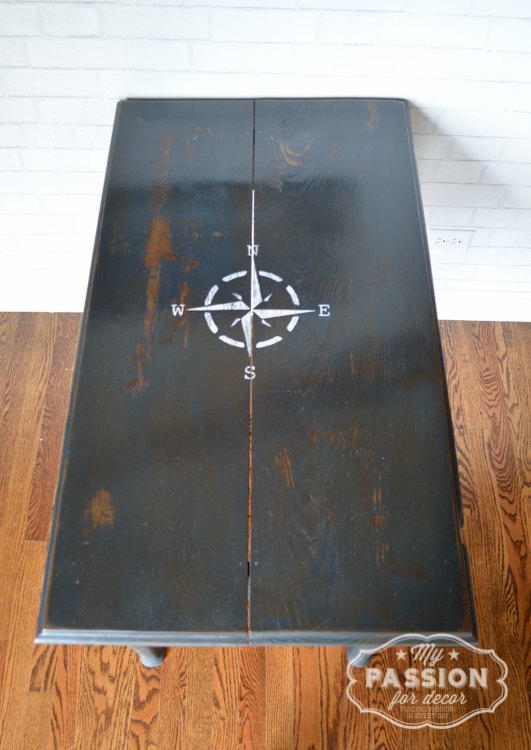
Milk painted table finished with dark wax and a nautical compass.
Want more details about this and other DIY projects? Check out my blog post!
Comments
Join the conversation
3 of 6 comments
-
Love!
-
I love your vision here!


Frequently asked questions
Have a question about this project?