


How to Remove Old Finish From Detailed Wood

by
Natalie
Ever come across a piece that is just screaming to be refinished, If not all of it, at least some of it. I mean those curves, those amazing details! Ah! But, what about getting into all of those details to get all of the old finish off? What a pain!! Well I found that piece this last week. When I saw it I just knew I wanted those pretty legs to come back to life with fresh stain. I didn't want to cover them up with the same old chalk paint we always do.
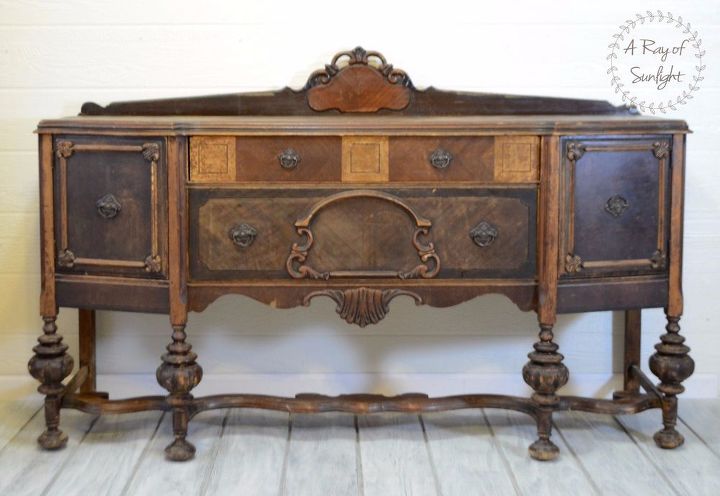
I haven't spent too much time removing an old finish from detailed wood so I was a bit nervous to go for it on such an amazing piece. So I searched and searched for guidance on how to go about removing old stain. I found a couple of written out tutorials on stripping detailed wood, but mostly I found tutorials on stripping stain from a flat surface. UGH! I needed something more. And when I couldn't find what I was looking for, I decided I needed to change that. So without further ado, here is how to remove old stain from detailed wood.
{
"id": "3578069",
"alt": "",
"title": "",
"video_link": "https://www.youtube.com/embed/sOZGlhVDUlg",
"youtube_video_id": "sOZGlhVDUlg"
}
{
"width": 634,
"height": 357,
"showRelated": true
}
Supplies:
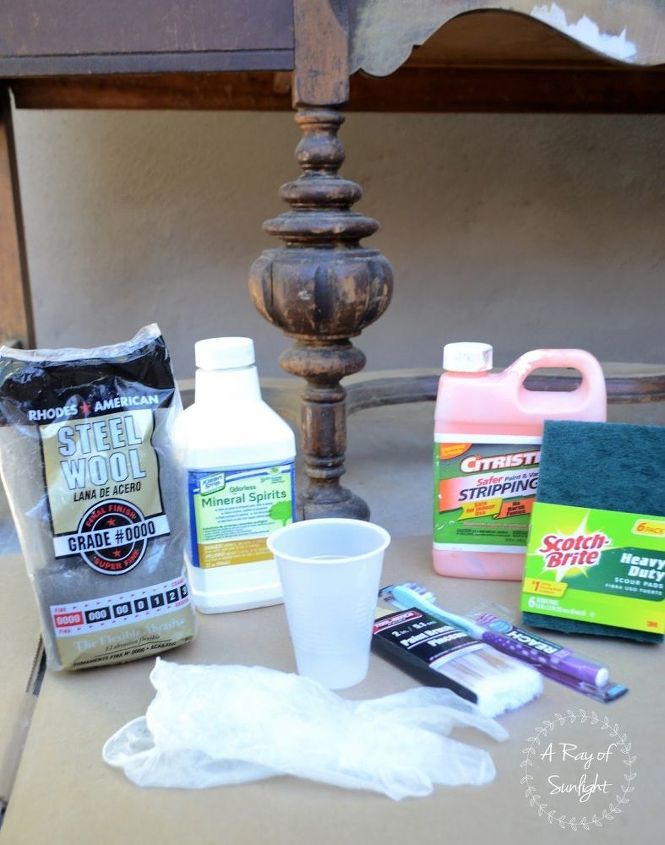
First bring your piece out to a well ventilated area. Citristrip says it is safe for indoor use, but between Citristrip and Mineral Spirits, you'll want to get fresh air while you work. Make sure to lay a drop cloth, piece of plastic, or a cardboard box under your piece if you don't want the ground to get messy.
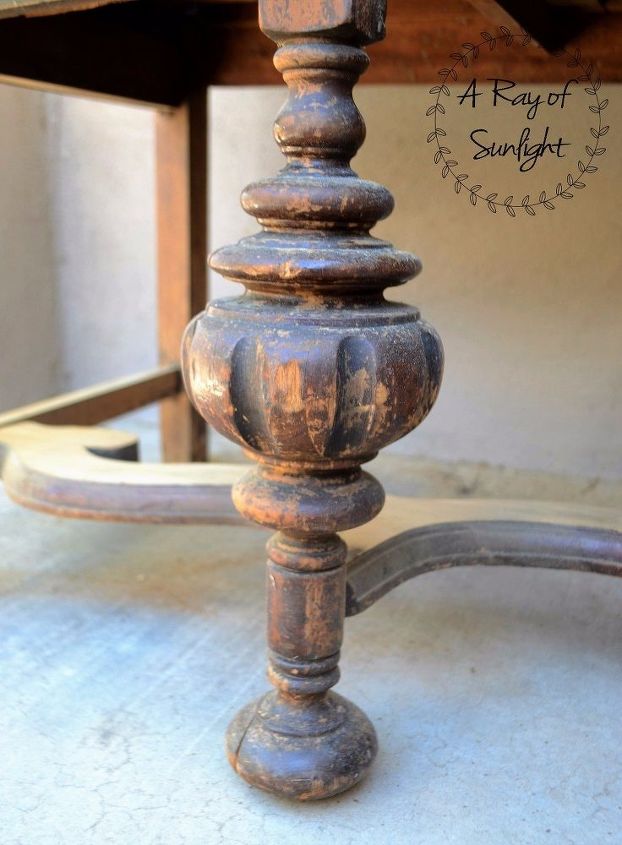
Before Removing Old Finish
After pouring a bit of Citristrip into a metal bowl, brush on the stripper, being very generous as you go. You're going to want to get to work as soon as possible, but it is best to leave it overnight to let it do it's thang. You can brush on the Citristrip in the morning and start stripping it off in the evening, just make sure your piece isn't in direct sunlight, or a very warm area so the stripper doesn't dry prematurely. I left mine overnight, for about 13 hours. Test a small area to make sure the finish is coming off fairly easily before proceeding.
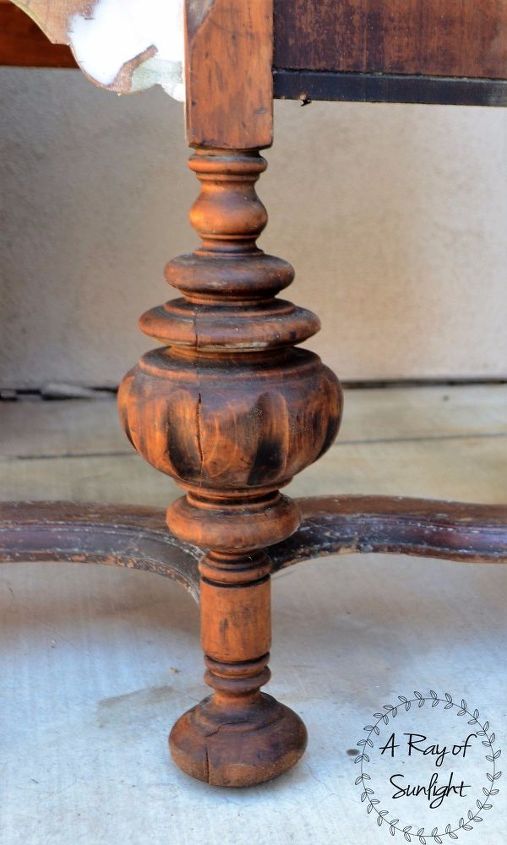
After Removing Old Stain-Ready for New Stain
Use the tooth brush to get into tight areas. If you have even tighter areas than me, a toothpick and q-tips will help you immensely. Go over the bigger areas with a scotch brite pad or steel wool. Whichever you prefer. I seem to like to go between the two.
Want more details about this and other DIY projects? Check out my blog post!
Comments
Join the conversation
3 of 7 comments
-
Thank you for sharing!
-
Thank you for your instructions on howto remove old finish from detailed pieces!


Frequently asked questions
Have a question about this project?
Hello, are covering with something after you apply the Citristrip?