


How To Stencil The Coco Trellis Wall Pattern

1 Material
Easy
If there is a dull and boring space in any of your rooms, a stenciled accent wall is the perfect solution to bring pattern and color into your home. A stencil design is an easy and affordable way to enhance your home. Today we're sharing a tutorial showing how simple it is to dress up an accent wall using our Coco Trellis Allover Stencil. Let's take a look...
We'd like you to welcome back Greg, one of the Cutting Edge Stencils owners and a creative DIYer. Greg loves the depth and character that a stencil pattern can add to a wall. When he spots a white wall, he feels compelled to paint a stencil pattern! Wallpaper can be a hassle to install and very expensive so an over-sized geometric stencil pattern, like the Coco Trellis Stencil is a great option.
{
"id": "3692669",
"alt": "",
"title": "",
"video_link": "https://www.youtube.com/embed/074Xr-u-DVs",
"youtube_video_id": "074Xr-u-DVs"
}
{
"width": 634,
"height": 357,
"showRelated": true
}
If you love tutorials then you'll enjoy this quick and instructional video on using the Coco Trellis wall pattern. In it Greg shows fans how easy it is to stencil an accent wall using this trendy wall pattern.
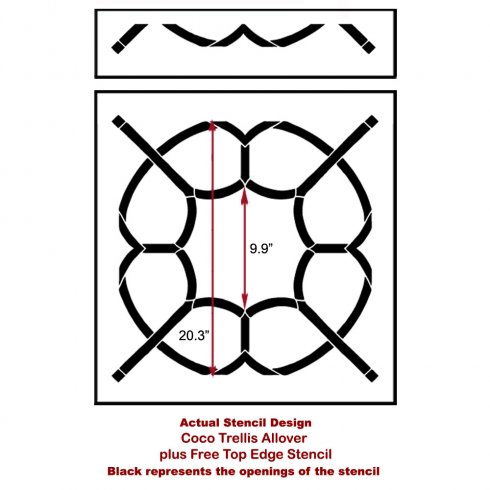
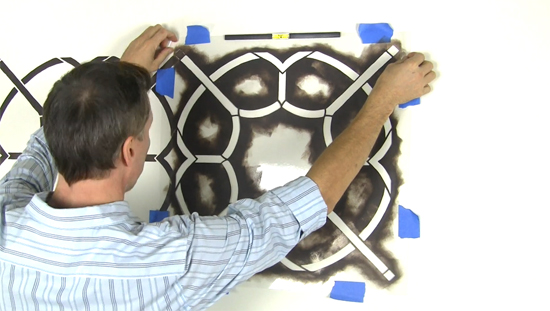
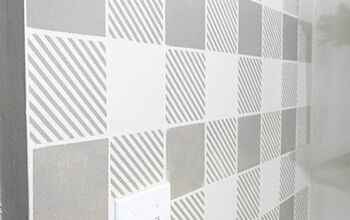
Let's walk through the steps for completing this accent wall project. Greg kicked off the task with a freshly painted white wall. Then he selected a trellis wall pattern to create an stylish accent wall.

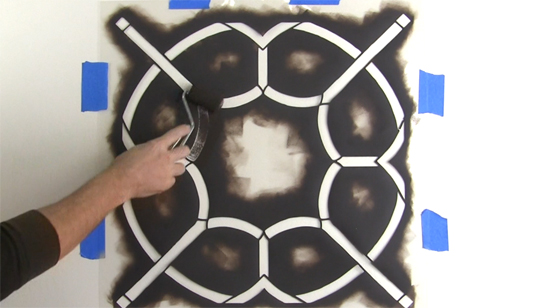
With his oversized geometric pattern in hand, he was ready to start stenciling! Greg carefully taped the stencil to the white wall. He used the clip-on stencil level to ensure the pattern was evenly placed on the wall. This tool is especially handy when completing a wall project. Greg used a two inch dense foam roller to paint the pattern in a neutral brown hue.
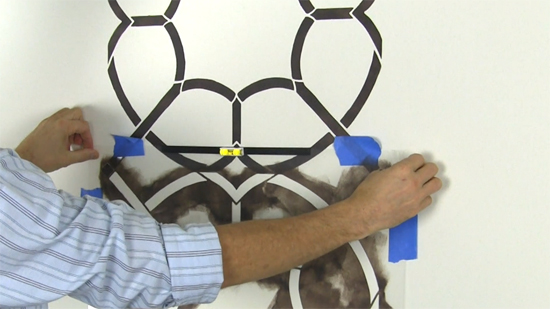
Since the wall was not complete, Greg lined up the stencil using the interlocking pattern. Our stencil designs make overlapping the previously painted part easy. Greg points out the small squares located on the lower left and lower right hand corners of the pattern. This is where the stencil should line up.
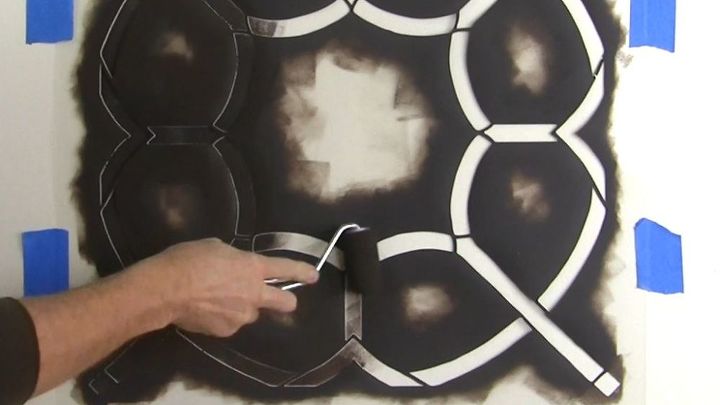
After it was lined up and taped to the wall, he continued to paint the stylish trellis wall design.

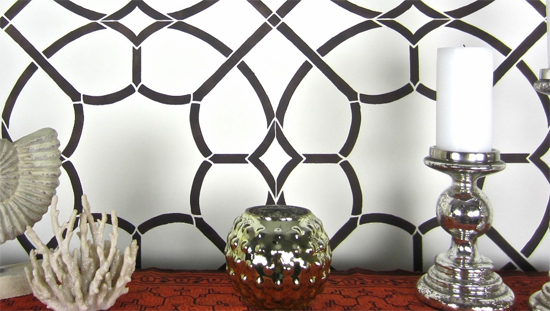
Once his wall was completely stenciled, Greg decorated his newly space. He then stepped back to admire the pretty trellis wall pattern. Are you ready to see his accent wall? We thought so! Here is his accent wall featuring the Coco Trellis.
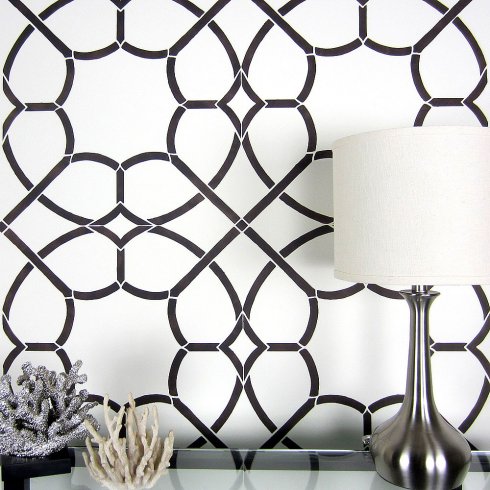
Elegant and classy is how we would describe this stenciled accent wall, don't you agree?


Frequently asked questions
Have a question about this project?