


How to Use Antiquing Wax

Antiquing Wax will give any piece a vintage, antique look while also protecting your piece. There are many wax colors -- choose the one that best fits your home’s decor. You can use a tinted wax to add depth or highlights to your piece. The antique wax will make its way into the nooks and crannies of your piece, giving it an aged look. In this video, Alicia applies antique wax over chalk paint, but you can really use it on any surface.
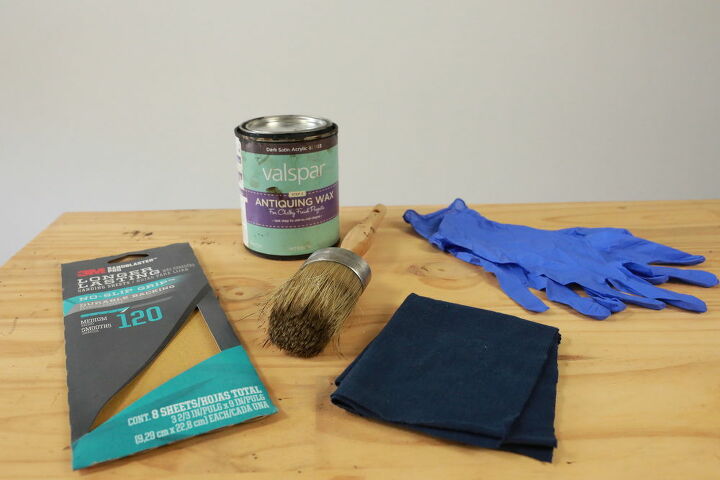
Step 1: Gather your materials
Begin by gathering your materials:
- Antiquing Wax
- An antiquing brush
- Rubber gloves
- Medium grit sandpaper
- Lint-free cloth

Step 2: Sanding
Use medium-grit sandpaper to sand the corners or any surface of the piece where you’d like to show this technique. You can sand the entire piece, or just the edges to add highlights or give depth.
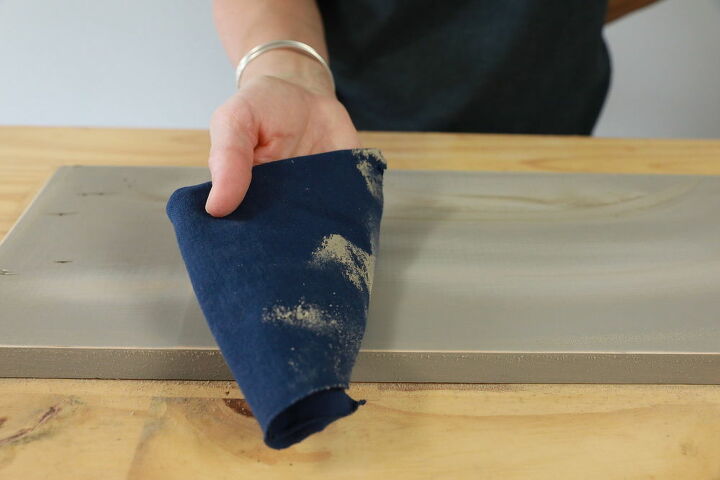
Step 3: Clean your piece
After sanding your piece thoroughly, use a cloth to wipe down the piece to remove any dust. To avoid any fibers being transferred onto your surface, use a lint-free cloth instead of a terry cloth.
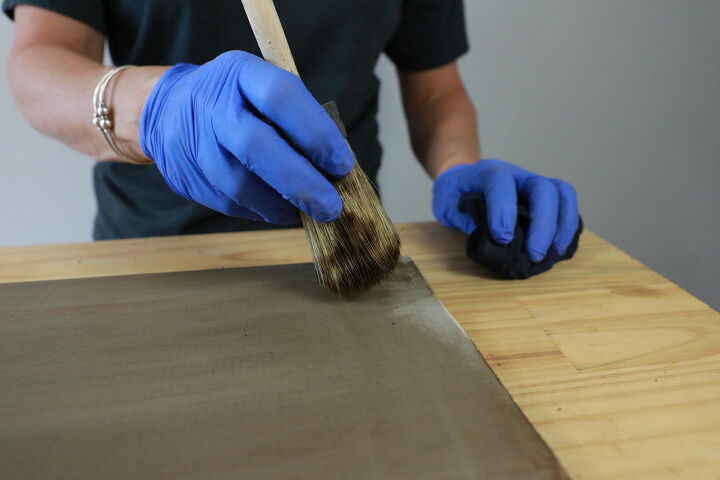
Step 4: Apply the Antique Wax
Safety is important, so make sure you put on rubber gloves for this step to protect your skin. Dip your waxing brush into the wax, and apply the wax in circular strokes, removing the wax immediately with your lint-free cloth. If you are working on a larger piece, work in small sections so you can remove the wax before it begins to dry. Make sure to push the wax into the wood, covering the surface of the piece.
If you do not want your entire piece darkened with wax, lightly brush the piece with wax where you’d like to see it. Make sure to rub it off when you’re finished applying the wax. You can stop here, or if you’d like even a heavier distressed look, continue onto Step 5.
Step 5: Optional for a heavier distressed look
For a heavier distressed look, remove more of the paint with sandpaper, then reapply the wax. Again, wipe off when finished. Continue until you get the desired amount of distressing you’d like.
Once you’ve completely the project, allow it to dry for 24 hours.


Frequently asked questions
Have a question about this project?