


How to Paint Over a Dark Textured Ceiling
Looking for ways to paint over a dark or heavy textured ceiling? Whether you are painting over a heavy faux finish, dark accent wall, or textured ceiling, wait until you see Part 2 of this dining room renovation!
I think I’m on painting overload these days because I JUST finished painting over the faux finish in our sunroom, and now we are wrapping up the dining room.
I’m heading to the paint store today and wondering how much paint we’ll need to cover a faux finish textured ceiling in our dining room because it's really dark.
And I only want to make one trip, so I’m estimating how many paint coats I’ll need to cover up the faux finish design.
Not to mention, I’d rather not spend days just painting the ceiling!
The dining room is the first major project we are tackling in the new house.
And there are a lot of projects to do here.
The house is full of dark faux finishes and I want to lighten it all up to start with a blank slate before really digging our heels in.
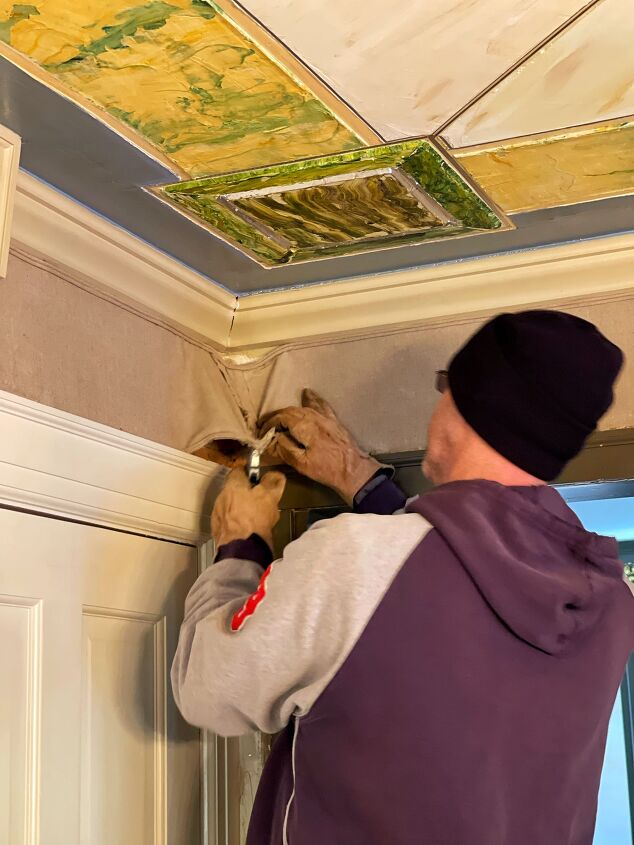
We started the dining room renovation by removing the upholstered walls.
But it also has a faux finish texture on the ceiling that needs to go.
Ultimately, we will either eventually skim coat the ceiling, panel it or replace the sheetrock.
Since that’s a larger project than we want to take on right now, we are just going to paint over it.
If it doesn’t look good after painting over it, we’ll figure out the best way to cover it all together.
So if you had to guess, how many coats of paint do you think it will take to cover the faux finish textured ceiling?
Let’s find out as we paint over the ceiling in the dining room.
(Posts on stacyling.com may contain affiliate links. Click HERE for full disclosure.)
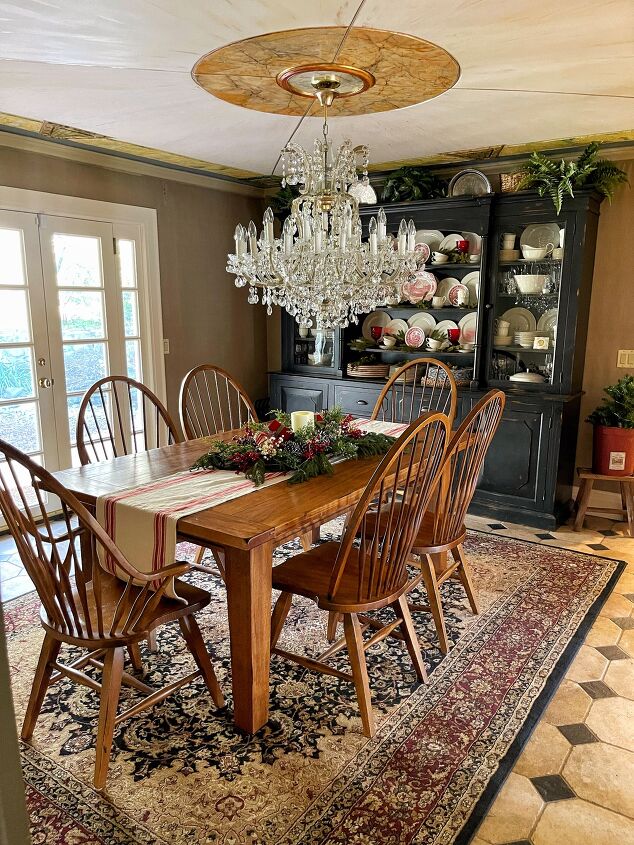
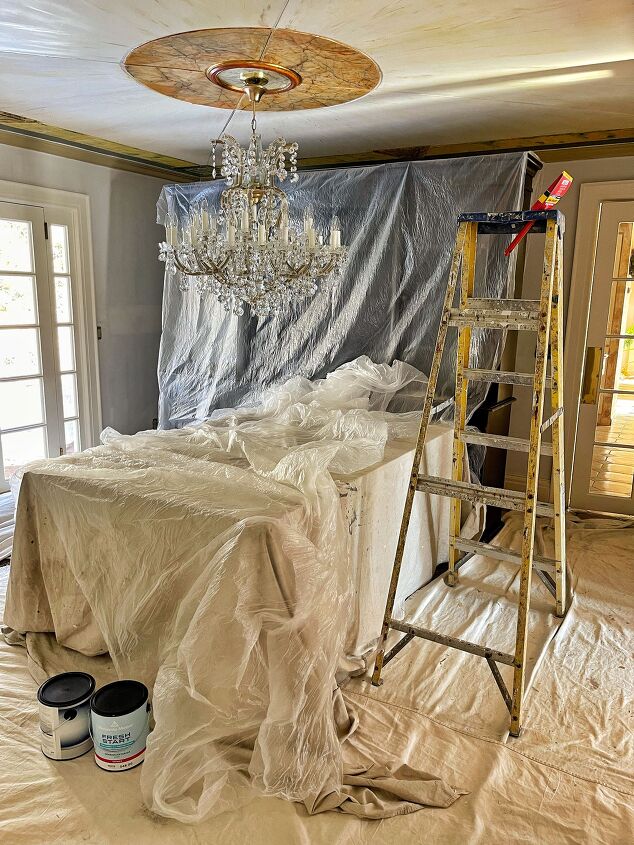
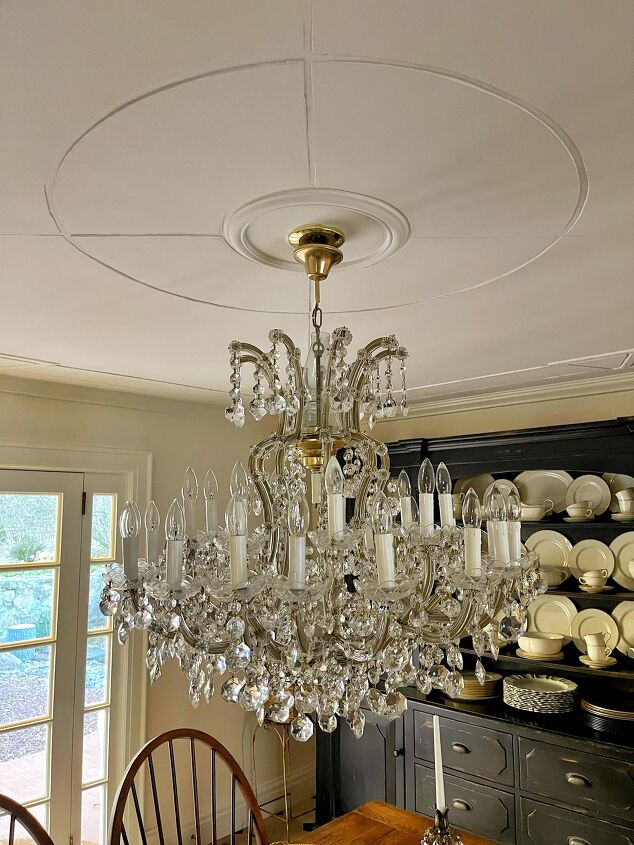
The Dining Room Textured Ceiling Before
Before we deep dive into how to paint over the ceiling, I want to mention that I am not covering a popcorn ceiling.
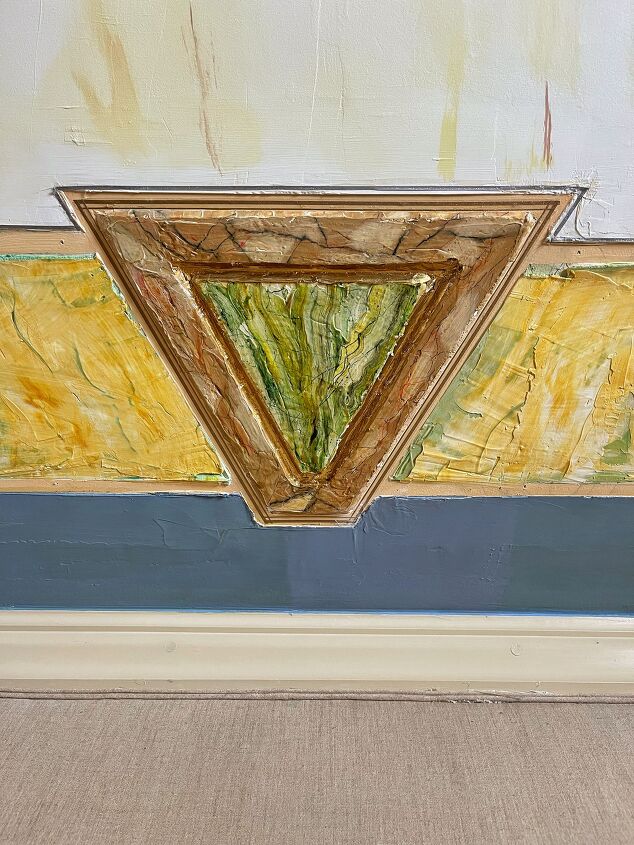
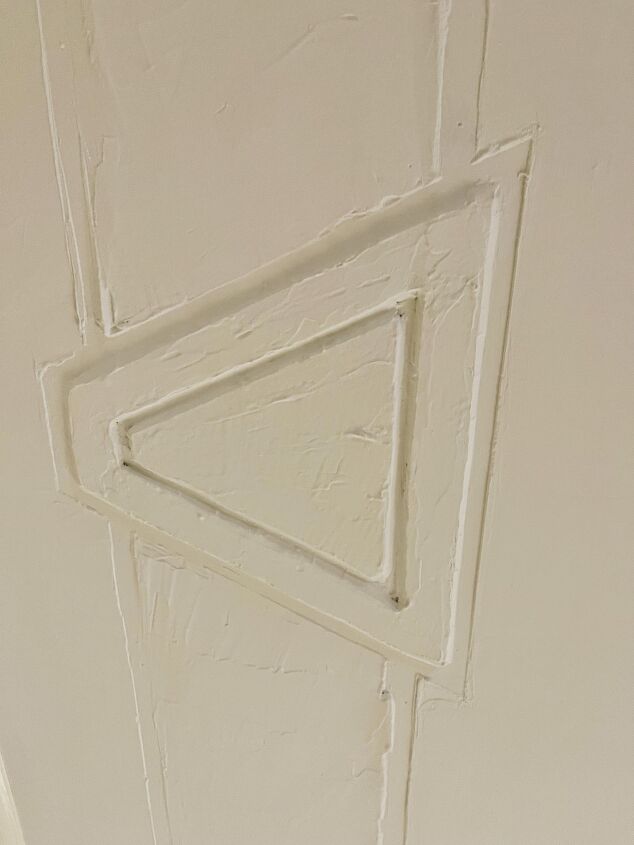
There are a few different faux finishes on my dining room ceiling that I do not love and want to cover up.
The colors don’t really work for me and I don’t love the design.
It worked well with the former homeowner’s decor but it’s just too dark and distracting to us.
We just moved in and are still unpacking so we don’t want to take on a huge project right now, but rather want to quickly lighten up rooms to start making it feel more like ours.
The dining room feels so dark every time we walk through it.
It has a gorgeous crystal chandelier that I want to highlight without as much focus on the ceiling.
And the padded fabric on the walls together with the textured ceiling made it feel really dingy with my rustic farmhouse table and black china cabinet and hutch.
Since you’ve already seen Part I of the dining room renovation, today we are working on the ceiling.
So How Do You Change a Textured Ceiling to Smooth?
To change a textured ceiling to smooth, there are a few directions to take depending on what’s there:
- Skim coat then sand it.
- Scrape or sand it off.
- Cover it up with shiplap, beadboard, etc.
- Remove it and replace it with sheetrock.
- Paint over it.
Since we just spent the last few months packing and moving, we want to go the easy route for now and just paint right over it.
Not to mention, I want to see what it will look like just painting over it before we completely remove or cover it all together.
We considered going right over with sheetrock but there are so many different levels it is easier and less expensive to just paint it.
How Many Paint Coats Are Needed to Cover a Textured Ceiling or Walls?
To start, measure the dimensions of the room so you know the square footage of the space.
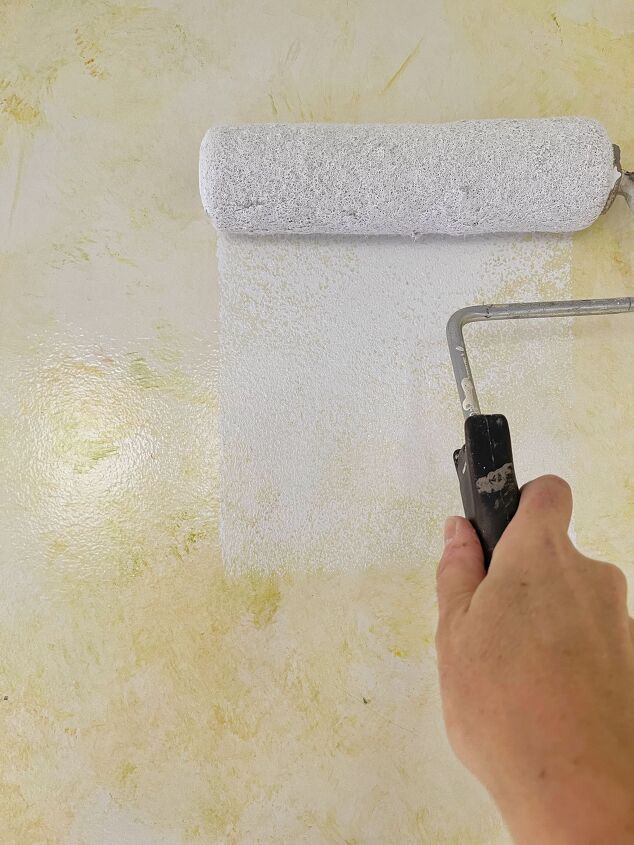
Since there are lots of dark colors and different finishes on this ceiling, we’ll need to lightly sand and prime the ceiling first before painting with a good flat latex paint.
Because the ceiling is so dark, it’s going to need a lot of coverage.
I am estimating I’ll need one gallon of primer and one gallon of latex ceiling paint.
Let’s see if I’m right!
Supplies Needed to Paint Over a Dark or Textured Ceiling
- Sandpaper
- Primer
- Latex Flat Ceiling Paint
- Paint Roller
- Paint Roller Pan
- Drop Cloths
- Paint Brushes (to get in any grooves)
How to Paint Over Textured Ceiling or Walls
In general, follow these steps to paint over a faux finish textured ceiling.
- Sand lightly then clean the surface from any sanding residue, dust, dirt, and debris.
- Apply one coat of primer and see how well it covers. If the design is dark and heavy like ours, I recommend doing two coats of primer on anything dark that’s still showing through.
- Then apply flat latex ceiling paint using a paint roller.
- Brush any areas that need to be touched up. If the texture varies, a brush can get in the small grooves.
So How Many Paint Coats Did It Take to Cover My Dining Room Ceiling?
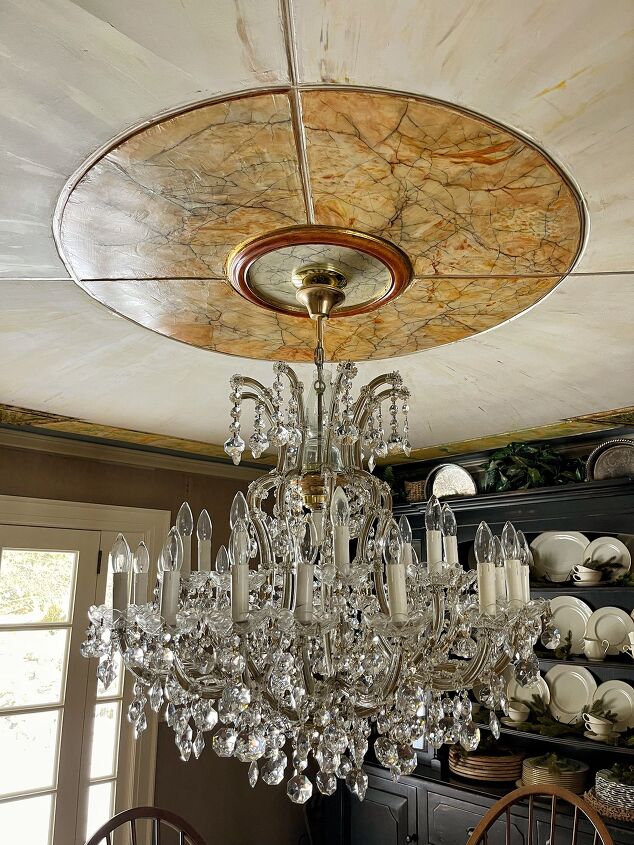
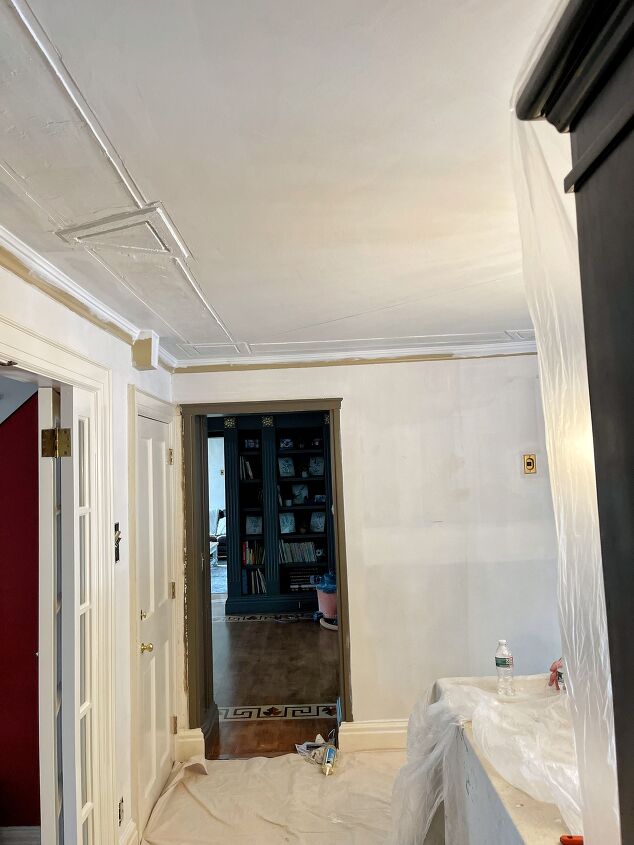
For my dining room ceiling, it took 3 coats of paint total.
We primed the ceiling first.
Because the design was so dark in some areas, we painted two coats of primer.
And the applied one coat of flat latex paint.
My guess was correct!
I had just enough primer for the ceiling and have some flat latex paint leftover for the next room renovation.
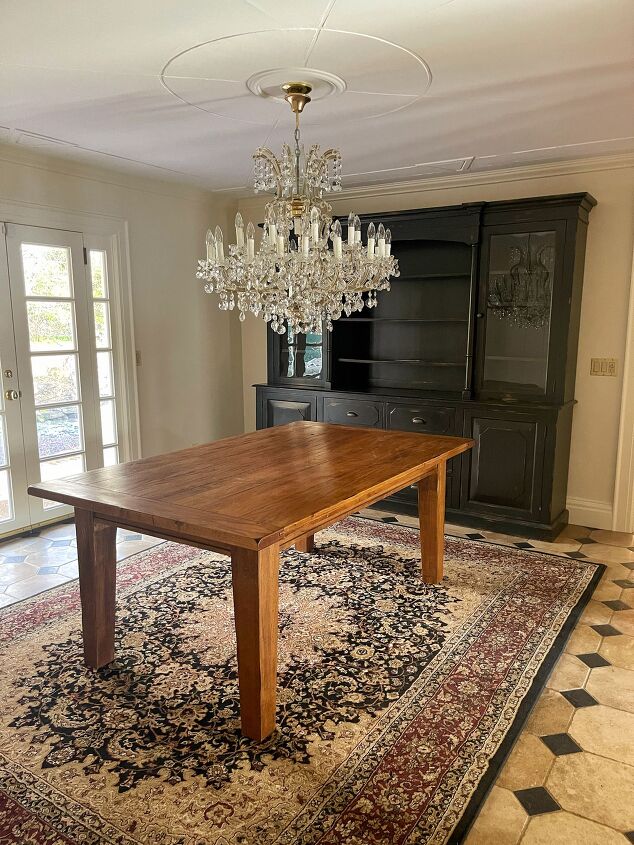
Doesn’t the ceiling look SO MUCH BETTER?
It always amazes me how much paint can totally transform a space.
The dining room feels lighter, brighter, and beautiful!
I can’t wait to decorate it.
Want to See More Before and Afters?
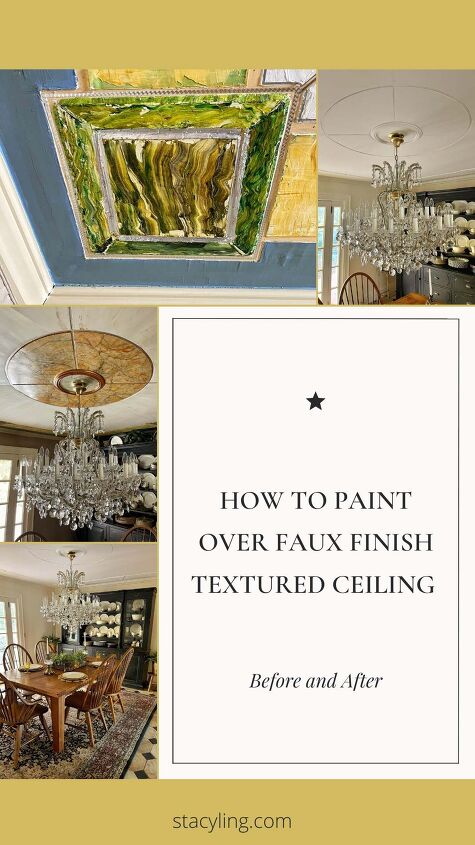
Pin and Save It For Later
If you like this post, please share and pin it on Pinterest. (If you hover over the image, the Pinterest button will be in the upper left corner.)
I’ve created the below-custom pins for this post.

Subscribe to the blog and gain access not readily available to the public.
Thanks so much for following along.
Enjoy a beautiful day! xo

If you like this post, please follow me @bricksnblooms on Pinterest, Facebook, Instagram, and Tik Tok. Subscribe to my YouTube Channel. Or join my Facebook Group.


Frequently asked questions
Have a question about this project?