


Adding Wall Texture Art

Last post, I showed how I made the slide-away mirror cabinet in our bathroom. Many people asked how I did the walls, so here ya go!
Early in the bathroom reno process, I realized our walls were going to need a little love. The giant mirror that I popped off the wall had gobs of silicone that pulled off the drywall. Behind our tub insert had NO drywall to even start. Yikes.
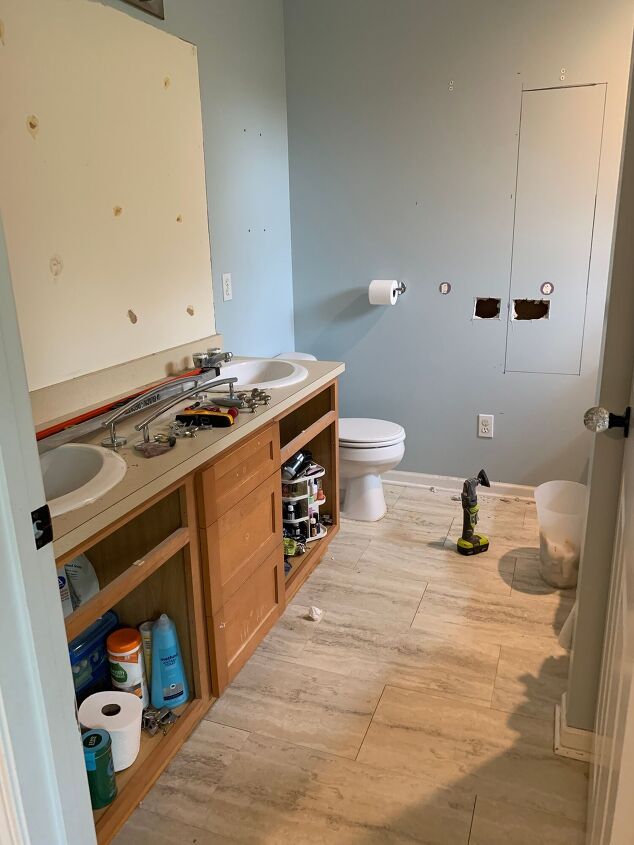
So, rather than meticulously taping and smoothing out joint compound over these holes and seams, I decided to cover the walls in some sort of texturing. Scouring the internet (mostly Pinterest), I searched for unique textures that would give an artsy effect to the walls. That’s when I came across how a lot of artists use joint compound, or something similar, to create textured canvas art. One in particular kept showing up on my feed, and it soon became my favorite and the clear winner for what I was going to try to replicate. If you have a chance, check out @studiospindler to see some of this amazing art that inspired my bathroom walls.
I’d done wall texturing before – on our office as a faux-brick wall and elsewhere – so I was pretty confident I could pull this off, plus I knew it would be a fairly inexpensive fix to our messed up walls.
Supplies:
- Joint compound (I got 5 gallons)
- String of beads (I used 2 rolls)
- Paint (mine is “Accessible Beige”)
The really nice thing about doing this is that it’s VERY forgiving of imperfect walls. Some sections of our walls were ok, so I simply added my texture to the particularly bad bits and made it all look like a purposeful design. I didn’t even have to take out the wall anchors where I’ll later rehang our towel racks.
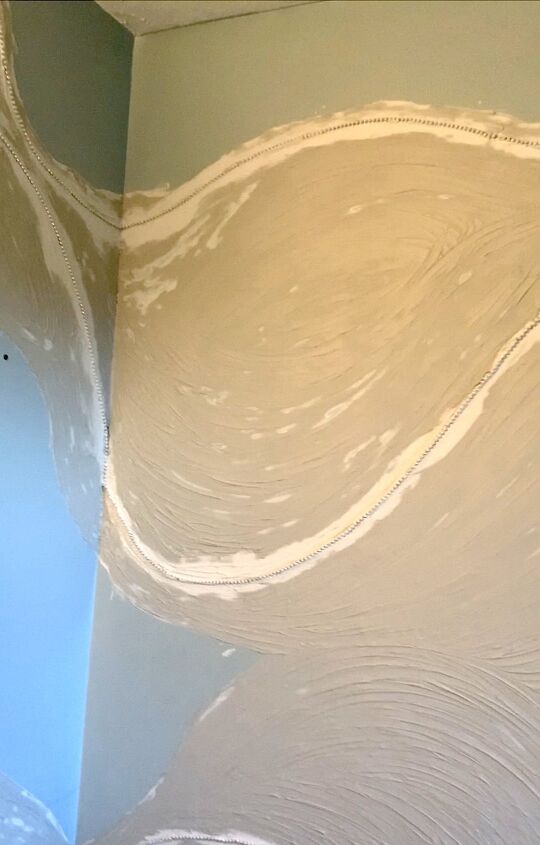
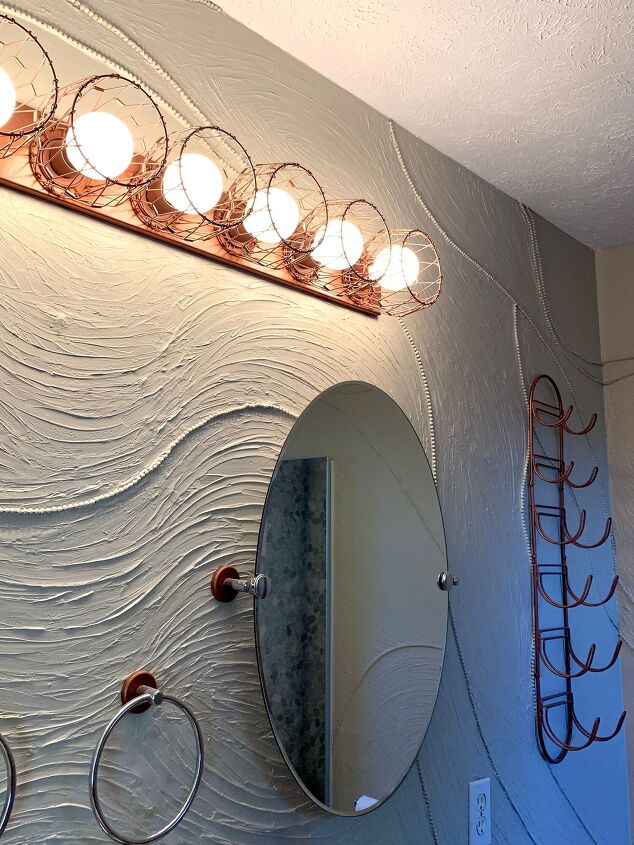
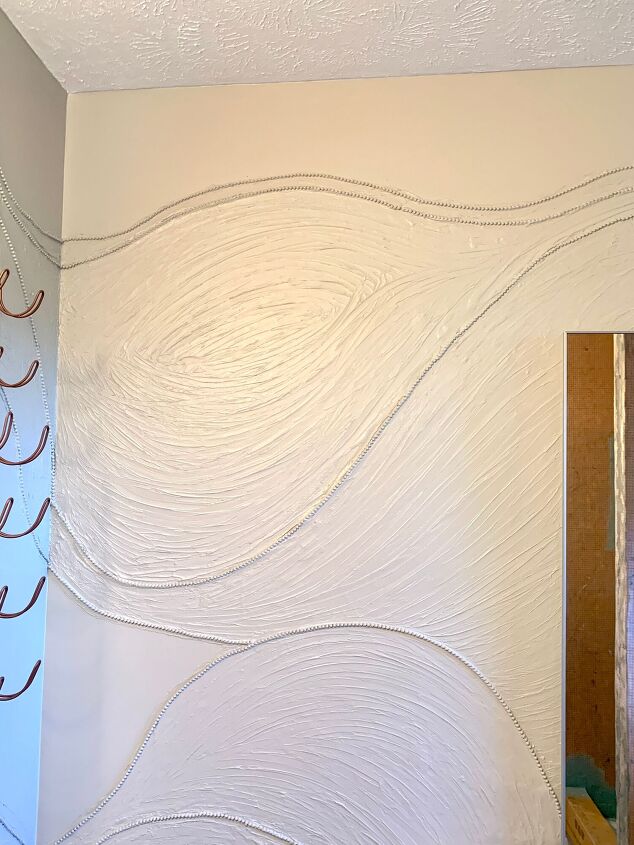
Step 1: Spread wavy lines of joint compound that are quite thick. I used a combination of my hands and a grout float to spread decent amounts of the compound in long waves along my walls. This created a good outline of how my textured pattern was going to turn out. It also helped make clear which sections of wall I wanted/needed to cover. I went for a generally wavy look that would pull the eye around the room. I also had my lines intersect in a few places to add interest.
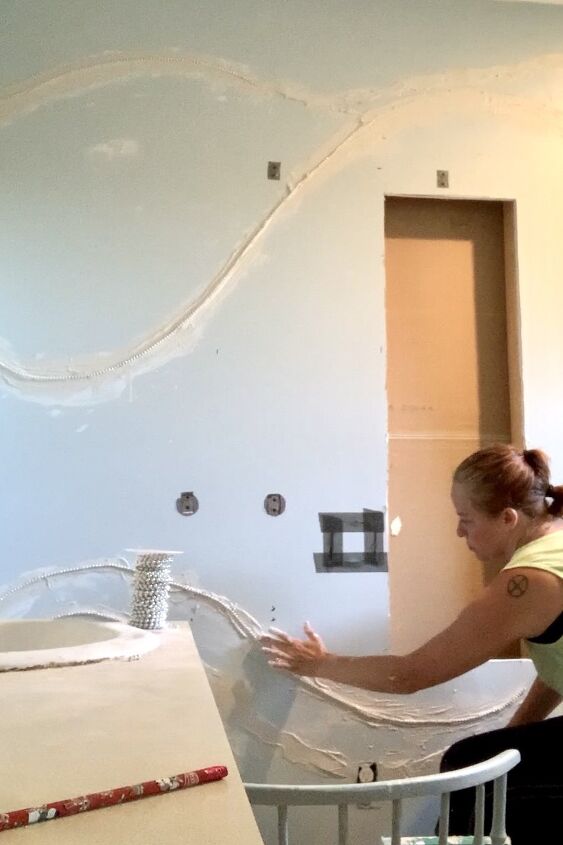
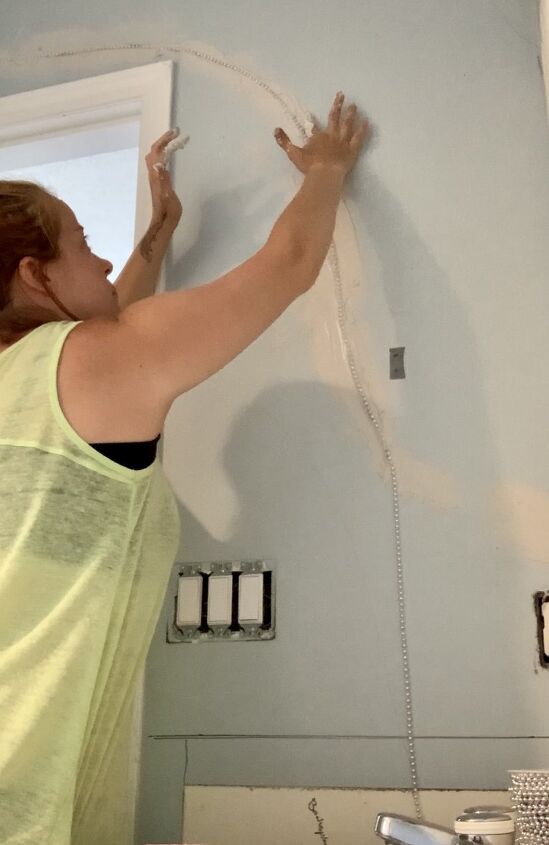
Step 2: Press in the beads. Once I had the “outline” done, I unrolled some of my string of beads and held the end where my outline started at the ceiling. Then I simply pressed the beads gently into the joint compound as I followed my outline. At corners, I found that it was easier to cut the string of beads than try to wrap the beads around the corner and continue, but either way works ok. I just liked working with shorter strings at a time in case I pulled it loose accidentally.
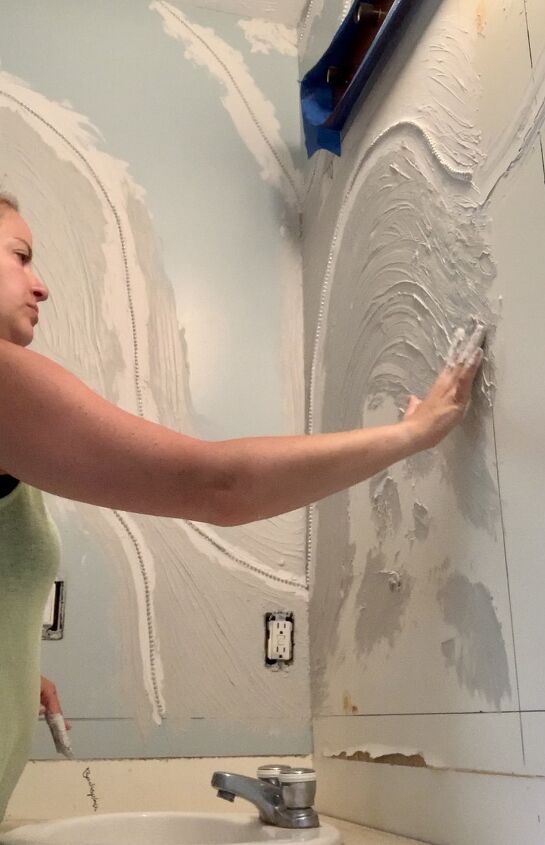
Step 3: Slather on joint compound. With all my outlines done with beads, it was time to fill the big sections between. I found that my grout float worked quite well for this part to just hurry and get the joint compound on the walls. I covered a big section of wall at a time, but you don’t want to do too much if you have the quick-drying kind of joint compound. (You get a feel pretty quickly of how much you can manage at a time.)
Once I had a big glob spread on, I used my fingers to swipe back and forth until I had a pattern/texture that I liked. I found that the thicker the compound and the harder I wiped, the more dramatic the effect. And it also looks best to do long strokes so the compound looks less choppy. You really can do any pattern you like, but I followed the general waves of my outlines.
Step 4: Let it dry. A fan aimed at your walls helps to speed up this process a bit. Obviously, the thicker parts will take longer to dry. It looks a little different once dried, so you might see places (I did) where you want to add thicker texture. You can do that with more compound before it’s all dry.
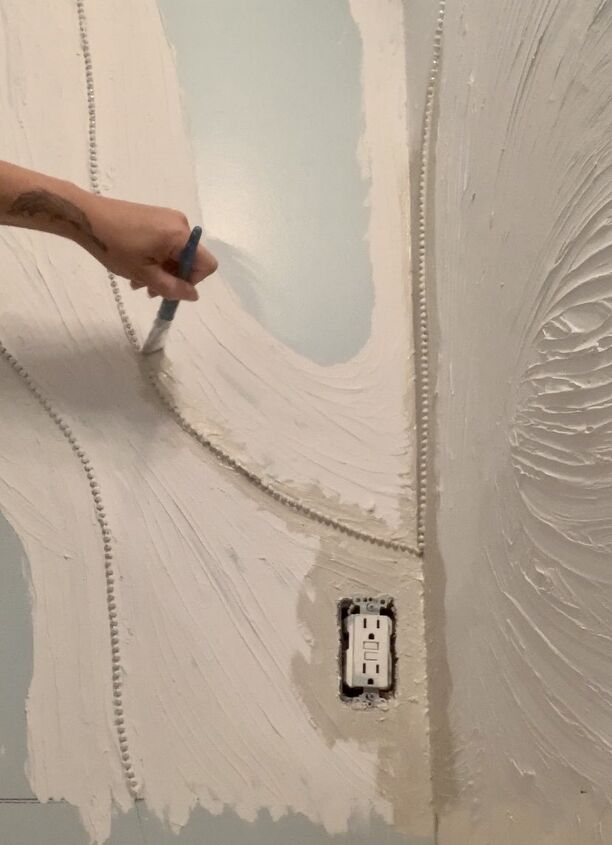
Step 5: Paint! I’m not gonna lie, painting the beads takes TIME. I tried using a big brush, but sometimes that was too rough and pulled the beads free a little. Instead I used a small craft brush, and this was the smarter choice since it was gentle and also let me get into all the little gaps around the beads.
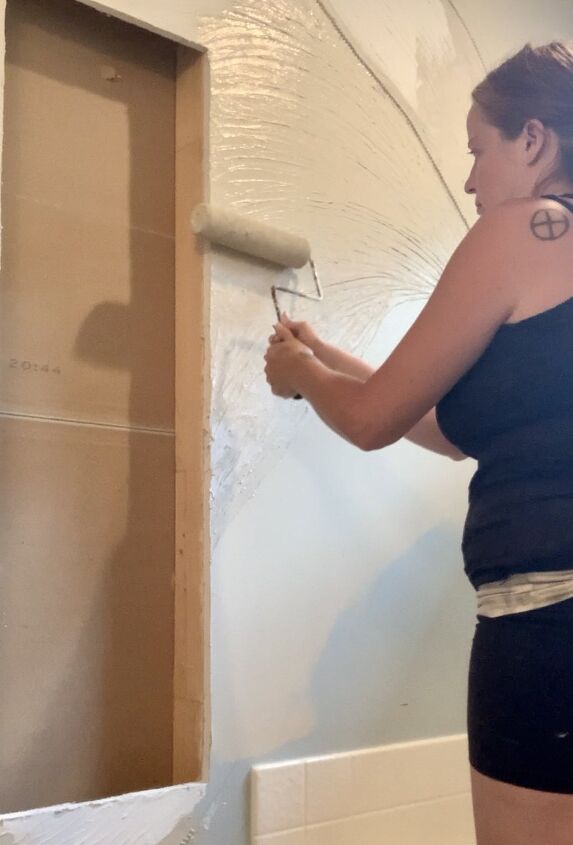
After I’d painted all the bead outlines, I switched to a roller for the rest of the wall. This went much faster, but I also had to do 2 coats to make sure I got all the little nooks and crannies in my dried joint compound. Where there was no texture at all, I used the same roller at the same time and painted like normal.
Once my paint was dried, I was done!
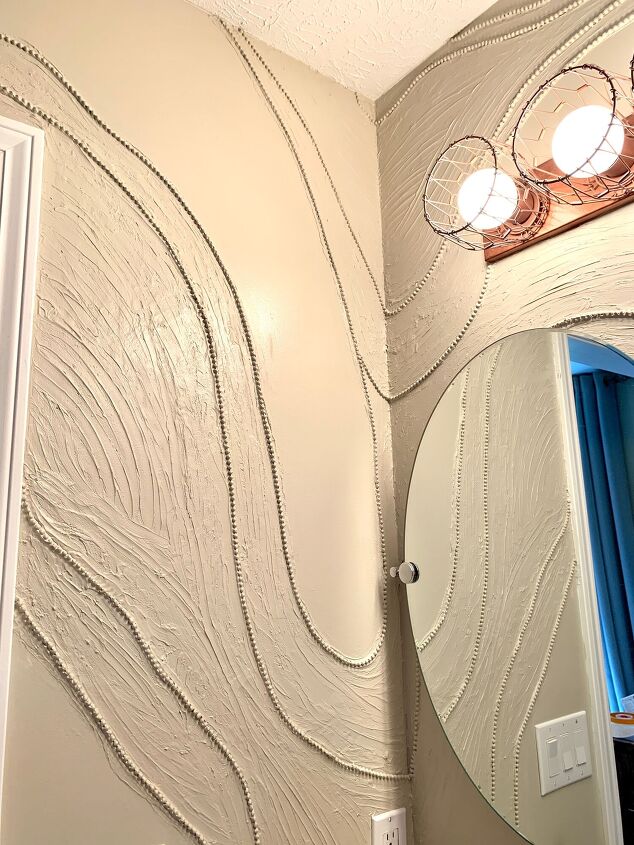
Side note: I decided that I wanted even more beads for a more dramatic effect, so I ended up buying a second roll and repeating the process in a few sections to REALLY outline the textured areas. I was worried this might look like too much, but it turned out great and looks like I fully committed to the whole idea. lol
This was a pretty simple but really cool way to add textured art to my walls. I love how it adds some charm and pulls your eye around the room.
Now to finish the rest of the room!! 🤞
Comments
Join the conversation
-
Very creative! I love it.
-
If you had come to New Orleans area for parades - Carnival or St. Patrick's/St.Joseph's Days, - you'd have gotten all sizes of beads for free!


Frequently asked questions
Have a question about this project?
How did you add the “ baskets” around your “ Hollywood” light fixture. I’ve been trying to figure out how to update mine.