


How to Paint a Checkerboard Wall

by
Amie
3 Materials
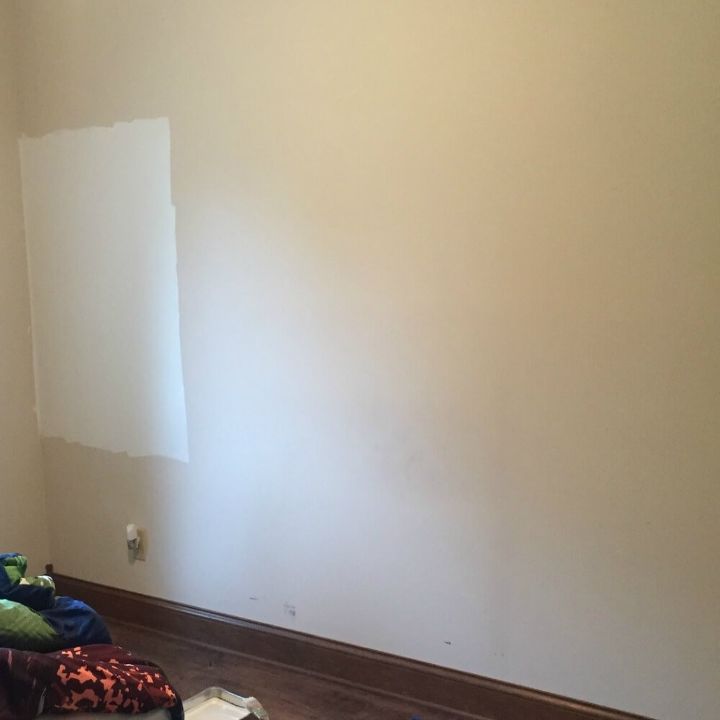
Dull yellowish white. That was the color of all the walls in our home when we moved in. The previous owner was over the top with keeping up on maintenance, but it was clear that decor was not their priority.
This was a good thing though. I would rather put our own personal touch on paint colors rather than a new furnace. Don’t get me wrong, furnaces are important and all. But still. One of the first rooms we tackled was my 7 year old, and we ended up with this cool checkerboard wall.
This was a good thing though. I would rather put our own personal touch on paint colors rather than a new furnace. Don’t get me wrong, furnaces are important and all. But still. One of the first rooms we tackled was my 7 year old, and we ended up with this cool checkerboard wall.
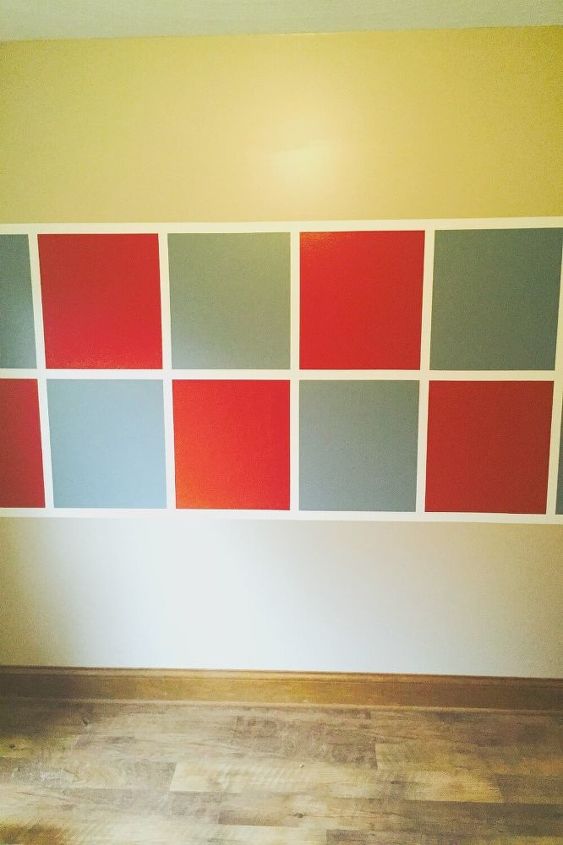
I knew that I wanted a bright white border between the squares, so I started this project by painting a thick white stripe across the middle of the wall. I didn’t bother with tape at this point, because I knew I would be painting the rest of the wall a different color.
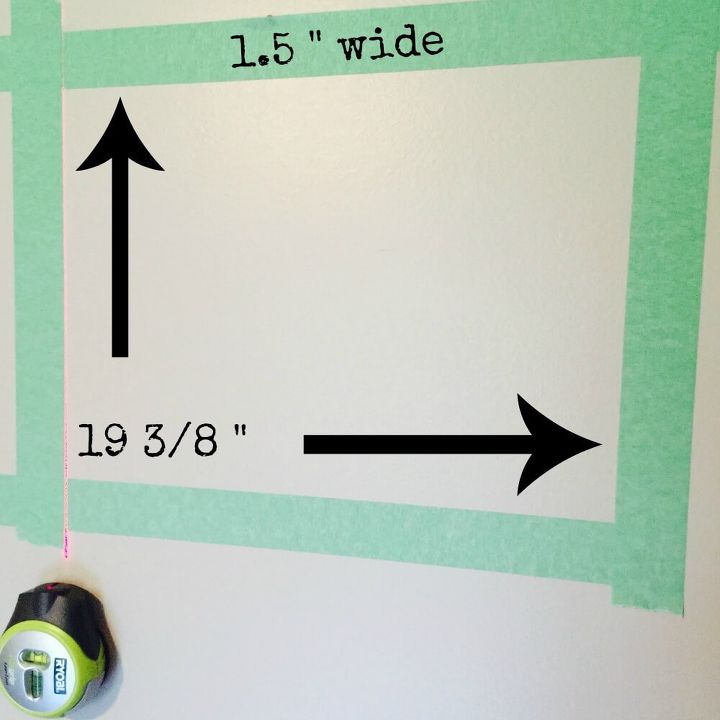
Once your base color is dry, it’s time to start taping. A laser level is HIGHLY recommended for this part. I didn't get a picture of the full wall taped, but lines below represent what it looked like as I went.

Measuring from the ceiling to the top of the baseboard, I marked the halfway point with a pencil to start. Then using a level, I ran tape across the middle from one side to the other.
Next comes the paint! In order to decrease the paint bleeding under the tape, take a small paint brush and paint over the edges of the tape with your base color. This step makes the project take longer, but it will make your paint job look so much better. Trust me.
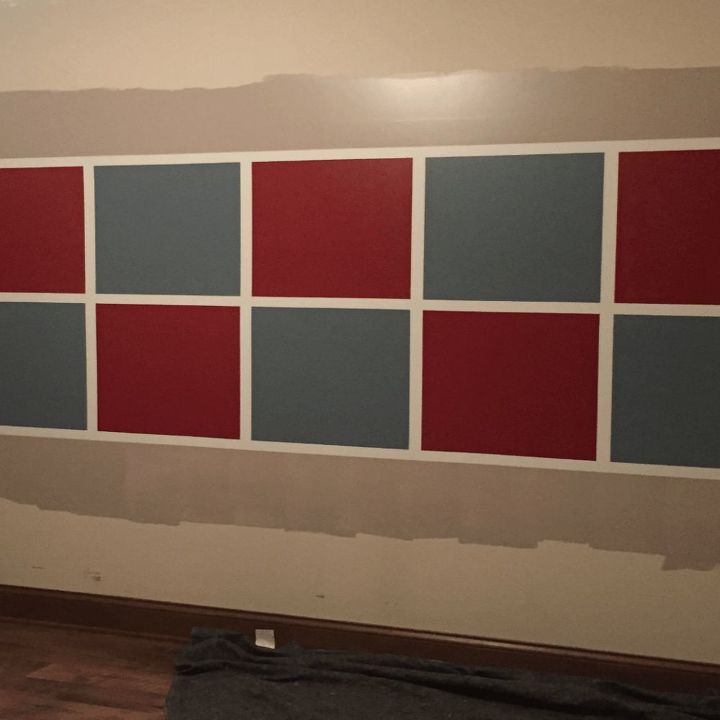
Here is the wall after the squares were painted, the tape was removed, but before the top and bottom of the wall was finished with the neutral.
Want more details about this and other DIY projects? Check out my blog post!
Comments
Join the conversation
2 comments
-
Love the border idea! Having your son pick the colors is cool! Now its HIS room =:) Great job!


Frequently asked questions
Have a question about this project?