


Wood Stain STINKS! … A (REALLY CHEAP) Wood Stain Hack

Ok- maybe “stinks” was a bit harsh, but did it get your attention??
I love wood stain. Truly I do. There really is something about a gorgeous piece of wood that is beautifully stained and varnished that draws my attention. Like you, I have used wood stain in many different hues on many different projects over the years with all kinds of fabulous results.
One thing I don’t like about wood stain, however, is the smell. It’s strong when it’s wet, and it still smells (at least for a while) when it’s dry. Dry time is also relatively significant, sometimes covering multiple days, depending on the project and product.
I have begun using this very simple little “hack” lately on certain projects to sidestep those issues. There are some great benefits:
-It’s VERY QUICK- in application and dry time
-It’s VERY AFFORDABLE-it costs much less than a can of wood stain
Before I go further, knowing that many of you are very skilled craftspeople and diy-ers, I will offer this disclaimer: I own up to the fact that this method would NOT apply to ALL projects involving wood staining, especially for something with beautiful, expensive wood or a piece that would be a relatively high profile addition to decor. However, for many of the little projects that pass through my garage, this method will do just fine.
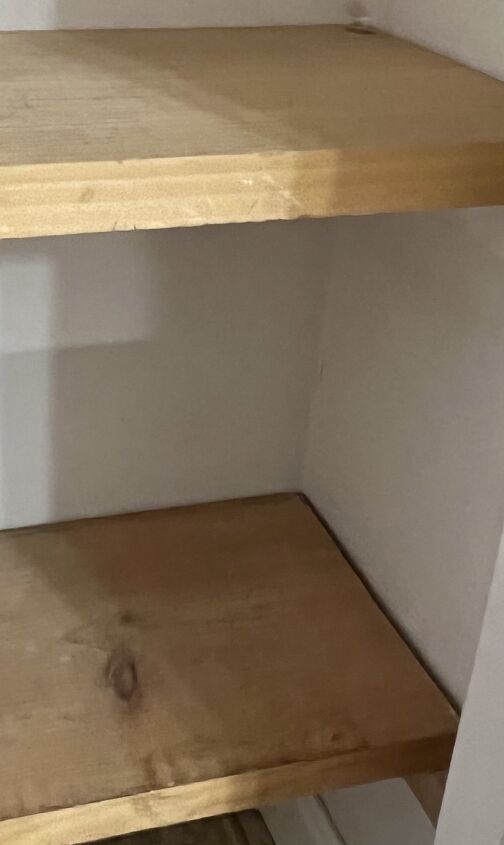
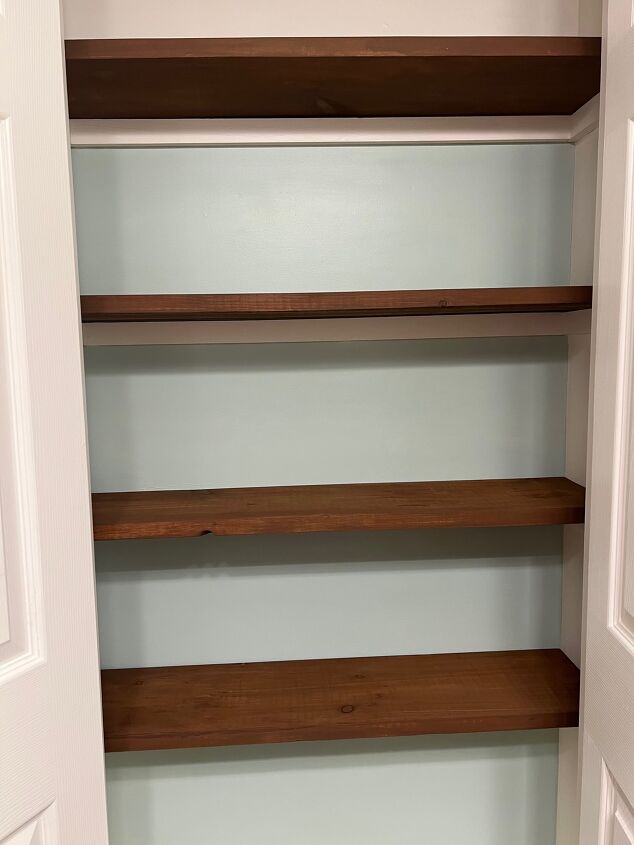
 Here’s an example: This project qualifies as one I would use this method to complete. I was recently doing a little revamp of our bathroom closet. The 4 shelves were just pieces of unfinished, bulk lumber, and I wanted a little nicer "stained wood" look, but without the hassle.
I began at the local craft store and checked out the many varying shades of brown that they carry in the craft paint section. (There are probably more than you think.)
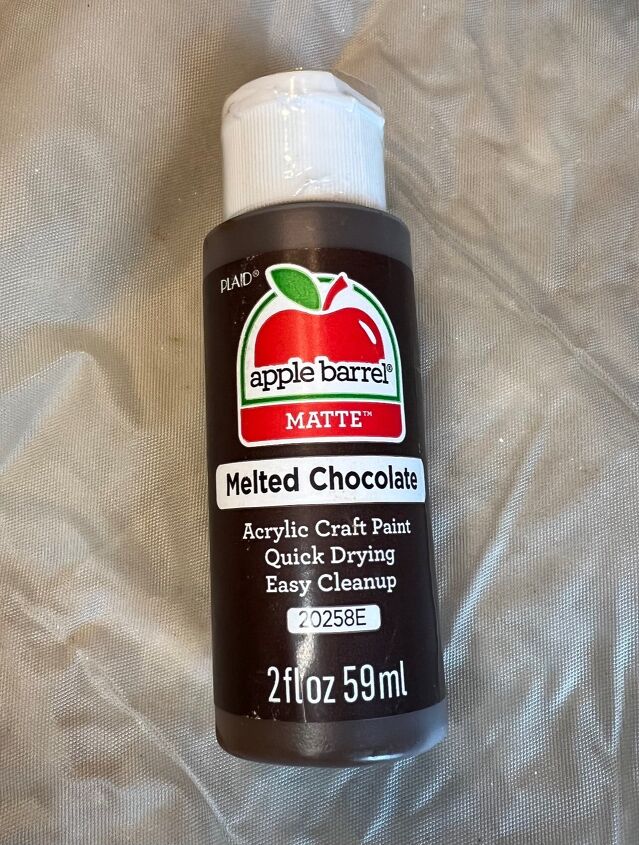
I knew the shade of brown I wanted, and decided that Apple Barrel craft paint in Melted Chocolate would give me that nice, deep brown color I was going for. I bought 3 bottles, just in case, at 58 cents per bottle (I told you it was cheap!).
Back at home, I removed the shelves and sanded them on all sides.
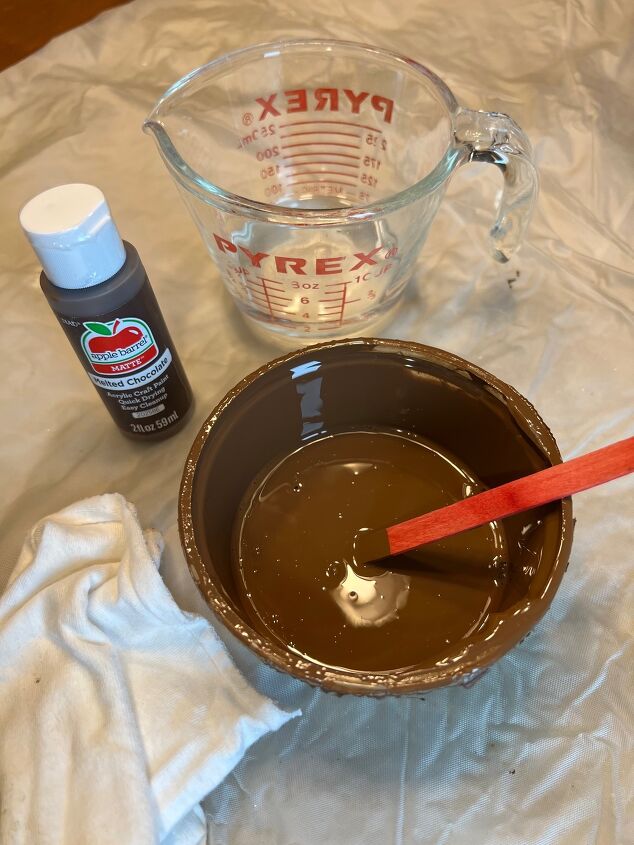
In an empty container, I poured 2 bottles of the paint, added water, and mixed until the mixture was decently watered down, and, when tested on a hidden spot, gave me the color I wanted.
 TIP: Keep in mind that the more water you add the more translucent the color will be.
TIP: You will want to mix all the “stain” you think you might need at once. Unless you use exact measurements for the paint and water, (I just experiment and pour paint in, mix, and test), you can’t be sure to duplicate the exact ratio of paint:water if you have to mix a second batch, thus the color will be different. Luckily, with the paint itself literally costing pennies, this is not expensive to do.
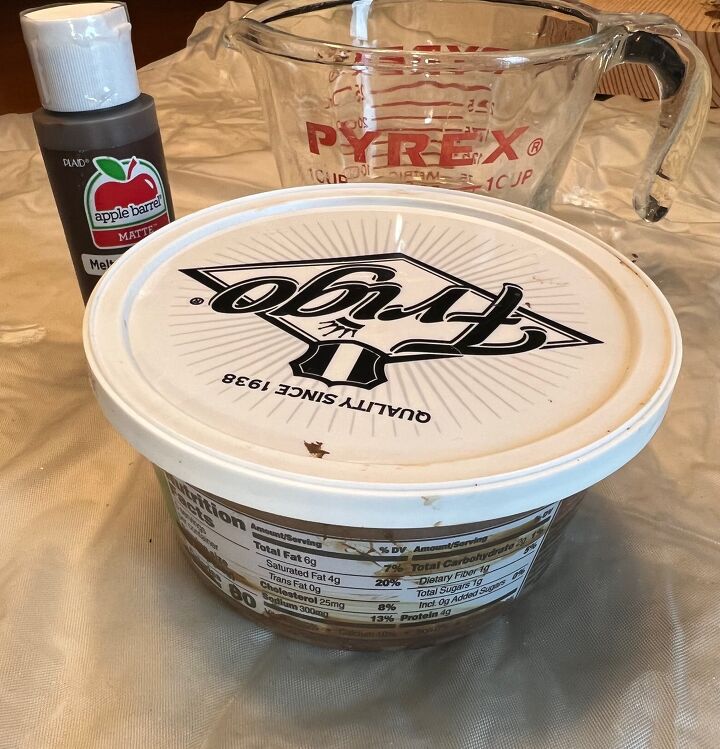
Afterward, you can store any extra "stain" in a covered container for other projects.
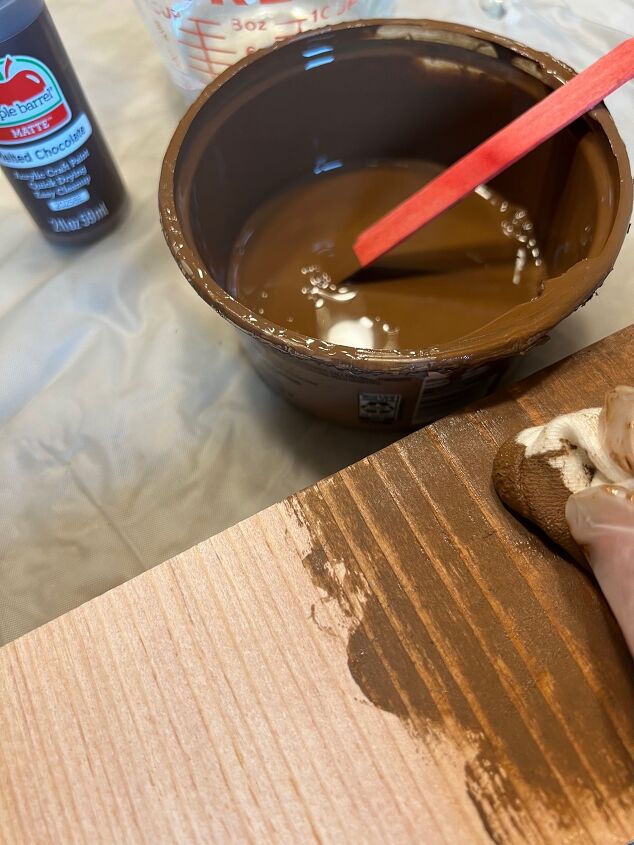
Get some gloves and a cloth or brush and apply the paint/water mix to the wood just like you would wood stain: apply, then wipe. You can always apply another coat if you want to darken the color. The color is absorbed just like real wood stain, so no worries about chipping or peeling.
 Let dry. This is the first part of what I really like because I am not always so patient in regard to dry time. It dries REALLY fast, especially in favorable temperature and humidity conditions.
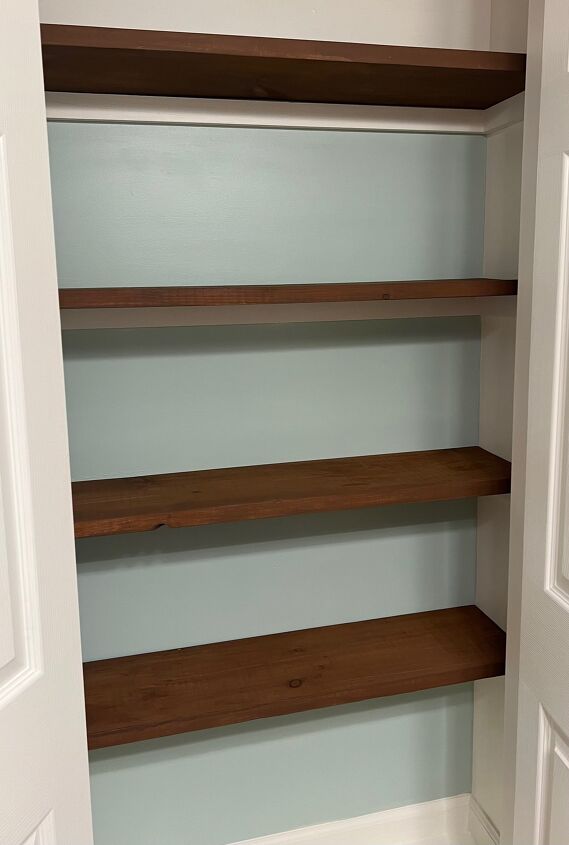
These shelves were ready to pop back into the closet in less than 2 hours, long before the paint used (Behr Marquee in Frosted Sage / Behr in Elegant White) on the closet interior was dry.
I had the entire project complete, including emptying the closet and then putting everything back in, in 1 afternoon.
 The second thing I really like about this method is that there is NO odor. Having to put these shelves into a closed space made that even more important, as things that would absorb those odors, like towels, will be stored here. My next project will be the shelves in my pantry, so the benefit of no odor there is obvious.
I have been asked about using a top coat like poly. For sure this can be applied over this wash. I chose not to because 1) there could be an odor associated with that product and 2) I really did not feel it was necessary on shelves inside a bathroom closet.
Also, I usually peruse the browns and grays because those are the colors most commonly used in actual wood stain, but this little work-around can be used with ANY color!
 The only thing I had to buy for this project was the craft paint. I bought 3 bottles but only used 2, so this project cost me WELL UNDER $2, and I achieved the look I was going for.
 So, a quick recap on the benefits of this wood stain “hack”:
- Quick- in execution and dry time
- Cheap- what more needs to be said about that?
- Versatile- can be used with ANY color paint and the color adjusted to your liking
- Excellent results - no chipping or peeling
Off to the next project....those pantry shelves!!!
Resources for this project:
See all materials


Comments
Join the conversation
-
Yes, I have used this method for all kinds of colors over the years as well. I love how quick it dries and, like you, like to see the grain show through. 🙂
-
What a great idea! A fast, easy, inexpensive upgrade. What else could I ask for?
Thank you


Frequently asked questions
Have a question about this project?
And apparently the color won't rub off on your towels or clothes?
Isn’t this more or less like “white washing?”
Does this only work with acrylic craft paint or would it work with regular wall paint? I’d like to “stain” a wooden credenza to match my dining room wall.