


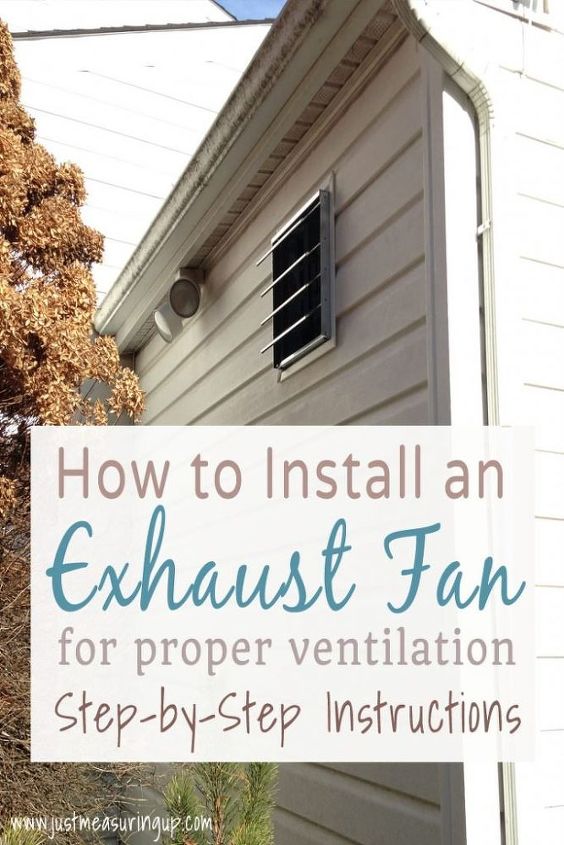
Easy Way to Vent Your Garage

by
Eileen
4 Materials
$120
4 Hours
Medium
If you spend a lot of time in your garage working on DIY projects, being able to vent fumes, sawdust and even hot air is almost a necessity. Check out how you can easily cut a hole in your garage wall, weatherproof the outside and install a ventilation fan.
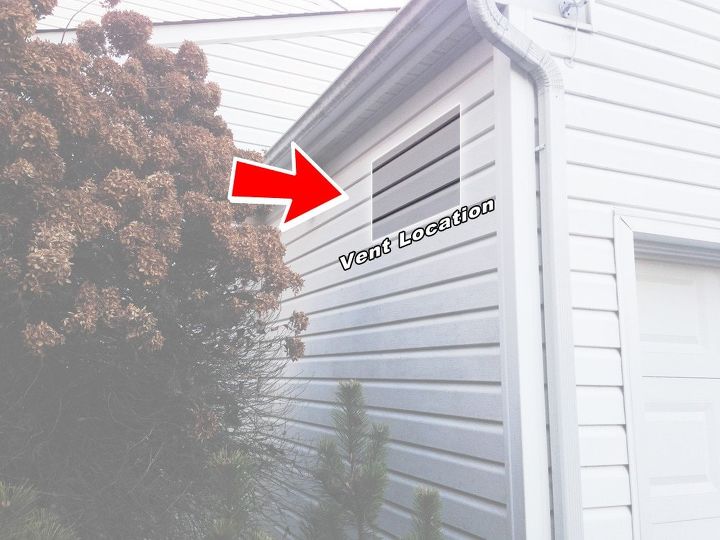
First you have to find an ideal location for your vent. My garage had a lot of storage shelves high up that would interfere with the vent, but I was able to find a little nook in the corner.
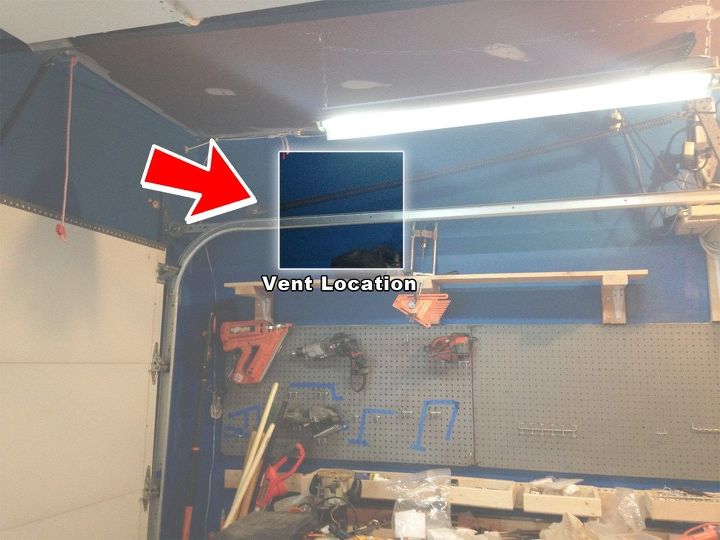
Also make sure you’re ok with what a vent would look like from outside.
Once you‘re happy with the location, double check the hole specifications for your exhaust fan and cut a hole in your drywall. Use a stud finder to position your hole between two studs. A jab saw works well for drywall cutting, but you can also use a reciprocating saw for faster results.
A handy tip to remember is that if your vent project is not getting done that same day, then leave the siding intact. Only cut into it when you are ready to insert the fan.
Once the hole is cut, plug the top and bottom with some 2x4 (or else you’ll end up venting inside the wall). I used some pocket hole screws to secure the 2x4s to wall studs.
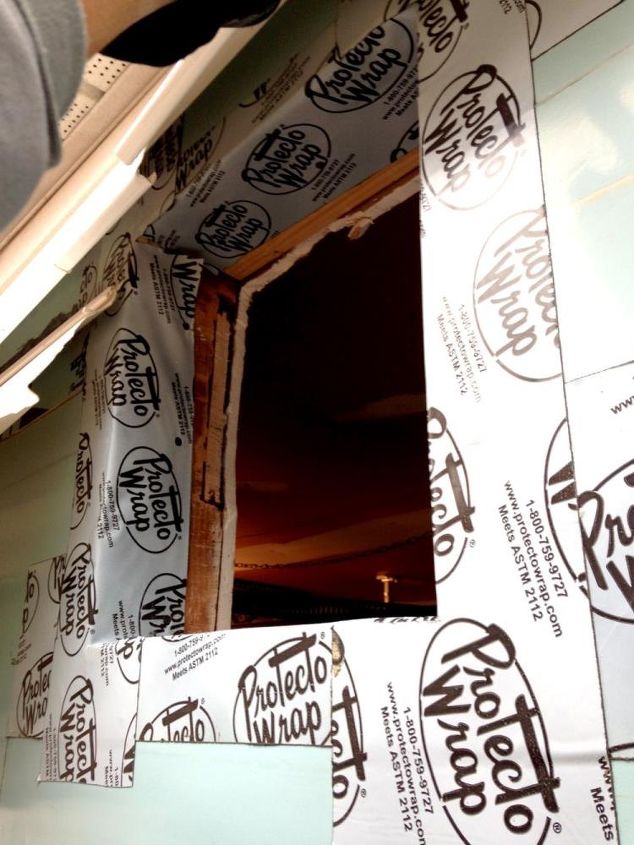
When you‘re ready to work on the outside, use a saw to cut through any siding. To prep the outside, you’ll need to temporarily remove some siding and apply weatherproofing tape around the perimeter of the hole. If you have vinyl siding, you can purchase a cheap J hook tool to help with the siding removal.

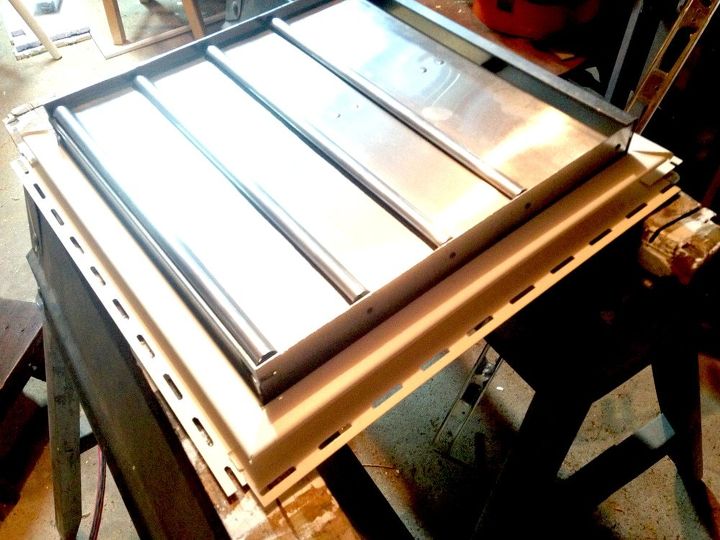
The final step to weatherproofing is J channel. Make a frame with some J channel to closely wrap the edge of your vent
Secure the outside vent to the wall studs. Then attach the J channel frame on top of the vent. Finally, reattach your siding and insert the cut ends of the siding inside the J channel.
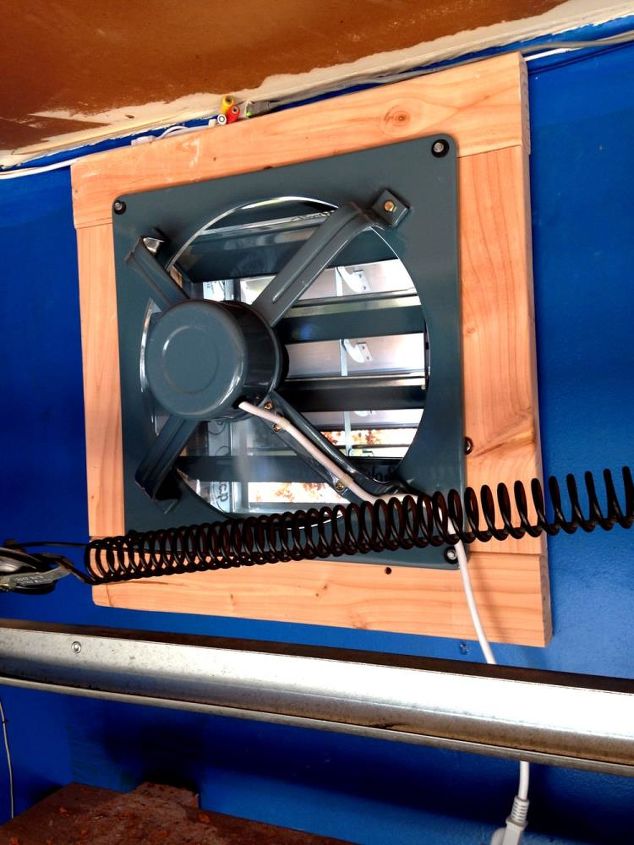
Once the outside is done, attach a fan to the interior and you’re done. Ideally the fan would rest directly on the drywall (secured into wall studs). For my installation, I had to make a 2x4 spacer frame because my hole was a little too snug for my fan and warping interfered with the louvre action.
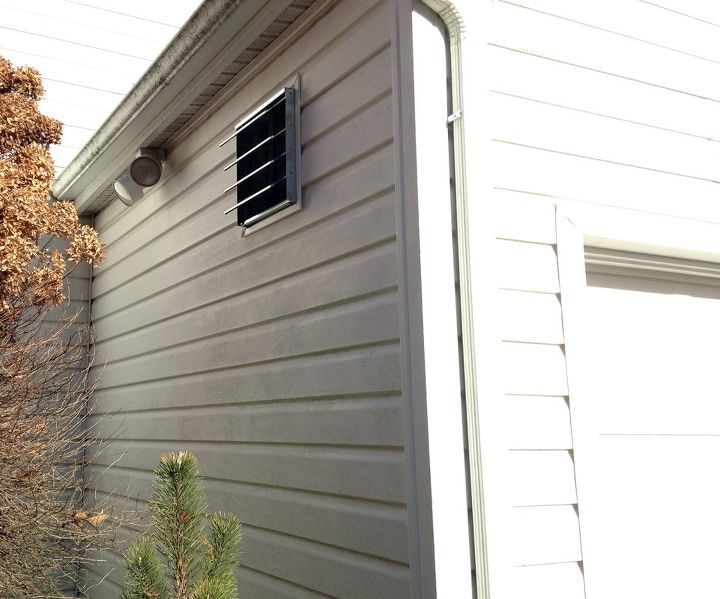
Vent installation is complete! I highly recommend plugging the fan into a timer switch. That way you can exhaust your garage for x amount of hours and have the fan shut off automatically.


Any price and availability information displayed on [relevant Amazon Site(s), as applicable] at the time of purchase will apply to the purchase of this product.
Hometalk may collect a small share of sales from the links on this page.More info
Want more details about this and other DIY projects? Check out my blog post!
Comments
Join the conversation
2 comments
-
What a great solution. Better than trying to vent through the roof and prevent possible roof leaks. Great share and a great job!
-
I read your post. This is really a great solution to vent garage. When anyone builds an attached garage, it is important to think about the vent of the area. Ventilation of garage is vital for two reasons : first, the chemicals or fumes that comes out from the cars and power tools that you use needs to stay away from the house and the second thing is that the heat build up into the garage will make your house more hot in summer. So garage ventilation is very important.


Frequently asked questions
Have a question about this project?