


No-sew, Water Resistant Draft Protector

When you’ve had it with forgetting to move the draft protector and then having to sweep up the leaves and water blowing through the 1-inch gap under your front door, this is what you do.
It's Winter in the Southern hemisphere and South African houses are notoriously badly insulated. Since it is cold for such a short time in most parts of the country, our way of dealing with Winter is to put on our fleecy pyjamas, sit under blankets and complain about how cold it is. We just put up with holes in our houses!
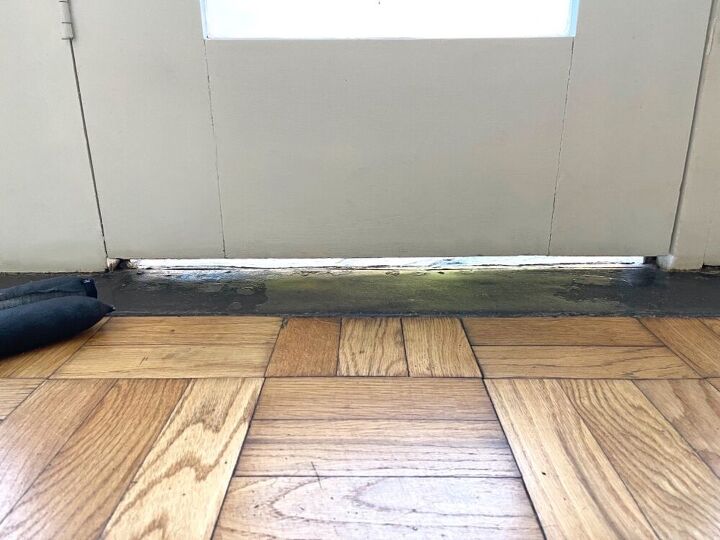
The picture above is of my 60 year old front door, a bit worn but still going strong. I can live with the cold coming through the 1-inch gap but not the leaves or the driving rain running onto the oak parquet.
The current draft excluder is a bit of a joke. Firstly because we always forget to put it in place and secondly because it is too short for the door. You would think that the little gap on the side wouldn't make a difference but it does. The amount of leaves that manage to find their way through that gap is astonishing. This morning I decided, no more! So I made a custom draft excluder that sticks to the door. Here’s how:

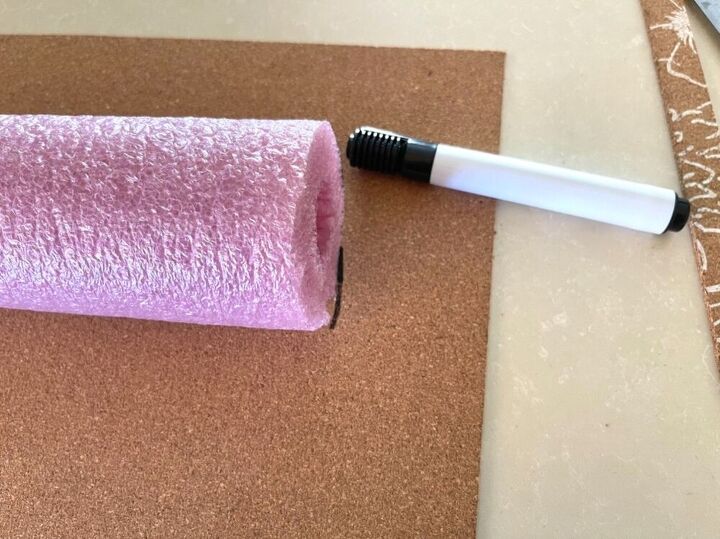
Cut a pool noodle to the door
I measured a pool noodle the width of the door
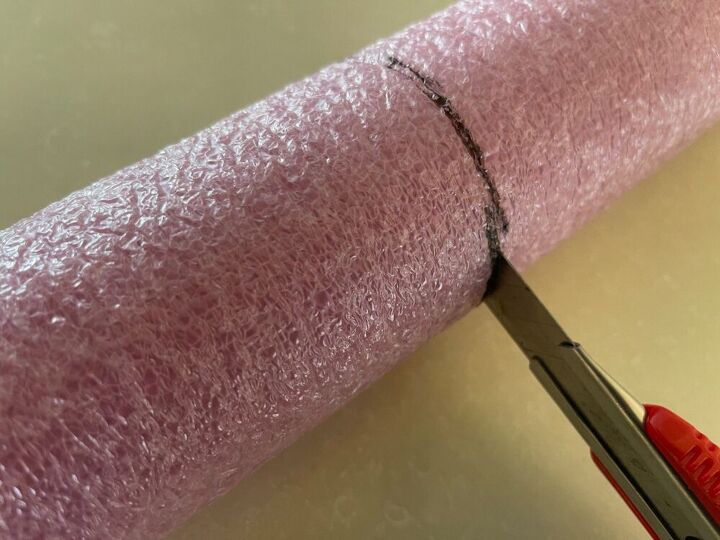
And cut it with a boxcutter.
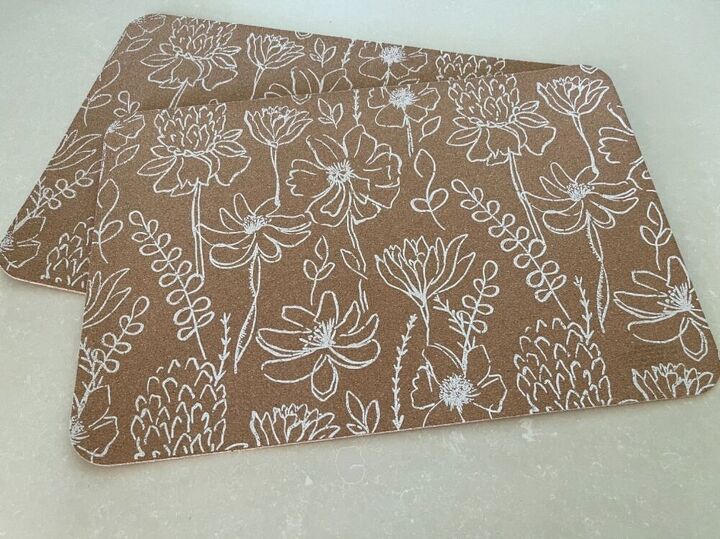
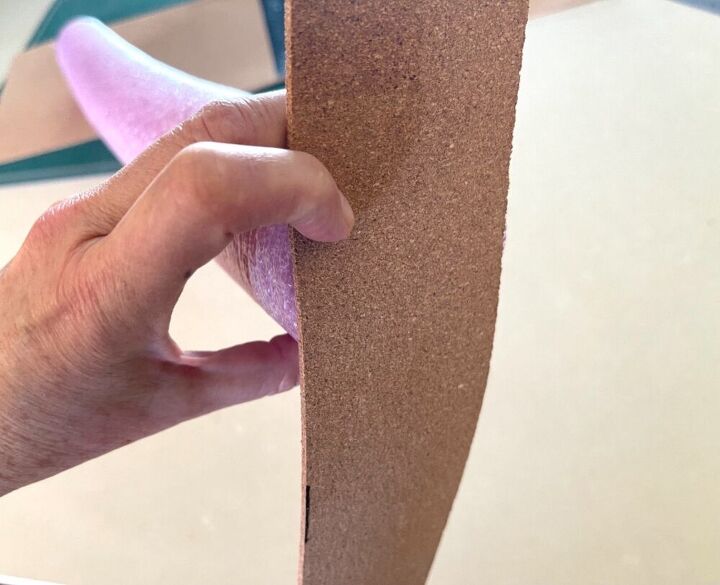
Stick two cork place mats together
I had gorgeous cork place mats that I thought would be a good covering. I've had fabric draft excluders before and they really do get grotty. The cork is a sensible colour and doesn't need sewing. A standard place mat should usually be broad enough to wrap around a pool noodle but not long enough, so you have to use at least two. Otherwise you can just use a sheet of cork or any other plastic mat, even leather. And remember, you can paint or stamp the cork with designs.
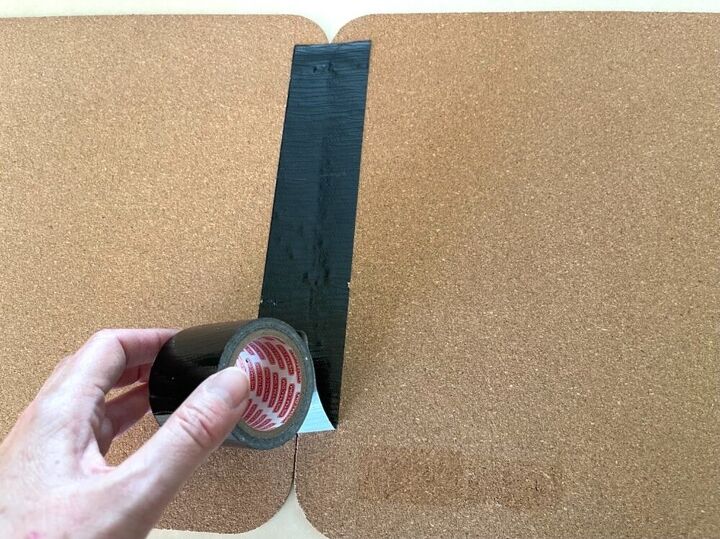
Laying them side by side horizontally, I stuck them together on the reverse with two strips of tape over each other.
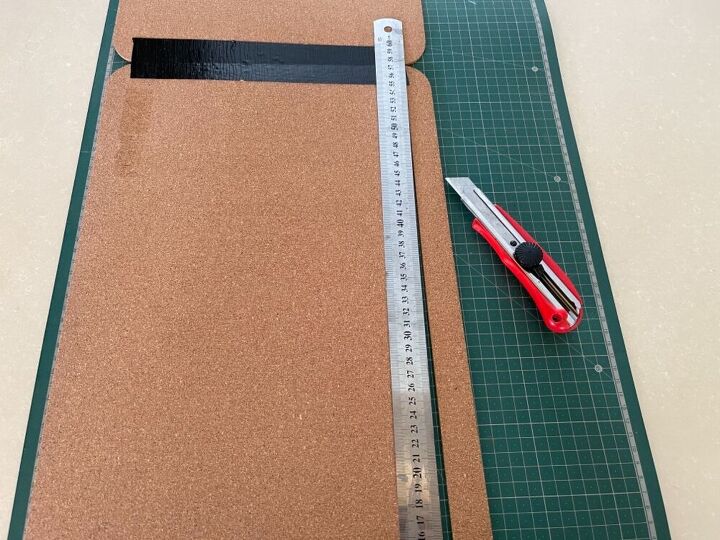
Cut the edges straight and to size
Next, I cut the rounded edges away until I was left with a long rectangle.
Once I had the rectangle, I had to get an idea of the circumference of the noodle and how the place mat would fit around it. I wasn’t sure whether I should overlap the ends or not and then decided not to cut them flush. The thickness of the cork may have bearing on this decision because it is more difficult to roll thick cork and stick it in place and overlapping could either make things harder or easier. Overlapping just seemed to leave less room for error when it came to measuring and cutting.
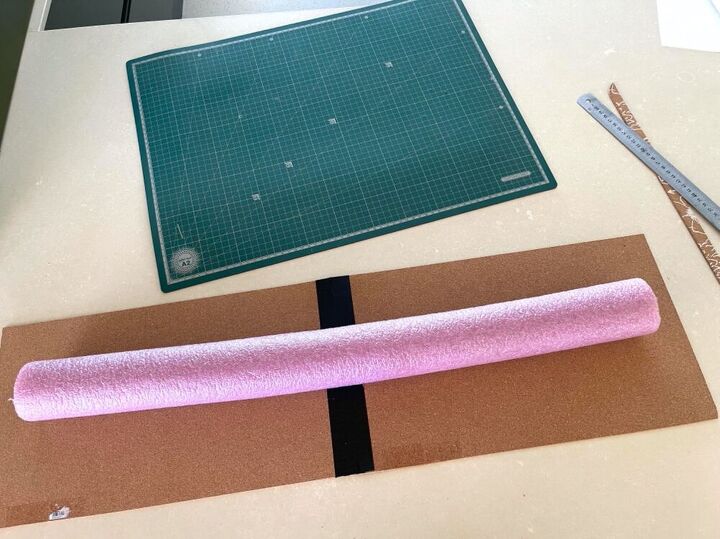
Measure out the length of the pool noodle
Lay the pool noodle in such a way that the join between the two placements is right in the center. If you were using a solid piece of cork, this wouldn't be necessary but in this case it was a bit like a wallpaper seam.
Mark the length of the noodle on either side onto the back of the cork and cut to size.
Make the round sides
After cutting the rectangle I had just, just enough cork left to cut two disks for the sides.
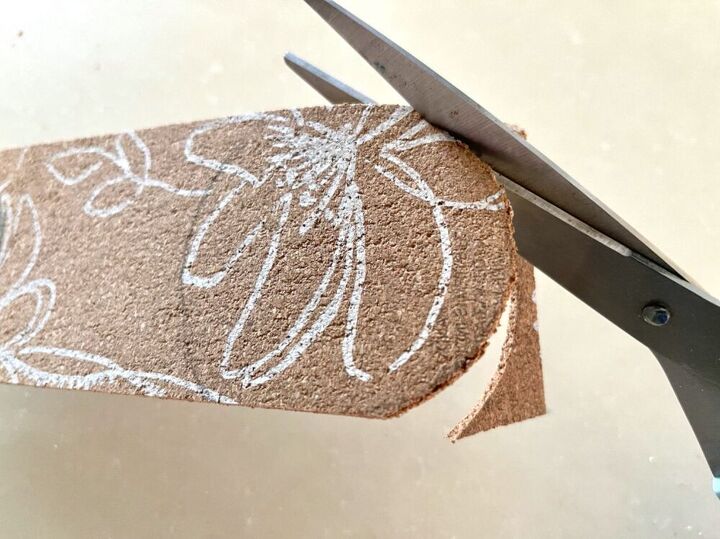
Trace two disks on the leftover cork with a marker or pencil. The floral design on these mats was a bit busy, so I decided to have the plain side facing outwards. The cork is quite brittle, work gently and don’t tug at it too much otherwise it will crack or chunks will fall off. The disks were stuck to the ends with contact adhesive, apparently pool noodles are made of polyethylene and not polystyrene, which means they won't melt away if you use the wrong glue.
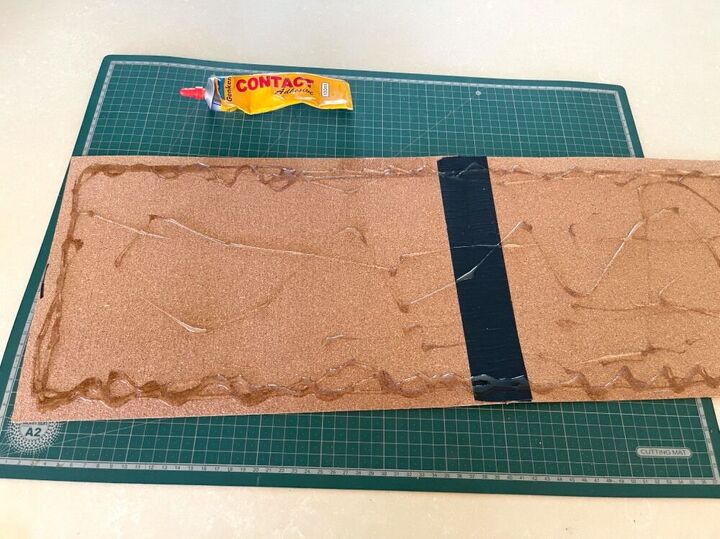
Cover the noodle
Since the place mat covering was cut to size, it could be stuck. The problem with contact adhesive is that it takes a while to dry, so I had someone help me to wrap masking tape around it at intervals until the glue dried.
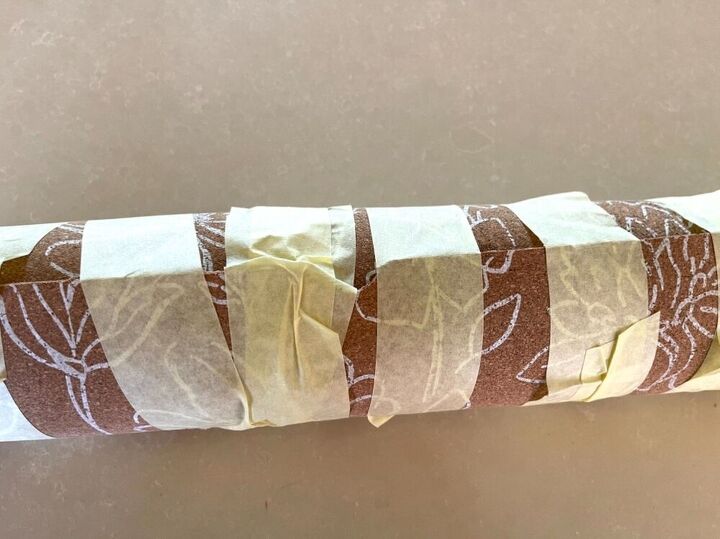
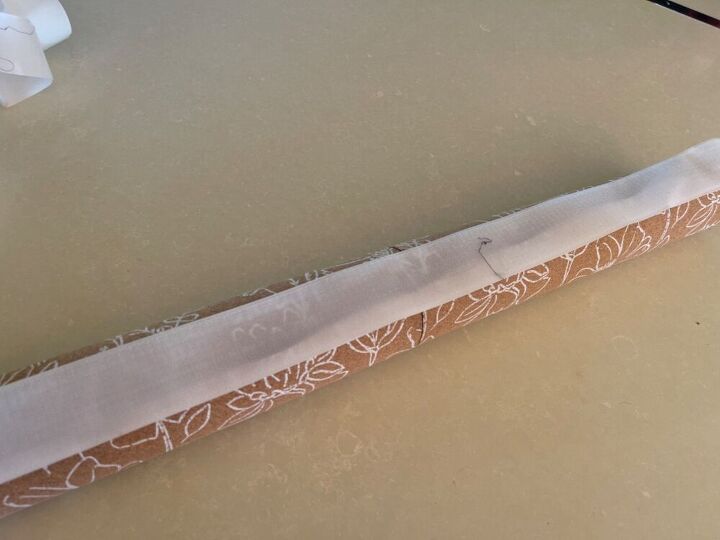
Once everything is dry, remove the tape.

Stick Velcro to the noodle
This part required a bit of a redo. Initially I used very thick Velcro. The problem with this is that the Velcro is very visible once the excluder is hanging from the door and you are viewing it from above. This, of course, I only discovered right at the end. Rather use a thinner strip.
As it was, I had already stuck a thick burry side to the excluder with a combination of hot glue and contact adhesive and there was no way of pulling it off. Fortunately, I could still remove the soft side that was stuck to the door and replace it with a thinner strip.
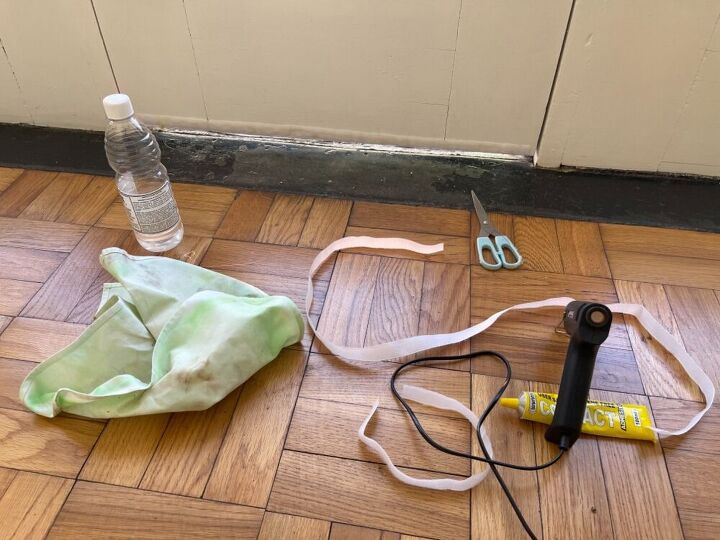
Stick the other side to the door
Once again using a combination of hot glue and contact adhesive, I stuck the thinner fuzzy side of the Velcro to the door. Also pictured is the benzine and cloth I used to take off my first attempt.
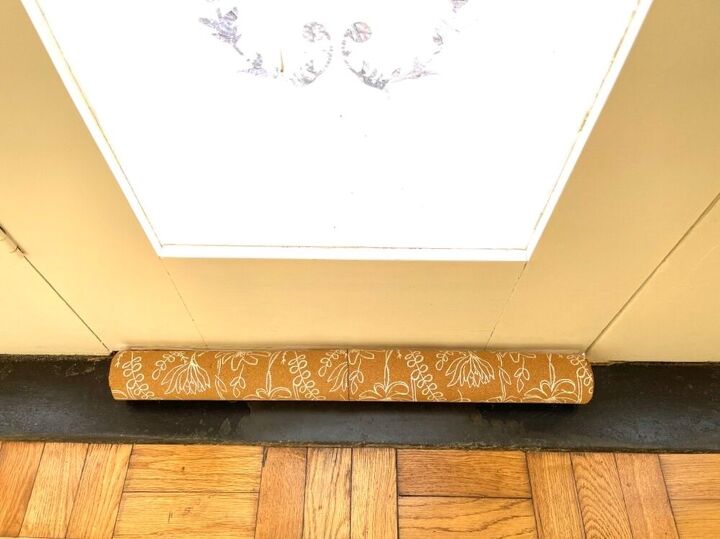
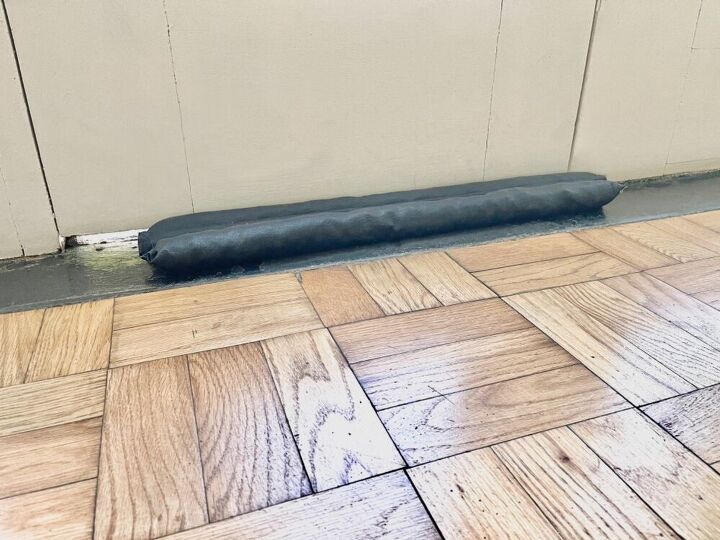
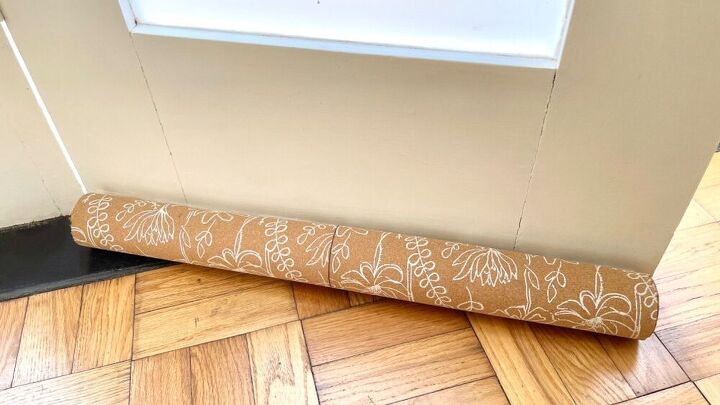
Once everything is dry, the draft protector can be stuck to the strip on the door.
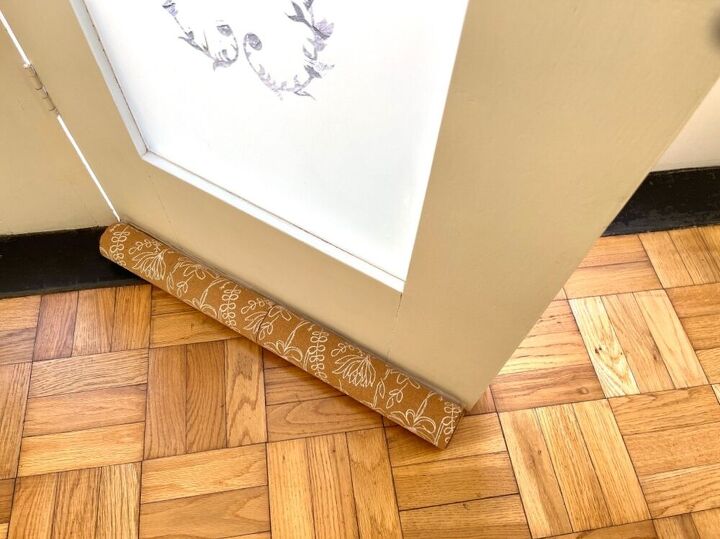
Unlike the old one, it opens with the door and can be readjusted if necessary.
Resources for this project:
See all materials


Comments
Join the conversation
-
Fantastic idea! We have weatherstripping that still allows a draft to come in so we use towels in front of the door. This is a much better idea!!
-
wonderful idea for draft protection. Going to use your idea under kitchen cabinets. Thank you!!


Frequently asked questions
Have a question about this project?
Won't the place mats eventually attract the moisture as they are cork? will they turn mouldy inside where you don't see??
Why not buy a weatherstrip you screw into the bottom of the door, especially with the huge gap you have.
Nice idea. When you take off the door is there a residue ? Also cork mats are very expensive what else do u suggest
I was confused to see the design on the outside, I thought you were going to put the plain side on the outside???