


How to Replace an Oven Heating Element (and When to Do It)

By Stacey Kelleher
Whether you’re popping in a frozen pizza or you’re baking a birthday cake, it can get infuriating if your food doesn’t cook all the way through in the oven. Luckily, if your electric oven is not heating food evenly or not producing any heat at all, that doesn't mean the whole appliance is done for. It may just be the heating element that needs to be replaced.
In this guide, we’ll teach you how to test the bake or broil element, remove a burned out element, and install a new one for safe and efficient baking and cooking. Before you know it, you'll be back to baking that birthday cake worry-free.
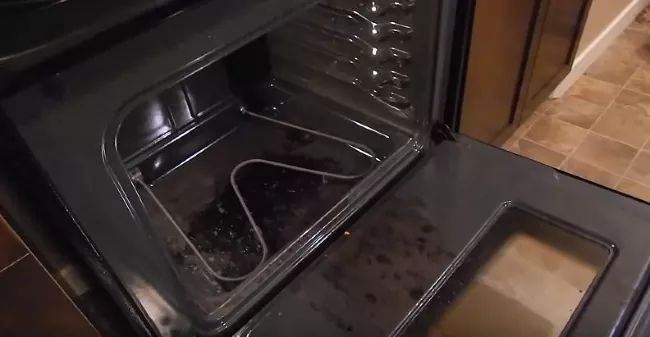
Photo via Bethany F
What is an Oven Heating Element and Where Can I Find it?
A heating element is the part of the oven that produces heat to warm and cook food. As electric current passes through the element, it heats up and glows bright orange—if it’s working properly.
Most electric ovens have two different heating elements, one at the bottom for baking and one at the top for broiling food. Some ovens also have a third convection element that is located behind the rear panel at the back of the oven. Check your owner’s manual if you’re unsure whether or not your oven contains a convection element.
When to Replace an Oven Heating Element
You’ll likely notice when it’s time to replace your oven’s heating element. Here are the telltale signs that you have a broken or worn-out heating element:
- Food is only partially cooking, or not cooking at all.
- The heating element is not producing any heat.
- The heating element doesn’t glow bright orange when the oven is in use.
- There are obvious signs of damage to the heating element including cracks, burns, or blistering.
How to Determine Which Oven Heating Element to Buy
Heating elements for electric ovens are widely available online and at home appliance stores. They are fairly inexpensive, costing on average from $25-$100 depending upon your oven make and model. Have your appliance's model number on hand when searching for an electric oven element replacement to make sure you get the right one for your appliance.
If you don’t have the manual that came with your appliance, you can usually find the model number on a sticker located on the top, bottom, or sides of the door jamb. In some ovens, the sticker is located on the metal frame where the bottom drawer opens or under one of the electric burners on the cooktop.
How to Replace an Oven Heating Element
Whether you are replacing the baking heating element or the element for the broiler, the process is the same. The only difference is the location of the heating coil (top or bottom of the oven). Here’s how to do it, step by step.
Safety Warning
Be sure that the oven has completely cooled and that it is unplugged and its power is shut off before attempting to remove the heating element. Oven heating elements can reach a scorching 1112 degrees Fahrenheit, so you don't want to play around here.
Tools and Materials Needed:
- Nut driver
- Envelope or small plastic bag to collect screws
- Needle-nose pliers
- Philips-head screwdriver
- Cooker element replacement
- Safety work gloves
Step 1: Power Down the Oven
Start by turning all of the controls on the oven to OFF and unplugging the appliance. Go to your main circuit breaker and turn off the switch that corresponds to your oven, or the whole kitchen if necessary. Use caution anytime you are working with electrical appliances!
Step 2: Empty the Oven
Remove any pots and pans from the oven along with the oven racks so you can easily access the heating element.
How to Clean Oven Racks
Step 3: Remove the Panel Concealing the Heating Element
If you don’t see the heating element, it’s probably covered by a flat, metal panel. Many panels have a small grooved lip on the edge so you can pull the panel up and out.
If you don’t see that groove, you can usually push down on one corner of the panel and lift up on the opposite corner to remove the panel. Some panels are secured with tiny screws that must be unthreaded before you can lift them out.
Step 4: Remove the Old Heating Element
Now it’s time to remove the damaged or defective heating element. Put on your safety gloves before you begin. Occasionally, older heating elements will shatter because of continued exposure to extreme temps. If that happens, use an old rag or broom to sweep up the pieces.
Most elements have several metal clips that are held in place with several screws. After you unthread these screws, put them aside in a small plastic bag so you don’t lose them. Once you remove the metal clips, you can gently pull the heating element away from the oven wall just enough to remove the wires that connect it. Use needle-nosed pliers for help with this step.
Pay attention to how the wires are configured so you can reconnect them the same way. Do not let the wires fall back behind the oven, as you’ll need them to connect the new element.
Step 5: Install the New Heating Element
Take the new heating element out of the package. Reconnect the wires to the new element the same way they were previously connected. Set the heating element in place and reconnect the metal clips with the screws you’ve set aside.
If you have a cover panel, wait to replace it until you’ve tested the new element.
Step 6: Test the New Heating Element
Now you can restore power to the oven. Plug it in and turn the circuit breaker back on. Turn on the oven with the temperature set to “High.” If the new element is functioning properly, your oven will reach the desired temperature and the element will have an even, bright orange or red glow.
You may notice some smoke coming from the new element, which happens as the protective coating on the element burns off. You don’t need to be concerned about it. If everything looks good and your oven is heating up, you can replace the element cover panel and your oven racks.
Now you’re ready to cook, bake, and reheat!
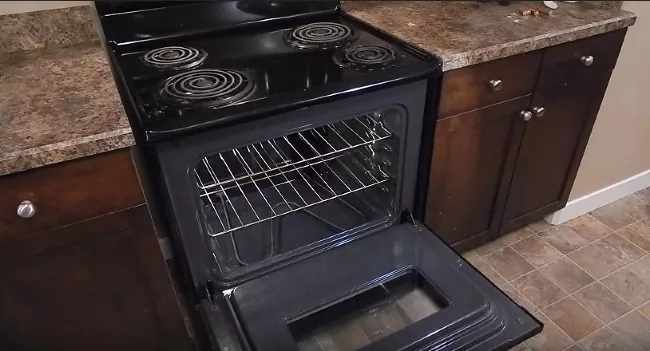
Photo via Bethany F
Tips and Hacks for Difficult Cases
If the new heating element doesn’t have a bright orange glow, your oven is not reaching the proper temperature, or your food isn’t cooking properly, the problem may be more complex. Continuous thick smoke is another sign that something else is wrong or has caught fire. In these cases, it’s best to call a technician to consult with your oven repair.
An oven heating element replacement may be one of the quickest and easiest home repairs you’ll undertake. Just remember to cut the power to your appliance and wear protective gloves in case the element breaks. In less than an hour, you can have an underperforming oven working as good as new!
Have you replaced the heating element in your stove? Share your tips below!


Frequently asked questions
Have a question about this project?