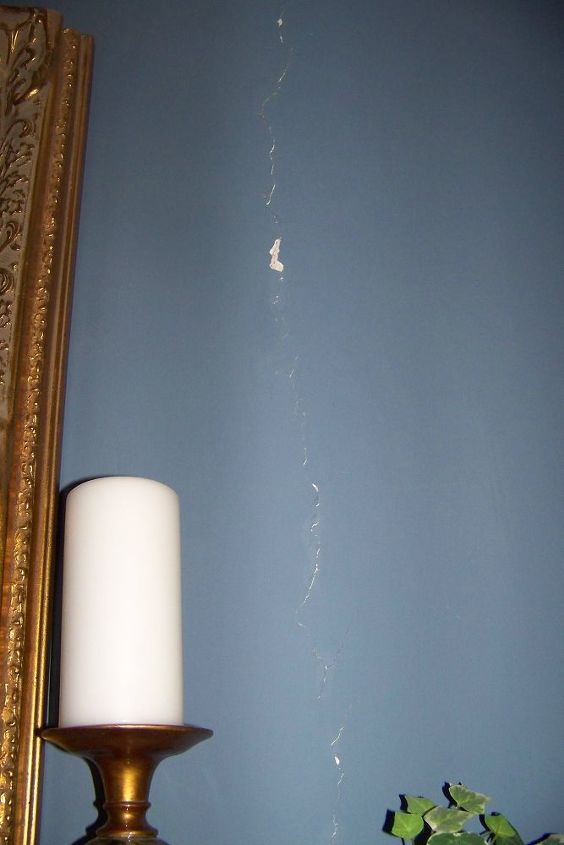
How do I patch a plaster wall?
by
Salliejoy
+10
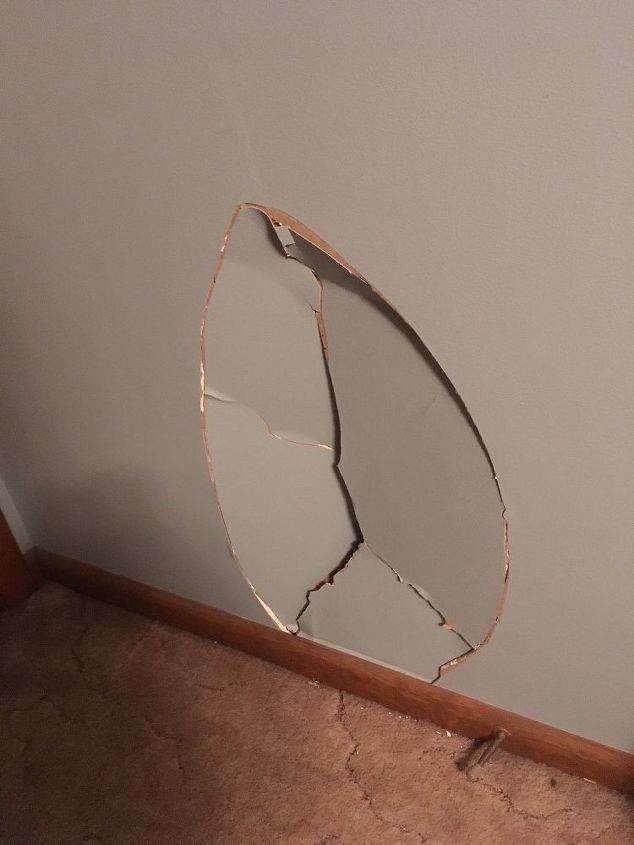
the house was built in 1942 and this is next to a chimney that has shifted a bit.


Try this!
https://www.thisoldhouse.com/how-to/how-to-repair-plaster-walls
https://www.thisoldhouse.com/how-to/how-to-fix-damaged-plaster
I would cut out the crack slightly and then fill the crack with sheetrock joint compound. Smooth it out and repaint after dry.
I have a similar spot, and just used mulitiple applications of the "fluffy"sheet rock compound to try to smooth the surface. then prime and paint. People who do the taping and sheet rocking professionally are really really good at this, ( I am terrible at it). When the color is all the same it is much less noticeable.
DAP makes a light weight patch which is easy to work with than joint compound abd dries in minutes, shoulld work fine.
,
Kits for patching dry wall are available at Lowes or Home Depot-contains everything needed to patch cracks or a hole in your dry wall-easy to use even for a gal like me.
There is a material called confill which is cementious just like plaster. It might be easier to work with. It has the same finish as plaster without the top coat. Much easier material to work with. Make sure you fan outwards quite a bit (like 7-8” on both sides of the crack) so you don’t end up with a visible bulge. Before you start, take the rough edges of the crack off as it will be easier to fill these with confill rather than trying to cover them by layering confill on. I used to use drywall patch stuff but since I’ve become a professional builder, I’ve learnt that there are other products on the market that work better. You may have to slowly shave off (top to bottom motion) until you end up with a smooth finish. The other thing is, drywall patch will sometimes crack again but confill will not. It comes dry in a bag & you mix it with water. It will take you three to four days to fill that crack, wait until it is dry & then sand it, apply more confill, sand it & repeat until there is no crack visible & no bulge. Good luck!
If you don't use either drywall tape or the spray for cracks, it will crack again. This is just part of older homes settling. Dig out your crack, wet it well and apply either joint compound or the DAP product (I haven't tried that). Wet your drywall tape and apply to the wet compound. Using a large putty knife to push on the joint tape so it gets pressed into the joint compound. Once that is done, apply a thin coat of compound over the tape. Allow to dry for 24 to 48 hours. Sponge with a damp sponge to smooth off edges. Sand if necessary.
https://www.youtube.com/results?search_query=how+to+patch+a+plaster+wall
Some good advice here for you. One thing to be sure to do is to prime paint before applying your finish coat. The primer seals so that your final coat covers better.
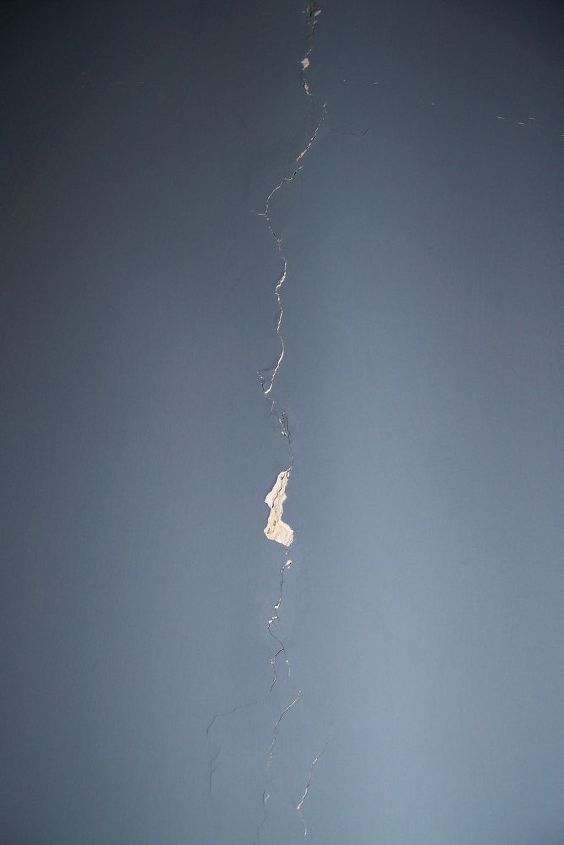
If you look at that 2nd picture you notice this is not atall like a normal super-simple crack. It is yet simple and the approach is similar when you know what you are doing, but...
This is not 1 crack.
And it certainly isn't in Drywall neither.
Spackle is fine for 1 crack.
This is several cracks by branching and weaving.
If you fix it wrong, you will have 7 cracks rather than 4,
If you fix that wrong you sill have 18 cracks rather than 7.
Believe or not, That Branching crack not tended can branch all the way down to 3 Nails in the Base Board and you may half-rightedly say: 'AHA! 3 pressures I could have pulled the 3 nails' but pulling nails is not resolve neither.
You could cut the entire out but that is overkill.
So you ask: Why is it cracking so weird?
A. The Weaving is due to inconsistency of pressure.
That kind of inconsistency is usually caused by an old furnace that is Vibrating and/or a loose door lock on say a Coal Shandy or even a Pipe Jiggling underneath the baseboard needs a Brace. The vibration needs fix too.
B. The branching is always due to pressure in different directions, namely: the shift of the Chimney has created an Oppositional Pull that yet Conflicts the Push and the Pressures that originally placed when the home builders installed the plasterboard.
Thus because these are several dynamics you need to
intervene in each of those dynamics just like you would do if a Tree was Leaning on your Head...
What would you do with a tree leaning on your head?
Keep the Tree and Request Anacin? Nooooo.
You would relieve the pressure on your head not cut it to Fall on your head but Away from your head.
You would divide it, at the Trunk right above the Roots to seperate the Bottom from the top.
Same here.
Thus...you do not have 1 crack.
For branching cracks, you can remove the entire as Jim-Whoever said, but: That's alot of work and they certainly don't make plasterboard like they used to in the 1940s.
Finding a 4.2/7.8 inch plasterboard is not easy.
You think that's hard, try drilling 5" Gypsum to install a TV Mount...
Then you gotta sometimes place index cards behind the thin new one to get a Same flush by depth, etc etc etc.
Nuisances exist of Replace rather than Surgically Repair.
A horse that needs a horseshoe gets a horseshoe rather than put to pasture or shot.
Of course you can keep it fun, and act like You are on M.A.S.H. with a Nurse passing the Tools...
So...you need a facemask, eyewear and a drill, preferably with a 1/2 inch or 3/4 inch Masonry bit and up to a 2 inch Hole Saw rather than say: a chisel of scalpel.
And you need go about it Slowly at an angle Opposite the crack.
Up close you will see the angle of the crack.
You need to seperate the Dynamics of the Branch from the Weave, like amputation, not Repeat fixing over and over again, with a Half-Gallon of Putty on the Soldier over 12 Years and 432 Visits...
Do you toss a Brick wall that needs mortar? No.
Once you drill a Hole to separate Branching Dynamics, you should see a tiny bit of pressure and relief, and that is great, because you do want to relieve that pressure.
Even if you needed a 3 inch hole at the area branching first occurs, you yet want to relieve that pressure.
You won't need a 3 inch hole.
You also drill at the stems, to avoid those branching too.
Every split end needs a hole.
You patch All New Holes Last after the other repairs set.
You Sand, Clean, Patch and Smooth the Branch First.
Sand, Patch and Smooth the weave next.
You let those set long before you start connecting that dynamic opposition again, as you fill in the biggest hole last.
In Summary
Prognosis is good. It will live. Take your time.
Does it take less time to cut the plaster out? Yes. And any Contractor who is paid $250 an Hour is Going to do the fastest route.
But you do not get same durability by those methods, as your problem is not really the plaster bad, your problem is that the Forces and Vibrations are in opposition to that plaster intact.
A tug of war is ongoing.
Best way to end a tug of war is? Split the rope.
That is why your wall split.
You do not take an old horse that needs to pee to the waterhole for extra drinks, you let him pee first.
Isolating away from those forces would be necessary even with Brand New Plaster in this circumstance of Tug of War.
Atop that is an impact of the Vibrations that are the Actual Root of the weaving problem.
Problem goes away by detaching the weave from the branching by drilling holes.
If you had alot of stems, I would say: Cut it out, too.
As you get to it early enough, you do not need to cut it out: Branching further is prevented by: Holes properly placed at the split ends.
Use a Guide Board, with a Hole, so when you drill this slowly, the guide board secures against flaking and breaking or worsening by splitting.
Patch with a Flexible Rubberlike Putty like: 'Painter's Helper' or Dap, you can smooth either with a Playing Card or anything thin and sturdy.
If you do not use a rubberlike compound you end up creating something that dries hard and defeats the entire purpose as that hardness transfers the Vibration rather than resists and absorbs that vibration.
Forces are reduced by That rubberlike flexibility absorbs tiny shocks--Just like the shocks in your car protect the chassis, same here, without the springs.
And you should not have the same problem again in that same area for a decade or longer because you Prevent the Branch from growing further by: holes disconnect all Branches and any potential stems from the plasterboard are provided an absorber and the weave detaches from the origin of Vibration, likely in the basement.
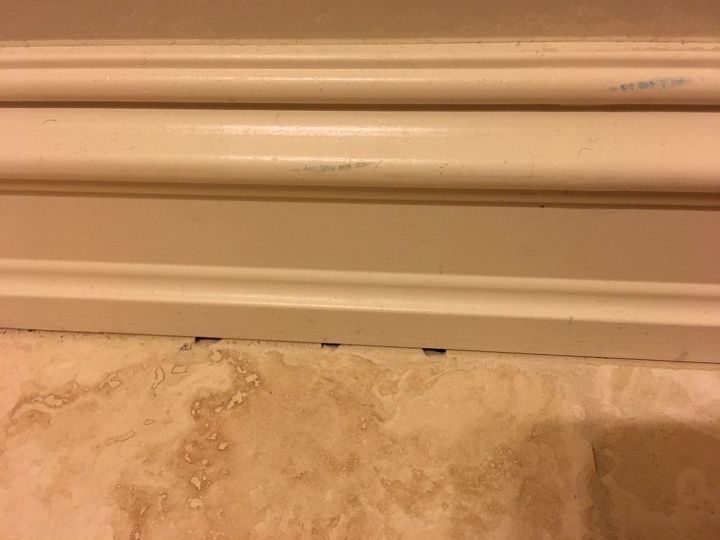
I live in KS and have walls just like those, I tried DAP compound and it worked for a week then started breaking off in chunks and that would be right above/below the top board border (can't think of name right now...LOL).
We had an earthquake during the summer that affected my driveway and the house where it moved walls in the house quite a bit, no loot to major fix (have a hard enough time to feed may daughters and myself.
Am going to try a concrete compound to see if that is better and never thought of removing a bit then doing the patch. Thanks for that hint. BTW this house was born in 1865 (according to the "insulation" we found in the walls when we remodeled the front rooms in 1975. Being 66 myself I feel as old as the house.