


DIY Hi-Fi Speakers

“Huh, the built-in speakers on my TV really aren’t that good…”. Seems like an innocent enough thought, right? Well, I tugged at that loose thread of a thought until I reached its logical conclusion: I’m going to have to build my own custom speakers with a solid walnut housing, and spun copper drivers.
Oh boy, how did I get there from the simple observation that my TV speakers were a little sub-par? It's a long story, let me show you how I made them and attempt to explain my reasoning...
BUT FIRST, I have to plug my social media. I’m sorry. I have to do it. It’ll be quick and painless, I promise. If you like DIY and woodworking, check out my Instagram page! I post all of my projects there along with all the tips and tricks I learn along the way! You can find me @zacbuilds (direct link: https://www.instagram.com/zacbuilds/ )
Ok, that’s it, now back to your regularly scheduled HomeTalk post.
The first step in this project was ordering all the pieces I needed.
Because I don't know very much about speaker components I decided to build a pre-made DIY speaker kit. These are available from a number of different retailers. I choose the "Overnight Sensation" DIY kit because of it's awesome styling.It’s a pretty popular kit and there's a lot of info online about it.
Included in the kit was 2 woofers, 2 tweeters, a plywood housing and all of the various internal components you need.
Instead of using the included plywood housing I opted to make my own.
You might be forgiven for thinking the speakers was made from a single piece of walnut with a piece of ash inlaid into it, but really, it’s a bunch of different strips glued together.
So to start this project I began by ripping a bunch of walnut into 2″ wide, and 5″ wide, pieces. When I buy my lumber comes in random widths and lengths so I choose 2″ and 5″ because it optimized the yield on the particular pieces I bought. Walnut is expensive, I didnt want to waste anything I didn’t have to!
The wider strips were used for the subwoofer and the thinner strips were used for the speakers.
I also ripped two 1/2″ wide strips of ash to use as accent strips.
It’s time to start “the glue-up”! I kicked things off by applying a thick bead of carpenters glue to my wood strips.
I figured that the easiest way to make the housing for the speakers would be to make a single “sheet” of wood by gluing all of my strips together and then cutting that up into individual components.
I rolled each piece of wood onto it’s flat and then clamped them all together. I used big long bar clamps to clamp across the width of all the pieces and then used smaller F-clamps to clamp the whole sheet down to my table. Clamping everything down to the table helps to prevent warping and twisting. That way my sheets are nice and sheet-like after the glue dries.
Pictured here are the wider strips that I used for the subwoofer housing, but the process was the exact same for the speaker housings.
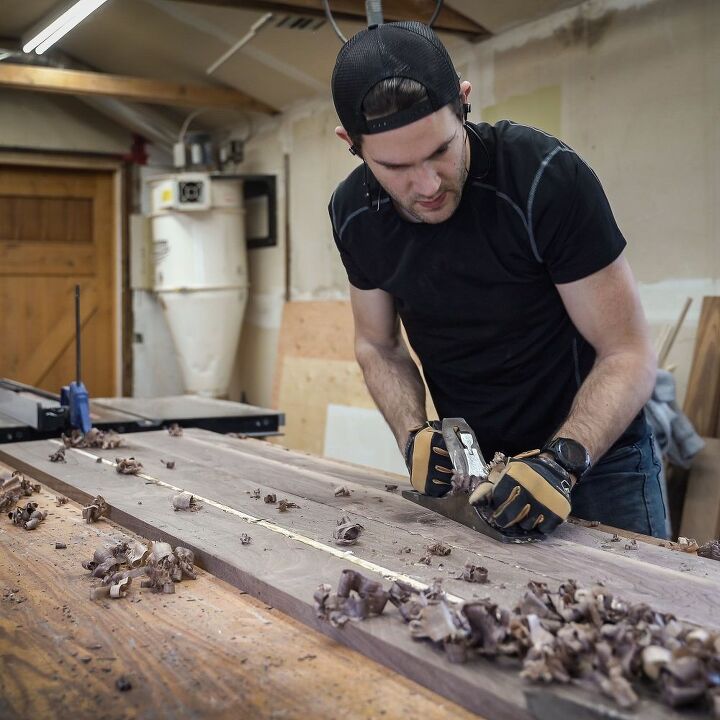
After the clamps came off of the speaker sheets I needed to do some planing. I did my best to make sure that all my strips of walnut and ash lined up perfectly, but there’s always going to be small misalignments between the individual strips in terms of height.
Using a hand plane I slowly scraped very thin layers of wood away until I had removed all of the high points as was left with a flat and even sheet.
This was a great workout. When I was making these speakers it was still early spring, the temps were in the single digits (celsius) and here I was working away in a T-shirt.
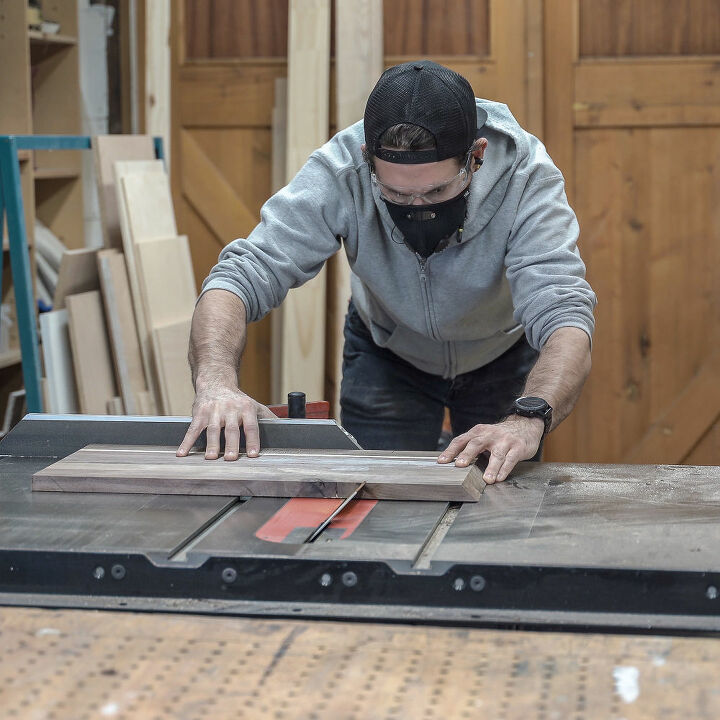
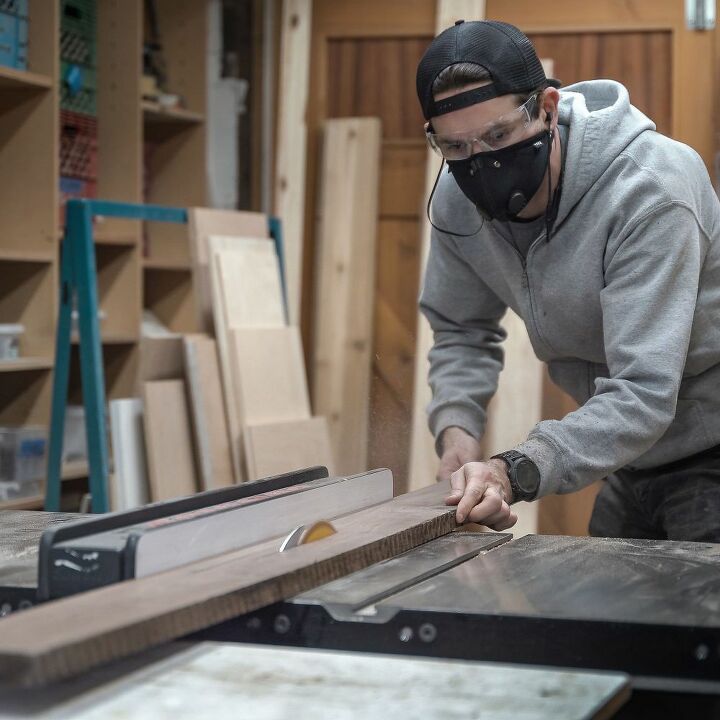
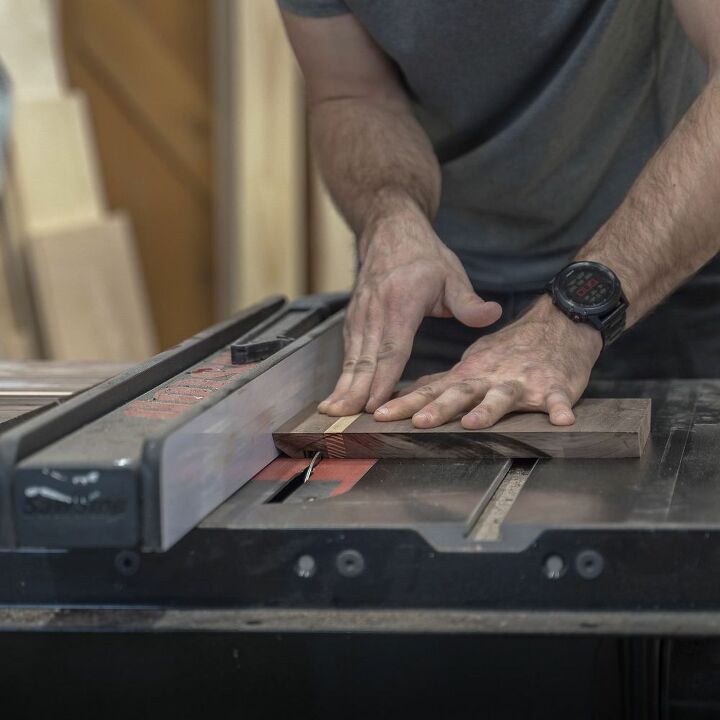
Using my table saw I divide it the sheets into smaller pieces.
Each sheet was further subdivided into 4 pieces. A top, a bottom, and the two sides. I made a series of 45-degree cuts and paid careful attention to how I cut each piece. I wanted the grain of the wood to be continuous around the entire visible part of the speaker.
In other words, I wanted the grain to “wrap” around the speaker. I started with the left side and worked my way counter-clockwise around to the bottom.
My design for the speakers was relatively simple. I’d preserve the original front and rear panels from the DIY kit and build the rest of the housing so that they would slot into it.
The front and rear panels were made from 3/8″ thick plywood and had rounded edges that I removed by cutting them off on the table saw.
In order to accommodate the front and rear panels, I had to cut some channels into my housing pieces! In woodworker parlance, these channels are called dados. Don’t ask me where that name comes from, I have no idea!
I cut 2 dados in each of the pieces. One at the front and one at the back. The one at the front was set in 1″ from the edge and the one at the rear was set in a 1/4″ from the edge. Each dado was 3/8″ wide (the same as the thickness of the plywood panels) and 1/4″ deep.
I probably should’ve used a dado blade to cut these channels, but it’s a really time-consuming process to switch out the blade on my table saw so I cut the dados using a normal saw blade by repeatedly cutting the same piece of wood and adjusting my fence over in 1/8″ increments.
Assembly time!
You can’t see my face in this shot, but if you could, you’d see I was brimming with excitement. I had been working for multiple days at this point and still had yet to see anything that even remotely resembled a speaker. That was about to change though.
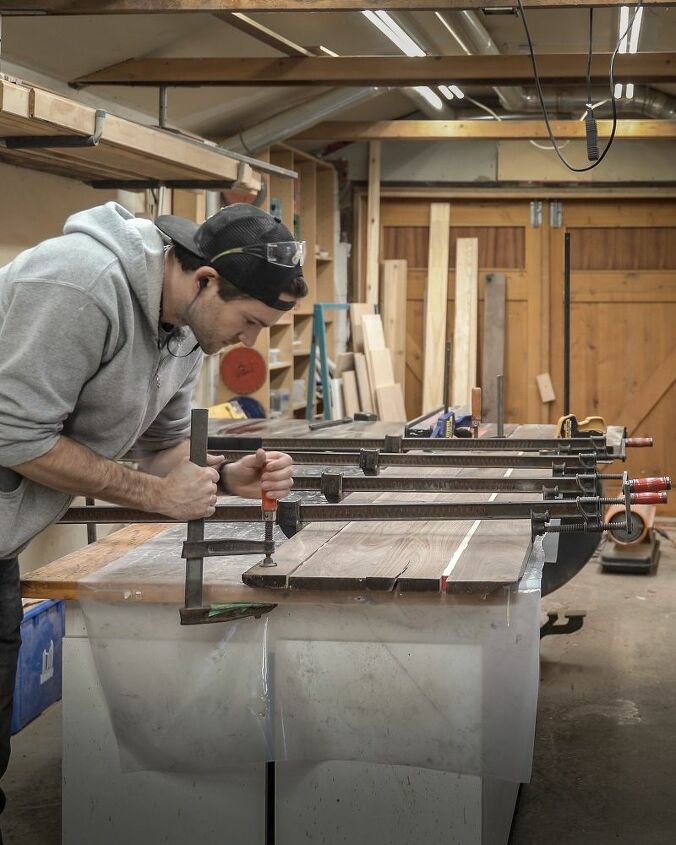
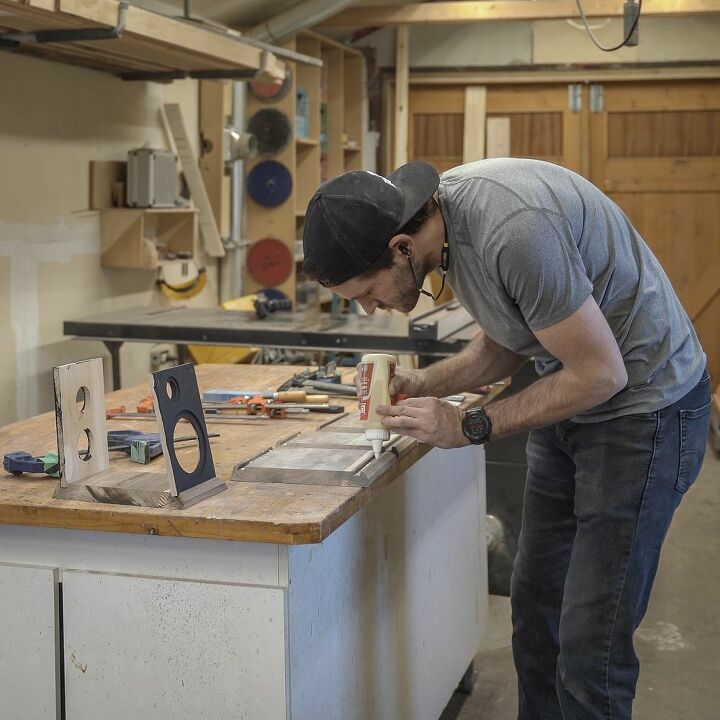
I applied more carpenters glue to my 45-degree corners and into the dado channels on 3 of the 4 pieces of the speaker housing. I skipped the glue when I came to the bottom piece because I didn’t want it to be permanently attached. I still need to access the inside of the speaker housing so I could wire up all of the various components and install the drivers.
There’s a pretty common jokette in the woodworking community that you always need more clamps and that was definitely the case here. I used every clamp I had to hold the speaker case in perfect alignment as the glue dried.
If I had more clamps, you can be sure I would’ve found a use for them.
All hands on deck, we’re now entering uncharted waters!
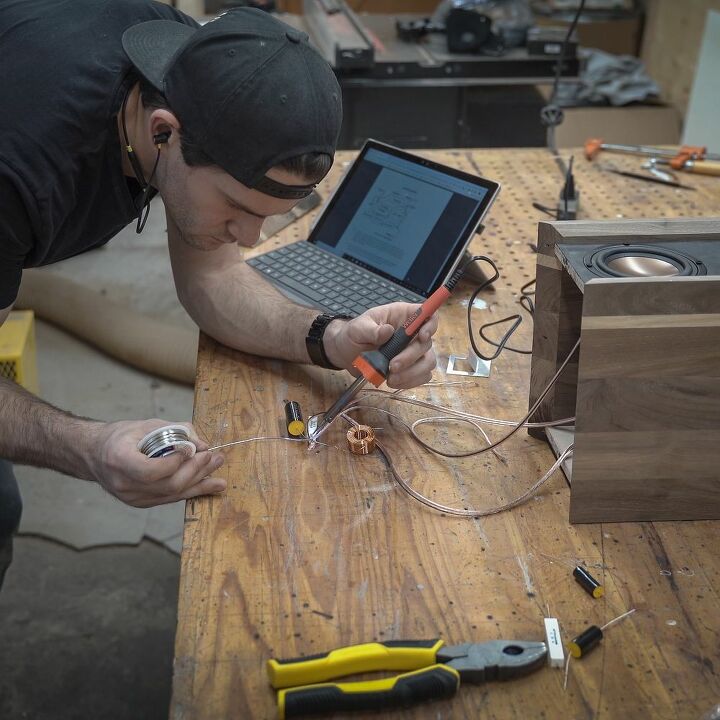
This is the part of the project where I was completely out of my depth and threw myself at the mercy of the instruction manual. I’ve never wired up the guts of a speaker before. Hell, I’ve barely even done any soldering before. But hey they say you have to step out of your comfort zone to grow, so I jumped in with both feet! I had my laptop on standby in case I needed to look anything up.
The first step in wiring up these speakers was soldering 12″ long speaker wire leads to my woofers, tweeters and terminal plates. This was relatively simple, all I had to do was strip an inch or so of speaker wire down to the bare wire, thread it into contacts on the various components and then melt solder onto the contacts to secure them in position.
Ok, so far, so good. I can handle this (I’ll just keep telling myself this until it’s true)
This is where things started to get a little crazier. I Installed my woofer, tweeter and terminal plate in the speaker housing and pulled the speaker wire leads out of the bottom.
Once that was done I had to wire up and solder the “cross over”. Now I’m going to attempt to explain what the crossover is, but I probably won’t get it 100% right because I’m not that bright.
The cross over is an electrical circuit inside the speaker that splits the input single into 2 parts. It sends the higher frequency part of the input signal to the tweeters and the lower frequency part of the signal to the woofer. Sounds simple enough, but it’s really a spaghetti bowl of resistors, capacitors, and inductors.
Luckily the DIY speaker kit I bought came with an easy to follow wiring diagram. All I had to do was twist the leads of various components together and then solder them together so they wouldn’t come apart. I did a dry, solderless, run first, to make sure I knew where everything went. Then, one by one, I soldered each connection together.
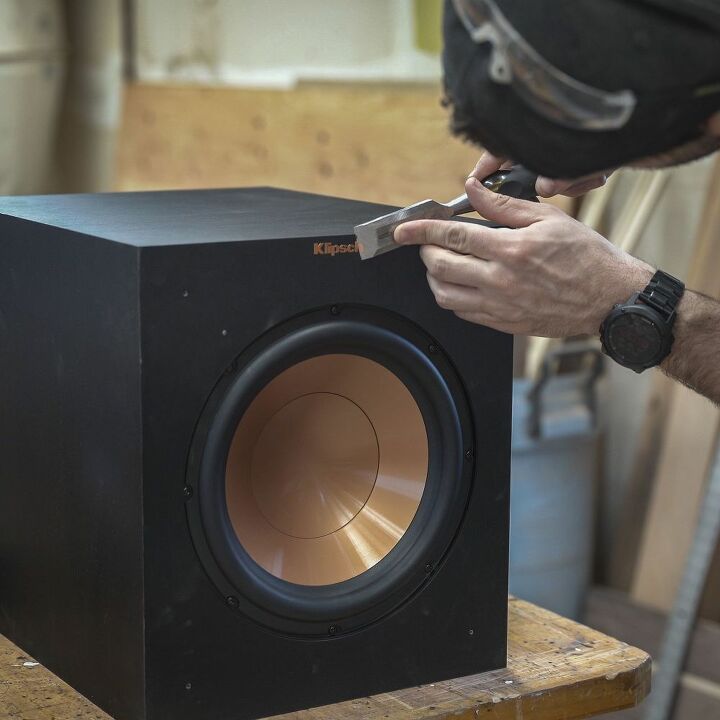
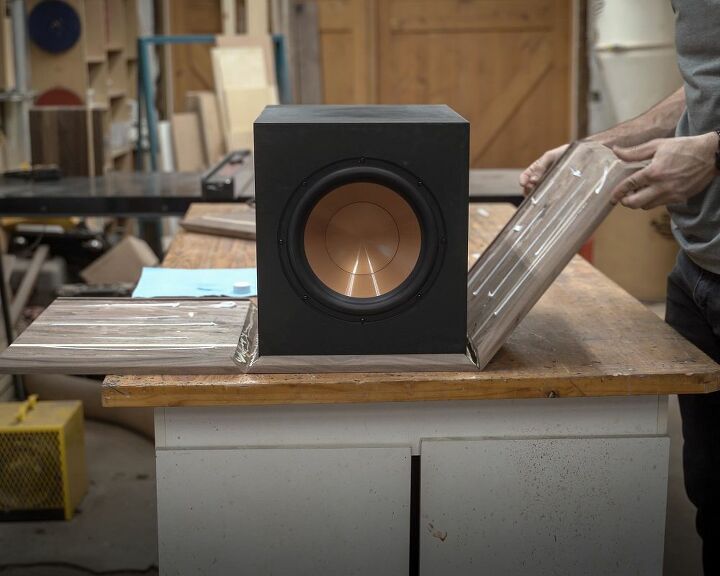
While I can confidently say I built the speakers, saying I built the subwoofer is pretty much a complete lie. It would be much more accurate to say that I re-skinned an off the shelf subwoofer. I found a local guy selling a used Klipsch R-12SW for $250 and decided to use that as my jumping off point.
So why didn't I buy a DIY subwoofer kit? It's not that they don't exist. I just couldn't find one that properly matched the colours and style of the DIY speaker kit I already bought. Also, the DIY kits were almost all more expensive than this used Klipsch. So I saved a bit of money by going with a brand name (how often do you get to say that sentence!?).
This part of the process was painful. I had to start the permanent and unreversible modification of the subwoofer. I used a sharp chisel to remove the Klipsch logo. Turns out it’s just a sticker, but I still cringed the whole time I did it.
After that egregious act of vandalism I continued my rampage and removed the 4 pegs that held the front fabric cover in place. They were threaded in and easily removed with a pair of pliers.
I’m ashamed to admit it, but, I didn’t stop there.
In my pursuit of a completely clean front face, I also removed a status LED from the front of the sub. Actually, scratch that. I don’t feel bad about the LED. It was ugly and I don’t know why Klipsch put it on the front face of the sub, I think it should’ve gone on that back.
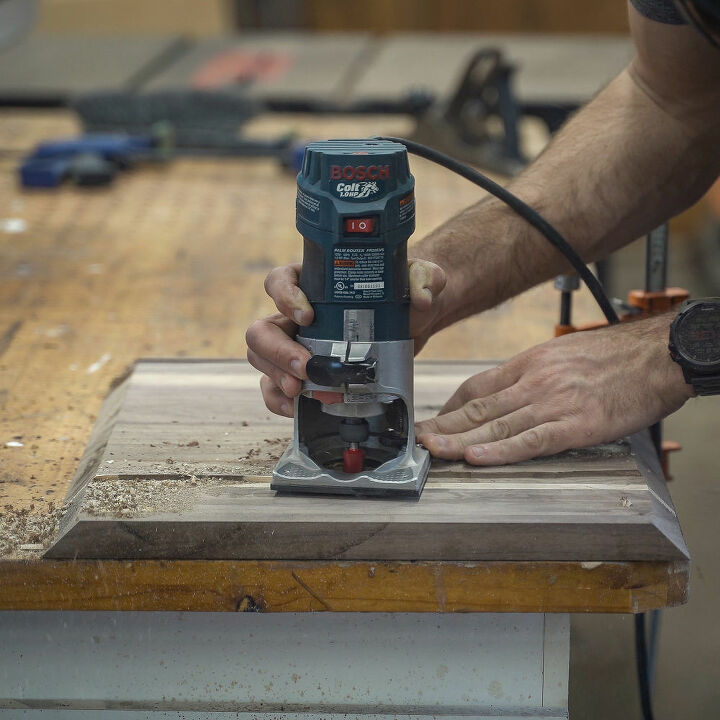
To create the housing for the subwoofer I went through all the same steps as the bookshelf speakers except for one small detail (other than their size of course). Instead of cutting 2 dados, I cut 1 very large dado that was the width of the entire subwoofer.
To do it I I cut 2 control lines and then used my trim router to remove 1/4″ of material between those 2 control lines. I used a 1/2″ straight bit set to 1/4″ deep.
This was time-consuming, and a bit awkward to do, but I really couldn’t think of a better way to do it. If you have any suggestions I’d love to hear them in the comments!
To install the housing around the subwoofer I simply glued it in place and then clamped the whole thing for a few hours.
I had to break out my bigger clamps for the sub. Instead of doing everything with dainty little F-clamps I used these big bar clamps.
It’s funny when I was doing the dry fit, everything fit great. As soon as I applied glue and re-assembled everything I had a much harder time getting all of my panels to line up perfectly.
In the end, I got it, but it’s funny how things always seem to get 2X harder when you attach a time limit to them.
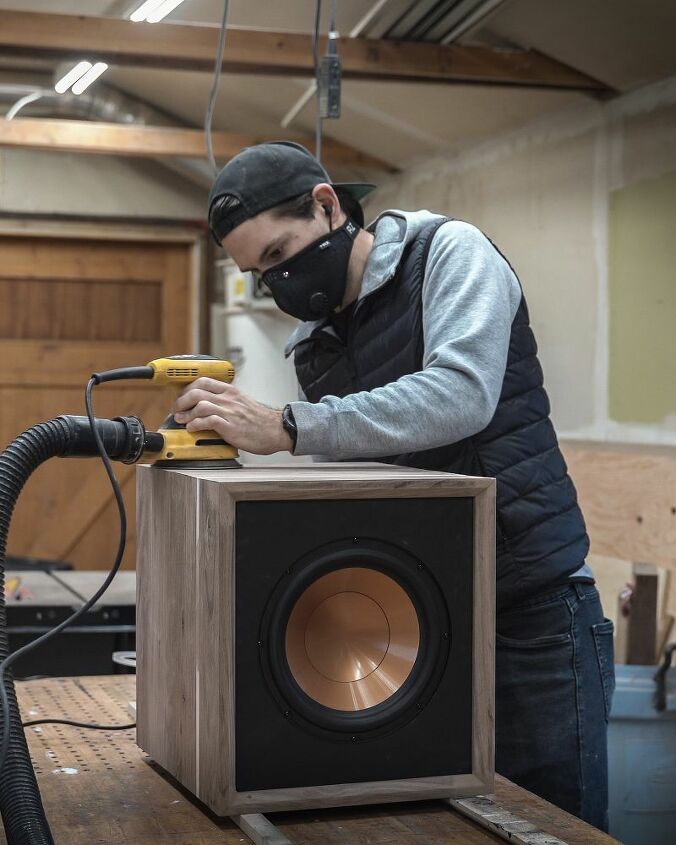
I sanded both the subwoofer and the speakers once the glue had dried. I started with 80 grit sanding pads on my random orbital sander and worked my way up to 220 grit sanding pads.
By the time I was done sanding that subwoofer was so smooth I could practically see my self in the walnut (no I couldn’t, that’s dumb).
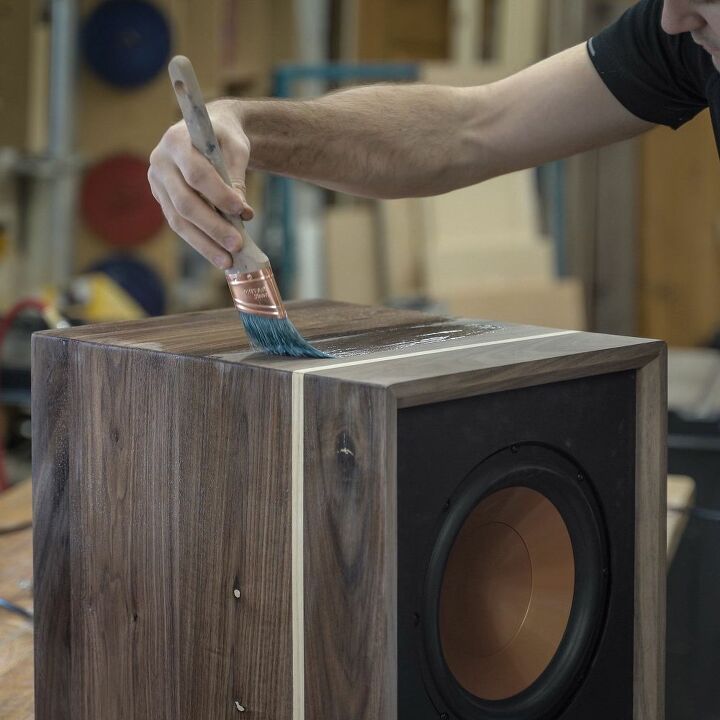
With everything sanded to 220 grit I was ready to apply my clear coat. For this project I used a satin hybrid oil and water floor varnish. Normally I like to roll clear coats onto my projects, but for this project, I decided to change it up a bit and brush it on.
That inner chamfered edge creates a thin strip that would’ve been basically impossible to clear coat with anything other than a brush. I was expecting to have a hard time getting a brush stroke free finish, but to my suprise, the clear coat leveled itself out quite nicely. In the future, I’ll have to try brushing on more finishes.
Cutting (or painting a straight line) with a paintbrush was something that I used to really struggle with. I’d get all up in my head about how it was impossible to draw a straight line with a paint brush. Eventually though, through practice, I learned to stop caring and just do it. It sounds flippant to say, but I really think the biggest difference now is that I just don’t think about it as I’m doing it and I’m able to get much better results.

After the finish was applied I brought them home and tested them out. Obviously I'm a bit biased, ok hugely biased, but I really love the way these speakers sound.
It's really funny how projects can evolve over time I started out thinking I’d just buy a soundbar. No problem, probably less than 100 bucks and a quick trip to the store. A few hours of internet research later and I learned that soundbars are pure trash and only trash people can bare having their ears subjected to the sounds that come out of them (obviously, I’m just kidding, but some of the opinions I read online weren’t far off this haha).
From there I just kept researching speakers until I knew I had to build my own.
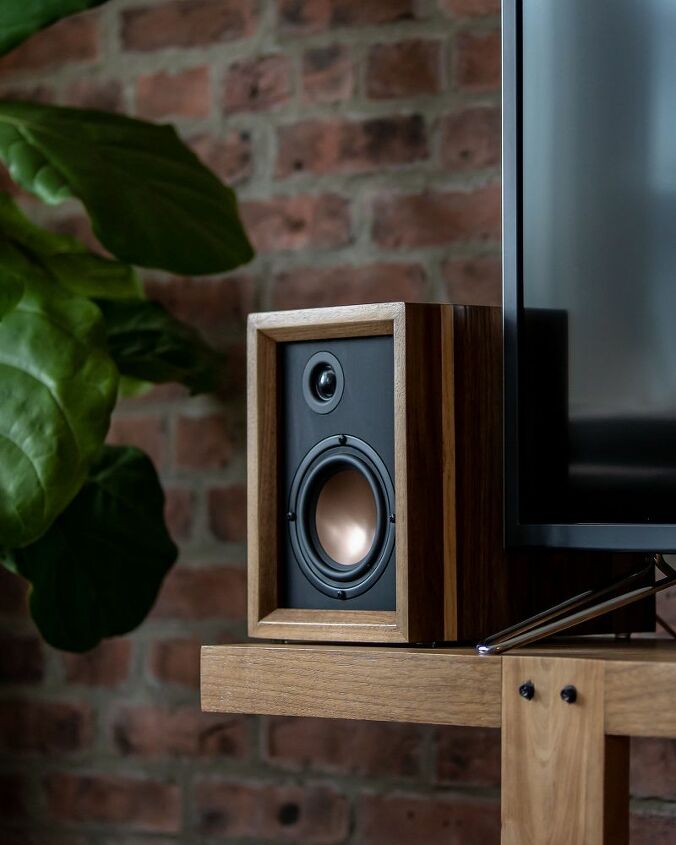
Here's a close up of the bookshelf speakers. The larger brass coloured speaker is responsible for playing the mid-range frequencies while the smaller black speaker located directly above it is responsible for playback of any high-range frequencies.
The brass colour of the 4" speaker is what original drew me to the Overnight Sensation kit. It wouldn't be an exaggeration to say I build the whole project around it. Something about the brass colour and the walnut pair so nicely together in my mind.
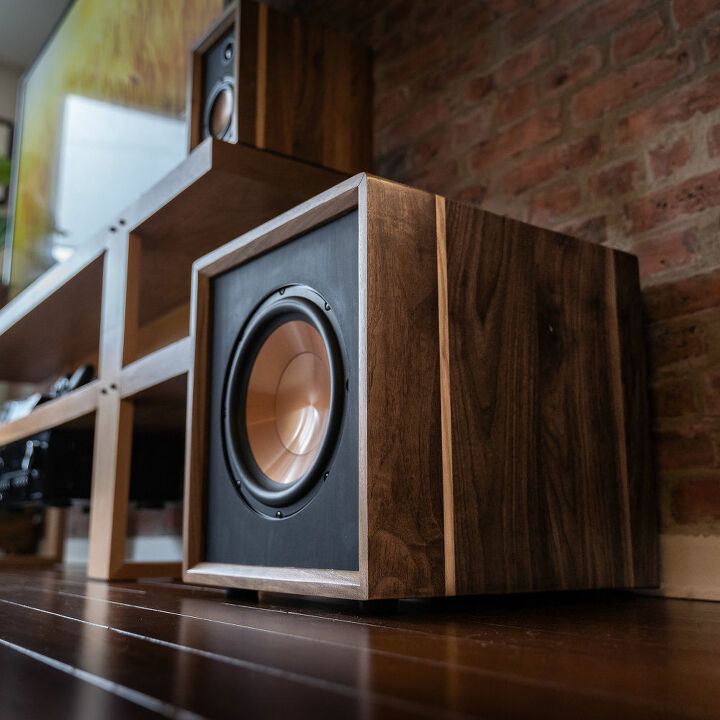
Here's a closeup of the sub. As I'm sure many of you know the subwoofer is responsible for playing back all the low-range frequencies.
It really adds a whole new dimension to listening to music and even watching movies and TV shows.
Alright, that’s it for this post.
Time for me to kick back and enjoy my new speakers. Thank you for reading this far.
If you have any questions or comments, hit me below and I’ll do my best to answer.
If you like more indepth info on how I built these speakers theres a link to my blog post below. Also, as a quick reminder, check me out on Instagram! you can find the link in the start of this post!
Resources for this project:
See all materials


Comments
Join the conversation
-
Awesome! What kind of tunes are you jamming to!
-
Thanks for this great post! As soon as the page came up I saw that black walnut and knew it would look good. When I was a teenager my brother owned a lumber business and mill and my dad bought 800 board Ft. x 2 in. of black walnut from him so boy did I have great wood for my school would projects! I wish I had all that wood now! Keep up the good work. :)


Frequently asked questions
Have a question about this project?