


DIY Sofa Slipcover. Update. Refresh. Renew
A new sofa is expensive and premade sofa covers do not always fit so this DIY Sofa slipcover is the best option to have a brand new-looking sofa on a budget.
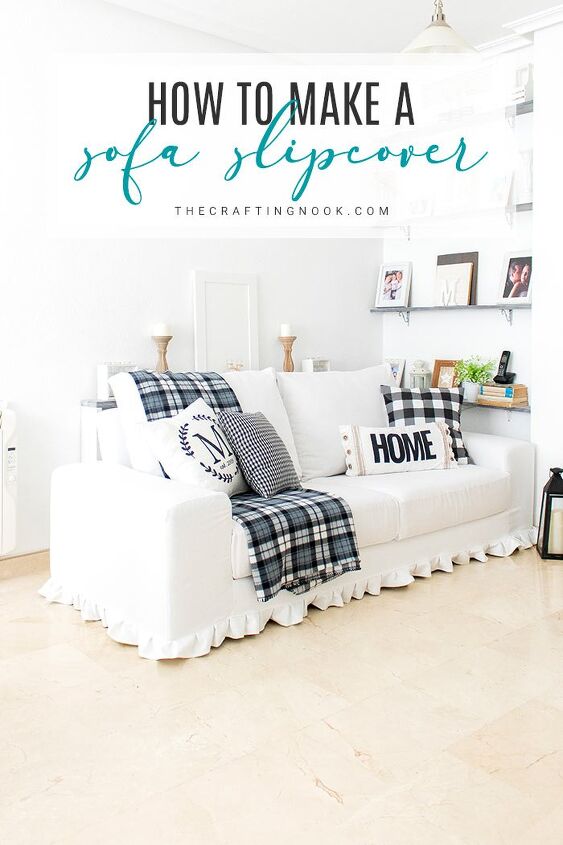
My new cover was made with white canvas, I was dying to have a white sofa since I can remember.
I’ve always been completely aware that having a white sofa requires more maintenance as it will be likely to get dirt and stains but I was willing to accept the consequences LOL.
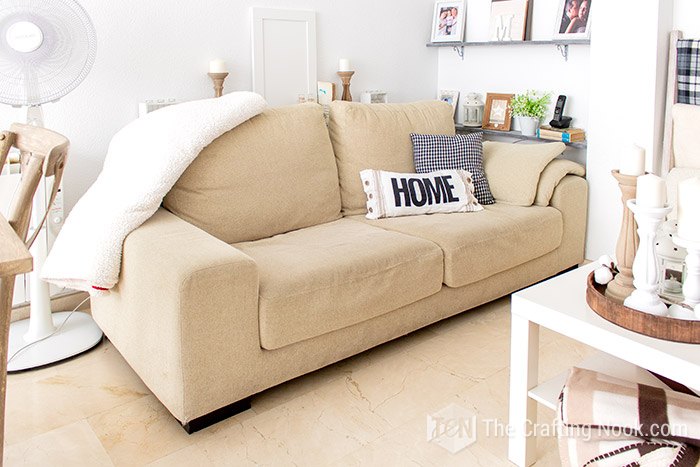
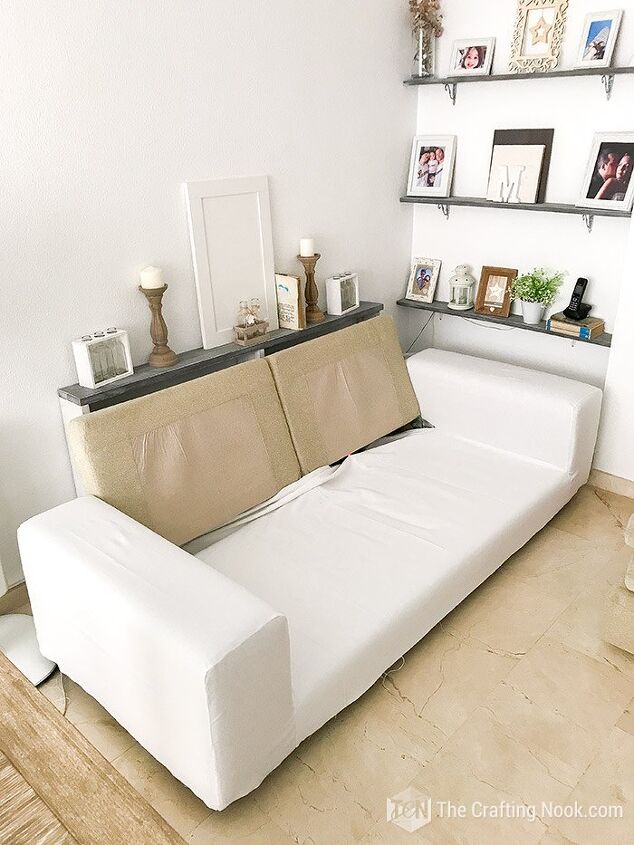
My sofa is a second-hand piece of furniture that I got at a very good price. From the moment I saw it I knew it had the potential and the simplicity that would help me pull this off.
I didn’t want to just create a normal cover that you just lay on top of the sofa. Every time someone sits on it, it messes all up and I’m a control freak.
Replicating each cushion cover it already had and creating a new sofa slipcover was the only option I could come up with that wouldn't get messed up.
This project is not as hard as it seems but is really complex and long to explain so I'm giving an overview here of what it takes to make the slipcovers but the full very detailed tutorial is over on the blog.
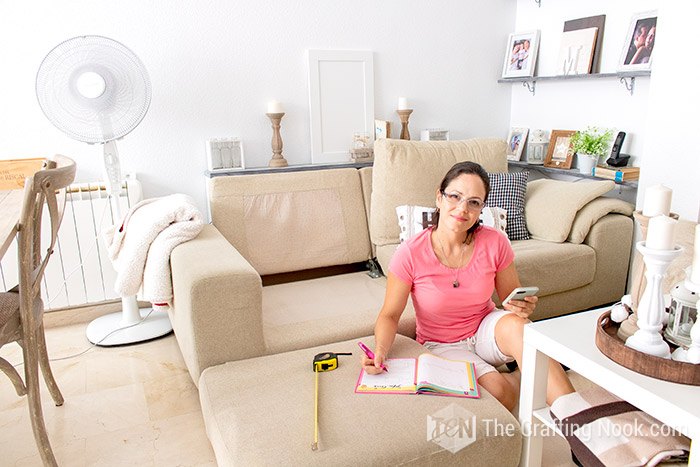
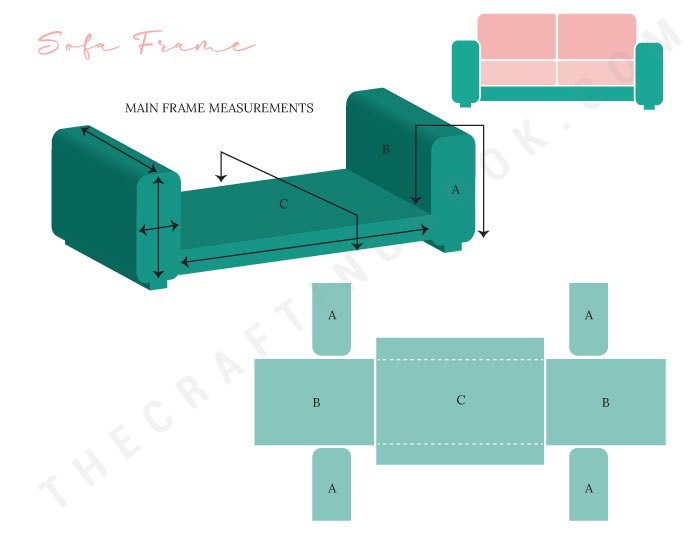
So the first step was creating the sofa plans and measuring each piece for each piece of the sofa.
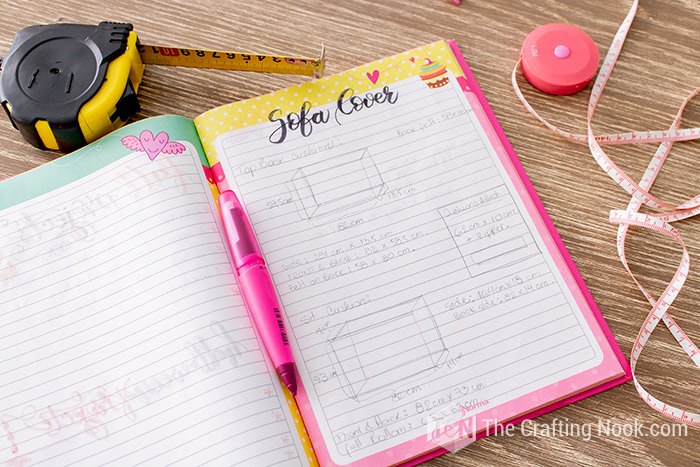
I firstly started by drawing a rough sketch to have an overall view of the sofa and then created the plans with measurements
I don't give specific measurements here because each sofa is different so what I try to point out is how to get your own measurements. Your own sofa will give you the exact measurements you need.
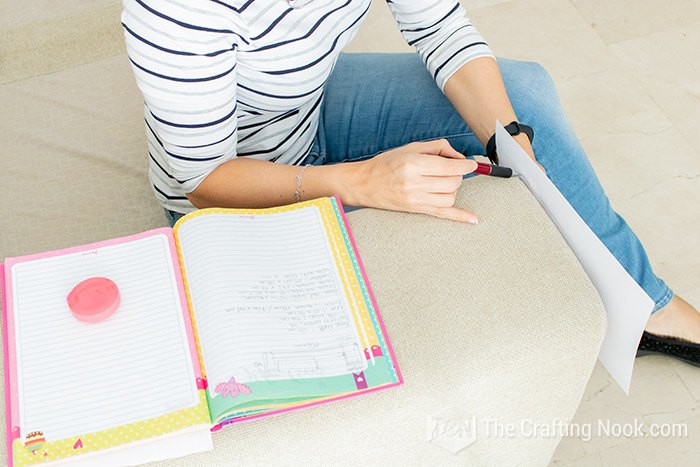
For the curvy parts of the sofa, I just traced the shape on paper to create the pattern so I can cut the fabric properly.
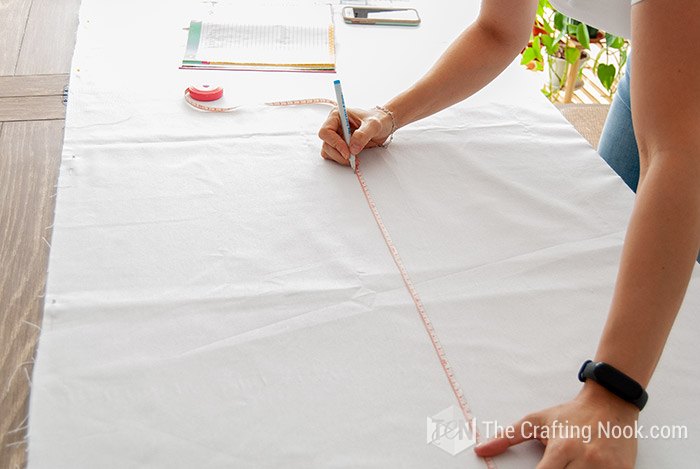
Once the measurements are done, It's time to transfer the pieces to the fabric. I used heavy-duty white canvas because it's really strong.
But first, don’t make the mistake I made, and wash your fabric before starting. I completely forgot. With all the excitement and planning the video the measurements and all, I forgot to wash the fabric. Luckily, it didn’t shrink after I washed the covers, but it could have LOL.
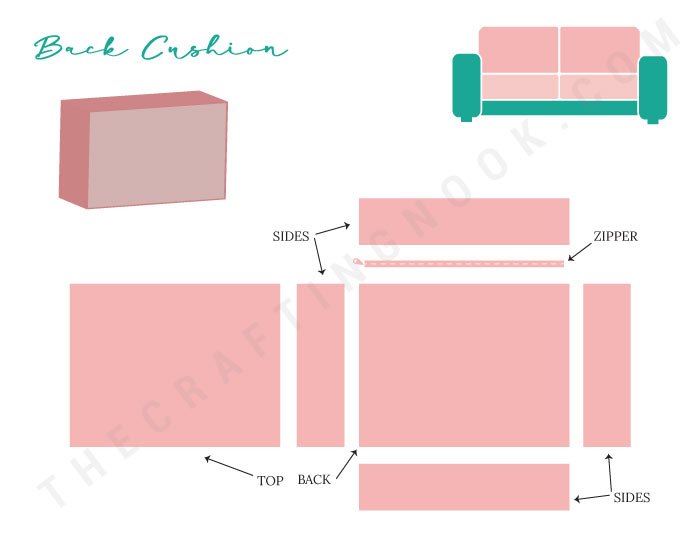
Having all the pieces cut, it's time to assemble. I started with the cushions. I used the original ones as my guide so I placed each piece of fabric exactly the way the original has them.
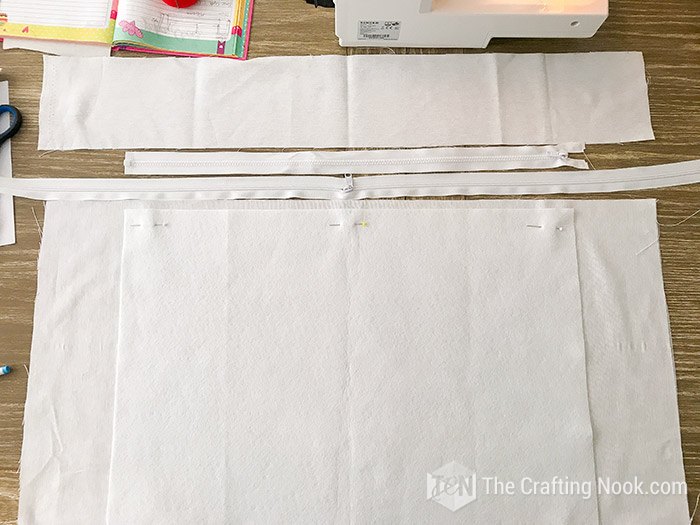
Here's the layout for the cushion. I started stitching the pieces together in a very organized way so I would assemble the cushion correctly.
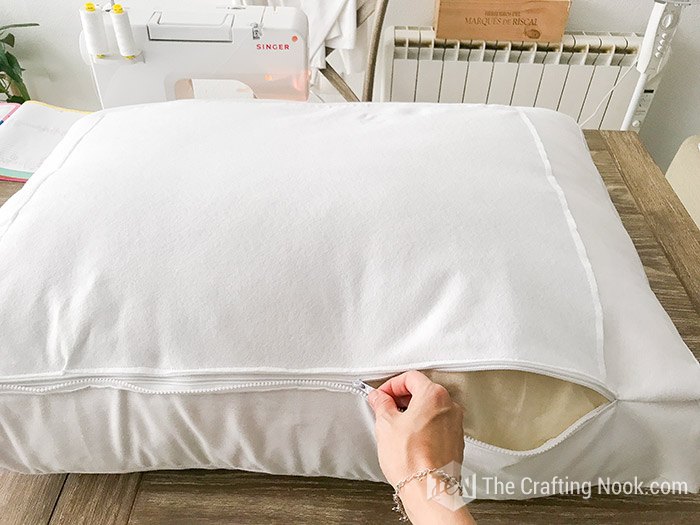
Once it was all stitched out, I tested it on the actual cushion and WOOHOO!!!! It fit!!!
I repeated the same process for all 4 cushions.
It was time to work on the sofa frame. with measurements in place and fabric cut, I started stitching together piece by piece, starting with the arms.
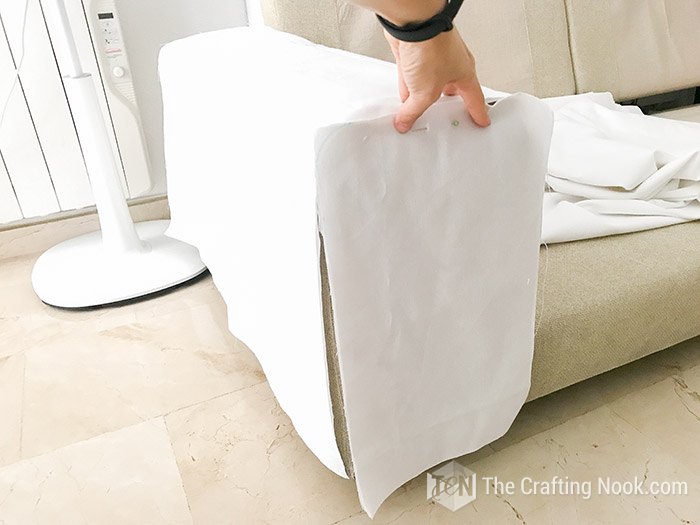
It's always good to place the pieces in their right place to make sure the measurements are good before actually stitching.

After stitching it did fit perfectly!!! SO I moved on to the other arm and then stitched the base pieces.
I had to adjust and create some openings for the hardware that the sofa has. but it all worked out. Not all sofas have those.
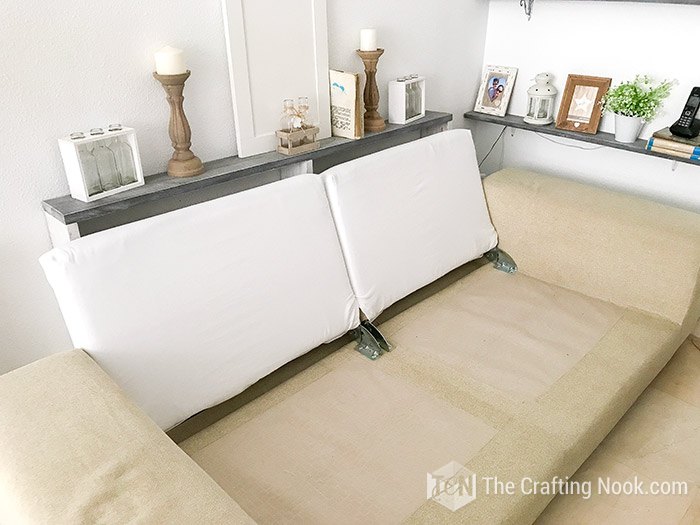
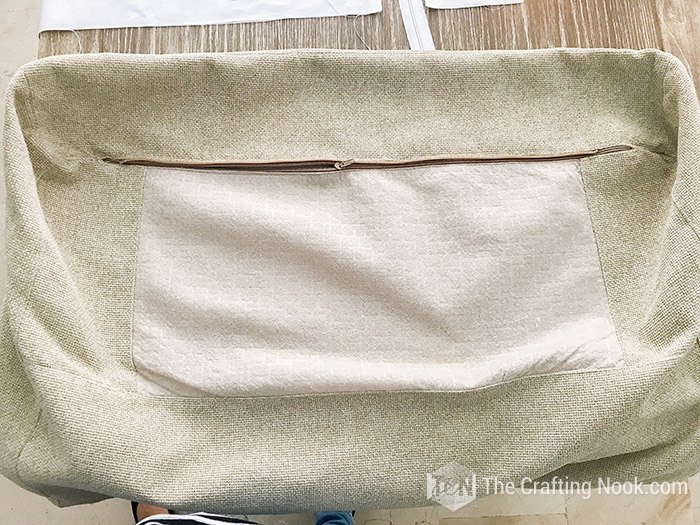
For the back support of the sofa, it was a simpler solution.
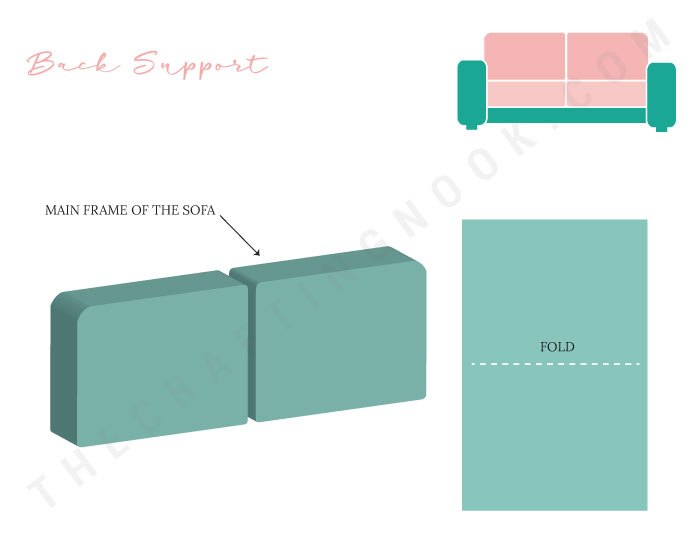
One piece of fabric and created kind of an envelope that fit perfectly and closed with velcros.
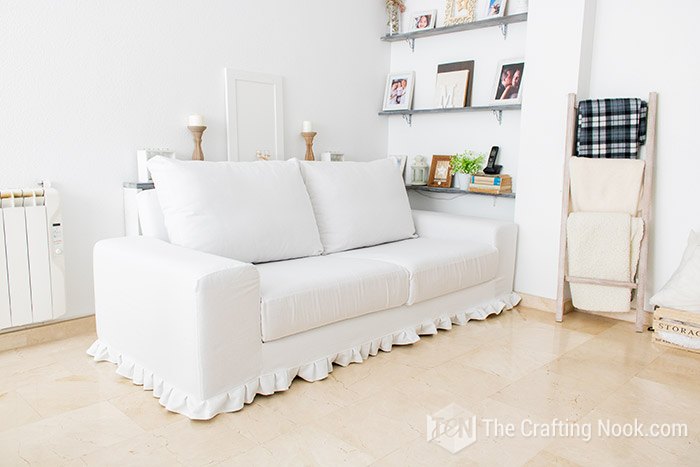
Once I Dressed the sofa with all the covers, the result was beyond what I expected. My final touch was the ruffles on the skirt of the main slipcover and OMG! I was in love!
I know It's hard to process it all but like I said it's complex but I assure you, it's not that difficult. I am not a professional sewer and If I could I'm sure you can too.
Everything will make a lot more sense on the blog where you will find a more detailed step-by-step tutorial.
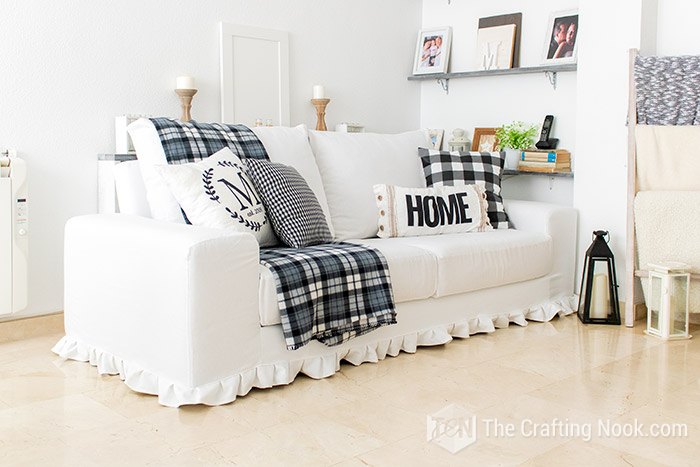
After a little bit of styling, this is how my sofa looks now.
Do you want to learn all about the process? Jump over to the blog here and get all the details!
Resources for this project:
See all materials


Comments
Join the conversation
-
Me too, in high school I learned to sew and did a lot of my clothes. That was way back in 1974! Now I still do balloon type shades and pillows too. But sewing has taken a back seat! Here's a pic of my most current shades. So much glare, they are over plantation shutters. I have similar couches in this room, they would look great with the white covers!
-
Thank you for such detailed instructions. It is beautiful. Wish I'd paid more attention in home ec. I can't use a sewing machine :(


Frequently asked questions
Have a question about this project?
Did you mean felt to avoid slipping? I couldn’t find Felf when I looked it up online.
how many yards did you use for this sofa (fabric 58 or45 inches?)
Amazing work, well done!!!!!!