


How to Replace Broken Caning on a Chair

by
Rhonda
3 Materials
$50
4 Hours
Medium
To begin with let me just give you some basic information. Caning supplies can be purchased at Rockler or at Woodcraft. I happen to live outside of Houston and we have both stores in my area. SCORE! I shopped both and ended up purchasing at Woodcraft. I found Rockler to be almost twice as expensive as Woodcraft but I am not sure that is always the case. I would shop both and if you do not have a physical location near you please be sure to take shipping/handling charges into account. The staff at both locations were very helpful!
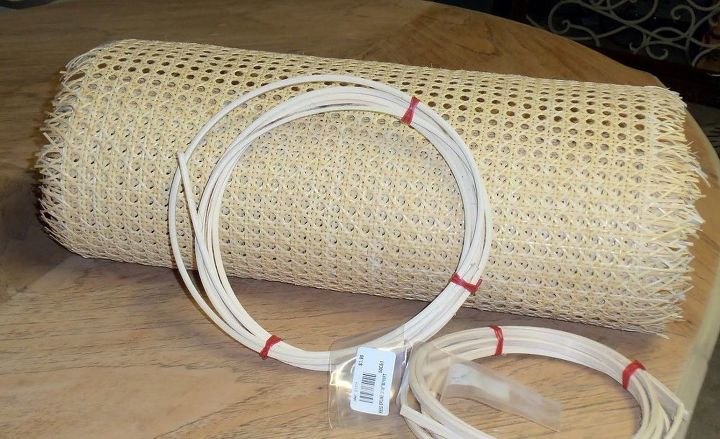
Make sure that you know what sizes you will need. Caning comes in a few sizes/styles. I have found that most pieces are done in the "conventional" caning. Rockler and Woodcraft websites can help you figure out what type you have. Take careful measurements and order the proper width for your project.....caning comes in a sheet. Also, do your best to figure out the spline size. This part can be tricky. If you have a store near you just take the removed caning and spline in with you and someone in the store will be able to assist you with your selections.
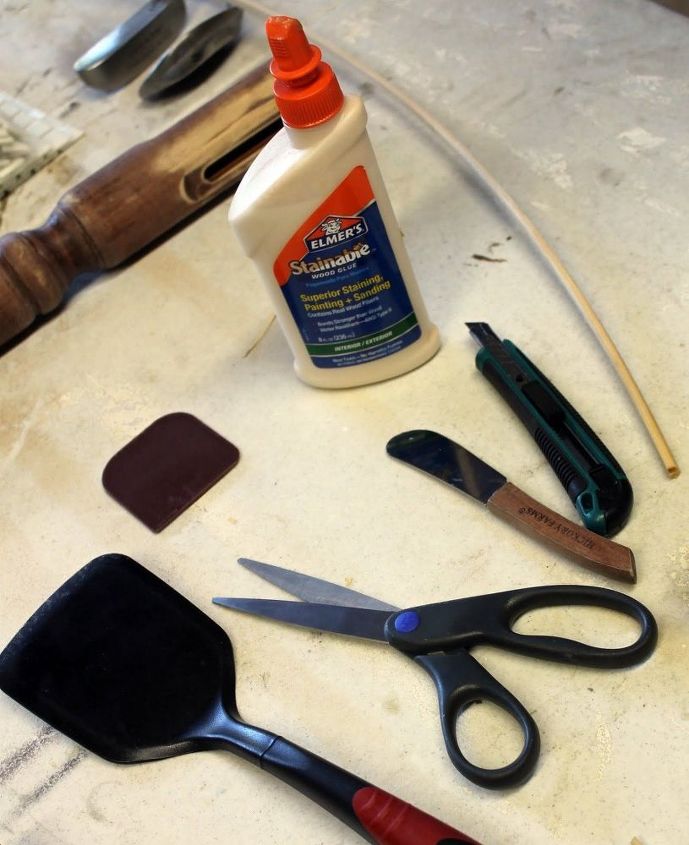
I did not purchase any special tools. I only used kitchen utensils! Just make sure that whatever you use has blunt edges....anything sharp will damage the new cane as you try to push it into the groove. I am pretty sure that they make a "special" glue for gluing the spline but again, I used a standard wood glue (clear drying) and it worked just fine.
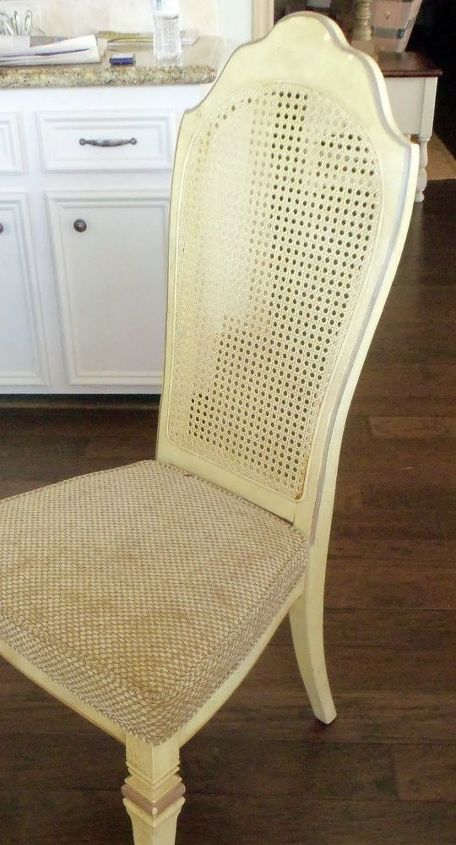
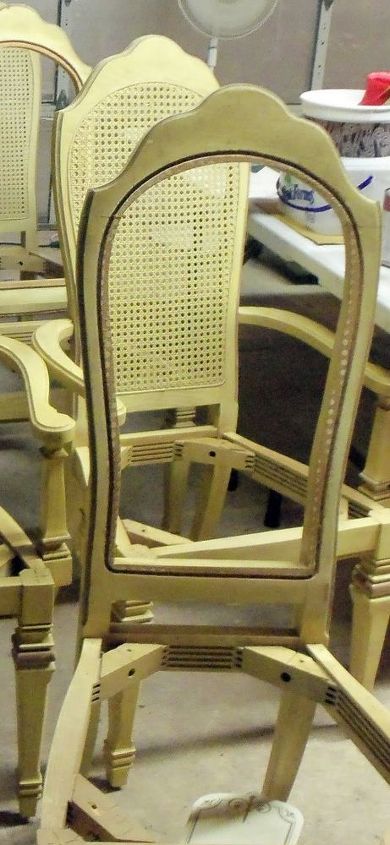
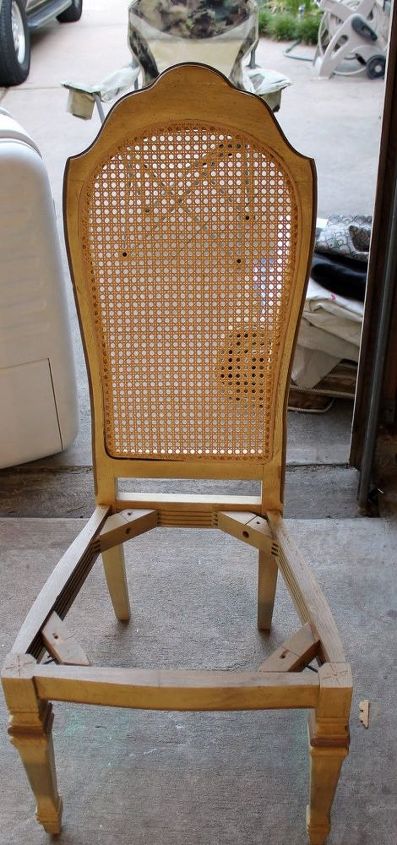
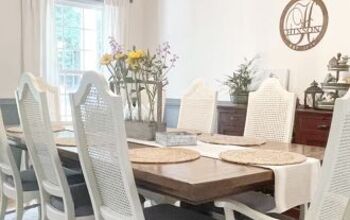
Here is a picture of one of the chairs. I, with the help of Mr. YBR, actually recaned 3 of these chairs. I think this is actually one of the chairs without any damage but you get the idea.
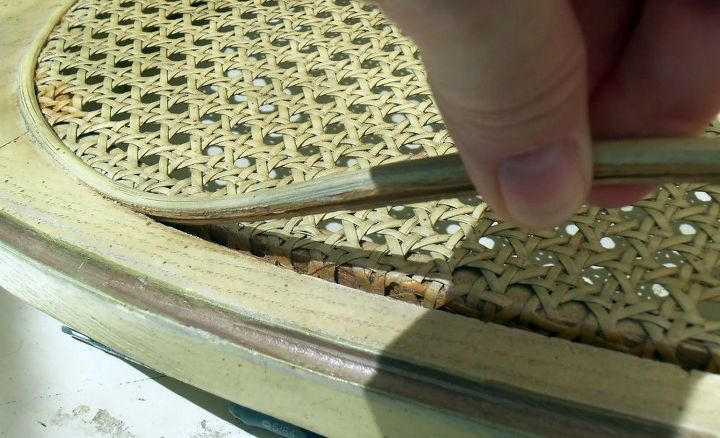
Once you are ready to begin you will need to remove the old caning. This actually was not as hard as I imagined it would be. Find the end of the spline and begin lifting it as best you can. I used a screw driver and a chisel/hammer and tried to keep the spline intact in order to determine the size of it for replacement. No worries if it breaks apart, just keep working at it. It will lift easily in some places and stick in others.

Once you have the spline removed begin to remove the old cane. I found it easier to break a hole through the back and cut out the inner circle of the cane. That way I could pull up on the old cane from the inside and it seemed to lift better. Again, it will lift easier in some places than others.
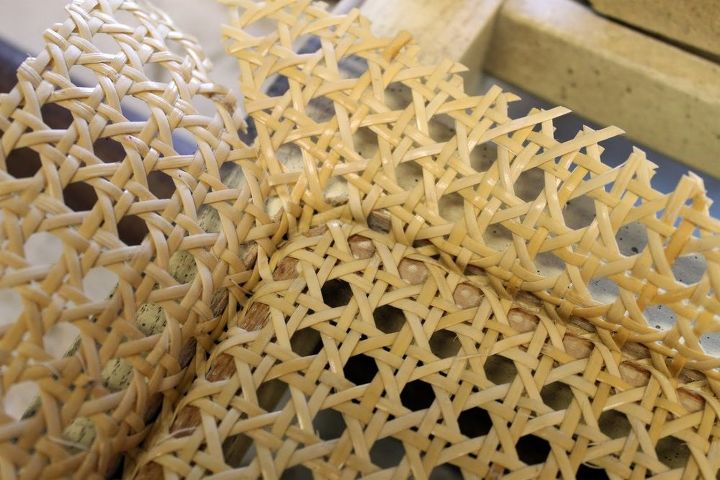
Just continue around the perimeter of the opening and remove as much as possible. Once the cane is out you will need to clean the groove. I used a Dremel tool and a screwdriver (although missed that pic) and made the groove as clean as I could in order to be able to push the new cane into the groove and leave space for the spline to fit snugly. This is what you will have when you are done removing the old cane!

I took a break here....keep in mind that I was working OUTSIDE in HOUSTON in 95 degree weather. So, if you are like me, this is where you take a dip in the pool! Yes, it is a recommended step.
No pics necessary! LOL
Now that I am back from the pool and quite possibly Happy Hour.....at Sonic....Cherry Limeade, Baby! Can I get an "Amen!" (See, the heat does get to you after awhile.....)
You should have your new caning supplies ready to go! First go fill up the bath tub with warm water.
(Side note: not sure about the chlorine part but maybe you could just throw everything into the pool with you...caning and spline.....and eliminate the need for the bathtub and the one hour wait.....just sayin')
Make sure you have measured the piece that you are recaning and have cut the length of caning that you need and also the spline. You will need to leave a little extra length on each....do NOT make perfect cuts just yet.
Place your new caning and spline into the filled bathtub and head back to Sonic wait about an hour. Do not rush this step as this will make the cane and the spline pliable and easier to work with.
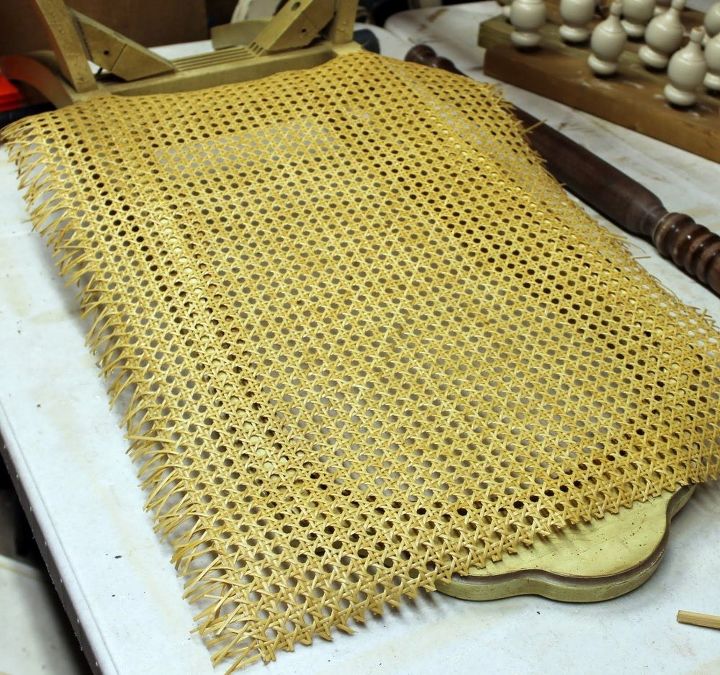
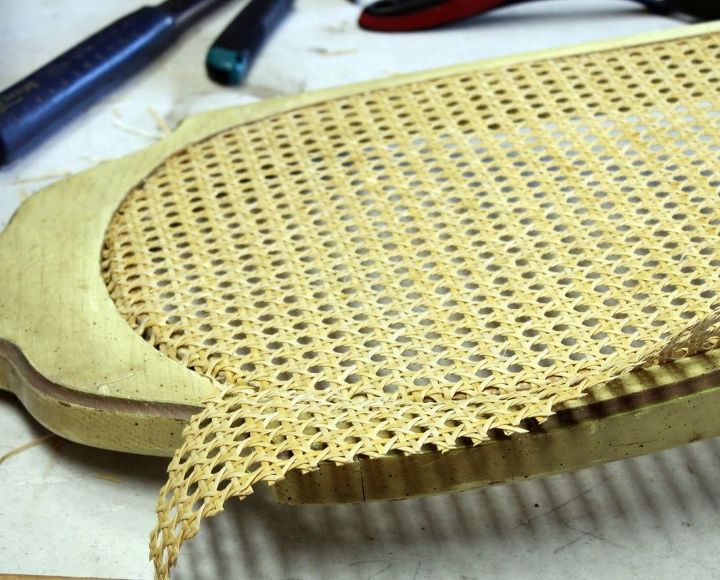
After an hour, or so, remove the cane and let it drip dry a few minutes. Take the caning to the new piece and lay it across the opening to be covered. Lay the spline to the side while you work with the cane.
I began at the bottom and made sure that my lines were straight both vertically and horizontally. I found on the next 2 chairs that is helped to clamp the top in place while I pushed the caning at the bottom into the groove. I used the spatula with the handle for the long parts and the small pan scraper to push in the corners.
Once you have your caning in place go around the perimeter a few times and really push the cane into the groove....being careful (especially at the corners) not to rip the caning. I found it to be helpful to cut the caning on the diagional at each corner when I was pushing the cane into the groove because it allowed some additional "give" at the corners. Just be sure not to cut too far in.
Now for the "fun" part! Honestly, this was the hardest part for me....as you are about to see!
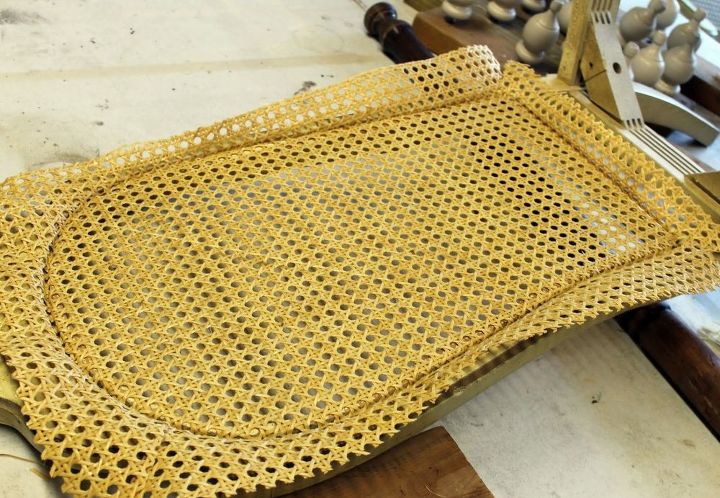
Begin with a razor blade to cut the excess caning away from the groove. You want to leave enough in the groove to be pushed snugly in when you tap the spline in. You will need to cut on the outside lip of the groove but do not leave any of the caning sticking out or you will see it once you have the new spline in place.
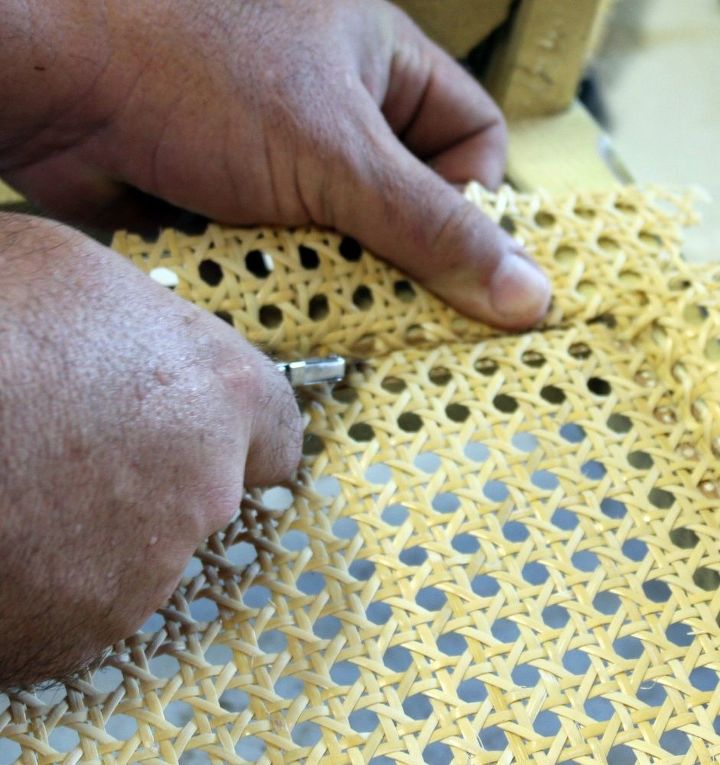
Disclaimer: these are not my hands....I repeat, NOT my hands. I do not have hairy knuckles......*smile*
This is the part where I needed the brut strength of Mr. YBR. It was much easier for him to cut through the wet caning and trim it for me. I'm sure that I could have done it but he was handy so I played the damsel in distress took advantage of his help.
Rest assured that I was completely in control of this entire process and everything was done to my exact specifications.....
(Love you Honey.....I'm so glad you have big guns!)
and yes, flattery does work.....I will need him again for another project
The picture above is just an illustration of what your project should look like as you cut out the excess cane.
So here is where I am winging it and you will have to follow me from here on out sans pictures. Good thing we are almost done! For some reason I cannot locate the rest of the pics that I took for the tutorial. Remember, we just bought a new camera? My guess it that I accidentally lost them when I was swapping memory cards but I just don't know....so sorry.
Once you have removed all of the excess cane go ahead and get the wood glue. Run a pretty thick bead of glue through the groove on top of the new caning. It is ok that the cane may still be wet, as well as the spline.
Then I started to place the new spline at the bottom of the groove..in the middle. Do not try to start at a corner if you can avoid it because it will be very difficult to get the other end to match up. I gently placed the spline in the groove and gave it a good push. Do not tap it all the way in just yet. Continue around the perimeter until you end up back where you started. Note: when you round the corners it may feel like the spline will not give.....trust me, it will and it will not crack or snap. It may feel like it but just gently force it around the curves and it will be just fine.
So now you have two ends meeting. I found from one of the tutorials that I referenced above that the best way to have them meet evenly is to pick up both ends just enough to slide a wooden shim under them. Once the shim is in place find Mr. YBR apply even pressure with a sharp razor blade and push through both ends to make a perfect cut. Place both ends back into the groove and you should have a very good fit!
Now gently go around the perimeter with a rubber mallet and tap the spline into place. Do not "bang the crap out of it" with a traditional hammer as you will most definitely gouge up the spline. Just firmly and gently go around a few times and tap the spline into place. You will have wood glue seeping out...no worries...wipe it up with a wet cloth and keep going.
Once I was done I noticed that the caning was not as tight as I really wanted it to be....mostly when I compared it to the chairs that I did not recane. Do not worry! As the caning and spline dries it will tighten up. The next day everything was as it should be. Do try to get it as tight as possible when you are working it but don't fret if it is not as tight as you had hoped for at first.
Voila! This is what you should have!
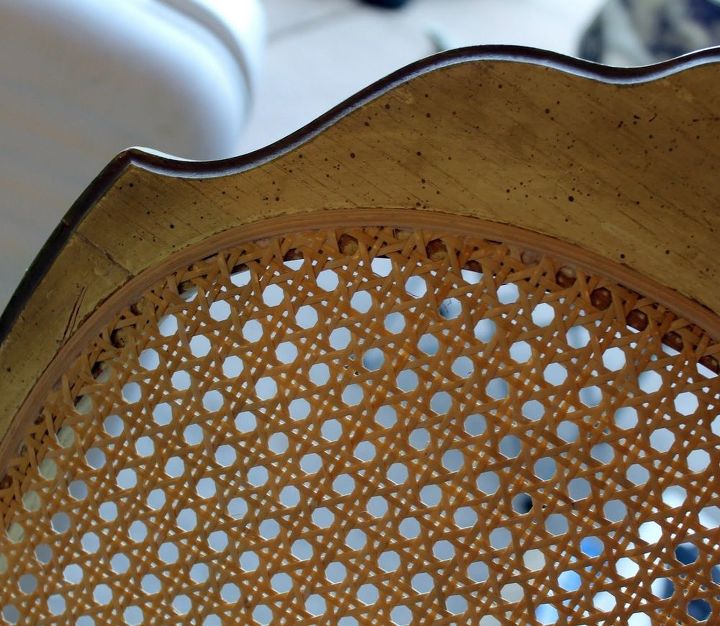
Not too bad, eh?
If this reward is not enough to make you feel good than head to your phone book and try to find someone to recane a piece of furniture for you. First, I think you will be hard pressed to find anyone....even in Houston....and second, if you are anything like me, you will not want to pay what they are going to charge you! I spent less than 40 dollars to recane 3 chairs!
And that, my friend, included 2 trips to Sonic Happy Hour!
Saaaawwwweeeeeetttttt!
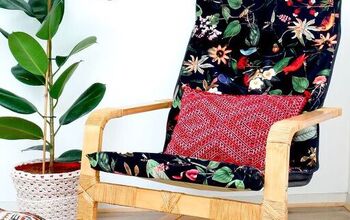
You will see these chairs again....they will be getting a couple of coats of Chalk Paint and then some delicious little skirted slipcovers. YUM! So be on the lookout for their big debut!
Blessings Abundant.....
Resources for this project:


Any price and availability information displayed on [relevant Amazon Site(s), as applicable] at the time of purchase will apply to the purchase of this product.
Hometalk may collect a small share of sales from the links on this page.More info
Comments
Join the conversation
3 of 6 comments
-
Great tutorial!
-
The chair I have that needed recaning wasn't the sheet of caning, it was woven caning. I was able to get it done very reasonably here. I didn't want to ruin the authenticity of this antique chair which was in my great grandfathers & grandfathers business in La in early 1900s. I enjoyed reading ur tutorial even though I wasn't going to use it. Thanks!!


Frequently asked questions
Have a question about this project?