How to Remove Popcorn Ceiling

3 Materials
$100
4 Hours
Medium
Removing ugly popcorn ceiling can be expensive. Here's a cheaper DIY way to do it!
This project idea came from a quote we received for $1400 to have our popcorn ceiling removed! And to add to the blow, the plasterer required us to remove all of the “popcorn bubbles” first so that he could then plaster over what remained. This definitely did not fit our budget so I took it upon myself to come up with a solution. I searched the internet for advice and “how to’s” and didn’t have much luck.


I noticed that the bubbles of popcorn were being knocked off easily while our electrician was redoing our recessed lighting. I decided I would try and simply scrape them away (without moistening them) using a joint compound knife (which we used for the basement wall demo). In the pictures above, you’ll see the difference between the popcorn and scraped ceiling.
Here is the ceiling scraped completely free of popcorn. Some bumps were left behind from the paint that previously covered the popcorn bubbles.


I can fully understand why someone would want to hire a laborer for this job. I will say it took me about a day or so to recover from the neck strain. I seriously thought I’d be waking up to a football player sized neck in the morning!
We picked up two large 5 gallon drums of joint compound and the ceiling was now ready to be covered and made smooth again!


The first layer we applied was a skim coat. We covered the entire ceiling with a single layer of joint compound to make it as smooth as possible. We were instructed to do this step by our carpenter friend. Although the popcorn was scraped off, there was still a slight bumpy texture left behind from where the bubbles attached to the ceiling. This skim coat would attempt to fill in the gaps and level out the ceiling surface. We let this dry overnight.
Once the first coat was fully dry, we borrowed a plastering trowel from our friend. I scooped up a big glob of plaster and applied it in half circle motions. I kept swirling the plaster around until it reached the level of texture I was hoping for. It is tough to tell from the pictures below, but I applied a very small amount of texture.


This step takes the longest, and of course I had to keep taking break to allow my neck to recover. Once the entire ceiling was complete, I let it dry overnight.
The last and final step was to, of course, paint! The joint compound dries to a very light tan color, which almost makes the ceiling look dirty. I love bright white, so we finished off the ceiling with some flat white ceiling paint. I tried my best to capture the finished product in the pictures below! It turns out it is really hard to get a good picture of a ceiling.
For more details on this project, and on our basement renovation visit our blog VivaLasDIY.com!
Suggested materials:
  • Joint compound
  • Join compound knife
  • Plaster trowel
Ari Goldberg |  VivaLasDiy
Want more details about this and other DIY projects? Check out my blog post!
Go
Frequently asked questions
Have a question about this project?
  1 question
  • Charly Charly on Jun 16, 2017

    Now you know why they charge so much to re-do the ceilimgs.

Comments
Join the conversation
3 of 10 comments
  • Nickole Nickole on Nov 14, 2018

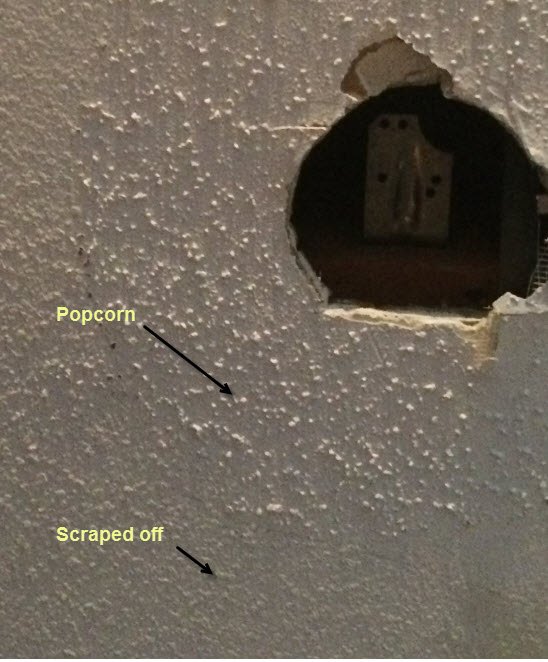
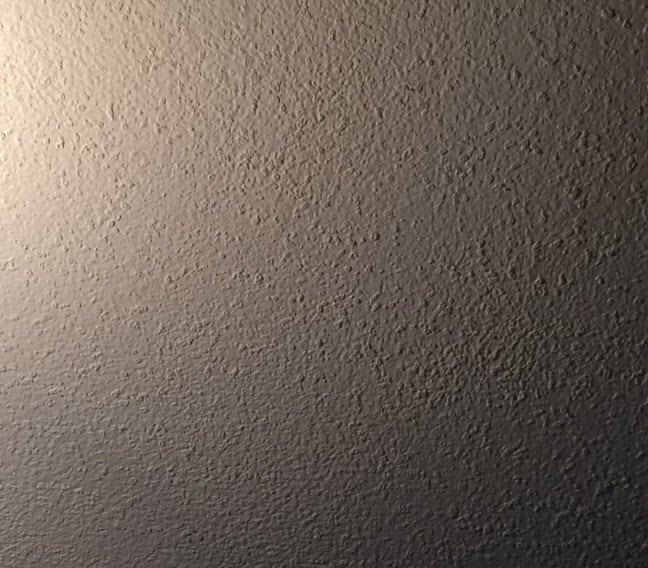
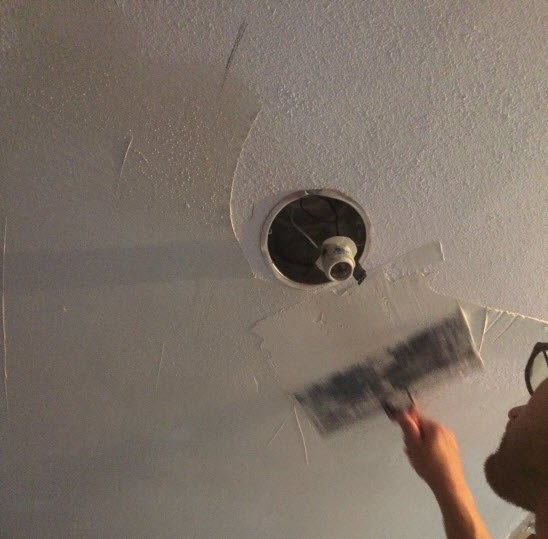
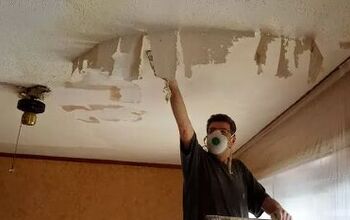
    The easiest way, I think so, is to get a sprayer, like you would spray your garden with. Fill up with regular tap water and spray the water directly on the area you are removing and simply run a chisel across the wet part and the popcorn literally falls off. I have done this before. It takes no time at all to remove all the popcorn, less than 30 minutes if even that long for an average room. The one issue is it makes a big mess, but if you lay plastic down to catch all the popcorn, you can just roll it up at the end and throw away. You do have to be careful not to gouge the ceiling when you are removing it. If it gets difficult and is not coming off good, add more water. It is amazing how easy it is to remove. After removing all the popcorn, you will need to make sure you have a smooth surface to paint on the ceiling. It will require sanding and fixing any areas that might have dents or holes. YES, wear a mask, protective eye ware for sure. This is so easy you will be amazed.

  • Nickole Nickole on Nov 14, 2018

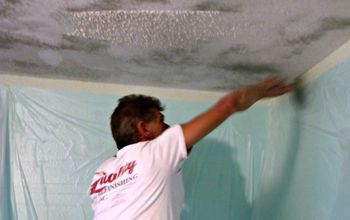
    Oh, one more thing. When I did it the way I described, it got all the popcorn and bumps off the ceiling. You will almost have a flat surface after you wet and scrape off. That is why the sanding is recommended. It is a job anyone can do so you don't have to bust the bank and hire someone. Thank you!

Next