


Fix Plastic Door Inserts and Crisper Drawer for Fridge
3 Materials
$100
6 Hours
Easy
I'm busy revamping my fridge to replace the door seal, spray the outside with Rust-Oleum Appliance Epoxy and fixing up cracked and broken plastic door inserts and crisper bins. There is a broken door insert, as well as a couple of cracked salad crisper drawers that need to be repaired. I worked out it would be far cheaper to fix these than replace the entire fridge.
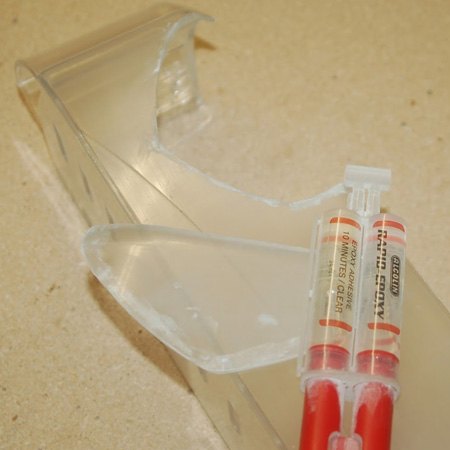
For the broken plastic door insert I need to stick back the broken piece and make the door insert look good. I've tried sticking it together before, but it only lasted a couple of months before it broke again. This time I'm making it permanent! To glue the broken section back in place I used Epoxy adhesive. It's important to mix this in the correct ratio, otherwise you end up with a sticky mess that doesn't harden.
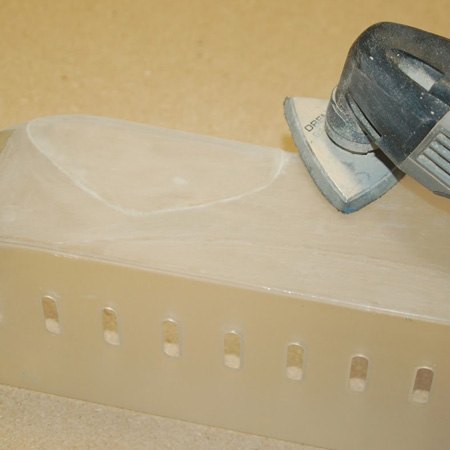
After letting the epoxy set overnight, I sanded down both sides of the container to remove excess glue. I want the repair to be almost invisible, so I am sanding the entire front section of the container so that it all looks the same.
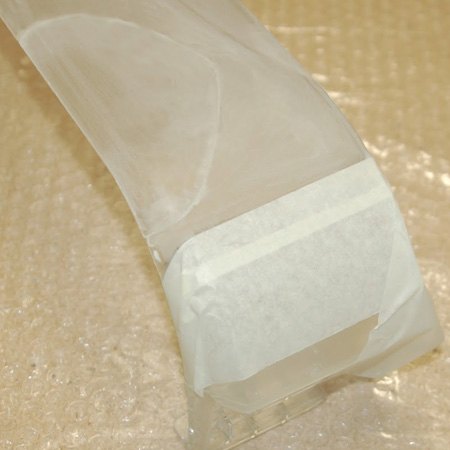
After sanding, the ends of the container were covered with thick masking tape. I don't want to paint the entire container - just the front section that was repaired and sanded.
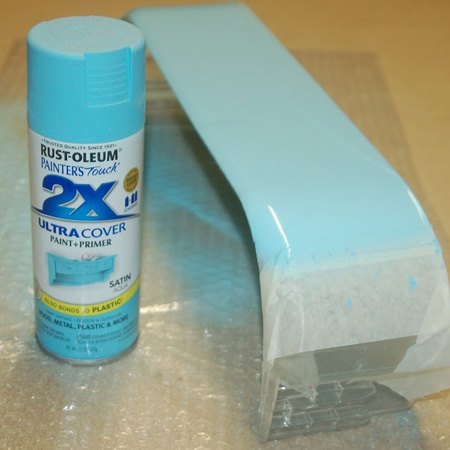
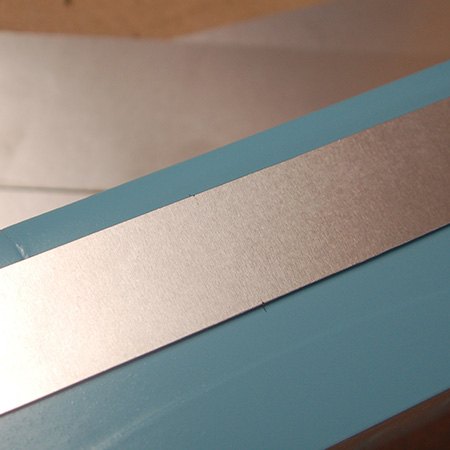
The front of the container was then sprayed with Rust-Oleum 2X satin aqua. You don't have to use this colour, I just chose a light blue/aqua because I thought it appropriate for inside the fridge. There are plenty of other colours in the Rust-Oleum 2X range, so go ahead and choose one that you like. You will find a huge selection of Rust-Oleum spray paints at your nearest hardware store.

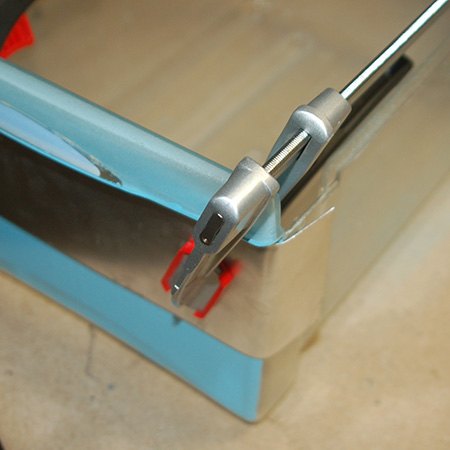
To ensure that the containers didn't break again, as they previously did, I cut aluminium sheeting into strips for the front of the bottle insert and two vegetable crispers. To cut the sheet I used my jigsaw and a steel blade. The sheet was clamped down to allow for easy, straight cutting.
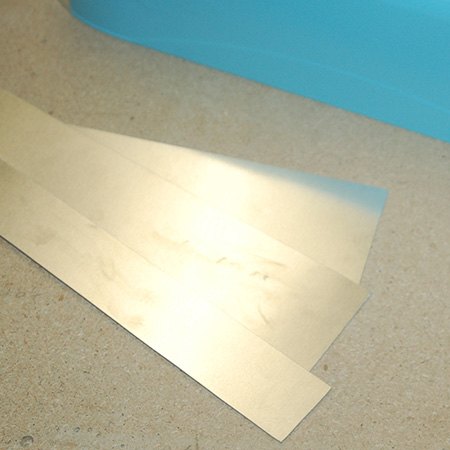
Here you can see the aluminium strips for the front of the containers.
GOOD TO KNOW: It's hard to see in the image below, but I made a small mark at the centre of the container and on the aluminium strip. This was to make sure I lined everything up neatly when gluing together.
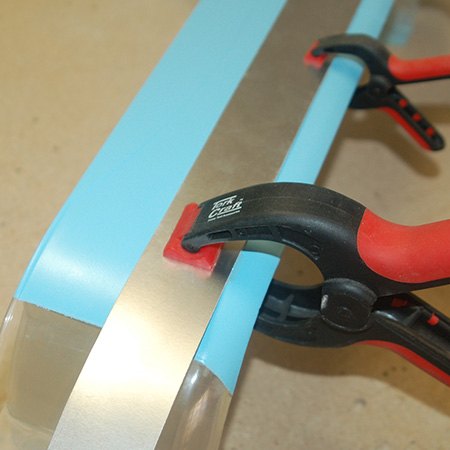
Next it was time to mix up some epoxy adhesive. Only mix a small amount at a time, as it hardens very quickly. Just mix what you need for each section. Epoxy adhesive was applied to the back of the aluminium strip, the strip lined up with my mark, and glued in place. This was clamped and left overnight to properly harden.
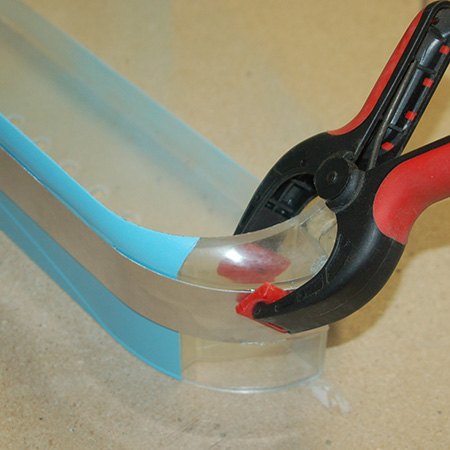
The next morning I glued the sided sections in place around the curved front. Again, this was clamped and left overnight.
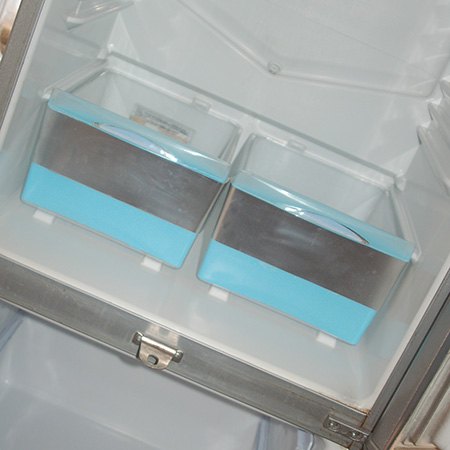
The same process was repeated for the aluminium panels for the front of the crisper drawers, doing the front panel first and leaving overnight to harden before gluing the sides down.
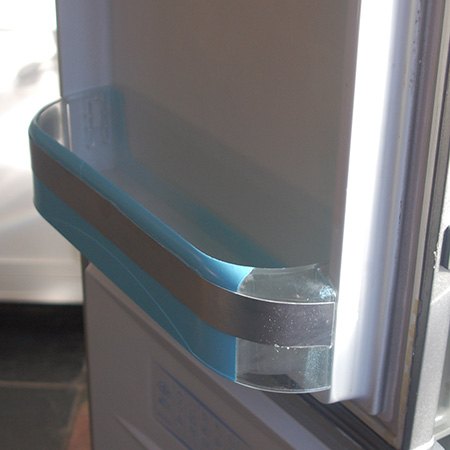
Here you can see how the repaired door insert looks. I'm very happy with the result and the aqua blue colour looks great against the aluminium strip. Both completely hide the patch-up repair that was done to fix the broken piece in place.
The idea has worked out brilliantly, and I pulled and pushed quite a bit to make sure it would hold... and it did!
Resources for this project:


Any price and availability information displayed on [relevant Amazon Site(s), as applicable] at the time of purchase will apply to the purchase of this product.
Hometalk may collect a small share of sales from the links on this page.More info

Want more details about this and other DIY projects? Check out my blog post!
Comments
Join the conversation
2 comments
-
Fantastic and well thought out repair. My mom's Viking refrigerator has the worst inserts. I have made "repairs" now hopefully I can fix them for good.

-
this is great ... thank you for sharing this tip.


Frequently asked questions
Have a question about this project?