


New Window – Replacing a Door, Starting on Lodi’s Space
3 Materials
$100
2 Days
Medium
Replacing a door with a new window. If you read my doors post than you know this is one of many posts coming up that all started with the jackpot of four PERFECT doors we found at the salvage yard. It started with taking out a window in the workshop and replacing it with one of those new doors. With the window in hand it was now time to finally get rid of the crappy door on the back of the house. Its needed to be replaced for years… literally since I installed it.
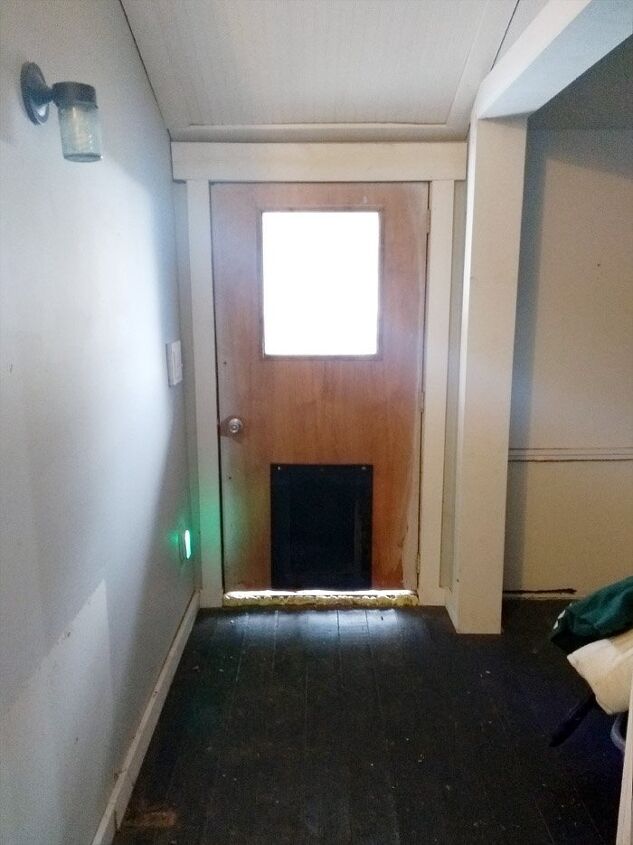
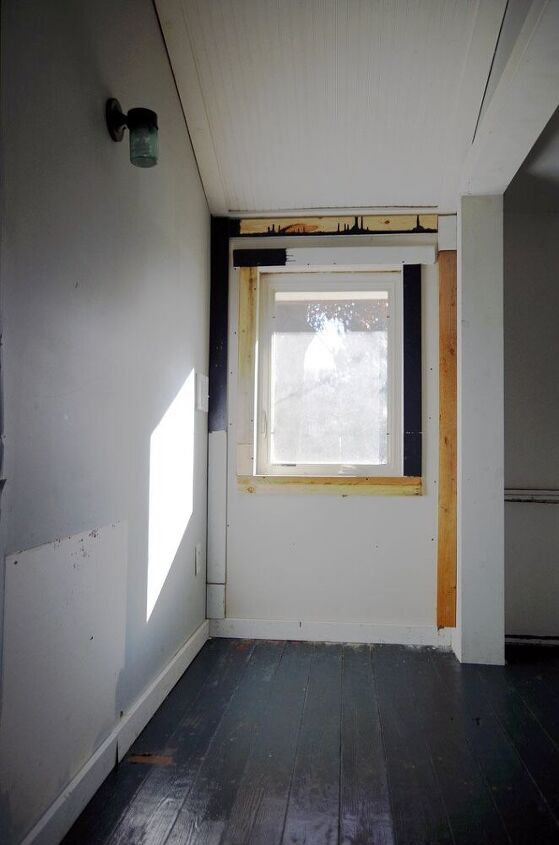
This space was once my back hall, doggo spot and giant closet that held a six foot wide chest freezer.Lives change and our homes then need to change with us.Lodi deserves his own space and we both deserve a storage space we can lock up for valuables etc.This spot back here was a big waste and it was such a terrible place for the old back door and doggie door. A new window here was far more ideal as I shudder to think of the amount of money wasted on heat that blew straight through the house and right out this back door for several winters…
There will eventually be a wall and door to officially make this a “room” but this is the first of many steps to getting us there.We uninstalled an old electric wall heater from out here, the old doggie gate and wood supports.Essentially we simply cleaned the room right out.Compared to replacing the window with an exterior door in the workshop this job we could have done in our sleep. (And its a good thing too because we did both of them on the same crappy wintry weekend in late October. This was the second day and we were both absolutely BEAT from what we went through the day before.)Because it was impossible without risking breaking the window we weren’t able to uninstall it from its old framing. Instead we cut it out of the workshop with reciprocating saws and a lot of swear words.
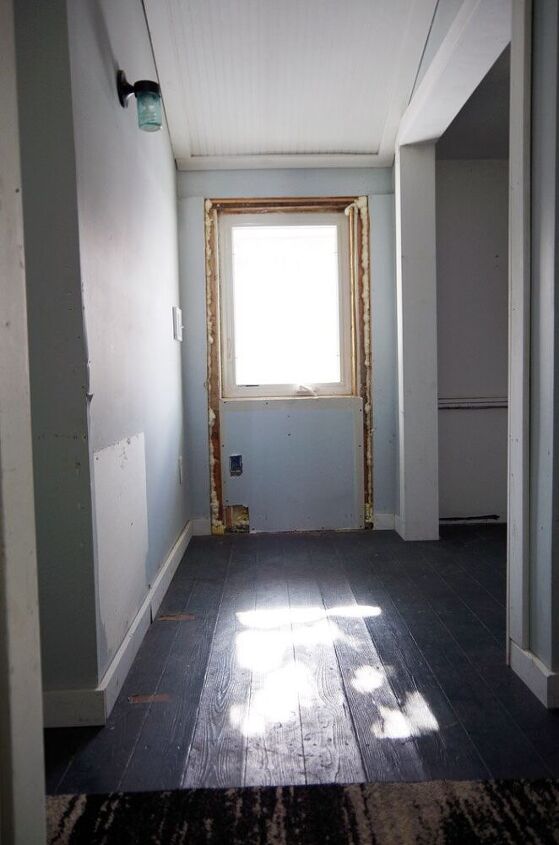
Essentially, we cut the whole wall out with the window in it and stuck it here where the old door used to be.Of course it wasn’t quite that simple as there was A LOT of adjusting and more cutting to do. HOWEVER, it worked out just fine! (That old outlet box and wires I left in the wall because its not hooked up to anything, not hurting anything and stuck like a rock in spray foam.)We were thrilled to get to this point.There is some weirdness here that may or may not bother us enough to ever mess with.
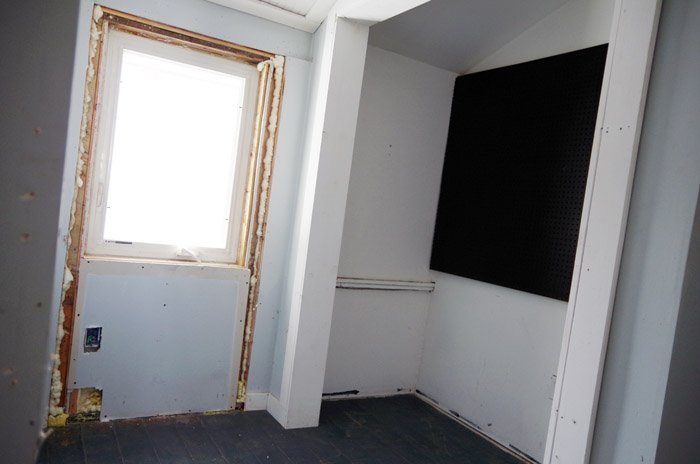
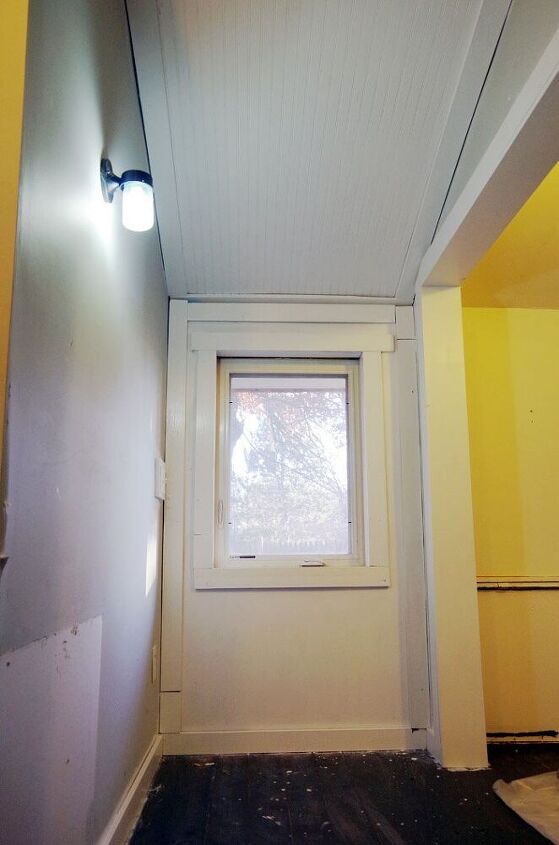
We now have a window with an outside light beside it LOL It made sense when it was a door, of course, now though, its just ODD.I may uninstall the fixture and clap a blank faceplate over the light box outside. I could do something similar inside to eliminate the light switch safely and to code as well.Inside I covered the entire wall with a full sheet of sheet rock (eliminating lots of weirdness) and trimmed out the new window and also along the floor and ceiling as well.I called it my Frankenstein’s monster at this point lol as I used literally every last 1×4 we had which were all recycled out of the workshop and several other places.I filled in the screw holes, did a little sanding, painted it all out and just went ahead and painted out ALL of the ceilings and trim in this hall in semi gloss Royal white.
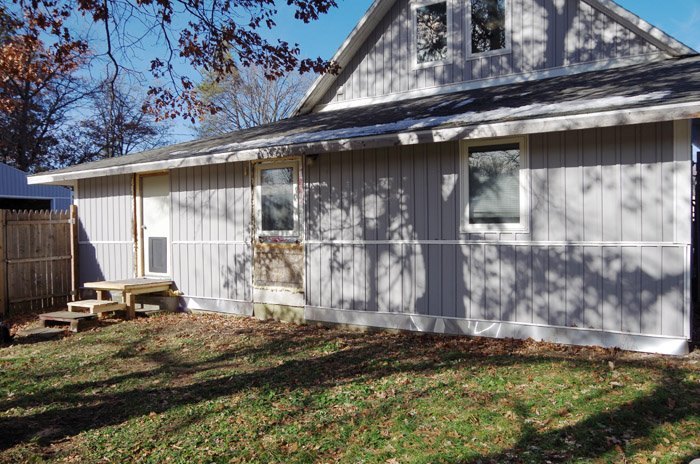
I’m sure you guys remember me mentioning it hundreds of times over the last three years how every single space in my house needed to be repainted after the wood stove my ex husband insisted on did horrible smoke damage. Repainting this room and hall was the LAST re-painting to do on the main floor!(You can see the floors need a new coat of paint too – I promise I will get to that eventually lol.)The window from the workshop is identical to the other window in the guest bedroom on this side of the house so I think the result looks just fine from the outside even though the new one we put in is a couple of inches low…
To be fair though its in our dog kennel which is totally hidden by a privacy fence so we’ll be the only ones that ever see it!Of course, as you can see, we have siding to do on the outside both here and around where the new door is but that can wait until next spring/summer!Next up: More posts about installing doors! We can now build a wall here and put in my favorite of our “new” doors to officially make this space a REAL room!

Want more details about this and other DIY projects? Check out my blog post!
Comments
Join the conversation
2 comments
-
Looks great. Like it was always there. Great job.


Frequently asked questions
Have a question about this project?