


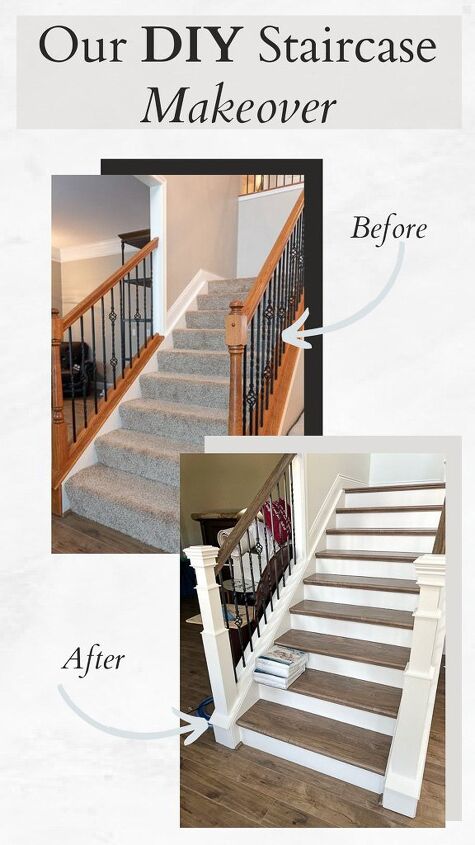
How to Remodel Your Carpeted Stairs: Our DIY Staircase Makeover
Let me show you how to remodel your existing staircase into a beautiful new set of stairs. In most homes with a second story, your staircase can be one of the first things you see when walking in. So why not transform it into the amazing focal point it deserves?
This series of DIY projects is a great way to update any existing stairs from builder grade to custom, on a budget.
This post is sponsored by Stairtek and contains affiliate links. Please see my full disclosure policy for more details.
Our staircase Remodel Before and After
From the minute we previewed our home before making an offer, I knew the staircase remodel was one of those home renovations we just had to tackle. But this thing was massive. Far bigger than the last stairway update we made in our old home. And I’m not gonna lie and tell you that I wasn’t 100 percent intimidated on where to even begin with it.
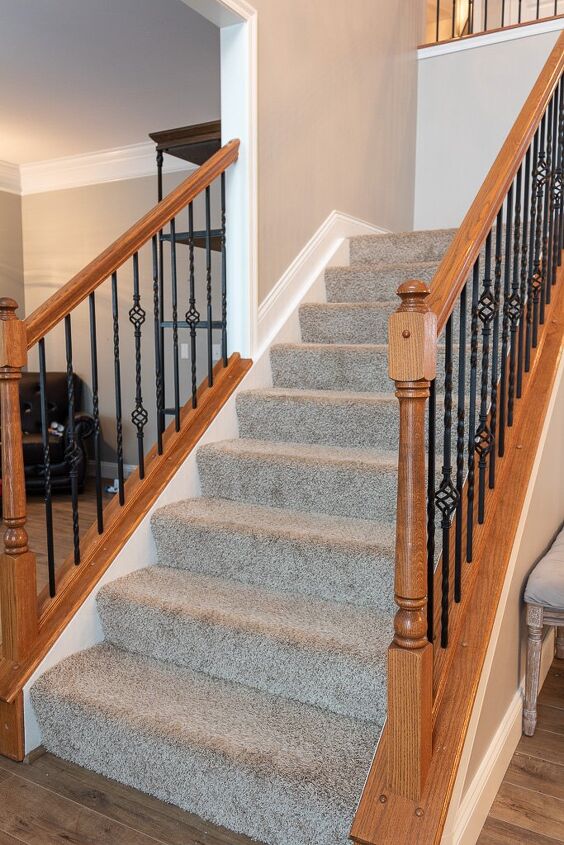
There were just too many variables to consider here. Like the style of the old posts, or the fact that it had a turn in it. And SO MUCH WOOD to re-stain, if we were going to try to keep our costs down.

So, it sat like this. For three solid years until I had enough and finally came up with a plan. And plan I did.
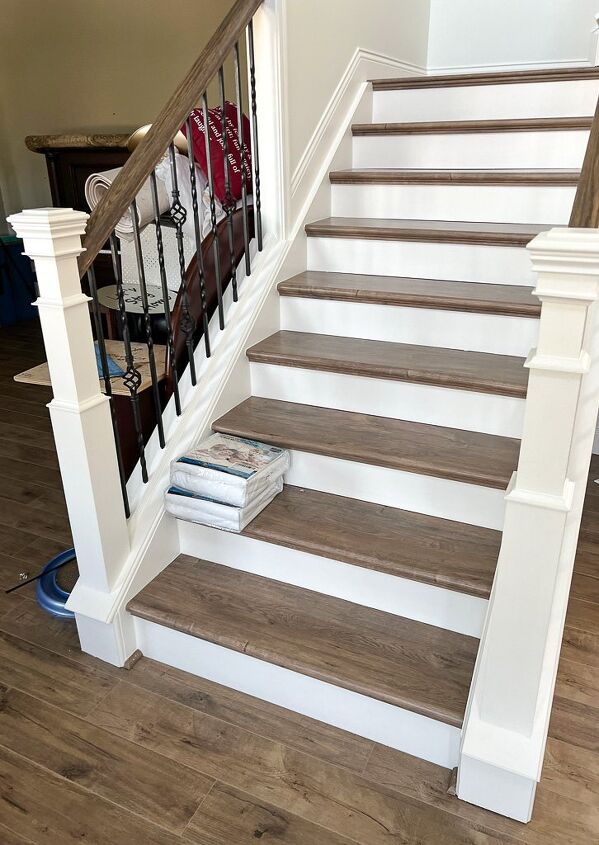
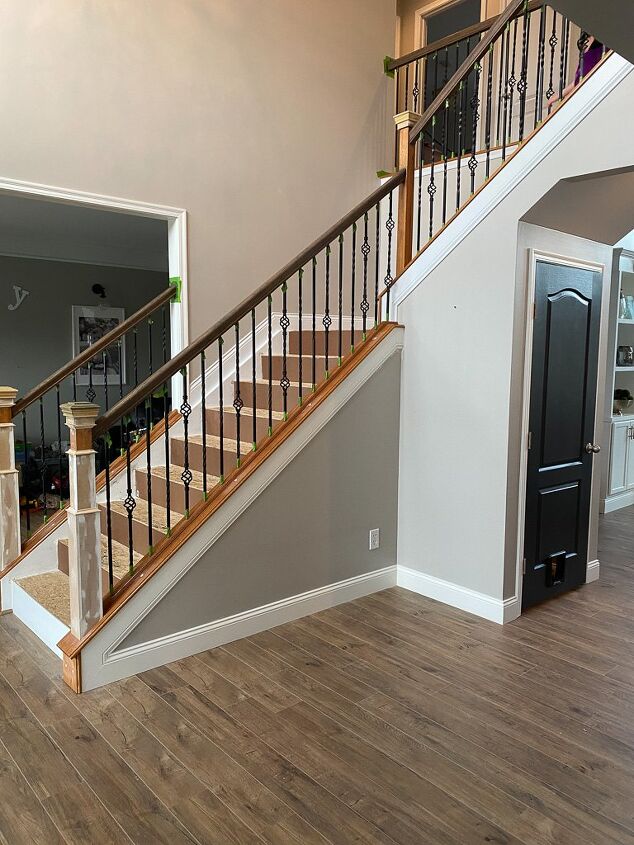
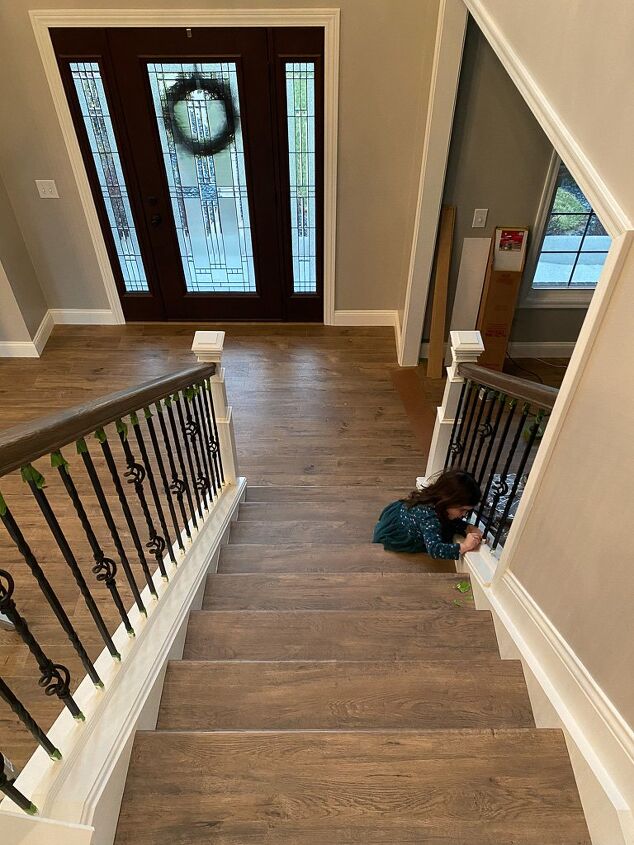
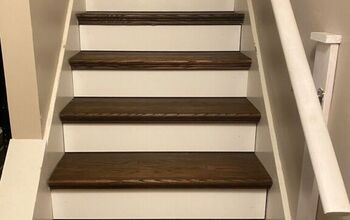
Isn’t she gorgeous now?!!!
For safety reasons, I still want to add a carpet runner. But progress my friends, progress.
Staircase remodel cost
The average cost these days to remodel stairs can range from about $1000 to $2000 in materials alone. And that’s just for your basic 9–12-foot staircase. Costs can easily be driven up to account for labor as well as any type of customization, like new railings, newel posts and iron balusters.
So it’s no surprise that cheapest way to remodel stairs is to do it yourself. So where do you even begin? I’ll break down our entire remodel process so that you can use it as a rough guide for your own project.
You may not choose to do all of the options we did, and you may even find a cheaper alternative. But this should definitely help serve up some inspiration to help you get that custom staircase look for less.
Full disclosure, our new laminate stair treads, which were a big chunk of the material cost for our project, were graciously gifted to us by Stairtek. And unless you’re one of the lucky few homeowners that are blessed with super strong hardwood stair treads (I go over all of the different types here), then I recommend recovering or replacing them when possible.
You can read all about why the type of wood you choose for your treads is so important here.
How to remodel stairs from carpet to wood look
There are plenty of products and even stair makeover kits available that can give you a wood look finish. But for the purpose of this project, we’re going to focus on 5 key things to remodel any stairs.
- Removing old carpet
- Staining / painting existing handrails
- Modifying outdated stair posts/ balusters
- Painting/ staining risers
- Recovering stair treads
Now, before we dive into how we tackled this project, let’s make sure you have you bases covered with any necessary tools and materials.
Tools and Materials Needed to Remodel any Stairs
- foam brush / paintbrush
- pry bar
- circular saw
- orbital sander and sandpaper
- tape measure
- miter saw
- pliers
- construction adhesive
- wood filler
- brad nailer
- stain / paint/ polyacrylic
- wood conditioner
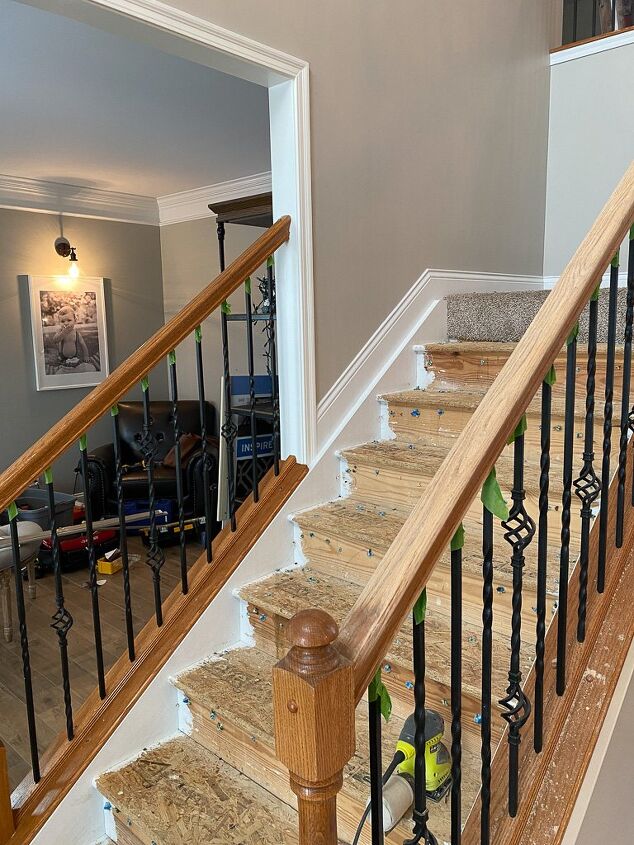
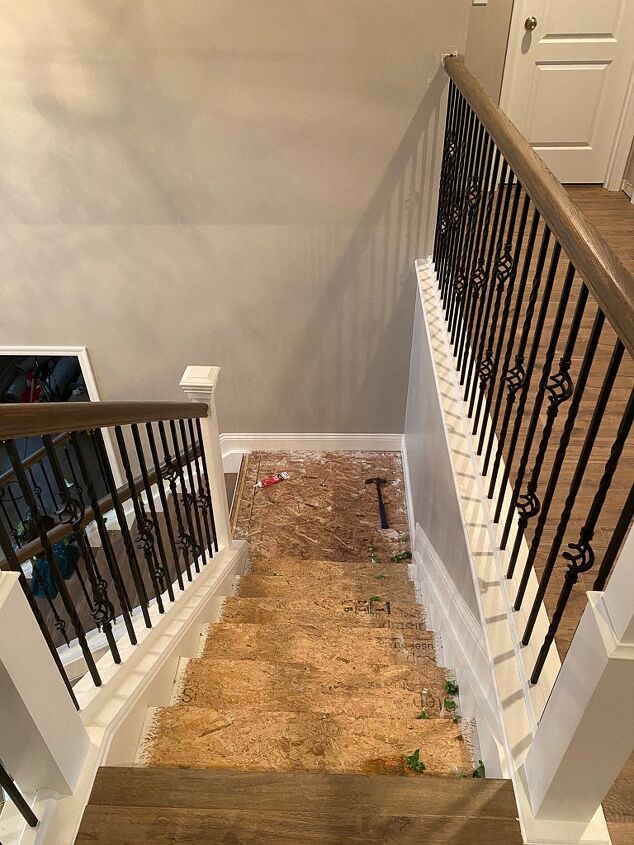
STEP 1: REMOVE CARPET FROM STAIRS
The first thing you want to do is begin removing all of the old carpet, tack strips, and padding on top of your current treads. This process goes pretty quickly, but I found it’s easiest to work through one step at a time.
You should be able to gently lift your carpet beginning at the bottom of your stairs and continue pulling it up off of the tack strips until you reach the top of your landing. There’s usually a nice clean seem where your stairs meet your top carpeted landing so you shouldn’t have to work about making any cuts.
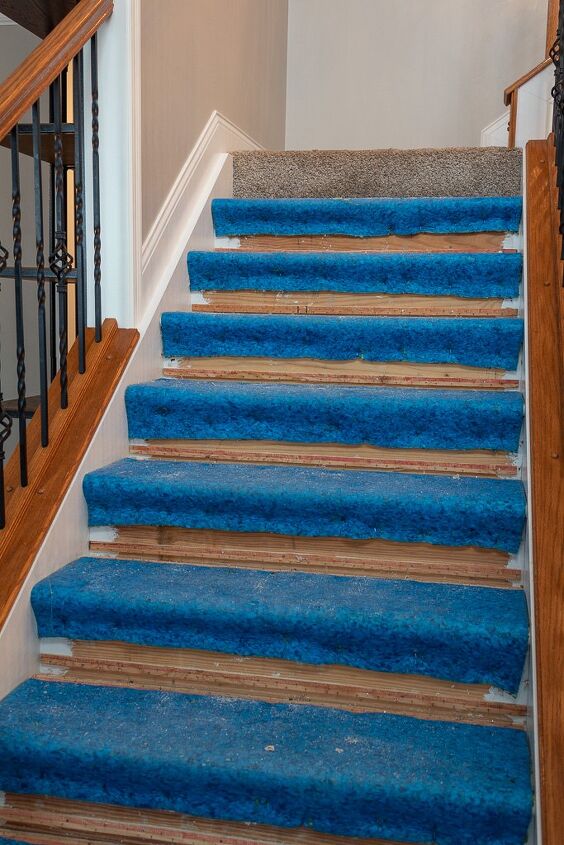
Repeat this same process as you pull up the layer of foam padding.
And finally, working your way from the bottom of the stairs up, gently use your prybar to begin lifting and pulling out the tack strips that line both sides of your staircase.
But the most tedious part of this whole process is using the pliers to remove each and every one of those lovely staples that was securing your carpet padding down.
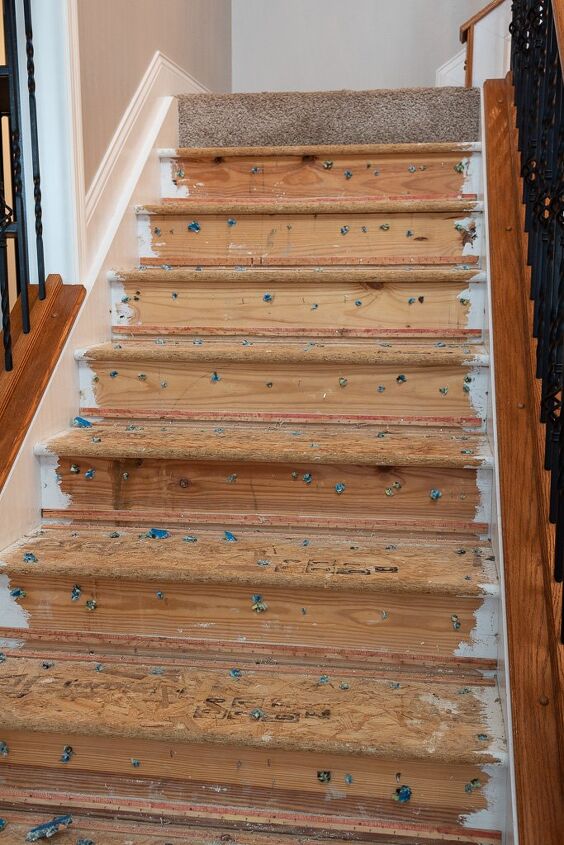
The good news is, that if you follow this tutorial, you won’t have to worry about filling in all those pesky holes.
STEP 2: REFINISH HANDRAILS
Choosing to keep and refinish your existing handrails is a good idea for any homeowner looking to keep the costs of this project down. And it’s very DIY friendly. So now that you have a cleared staircase you don’t need to worry about creating a mess during this next phase. And messy it will get.
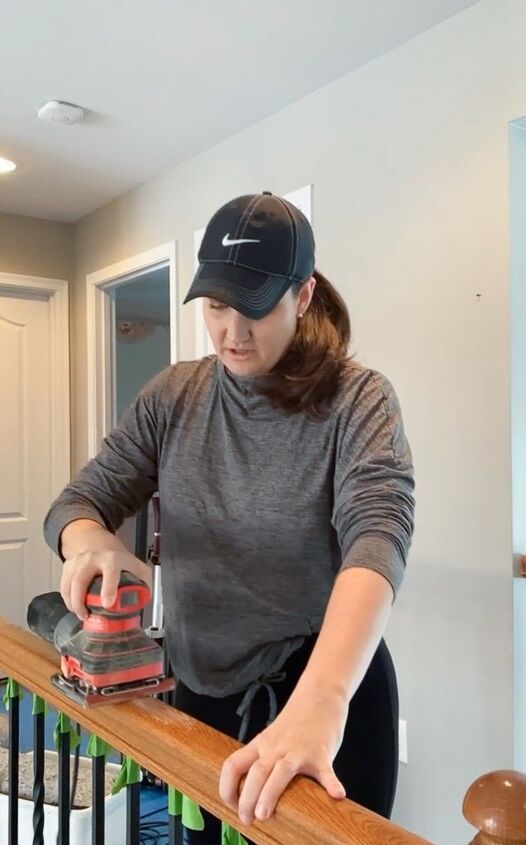
Using an orbital or palm sander, start with a very coarse grit, such as 60-80, to remove the existing finish of your banister stain. Patience is the key to this project. And while some might suggest using a chemical to strip the existing stain or varnish, I’m here to say, don’t bother.
I tried it, it was messy, and honestly I don’t feel as though it saved me any time at all. In fact, I think the mere fact that I had to clean up the goopy mess might have actually added on to our project timeline.
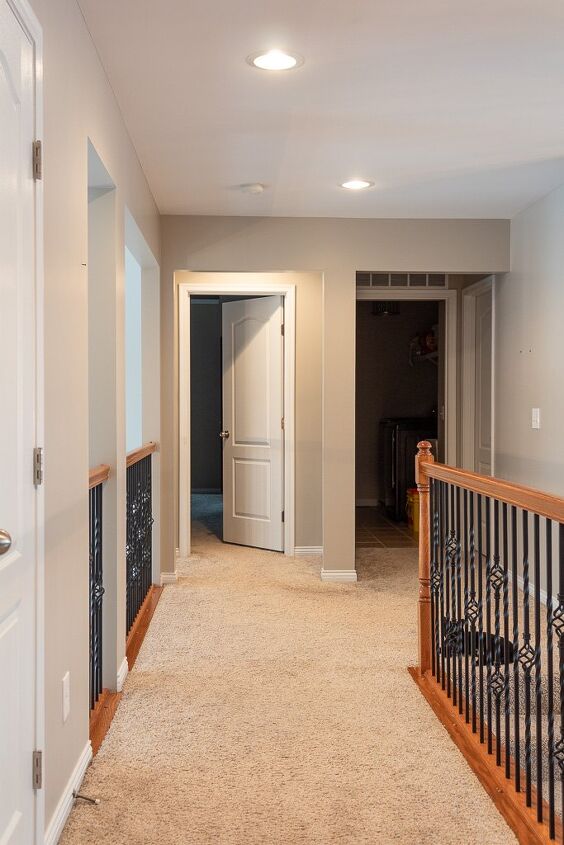
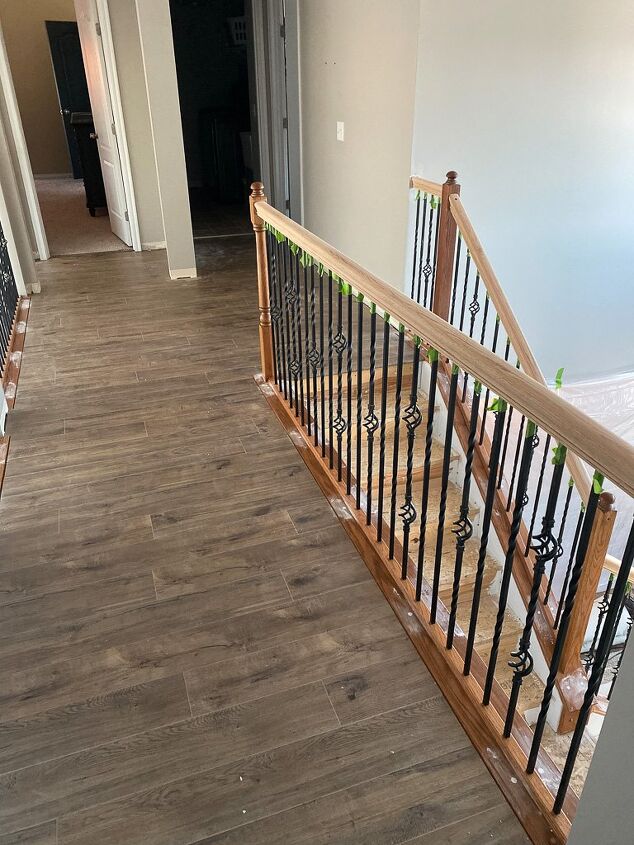
Since we have a massive amount of handrails on our staircase as well as our upstairs hallway, this process took a few on again off again weekends of work. But having done this in our previous home, I can safely say that it can be done in a day for a basic staircase.
Once you’ve completed the rough sanding and removed your existing finish, you can work your way up to smoothing out the roughness with a fine 240 grit sandpaper. Then you’re ready to choose a more updated stain color.
Unless you have an exact spare piece of your handrail lying around, you’re going to need to test out your stain options directly on you freshly sanded rail. Do not, I repeat, do not skip this step.
A note on staining…
Every species of wood can take on the same stain color and appear entirely different. So going off the swatches at the hardware store is not a reliable option. Again, take it from the girl who learned the hard way.
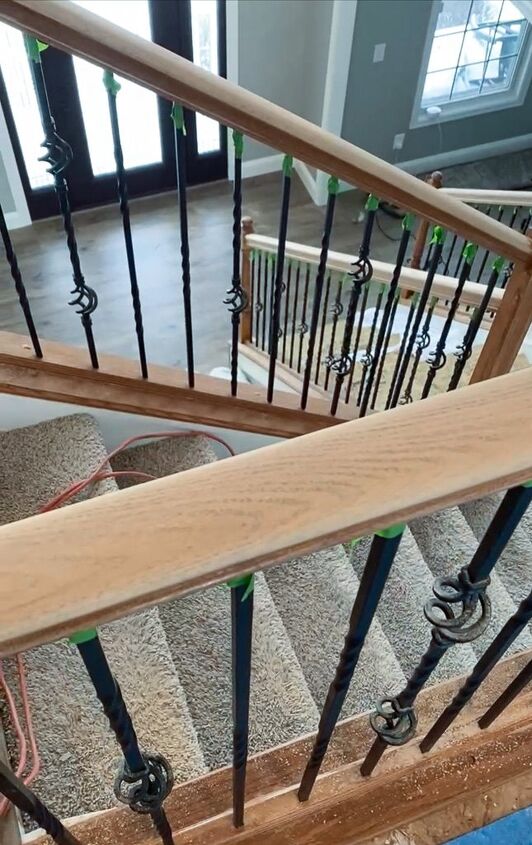
We ended up staining our red oak banisters in the color “Smoke Gray” by Varathane, and I never would’ve anticipated this dark color would be our match. But it was.
Using a foam brush or rag, apply wood conditioner to your handrails according to the instructions. This will help better prepare the surface to accept your stain and allow for a more even coverage.
Next apply a minimum of two coats of stain and allow it to dry for 48 hours. And finally, apply a minimum of two coats of polyurethane or polyacrylic. I opted for a satin finish polyacrylic to avoid yellowing, and because I wanted to avoid something overly shiny.
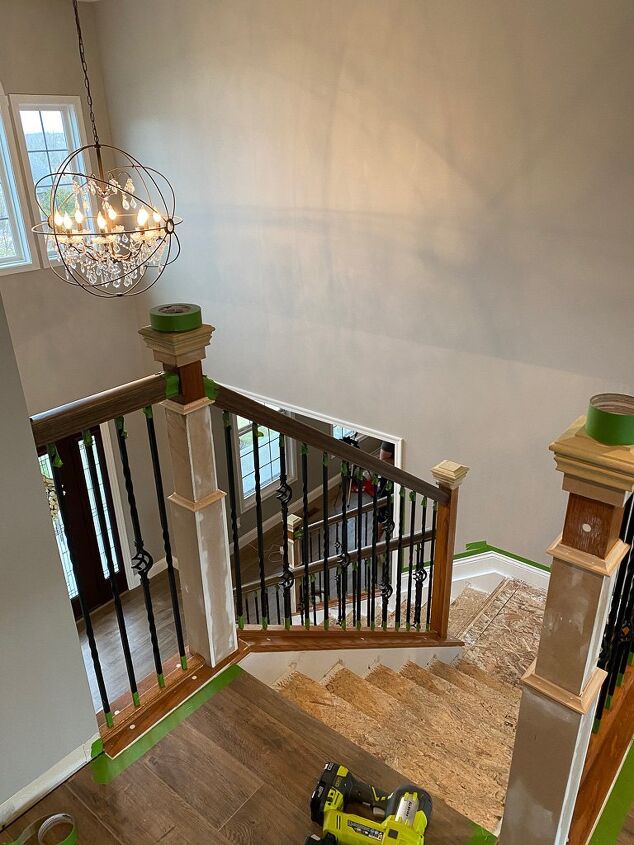
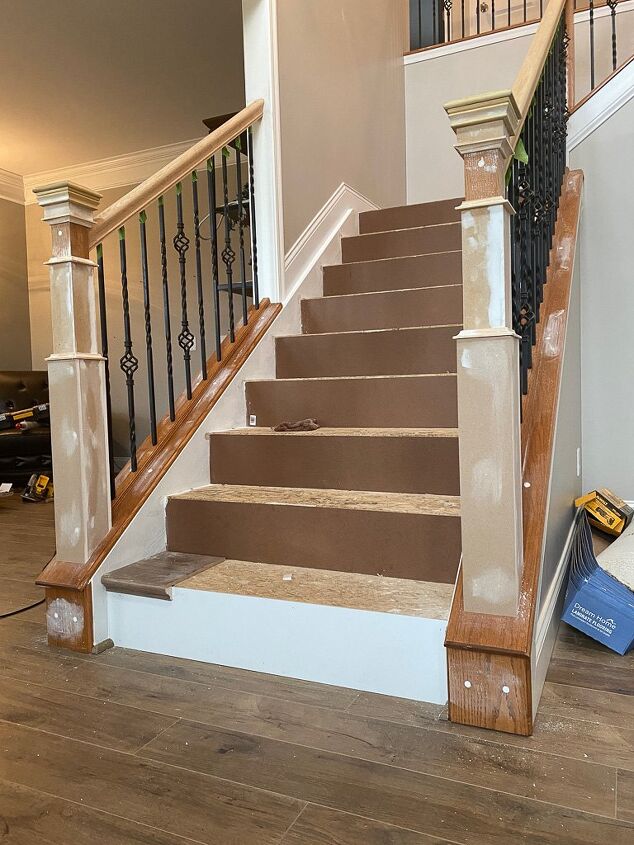
STEP 3: MODIFY OR REFINISH STAIR POSTS
You can choose to simply repeat the same process above to refinish your existing stair posts. Or you can get a little brave and creative and modify your existing post to look like a craftsman style newel post.
Obviously I opted for the DIY route. Replacing all five of our existing stair posts was out of the question. It would’ve cost us well over $500 in materials alone. Plus I couldn’t stomach taking the entire staircase apart and living without handrails when we have small children in the house.
Ummm, no thank you.
Because this was a project all in itself, I broke out the full tutorial of our DIY Newel Posts here for you.
But we did choose to update all of the wood molding around the base of our stair posts with a fresh coat of Simply White Paint. It took three coats of white paint to cover the old honey gold stain, and I love how it now matches all of the adjoining trim work.
STEP 4: UPDATING STAIR RISERS
Chances are, your existing stair risers are simple builder grade pine boards. These are perfectly acceptable to paint over, but they don’t accept stain very well and I don’t recommend going that route.
With the amount of pine risers we have, that’s a lot of patching nail holes, sanding and caulking in order to paint. And I just wasn’t up to the task. So we went with another budget-friendly option and ripped down thin sheets of MDF to use as new risers.
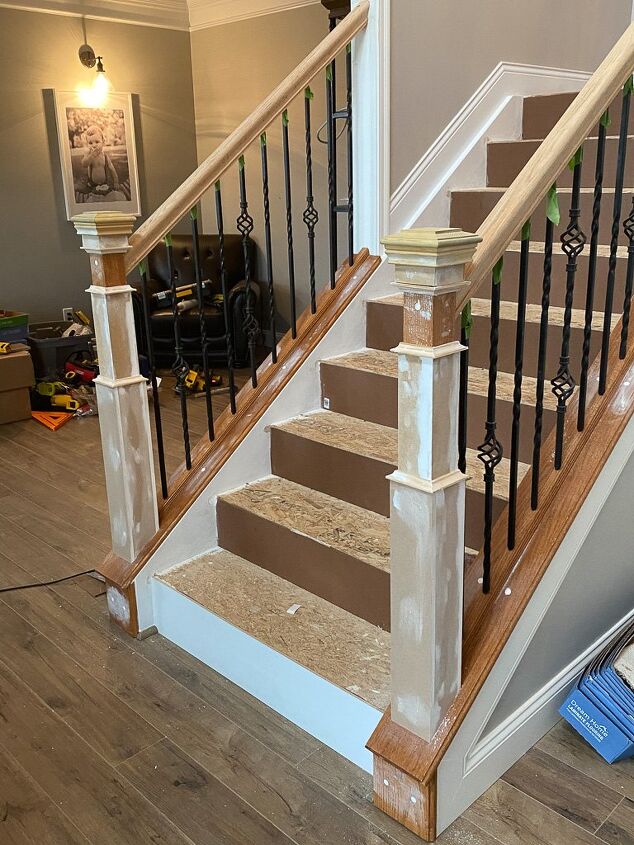
For this step, simply measure your riser height from the base of each stair to the top of it. They should all be roughly the same height and perfect measurements here aren’t all that important as your new treads will overlap each riser anyway.
Now measure the width of each riser from the inside edges of each adjacent stair stringer. Again, close, but perfect measurements here as well. We can caulk those small seams and paint over them.
You can use a circular or table saw to make your cuts, and simply apply construction adhesive to the back of each riser to attach it and cover the old ones. You can use a brad nailer to secure them as well, but that’s entirely optional, and keep in mind, you will need to fill in any nail holes.
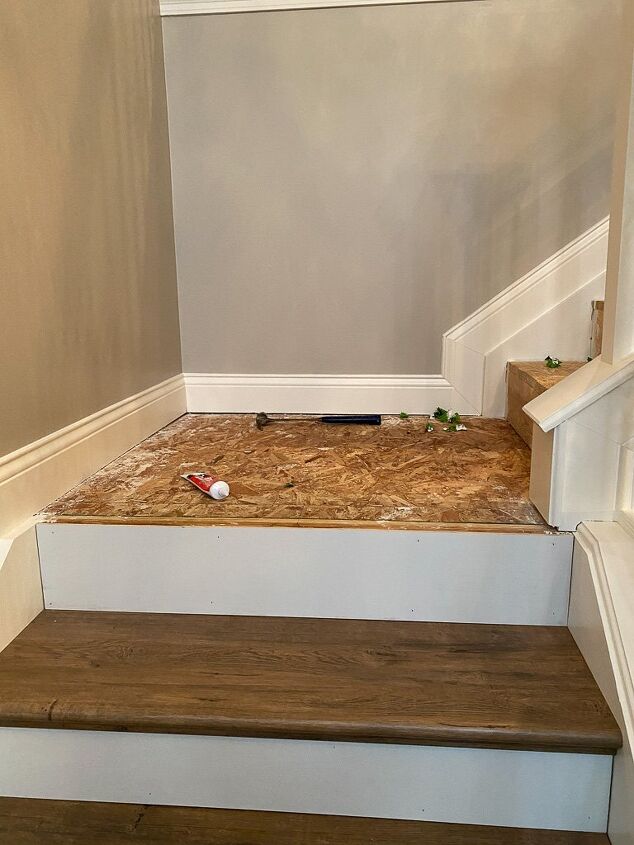
STEP 5: INSTALLING NEW STAIR TREADS
This is the fun part! And the easiest in my opinion! The last step is to install your new stair treads or tread covers. Now, I can’t tell you if you should go for new treads all together, or attempt to cover them.
It really comes down to your personal preference on the type of material you want to use, as well as the general construction of your stairs. But I can tell you that particle board treads, which we were so fortunate to have, are just not going to fly.
A not so fun tip: All of our stair treads were also secured into the sides of the stair stringers using screws. Which meant, that in order to replace them we’d have to completely remove them by dismantling the entire staircase, section by section. So I had to pivot in my plan again.
We opted to use laminate stair tread covers that actually matched our existing laminate floors perfectly. Happy dance!!!! Just one catch. The new laminate covers didn’t have that nice curve cap to fit right over top of the lip of our existing treads.
So we (my sweet husband) used a circular saw to cut off the lip of each of our treads. Once they were all trimmed and prepped we began measuring and cutting down the widths of each tread using a miter saw.
Then we simply worked our way from the top of the stairs down installing them with construction adhesive (no nail holes here). And then applied a good amount of weight on top of each tread as the adhesive dried and cured. This helped create a nice strong bond.
Final Thoughts
I’m so happy with how this project turned out. There were a lot of learning curves to it, and our patience was tested a time or two, but I feel so much more confident when the time comes to tackle our basement stairs.

Have a question? I love hearing from you! Drop me a comment below and I promise to get back to you as soon as possible. And don’t forget to pin this project for your future home renovation inspo!

Resources for this project:
See all materials


Comments
Join the conversation
-
Wow, yes I’m going to keep this and use it when I tackle my stairs. Thanks
-
Wow. I see that this project was done a year ago. Im sure you are enjoying your new staircase. What an amazing job you guys did. Lot of work has surely paid off.🙂


Frequently asked questions
Have a question about this project?
Great job! I plan on following you instructions exactly. That being said, I’m unclear on the stair lip process. Did you husband remove the lip entirely and then just put the laminate at 90 degrees? If so, was this strong enough? The picture looks like it is angled. Help, please and thank you!
What did you do at the landing to finish off