


Easy Way to Install Vinyl Floor Tile Over Existing Tile

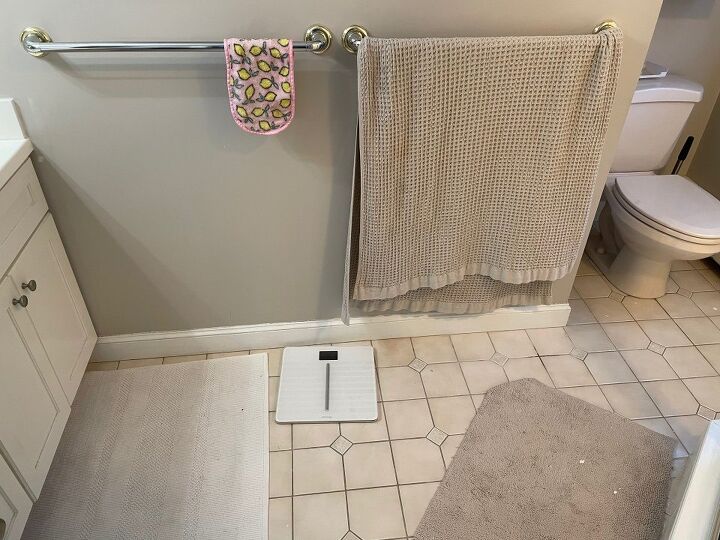
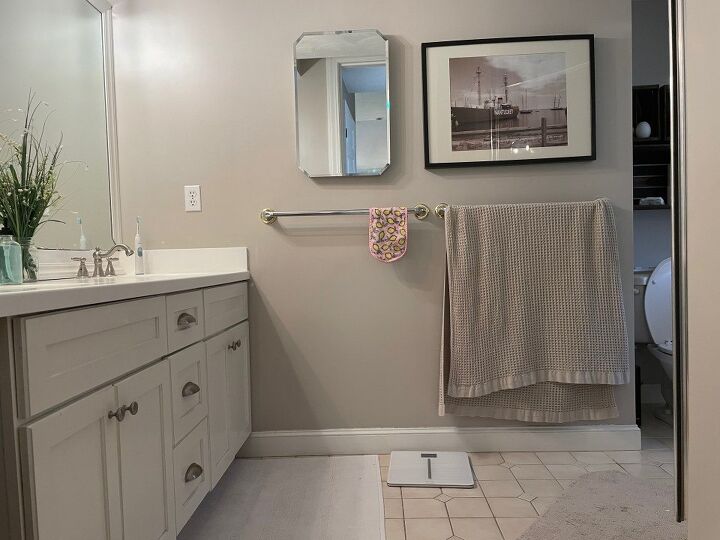
My bathroom has ugly old outdated flooring tiles. Of course, I would love to do a full gut renovation in this bathroom at some point but unfortunately it’s just not in the cards for now. So I opted for a super budget friendly option to install vinyl tile directly over the original tile. Not only does it look incredible, but it’s super inexpensive, durable, and way easier than ripping out your old tile and installing new.
Disclaimer: In the name of full transparency, please be aware that this blog post may contain affiliate links and any purchases made through such links will result in a small commission for me (at no extra cost for you). As an Amazon and Home Depot Associate I earn from qualifying purchases.
Step One: Pick your tile
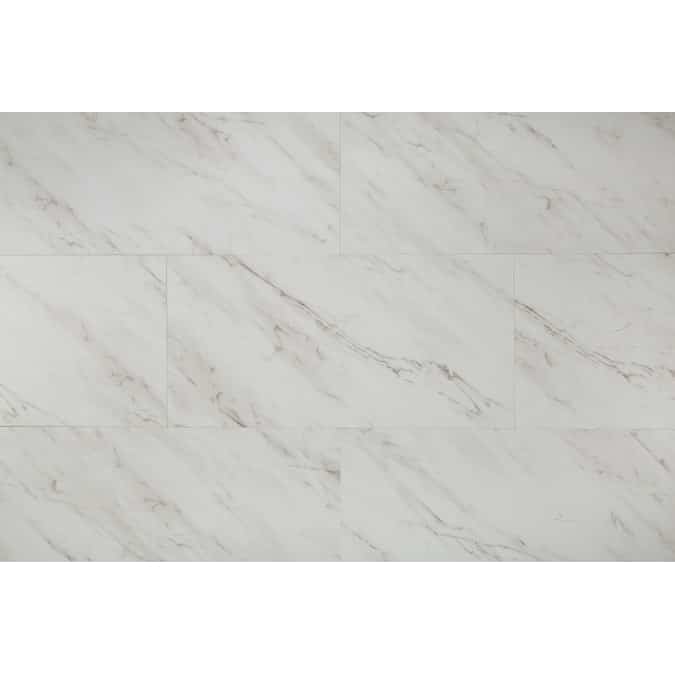
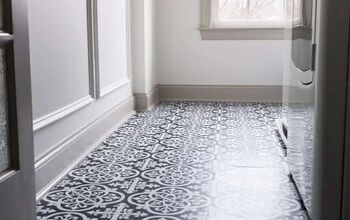
Unfortunately, peel and stick vinyl tile selection is somewhat limited. I was also looking for a version that is groutable so again, options are limited. I went for this 12 x 24 marble style tile which I found at Lowe’s. Overall it is really beautiful and meets the criteria of everything else that I was looking for.
Step Two: Determine your layout
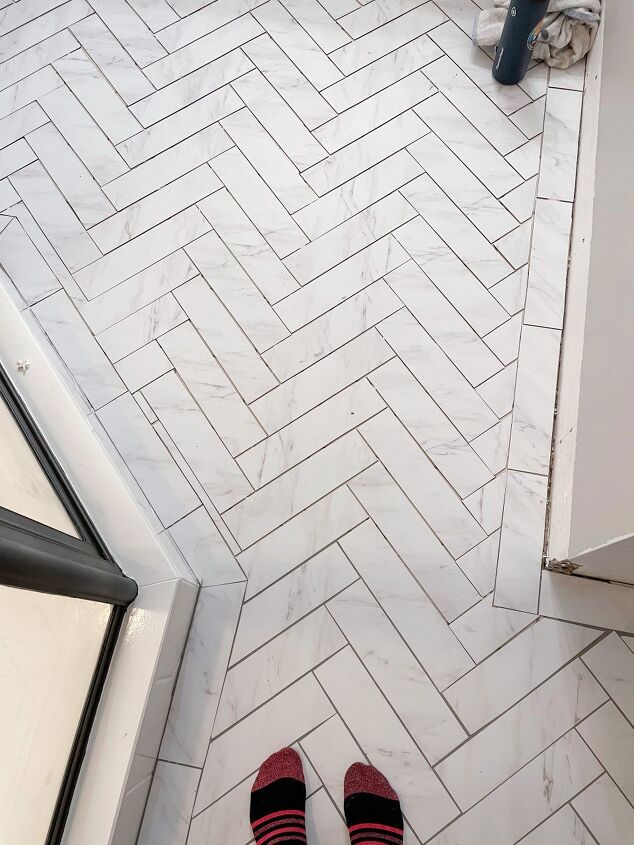
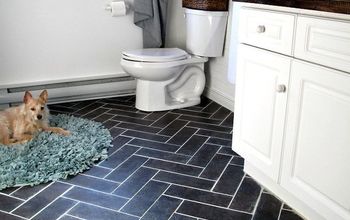
Again, these are 12 x 24“ tiles. And I think they would look very lovely laid out in a staggering pattern like this. In fact, I almost regret no doing that for my own bathroom. I think it would look nice and clean and uniform. The installation would’ve been way easier than what I opted to do as well, which was a herringbone pattern with a straight border along the edges.
Instead, I opted to cut my tiles into 3 x 12“ strips. This was done using a speed square and a sharp box knife. Placed the tile with the speed square on top. Very lightly and slowly score (make a light cut) along the line. I made the mistake of trying to cut too deep and go over it multiple times and I made several mistakes in my tile cuts. Don’t be like me.
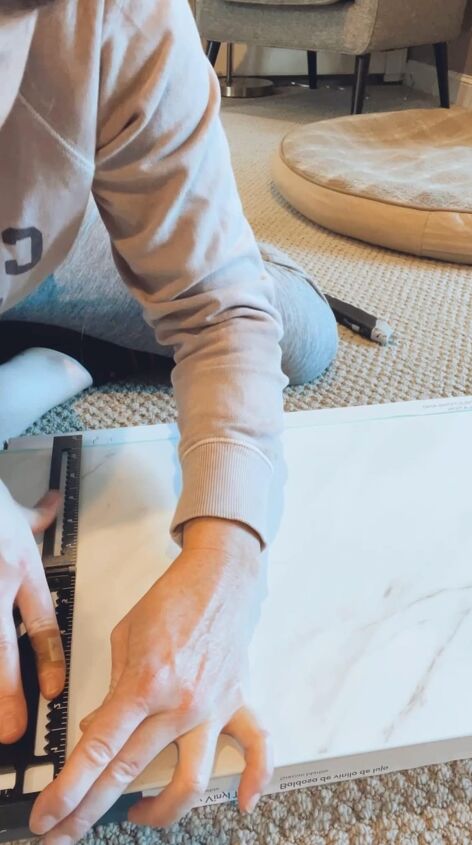
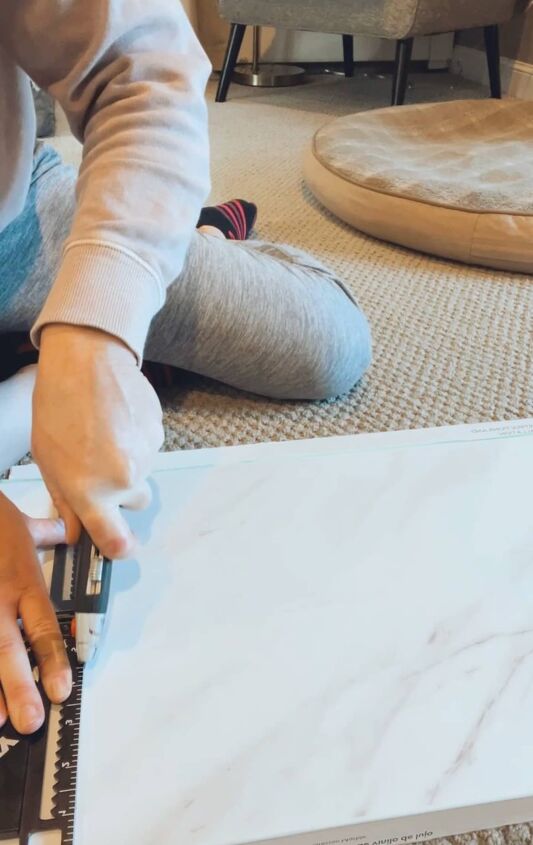
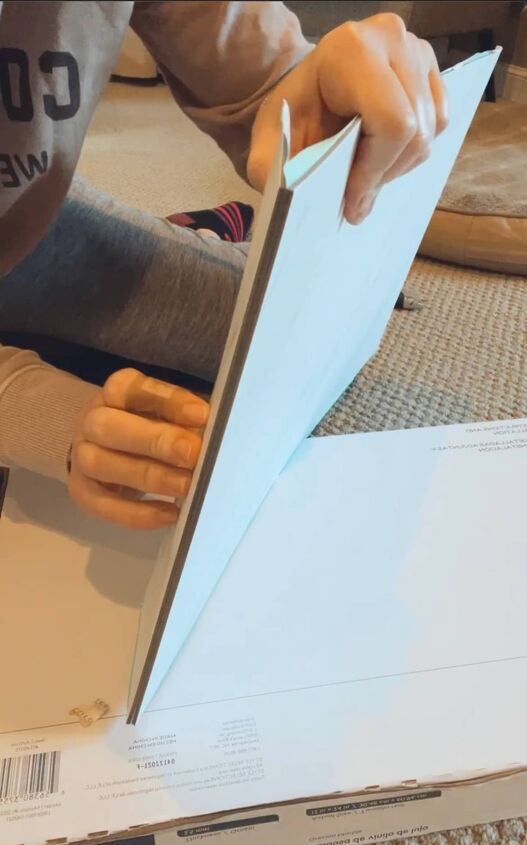
Once the tiles are scored you can just snap them along the line. Then repeat this like 4000 more times.
Step Three: Installation
It’s time to install your cut vinyl strips. Now, these are peel and stick tiles but I would highly recommend using additional construction adhesive to make sure that the tiles stick well on top of your previous tiles. I actually started my design and ended up making a mistake in my layout and had to pull up what I had already laid. It was far too easy to pull up and I honestly would be afraid that the tiles would shift or come up later if you don’t use extra adhesive.


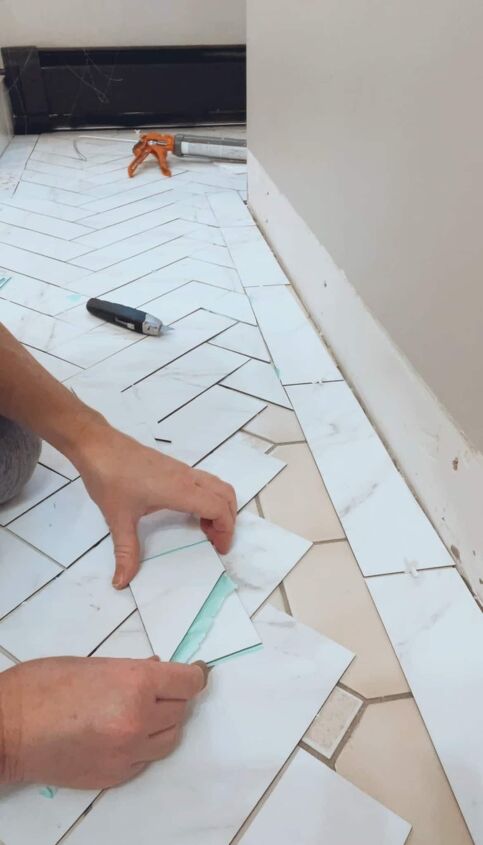
For this layout you will want to start by doing the straight border around the edges. Then to get the herringbone started, use a speed square to make sure that the center of the first tile is coming off at a 45° angle. If you get your first row installed correctly, the rest will follow. To get more consistent spacing between tiles, us 1/8 inch tile spacers. Also, spend a lot of time to make sure that your tiles are evenly cut and evenly spaced. I made several mistakes with spacing/placement and thought that the grout would hide them but in all actuality the grout actually accentuated them. That may not be the case if you use a white grout but I used a gray grout. Anyway, just something to be aware of.
As you get toward the edges of your room and your walls you will need to make lots of little cuts. Again just use your straight edge and a box knife and ultimately it goes pretty quickly. As long as things are symmetrical you can actually make a template and cut several pieces at a time.
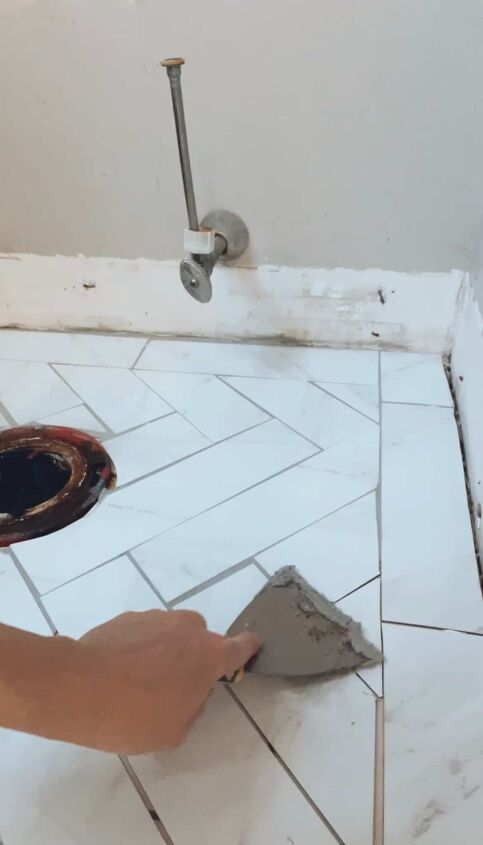
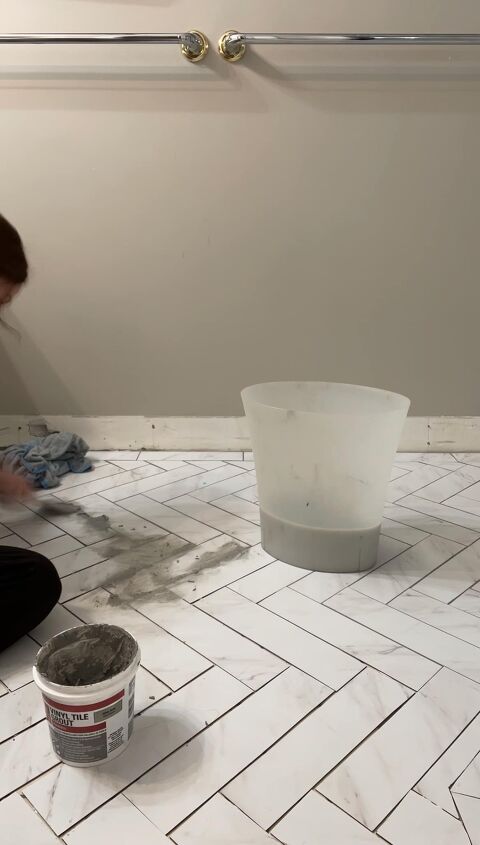
Step Four: Grouting
I recommend allowing your tiles and adhesive to sit for at least 24 hours before grouting. This will ensure that the tiles don’t shift around as you push the grout in between the cracks.
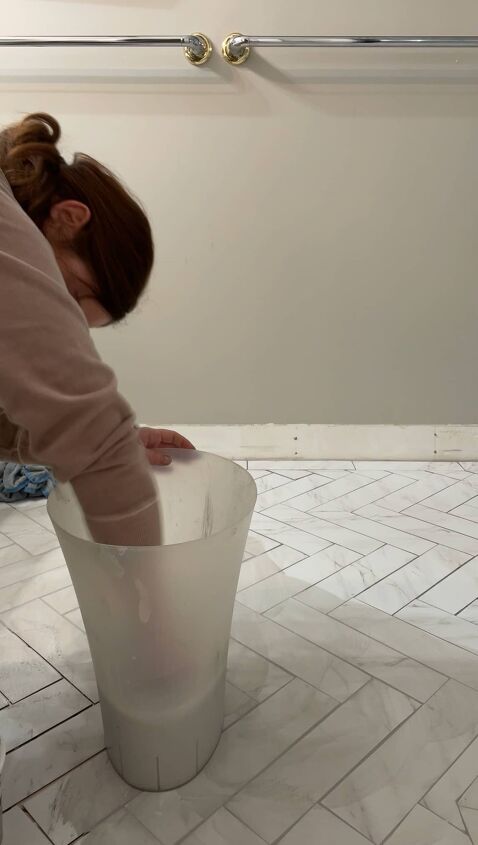
The grout is a specific grout made for vinyl tile. There are a few colors but I chose a gray thinking that it would not show dirt quite as much. Use a grout float to apply the grout in between the tiles. After you’ve done a small section of grout, wipe away the excess. Take a large clean sponge, make sure it is just damp and not wet, and then wipe away the excess grout. Rinse the sponge multiple times for each section just to make sure it gets nice and clean. Repeat this process until the entire room is done. Then try not to walk on it for another 12 hours or so. You may find that some areas of the grout shrink up a little bit in which case the next day you can go back and add some additional grout to those spaces.
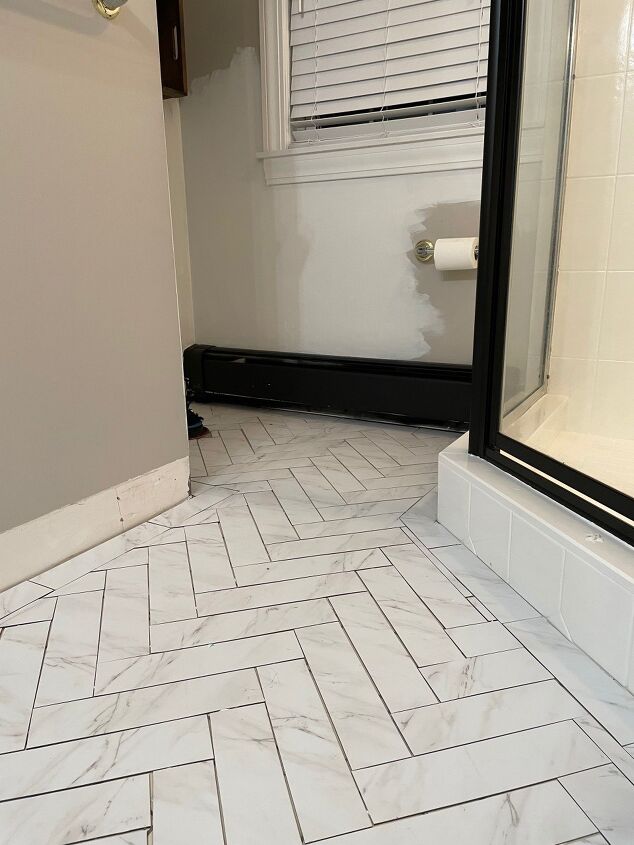
Completed Vinyl Tile Flooring
Now your new budget friendly final tile herringbone floor is installed and should last be quite durable and beautiful for years to come! I could not be more thrilled with how this turned out! And I spent less than $150 on the tile and grout supplies. Talk about bang for your buck!
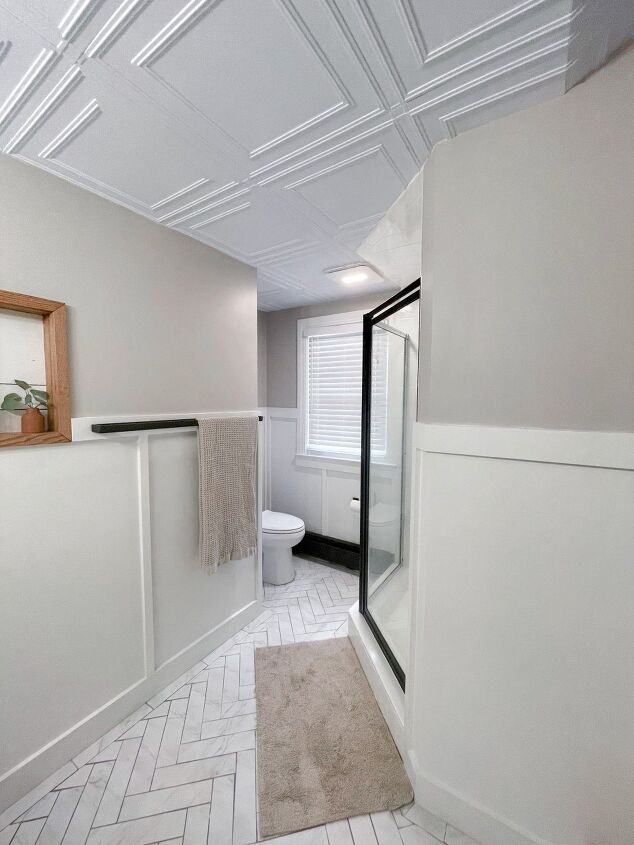
As we head into the final week of the One Room Challenge, make sure to check out all the other guest participants as well! So many incredible projects to be seen! Also, I’ve been documenting different portions of this budget bathroom makeover along the way! I have full tutorials for the overall bathroom design plan, painting the shower surround, and adding those stunning ceiling tiles. Next week…the big reveal!!!

Resources for this project:
See all materials


Comments
Join the conversation
-
This is awesome I love herringbone pattern and cutting larger rectangle tile in two was brilliant.
Has it been stable and smooth over the old tile?
-
Some good questions here. Would have been useful for at least a couple of them to have been answered.


Frequently asked questions
Have a question about this project?
Did you have to do anything to fill the old grout lines in the existing tile? My current grout is not level with the ceramic tile.
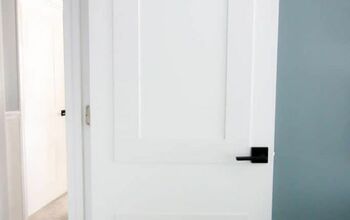
Due to the increased height of the new flooring, did you have to replace the entry door threshold transition piece with a new one that fit over both the new and old floor?
It would be helpful to see a photo of your transition piece also.
How did you cut around the toilet