


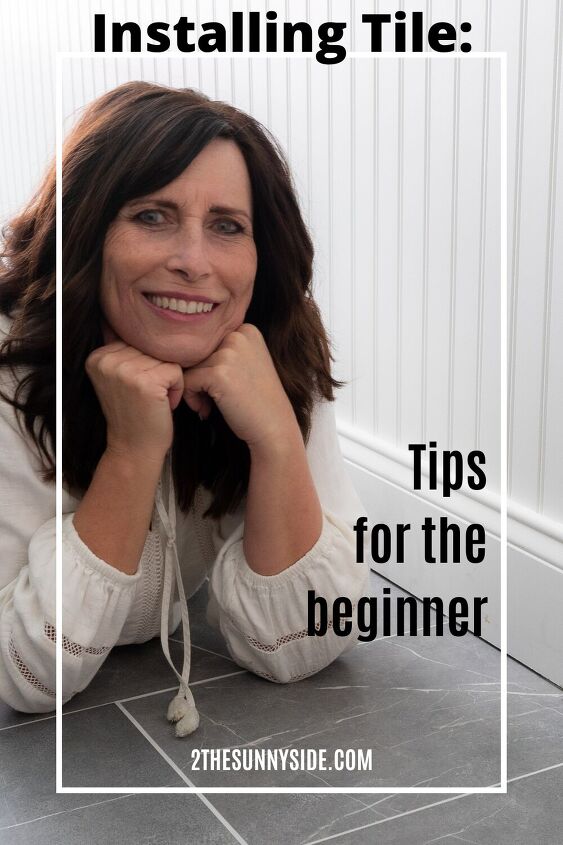
Installing Tile: Practical Tips for Beginners You Need to See
Our first project of the One Room Challenge was to demo the room and install our new tile floor.
No doubt it’s a big job, but all the work is definitely worth it!
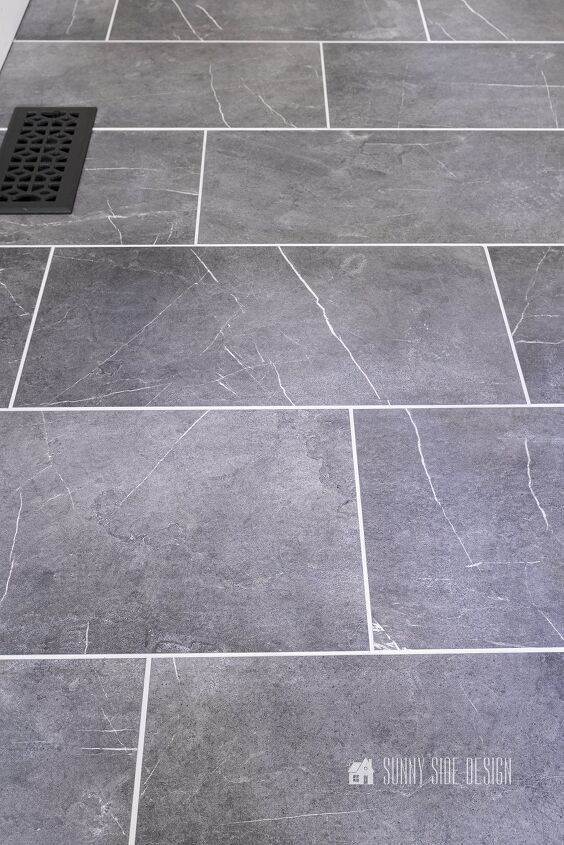
I mean, just take a look at my gorgeous floor!
And it’s so much more meaningful knowing that Steph and I tackled this project on our own.
By on our own, I mean the actual tiling.
My hubby, Steve offered to help with demo and if you’ve every tried removing tile you know what a nasty job it is!
So, I didn’t turn down that offer.
Let me just say, that taking on a project like this is empowering.
In the beginning, we definitely are a little anxious, but with slow and steady progress you can accomplish anything you put your mind to!
In fact, when we first started tiling Steph’s shower last spring, I had those same anxious feelings, but we pushed through and it looks amazing.
Today, we want to share tips for the beginner while installing tile on a floor.
Just as a reminder, you can easily navigate through each week of this Modern Cottage Laundry Room project.
- Week 1: 12 Ideas for Creating a Functional Laundry Room You’ll Love
- Week 2: You are here!
- Week 3: How to Make a Simple Laundry Room Fold Table
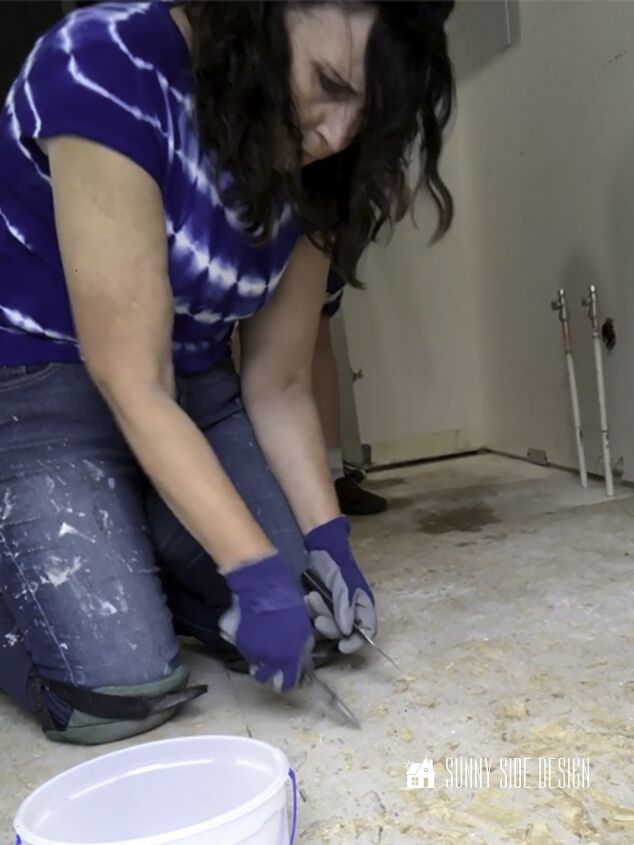
Definitely prepping your surface before installing tile is necessary.
You’ll want to make sure it’s level and free of any debris.
In our case, the original tile floor was installed over a wire mesh that was stapled to the floor.
That required us to remove all of the staples from the subfloor before we could install our tile.
Once all of the staples were removed, we then used a shop vacuum to remove any remaining debris.
Our tile would be installed over OSB plywood subfloor, that means that we needed to install a water-resistant cement backer board as an underlayment.
Unfortunately we learned this the hard way the first time we tiled a floor.
I mentioned to Steve that I thought we should put an underlayment down and he thought that was a waste of time and money, so we did not.
Because of this choice, after a few short months a few of our tiles loosened up from the subfloor.
It’s definitely a step you do not want to skip.
For Steph’s basement bathroom floor, we were laying the tile directly over a cement floor.
While you can lay the tile directly over a concrete surface, they chose to use a Schluter underlayment system to prevent cracking as well as a moisture barrier.
Clearly taking the time to prep your surface will ensure that your beautiful tile floor will look good for years to come.
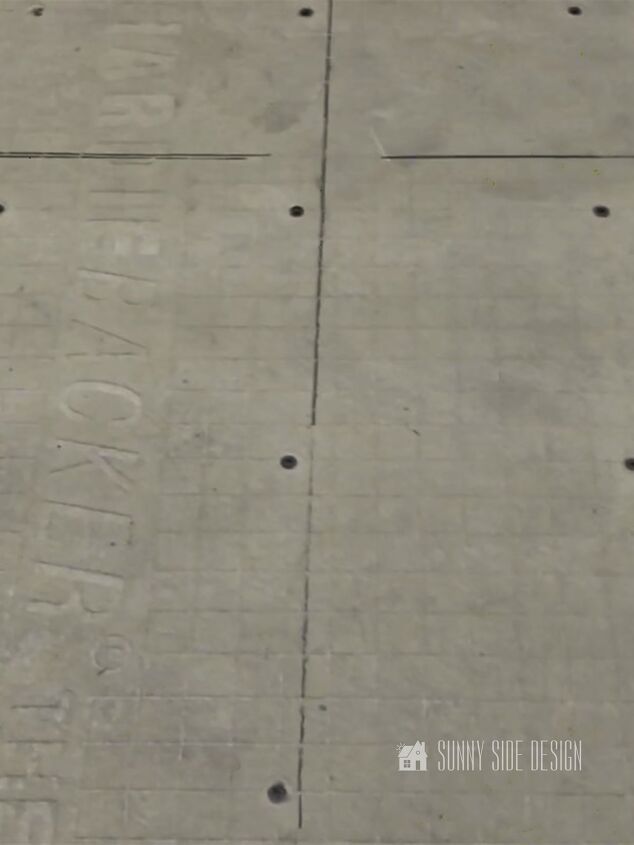
Rarely is a room square.
Taking time to find the center point of a room and making a plan for the tile layout will ensure you get professional looking results.
Since I was installing tile in a laundry room, half of the room would be covered with cabinets and the appliances.
I chose to find the center point from the cabinets to the wall.
Once you’ve found the center, lay a single row of tile in each direction beginning at the center point.
Then insert tile spacers between the tiles.
Personally, I think taking the time to do this will ensure that your tile placement is spot on!
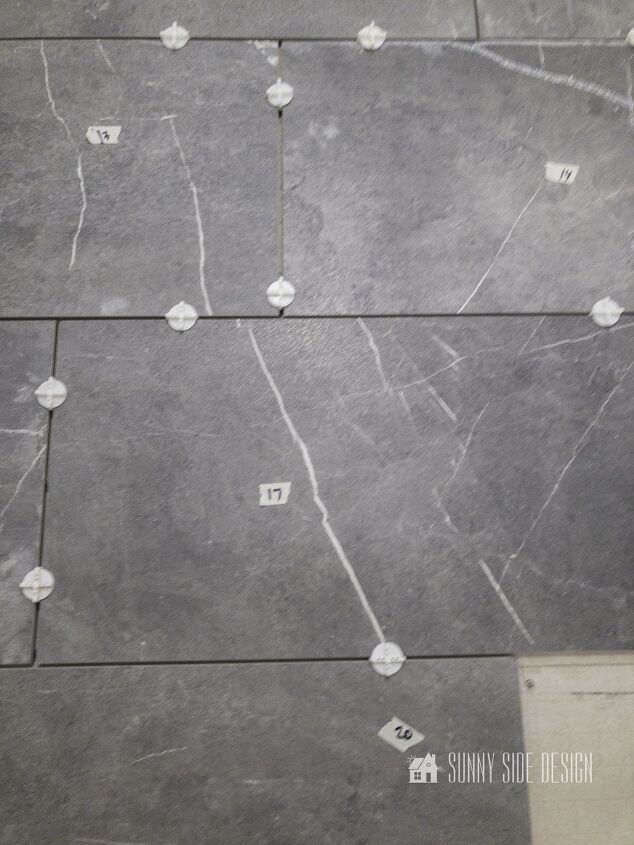
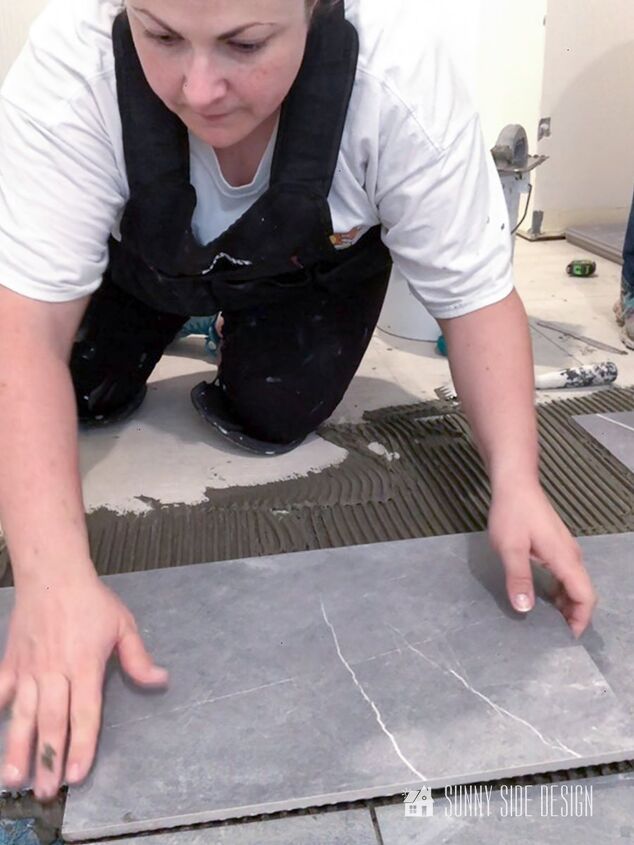
Another step we chose to do on this floor was to dry fit the tiles for the first half of the room.
There were two reasons we chose to do this.
First, we had a lot of intricate cuts to make and we wanted to make sure that it all fit while keeping on our center point line.
Second, we can not move at the speed of a professional tile setter and the mortar would dry out faster than we could install it with all of the cuts we had to make.
On the whole, this method worked like a charm.
We numbered each tile, stacked them up and we were then ready to install.
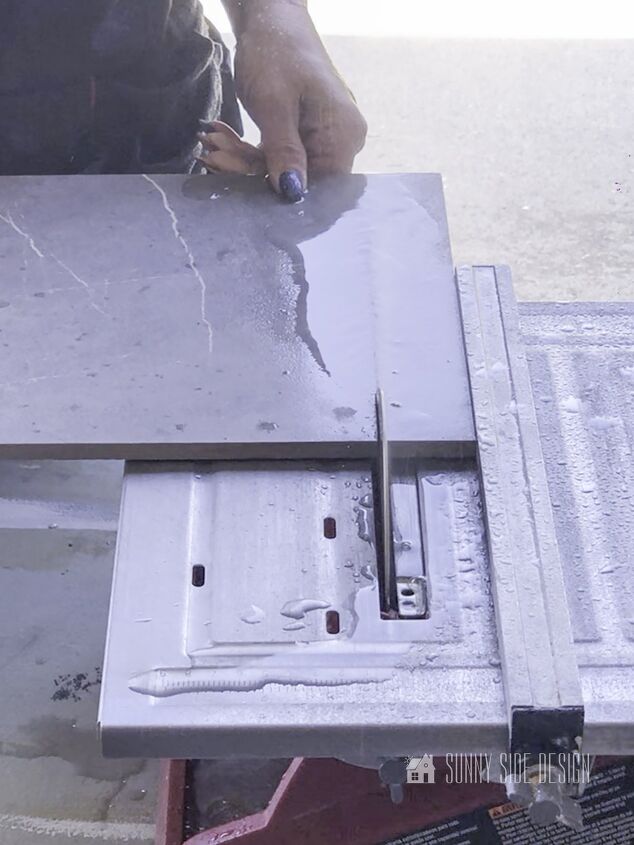
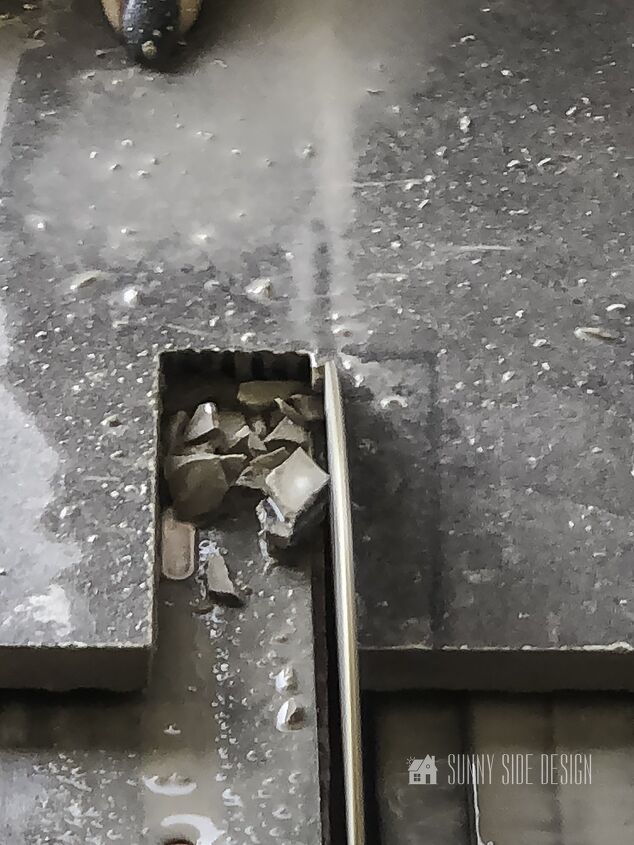
I realize a wet tile saw may seem intimidating to some, but it’s really not difficult to use.
Just be safe, keep your fingers away from the blade, wear safety goggles and a mask.
You will get sprayed with fine pieces of wet tile, so plan to get wet.
Now, if you are installing tile in a basic room without doorways to get around or HVAC vents to cut, a snap tile cutter will work fine.
But a wet tile saw will be required for more detailed cuts.
A wet tile saw can be rented, or you can have your tile store cut them for you.
But we knew we were doing quite a bit of tiling in our home and we purchased our tile saw for less than $100 several years ago.
Let’s stay connected! Follow us on social media!
In my experience, it’s best to not rush the process of installing tile.
Go slow, measure twice, cut once and you will be pleased with your results.
Because we are much slower than a professional, the mortar will dry out before we can use it all.
So we’ve found it best, to work in small sections.
And mixing small batches of mortar will ensure that you have the proper consistency while installing your tile.
All of the mixing instructions will be on your bag of mortar, just divide the amounts by 4 or 8 to get the proper consistency.
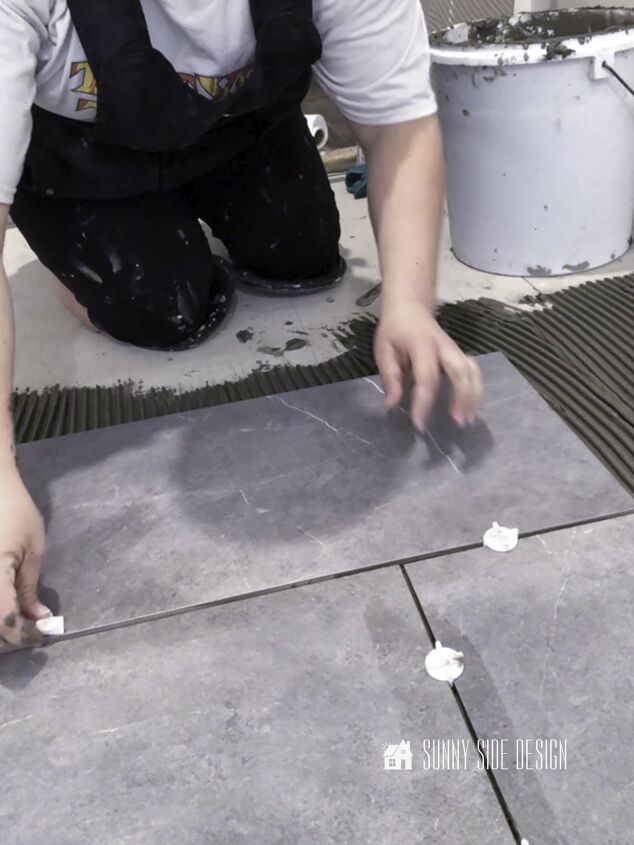
Next, you’ll want to use tile spacers.
Not only will this ensure that your grout lines are even, but it will also help in making sure your tiles are level as they butt up to each other.
This is where the rubber mallet comes in handy.
Gently tap the tile so that the surfaces are flush.
The job is always much more enjoyable if you have a work buddy.
Steph and I really enjoy working on our projects together.
Not only is she fun to work with, but when we get stuck and wonder what to do, we bounce ideas off of each other and work it all out.
I feel it also speeds up our process of installing tile by having one of us on our knees doing the actually installing and the other one is out in the garage making all of the cuts.
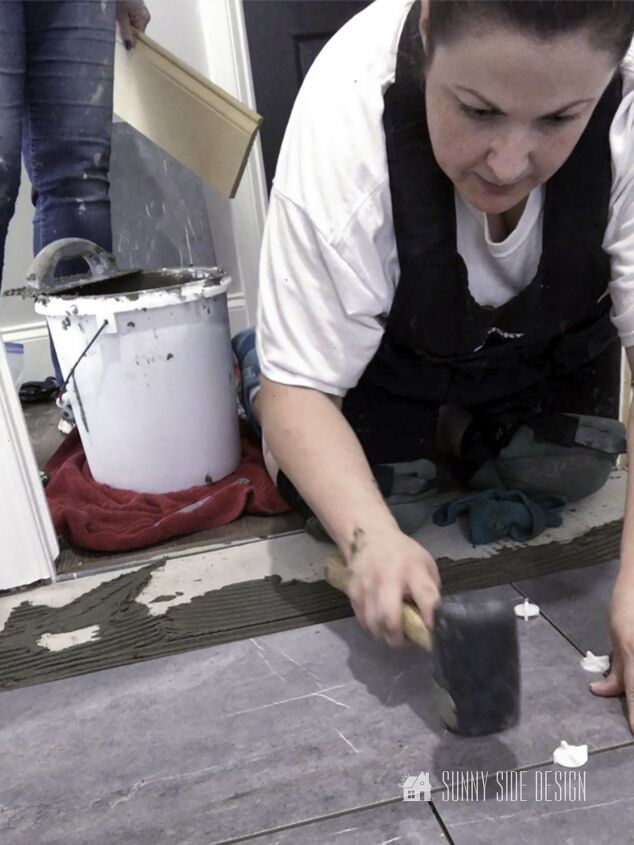
You’ll find a step by step tutorial for grouting your tile here.
Steph was quite anxious about grouting her shower after watching a professional tile setter on YouTube.
But by mixing small batches and working with each other we were able to do it quickly and it looks terrific.
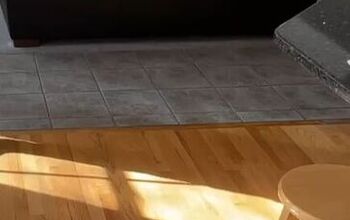
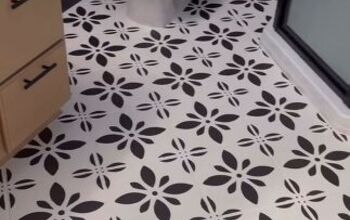
Just take a look at what my floor looked like before.
And now, I can’t stop staring at this beautiful floor!

There’s no doubt that in the beginning I was anxious about installing this tile floor.
One major factor was that the wall to the right was crooked.
And I knew that the tile job would look horrible if we didn’t keep it straight.
But by taking our time, (initially I thought we would install all of the tile in one day, it took 2) working together we were able to get professional results that we will enjoy for years to come.
Comment below and tell us if you’ve installed tile before and what your results were.
Or, are you ready to try this for yourself?
Please share on social media.
Sharing is caring!
Thanks for spending a little time with us today.
If you’re new here, WELCOME! We love having new readers and friends!
You can learn more about us here.
Let’s stay connected! Subscribe to our free newsletter so you don’t miss any inspiration for your home.
Please PIN and save for later, and share with your friends! Sharing helps grow our following!
Thanks for stopping by and as always here at Sunny Side Design
WE HOPE TO BRING YOUR HOME TO THE SUNNY SIDE OF THE STREET!
Be sure to follow us on Pinterest for even more home decor and DIY ideas.
To see what we are working on before it’s on our blog, follow us on Instagram.
You can also find our video tutorials on our YouTube channel.

Comments
Join the conversation
-
Great tips for the beginner DIY. Your floor looks amazing. Very good share.


Frequently asked questions
Have a question about this project?