


Colander to Planter

8 Materials
$3
2 Hours
Easy
This tutorial shows you step by step how I do one of my favorite hobbies: re-purposing old or unusual things to use as planter for my favorite kind of plant: FREE!!!
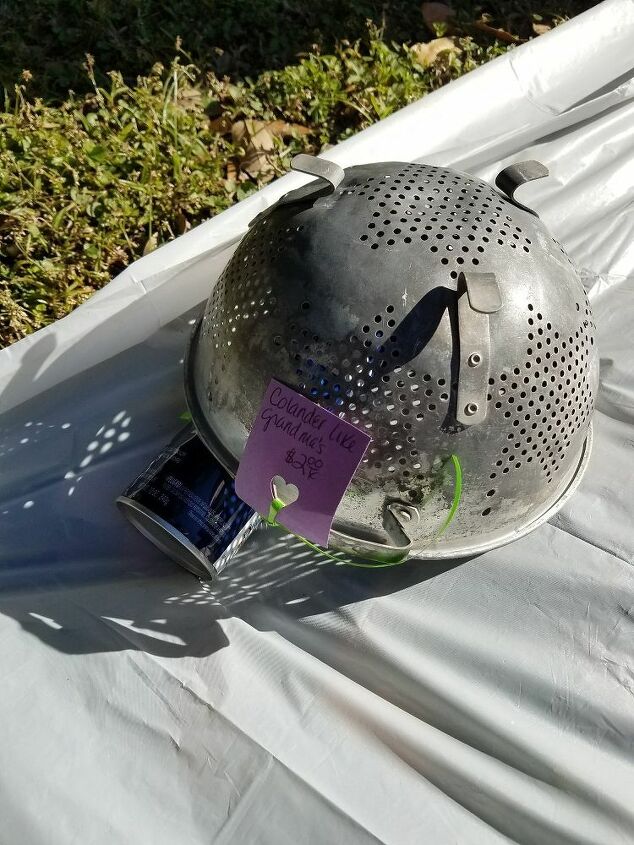
Garage sale find!
I found this old metal colander at a garage sale (I didn't pay $2 for it, because I bought a lot for $5), and immediately thought about a Hometalk Highlights feature that I had seen, http://www.hometalk.com/diy/decorate/rooms/11-surprising-uses-for-all-of-the-things-laying-around-your-house-9512528, where the author had re-purposed a vintage enamel colander to a succulent planter. I must have also seen the one where they used it for the exact same plant, and it was in the back of my mind somewhere :).
I had originally intended to use this one as a succulent planter, too, but ended up purchasing a cute tray of candle holders that I used instead. Anyway, I spray painted the colander my favorite blue, then waited until I could get some cuttings or find the perfect hanging plant. Luckily, I did both - the purslane cuttings make the perfect hanging plant.
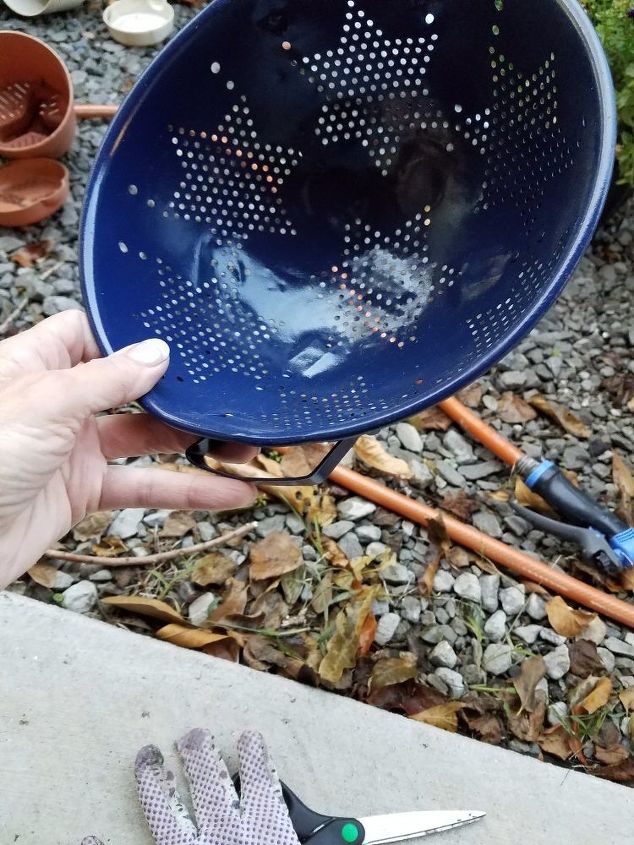
Pretty blue!
First, I painted the colander.
So, I had spray painted the planter the same day that I painted the half barrel for my hydrangeas, see article here: http://www.hometalk.com/diy/grow/flowers/when.... You can see the blue paint on the drop cloth. However, that was a lot of work, it was Sunday afternoon, and I ran out of potting soil. That's why, even though I got a first set of cuttings for this plant, it wasn't put in this planter - I just stuck the cuttings in another pot whose plants had died - I know, terrible practice - but hey, free plant, free dirt!
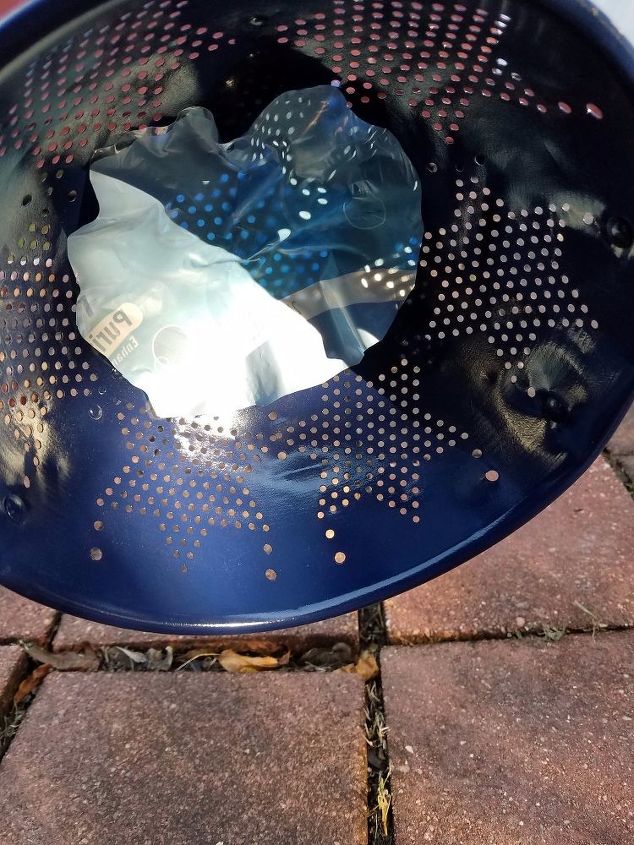
Plastic lined bottom
Early this morning, as soon as it warmed up a little outside, I started working on the myriad projects that I'm housing on my covered patio. Transplanting was one. I took out my pretty blue colander and some landscape fabric. However, I wanted to make sure it retained a little more water than it would if I only lined the planter with landscape fabric, especially the one I'm using, because it is cheap and thin. I went into my recycling materials and found the plastic that wraps cases of bottled water - perfect! It was even blue on the piece that I used.
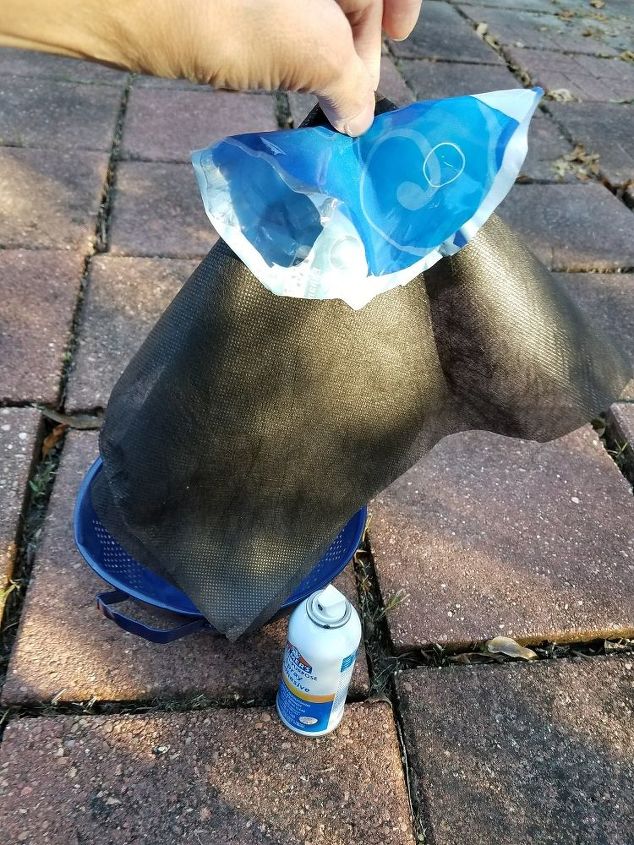
Plastic liner and landscape liner.
I cut out a small circle that covered only the bottom of the colander. While I was cutting, I also cut a piece of landscape fabric large enough to line the colander so that the soil didn't fall out through its holes. I had left my glue gun at work, so I used my new favorite adhesive - Elmer's Spray Adhesive. I sprayed a little on the bottom of the colander and placed the plastic over it. It allowed me to re position it until it was centered.
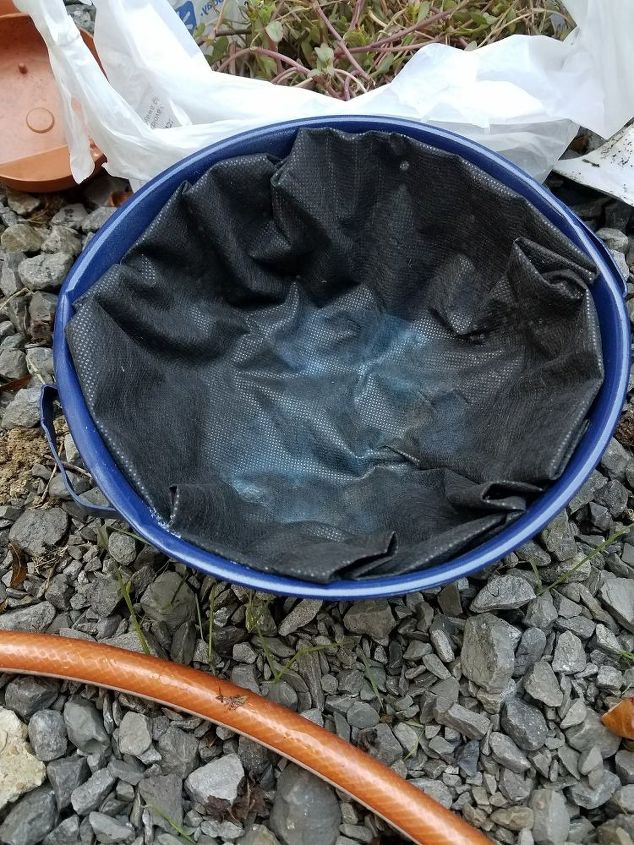
Then I sprayed adhesive on the plastic and along the sides of the colander. I neatly folded the landscape fabric so that it lined the colander and was not visible from the top of the planter. (If I wasn't posting these pictures, you KNOW that I wouldn't care if the landscape fabric showed! However, it did keep it in place, so I may start doing this more often!)
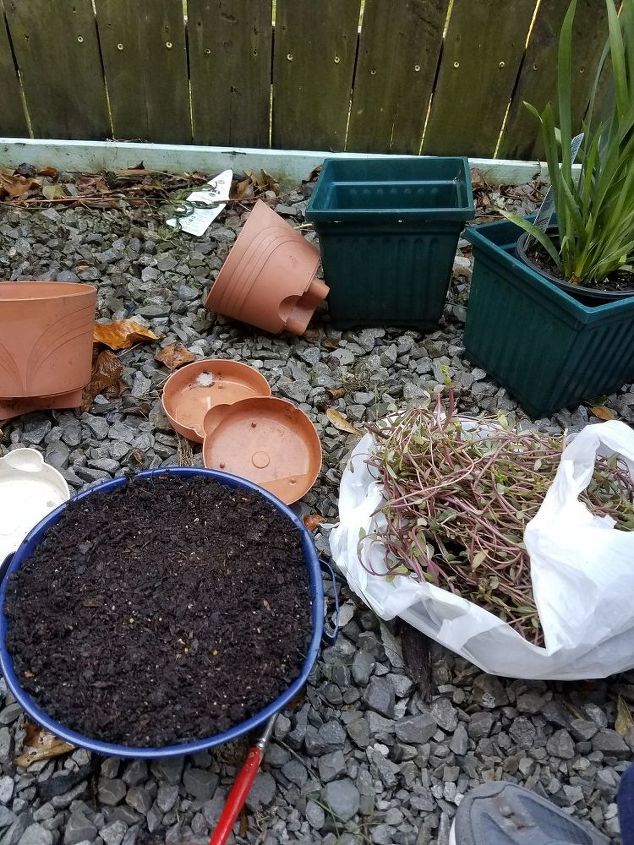
Next, I filled my planter with Miracle Grow Moisture retention potting soil.
Today, I had fresh potting soil and sorta fresh cuttings - I got them Tuesday, but, hey, Thanksgiving happened. Besides, I knew they would keep for up to a week in the plastic grocery bag that I had put them in when I collected them. Plus, I checked, and they were blooming in the bag. Really, that's why I love this plant so much - it's very hardy. You can even root it in water, but don't leave it there more than a few days, it'll start losing leaves and rotting in the water.
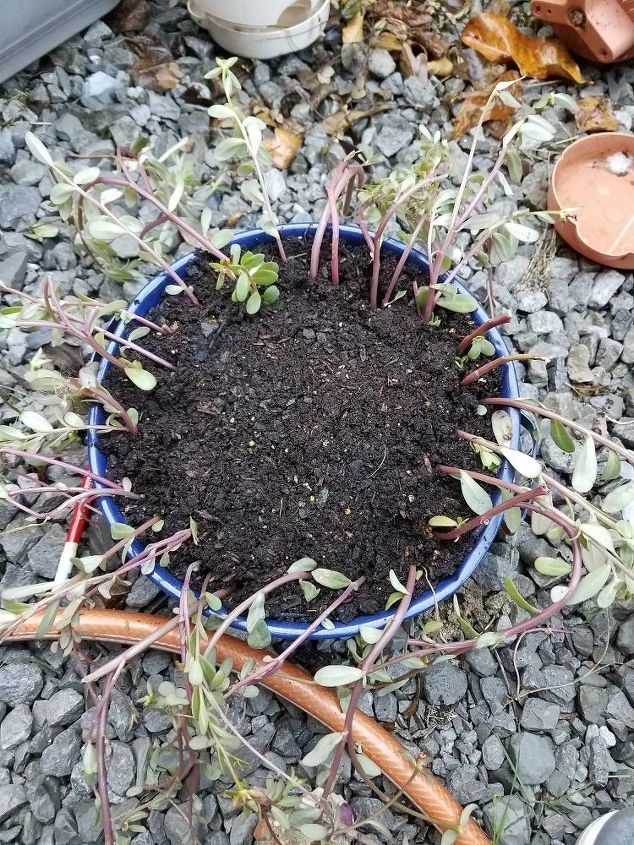
Start adding cuttings from the outside.
Then, the process of filling the hanging planter began. I first placed the cuttings in a circular pattern around the outside edge of the planter. Once I had the first circle filled in, I moved to the inner edge of that circle and filled another concentric circle closer to the center of the pot, and continued to do that until I had the center filled. It's already full and blooming! I must thank my nail lady, Tootie, at Nails Etc. for allowing me to take cuttings from her plant not once, but twice!
Follow my pictures as I show you how to place the cuttings to make a great hanging plant. Keep working inward with the cuttings, until the planter is filled in nicely.
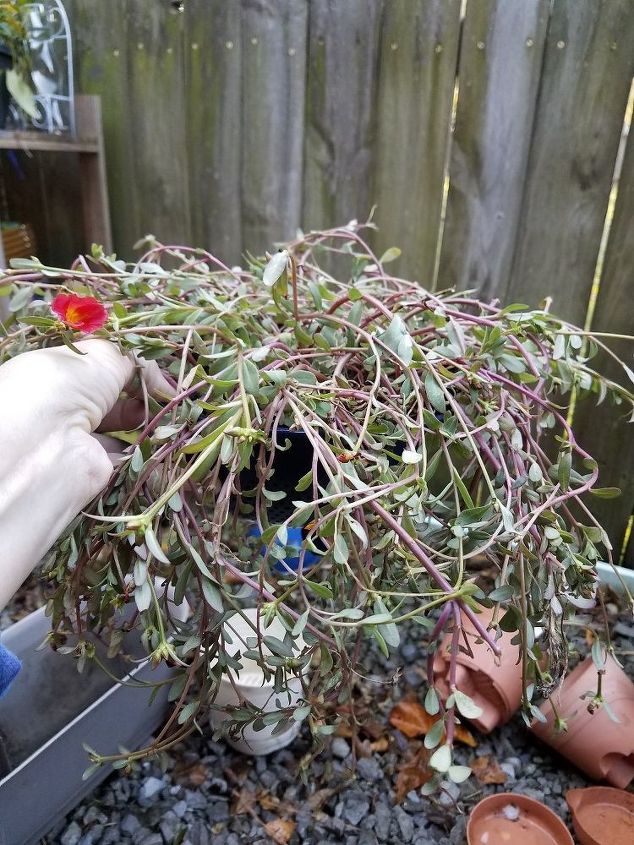
Already blooming!
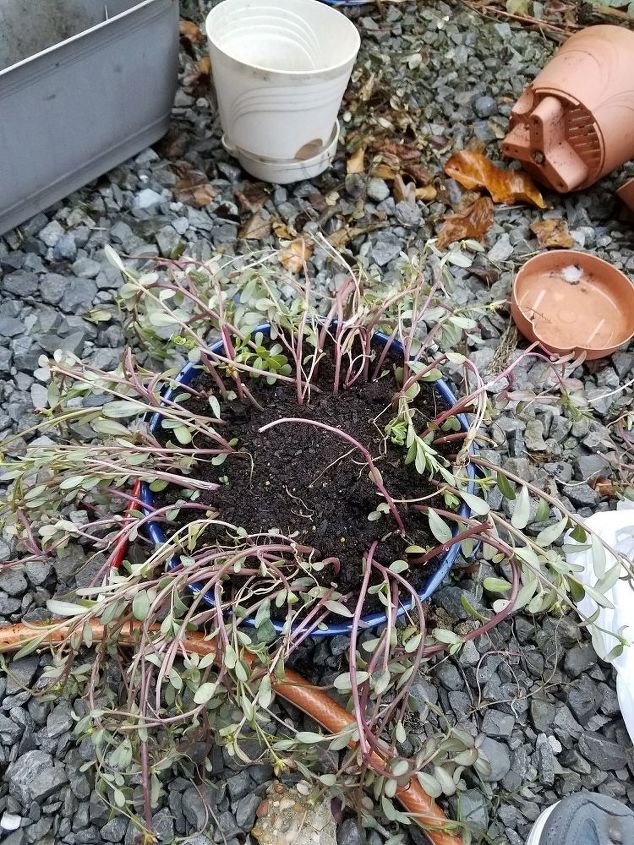
Once the planter was nicely filled in, I watered it quite well and let it drain before hanging it. This was to eliminate any air pockets and so that I could fill in any soil, if necessary.
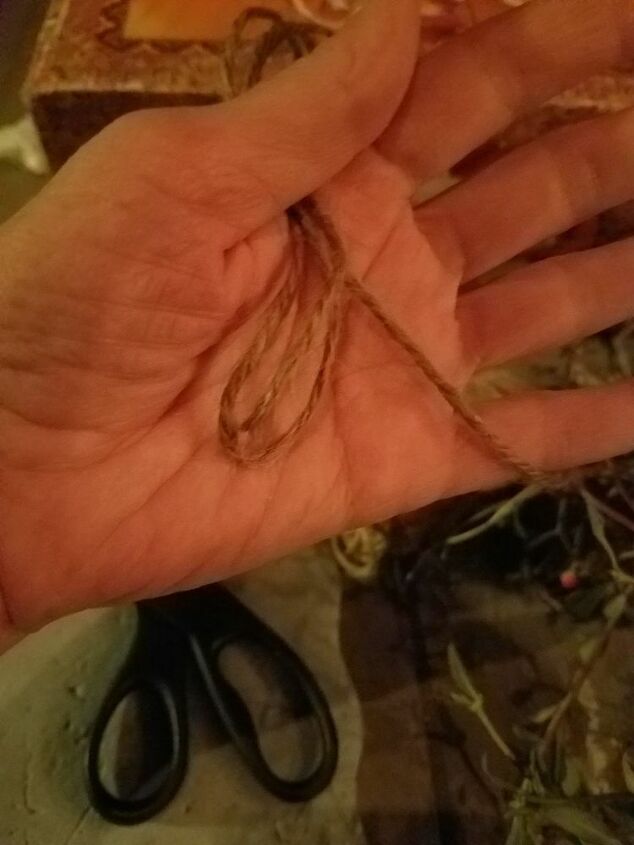
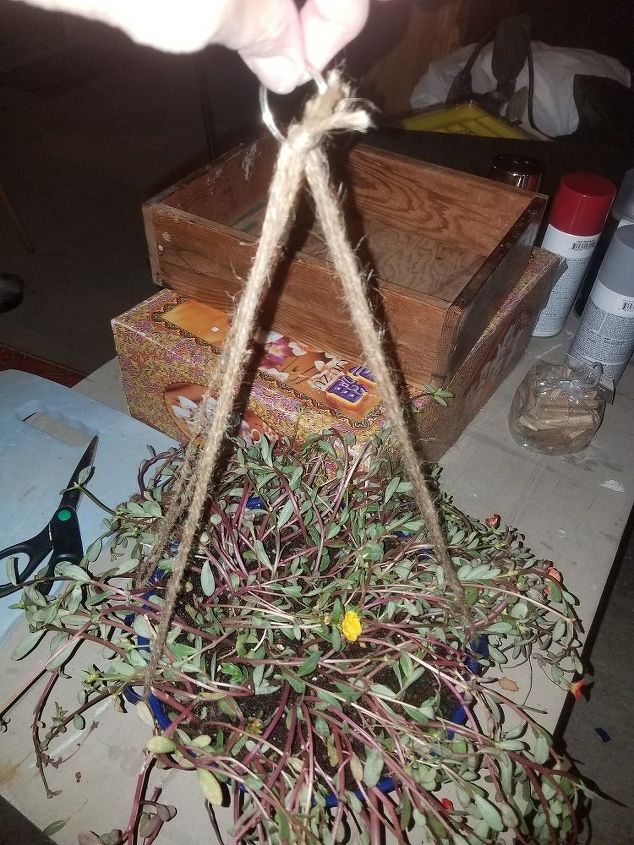
Jute Twine
I cut 4 double lengths of jute twine and looped them around the handles. Each handle had a piece of twine on either end.
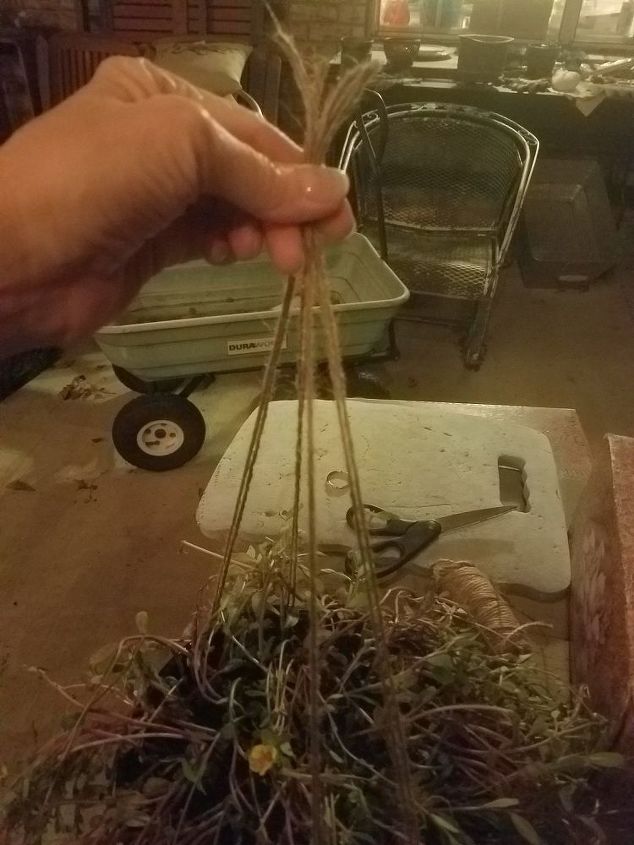
I pulled all four pieces tight and evened them up.
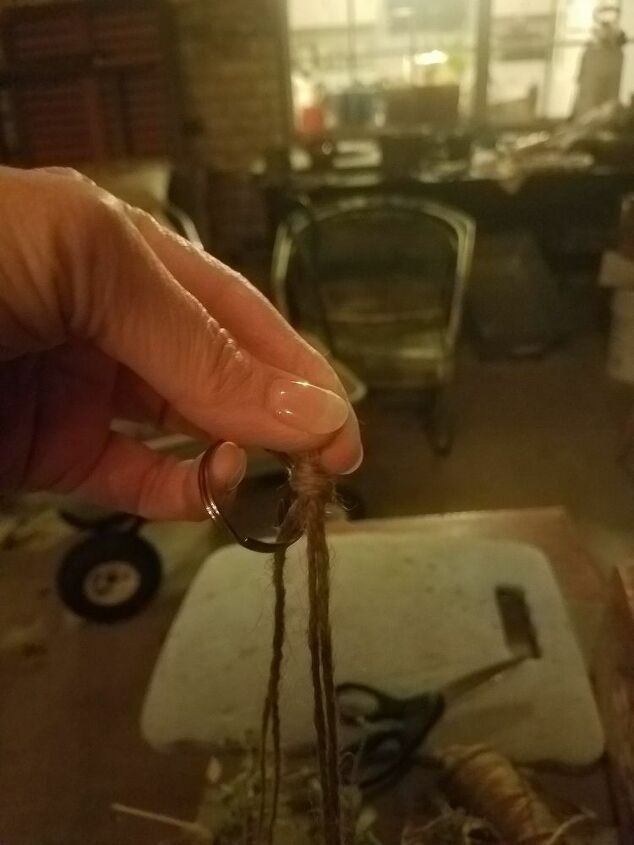
Keyring
After that, I tied the opposite ends around an old keyring. I then pulled them to even them out again.
Once the ends were tied off, it was time to hang my newest plant!
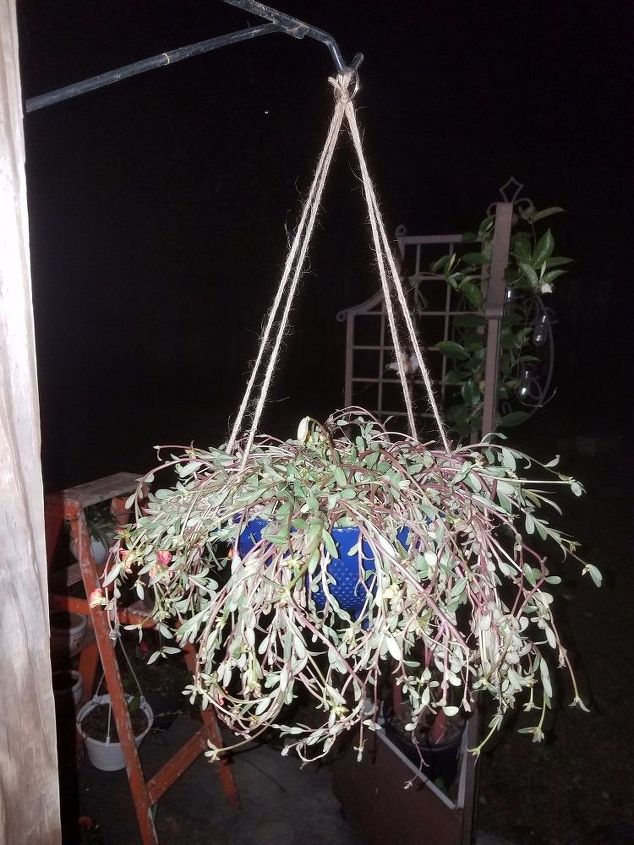
Planter - Finished, filled, and hung.
That's it! A re-purposed colander filled with free cuttings and hung with twine and an old key-ring. That's my kind of planting! Free, or nearly free!


Frequently asked questions
Have a question about this project?