


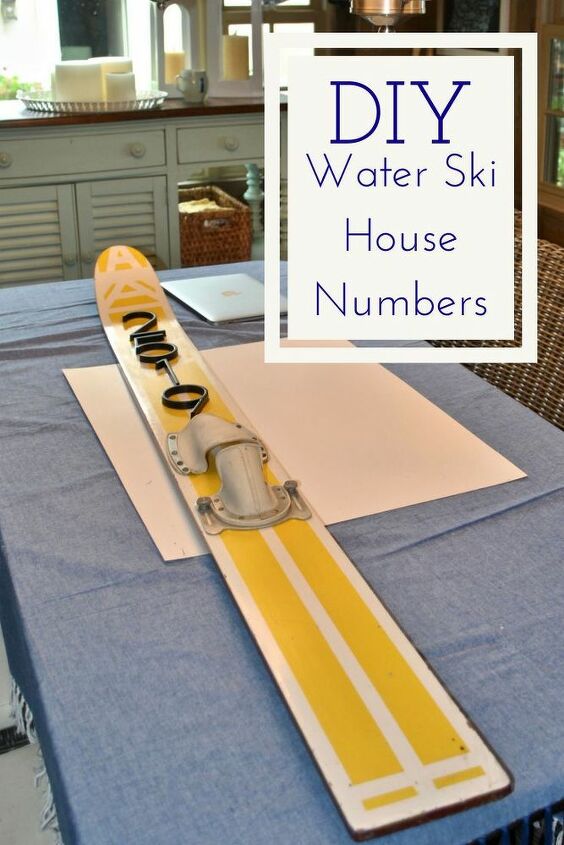
DIY House Numbers on a Water Ski
The Little Lake Cottage - DIY Water Ski House Number
Hi there! Here is a super quick easy DIY any beginner could try.
We recently moved into a lake home and our DIYing our way to our dream home. This was one of the first projects I did in this house, Water Ski House Numbers. I hope you enjoy!
Supplies & Instructions
Supplies
- Old Water skis – Ok, heres the thing… These will be outside, vintage anything can get pricey so be smart about how much you pay for used water skis and the condition of the piece. The pair I purchased was unusable for actual water skiing and that was exactly what I wanted. You could even take the bindings off and paint a pair if they aren’t the color you want. Additionally, I would recommend full size adult water skis for this project. I have training skis in my living room, you can see them here, and they are shorter then full size skis. I didn’t want to have to mount the skis to the stucco of our home so I needed a taller ski for the numbers to be visible from the road.
- House Numbers – These are the ones we used from Lowes.
- 100% Silicone – This product comes in a squeeze tube which is awesome because you don’t need a caulk gun. We went with Silicone because it dries clear and is waterproof.
- Pencil
- Paper towel
Instructions
Prep the area – I wiped down the water ski; it had been in storage for awhile and needed the dirt and dust off of it so the silicone could adhere.
Determine placement of numbers – lay the house numbers onto the water skis and mark with a pencil where you would like them.
Apply the Silicone to the numbers – I suggest working one number at a time to keep them straight. Also, do not be afraid of the silicone. The more you put on, the better it will stick. Trust me when I say more is better in this instance. Wipe away any access silicone so you have a smooth edge around the house number.
Let dry – The silicone we were using said to let the silicone dry for 8hrs before it gets wet. So I left the water ski flat over night.
Still here?! We should connect! Find me on Pinterest by searching The Little Lake Cottage in the search bar. Or join our email list!!! Stay up to date on the latest and greatest from The Little Lake Cottage. If you are interested, please click on this link here, and sign up today! Cheers! Lauren
DIY House Numbers
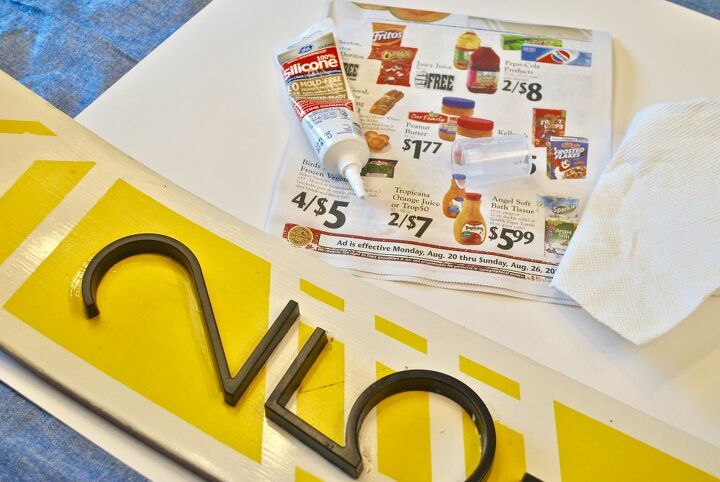
Silicone was used as the adhesive and we used news paper to create a clean work space.
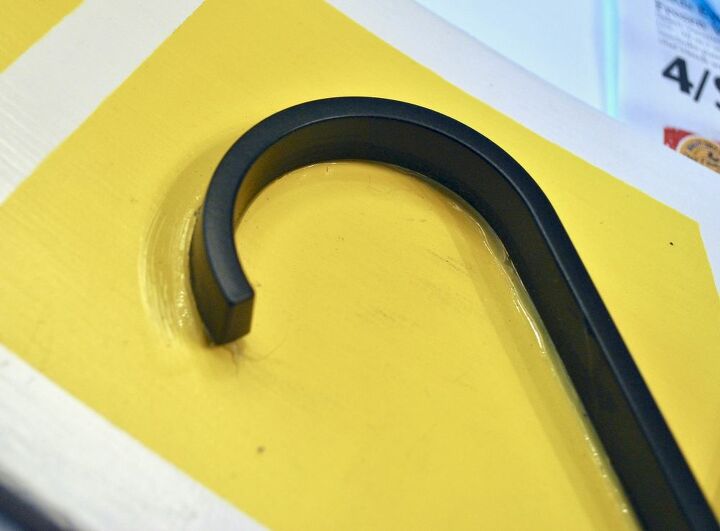
Close up to show that I was very generous with the silicone.
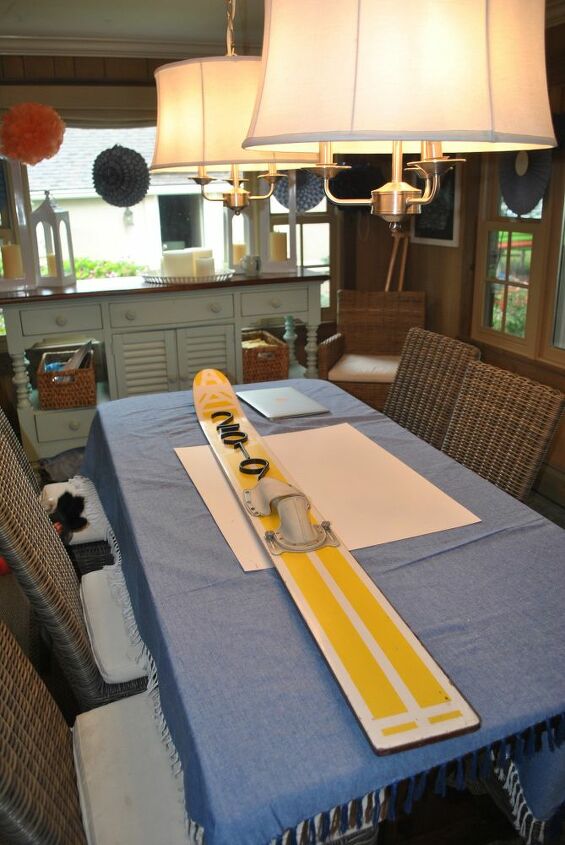
I did this DIY on my dining room table. I just made sure I put down paper so protect my table cloth.
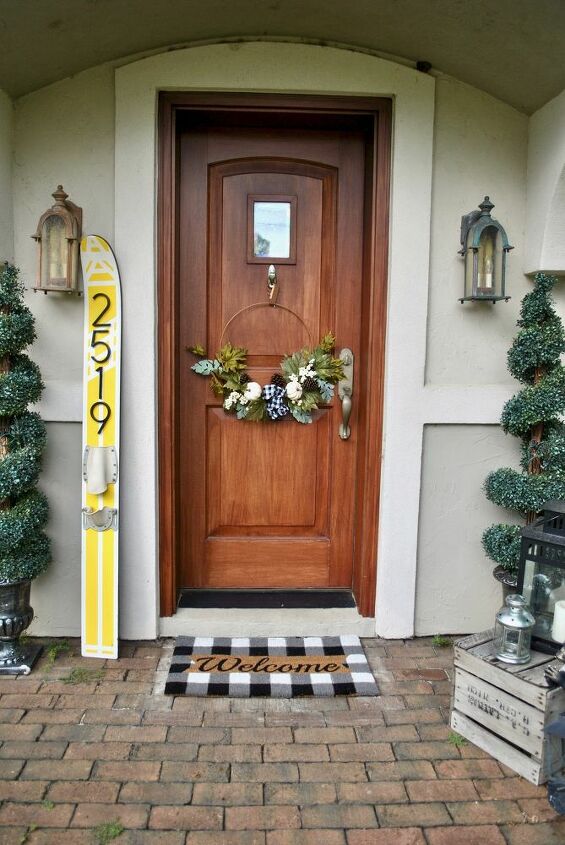
The finished project! Isn't it cool! I am super proud of this DIY.

Comments
Join the conversation
-
Very nice. Love the oars. what if you were to move the oars to the wall where the skis are and use the skis as shelves over the sofa. A few nautical pieces on the oar shelves. Just an idea thrown out there.
-
Ya know Ive saved up some skiies over the years and I wanna do the exact same thing . I just wanna put it in my mailbox. I just can’t quiet figure the how too part . I love diy’ing we live on a lake too & im a stay at home mom constantly doing different diy projects . Feel free to reach out yo me at tiquejeep@gmail.com. I also have a Pinterest . Thanks for sharing such an amazing project.


Frequently asked questions
Have a question about this project?
Very cool. Did you have the mate ski? Would make a great shelf.