


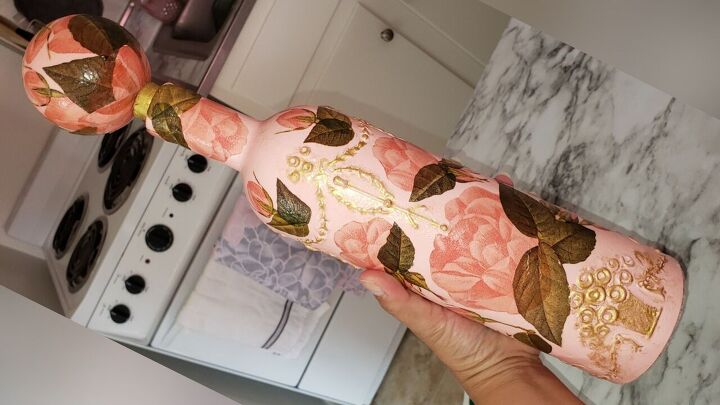
DIY Rose Wine Bottle Decor With Matching Topper

I made this bottle with a matching topper. I wanted to share how easy it is to create one. I use the decoupage technique to decorate it, but you can decorate it however you please!
You can watch this video that shows the easy step-by-step in more detail or keep scrolling for the basic steps
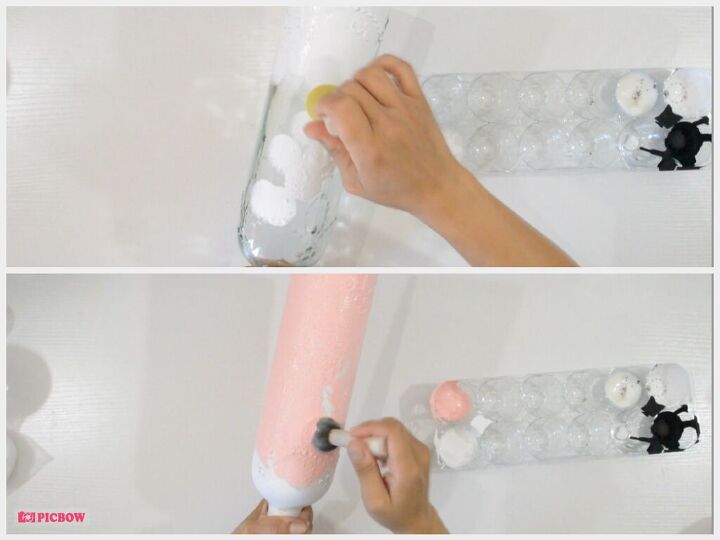
To begin, I prime my bottle with matte white acrylic paint.
After its dried, I gave it a coat of cameo pink acrylic paint.
I use a pouncer brush to apply the paint. I find that it spreads it evenly.
Tip: Use a small fan to speed things up.
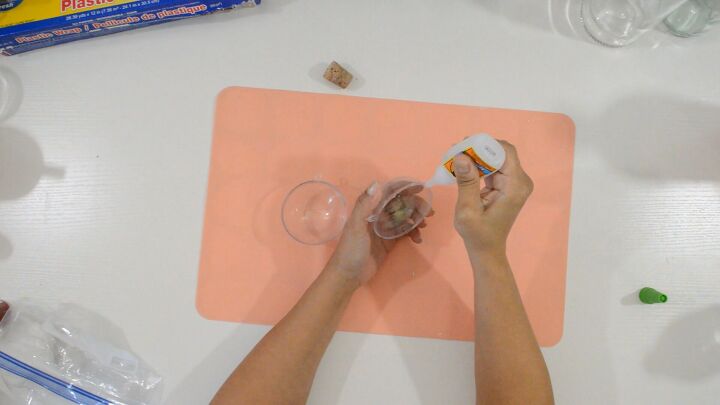
For the topper, I glued two halves of a clear plastic ornament ball using instant gorilla glue.
Using a wet cotton swab, I cleaned the excess glue.
Tip: If you are going to keep the ball clear, do not use instant glue. Use something like mod podge or school glue. It will allow you to clean the excess off without fogging up the ball. You might have to wrap some rubber bands around it while it dries.
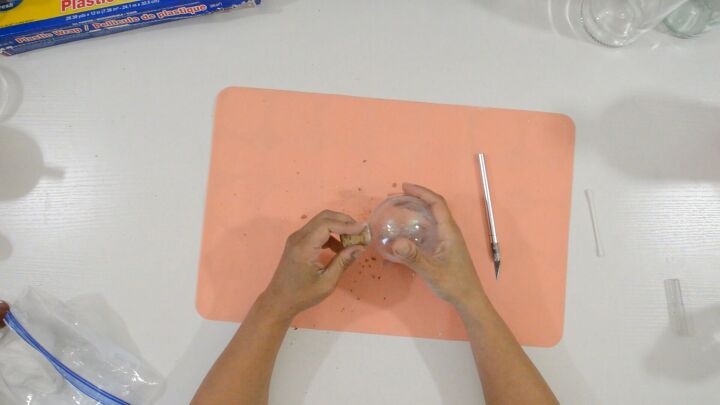
Carefully using an X-Acto knife, I carved a hole big enough to fit the tip or the ornament ball inside.
I don't glue the cork on until after it's decorated.
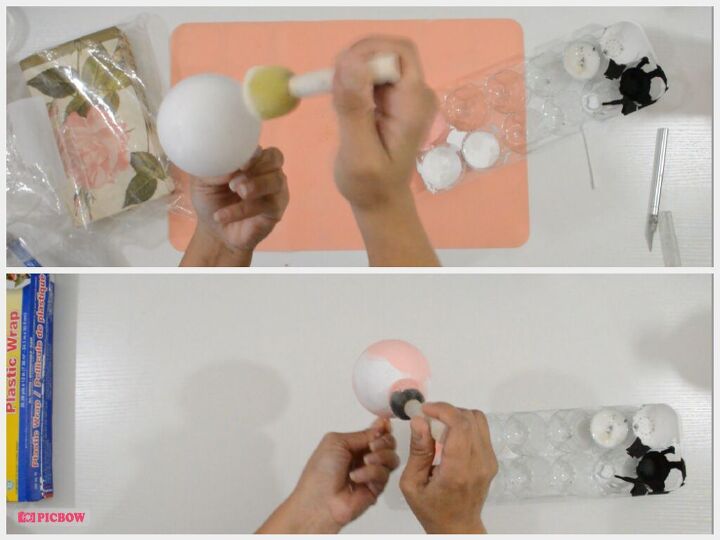
Next, as with the bottle, I gave the ball a coat of matte white acrylic paint. After it dried, I gave it a coat of cameo pink.
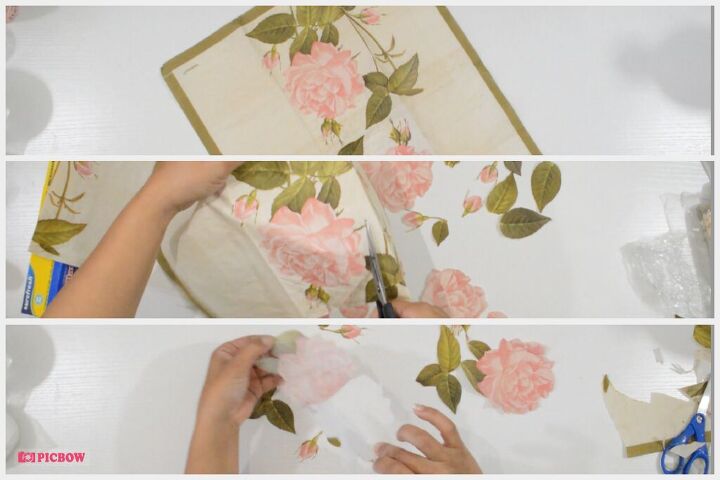
While everything dries, you want to prepare your paper napkin designs.
I cut out all the roses and leaves I wanted. I used about four napkins in total for this bottle.
After they're all cut out, remove all the plies.
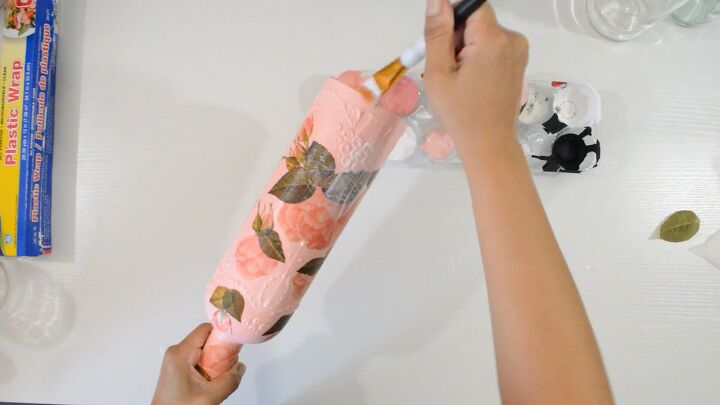
Decoupage all the roses onto the bottle one by one.
1.) Place some Mod Podge on the spot you'll be placing the rose.
2.) Use a piece of crumbled-up cling wrap to gently; smooth it down.
3.) Place the rose
4.) Give it one last coat of Mod Podge to seal it in.
I like to place some, let those dry, and then continue until it's all done.
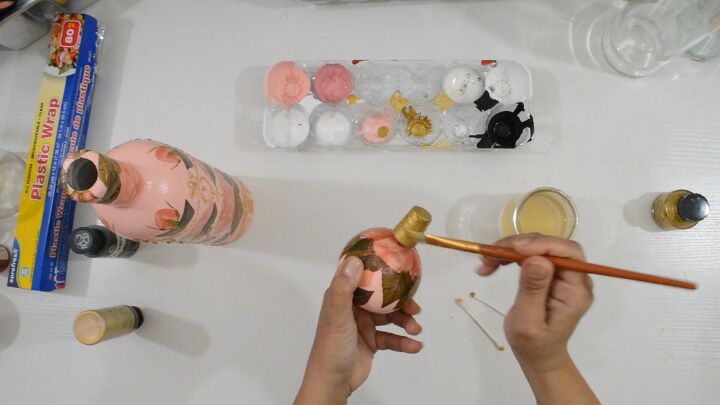
Do the same to the topper.
Once everything is dry, seal the whole bottle and topper with one more layer of Mod Podge.
You can also seal it with whatever sealer you'd like.

I used gold ink to highlight the raised parts of the bottle because that's all I had. You can use rubbing wax or paint.
Gently rub it on. Using a wet cotton swab, clean up anything that gets messy.
Glue the cork onto the ball. I used instant gorilla glue. Paint the cork with the same gold that you used to highlight the bottle.
Let it dry.
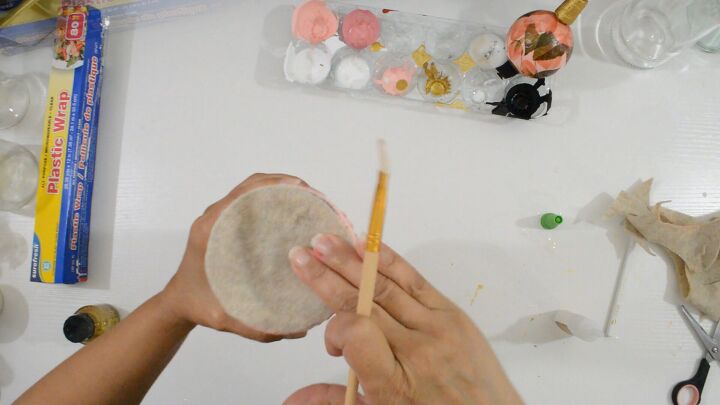
I like to add crafting felt to the bottoms of my bottles. It helps protect whatever surface they are placed on, and it gives them a finished look.
Trace, cut, and glue a piece of crafting felt to the bottom.
You can leave it as is and use it as a beautiful decor piece, or you can seal it with a waterproof sealer and add bubbles or liquid potpourri and give it as a gift!
I had everything in my crafting supplies, so it didn't cost me anything. You can find plastic balls just about anywhere during the next couple of months. I got mines years ago on Amazon. They still have them.
I hope this inspires you to recycle something of your own!


Frequently asked questions
Have a question about this project?