


Eco-Friendlier Concrete Orbs

Please stop breaking glass lampshades to cast concrete orbs! Do this instead.
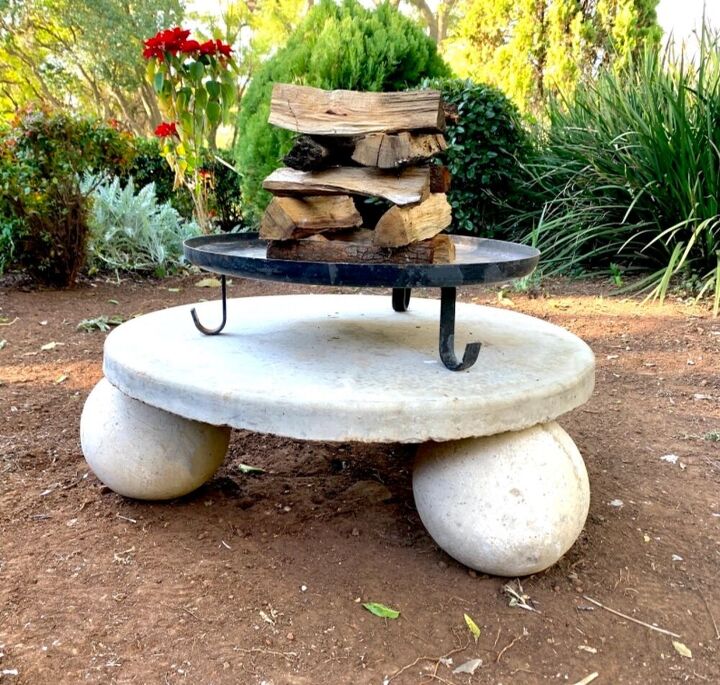
A while ago I shared this fire-pit project made from a stepping stone and three concrete orbs. I was surprised at how many overseas readers asked where they could buy orbs when, in South Africa, you can get them at every garden center.

Then it struck me, people in other countries aren't so selfish with their pavements (sidewalks). Here, orbs are used as bollards to keep people from parking in front of your house. Illegal but very common. So actually you should be glad that you can't find them!
The question remains, how do you make concrete balls? A search of Pinterest revealed using wire mesh, exercise balls, bowling balls or, horror of horrors, glass lampshades that you then shatter to unmold. That's just awful!
All good and well to jump on your environmental high-horse but what can one use instead? In all truth, it took me months to figure out...
You use a plastic lampshade that can be reused. Duh!
I picked up this particular one from a junk shop for less than what I pay for a cappuccino. And even if you were buying a brand new expensive one (because the good quality ones aren't cheap), your investment will be paid off after making just two balls - the concrete cost me less than a sixth of the price of one ready-made orb!
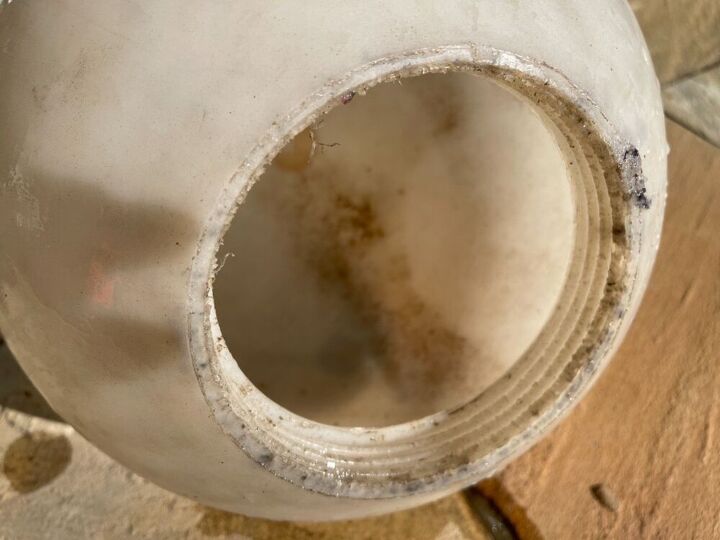
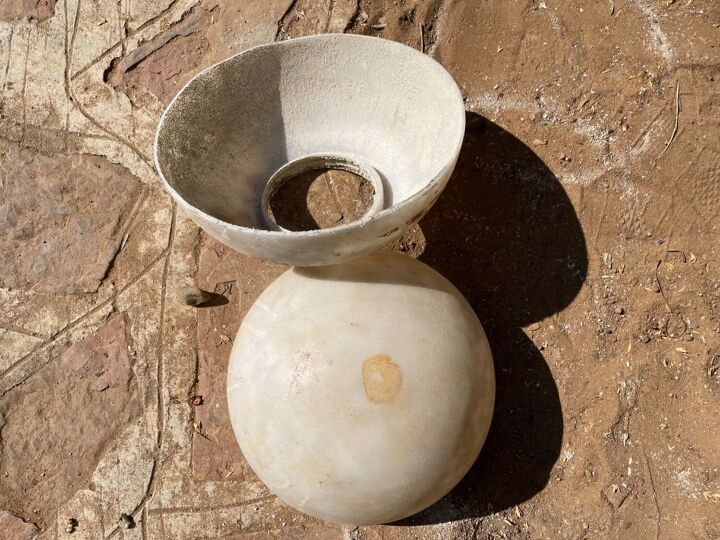
It’s so easy, this the first time I've ever cast concrete and it came out great. The fact that my shade it has an inward protrusion at the neck makes it less than ideal, yet I still managed.
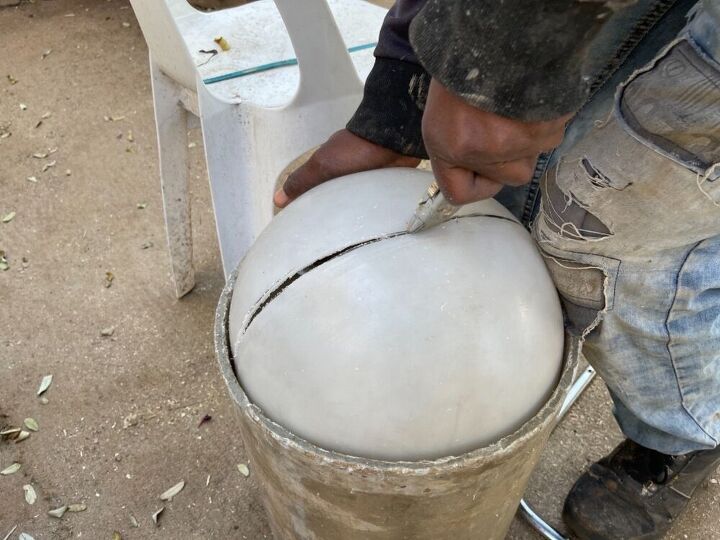
So, take a nice, big, strong plastic round shade and mark a line along the circumference. Next, take a hacksaw or box-cutter and cut a clean line to halve it. I got some muscle to do this for me. Placing the shade on a bucket or pipe whilst cutting is a great idea.
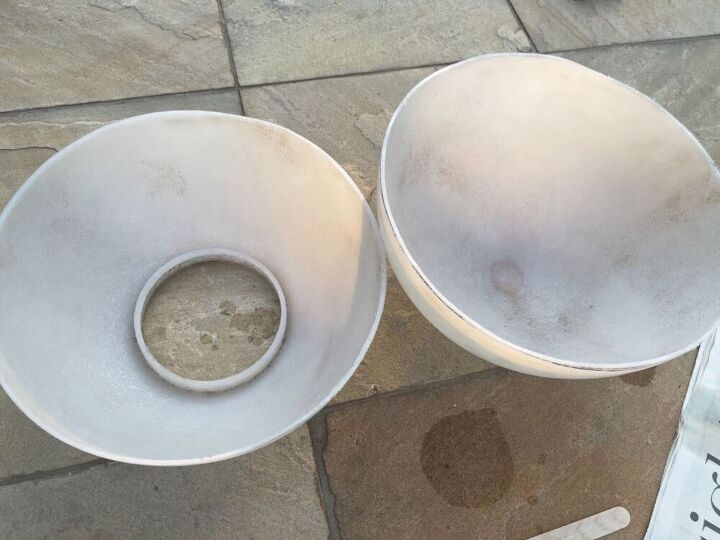
Two beautifully cut halves.
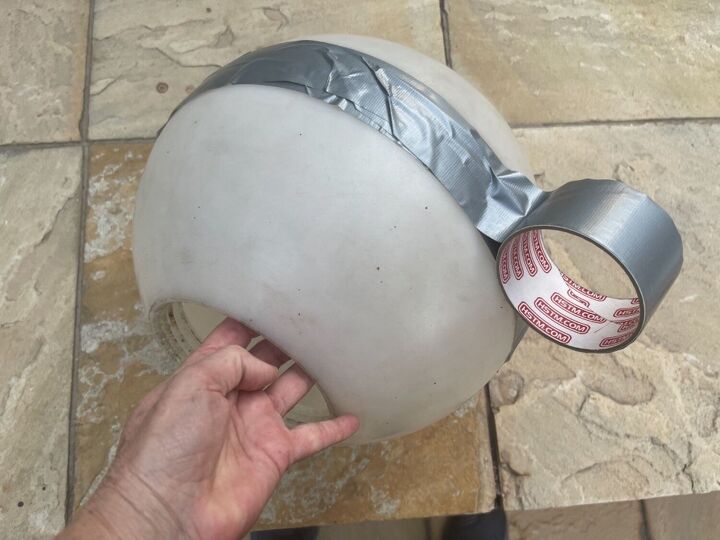
After scrubbing with a brush and water to remove dirt, tape the two halves together again using lots and lots of duct tape, not just one layer.
Most casting tutorials I saw, suggested using cooking-spray as a release agent. I made a half-hearted attempt after the halves were stuck together again but it was too difficult to get inside and I didn't want to waste spray on a shape that, to my mind, should unmold quite easily. Mmmm, perhaps that's why I also cannot bake cakes - because I always know better than the recipe.
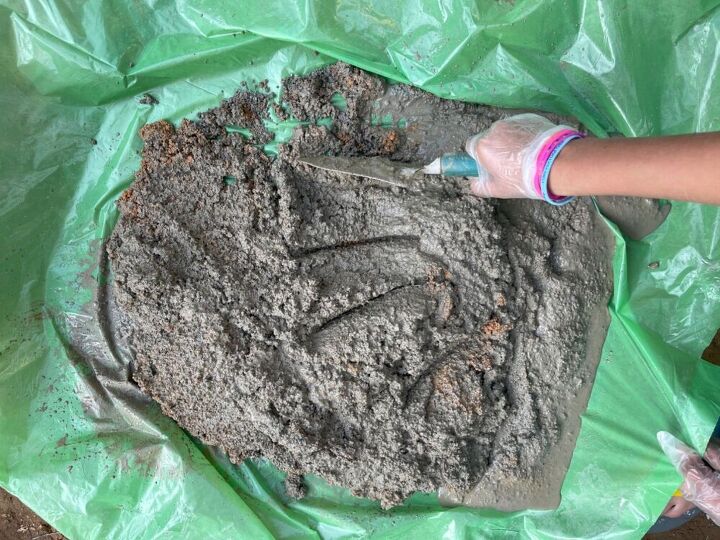
Then I mixed some screed-mix. (First pass I asked for concrete mix and came home with a bag of rough gravel). As is my habit with cake baking, I totally disregarded the suggested amount of cement that came with the bag and added some more. It couldn't hurt, could it? Adding water was also a bit of a thumb suck but I am sure that the concrete that you buy will be finely textured and come with meticulous instructions.

With the shade perched on a bucket and using a small potting shovel, I filled it with concrete.
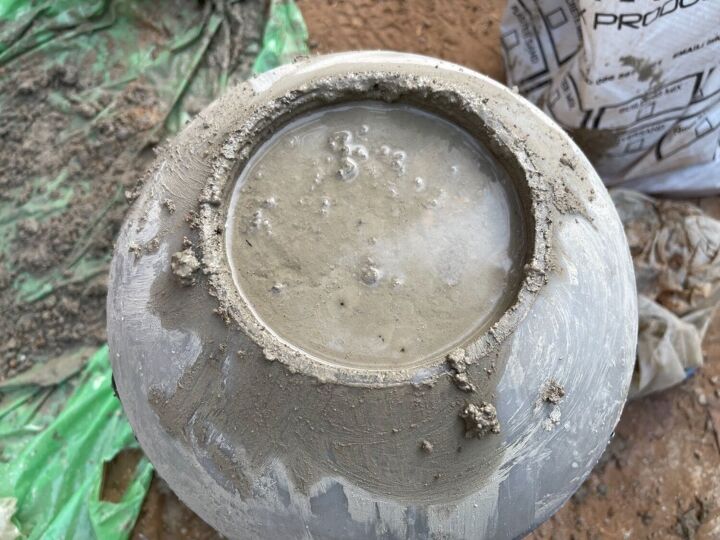
I was a bit worried about the extra water. And in theory you should vibrate or bang it a bit to remove air. Alas, me and the cake recipe again...
The time it takes to cure depends on the ambient conditions. I left mine for about 3 days. I think the plastic could delay the curing time a bit since it is more waterproof than say, wood or cardboard. The area that is exposed to the air is not the main concern when it comes to drying. Instead, the area that you should watch out for is the bottom.
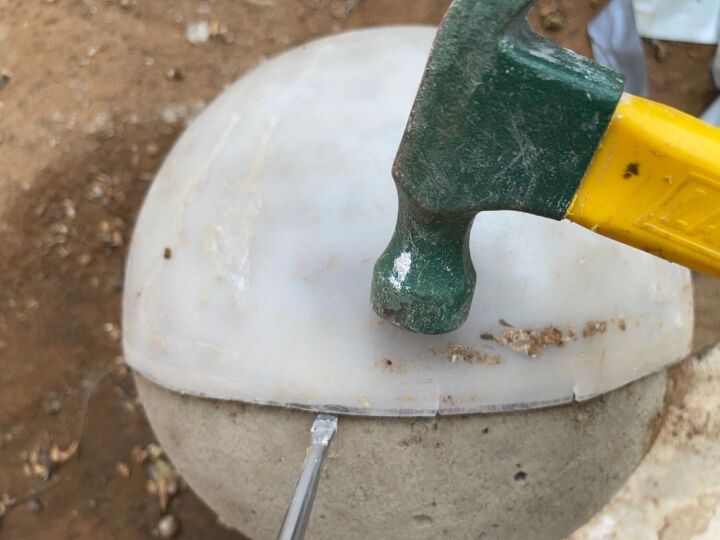
To my great surprise the part with the inverted neck came out very easily. I loosened the mold with gentle bangs of a hammer and screwdriver. I suggest you use a flatter object such as a metal scraper instead of a screwdriver otherwise you end up damaging the line along the seam. It helps to work on sand or grass so that the orb doesn't roll around so much.
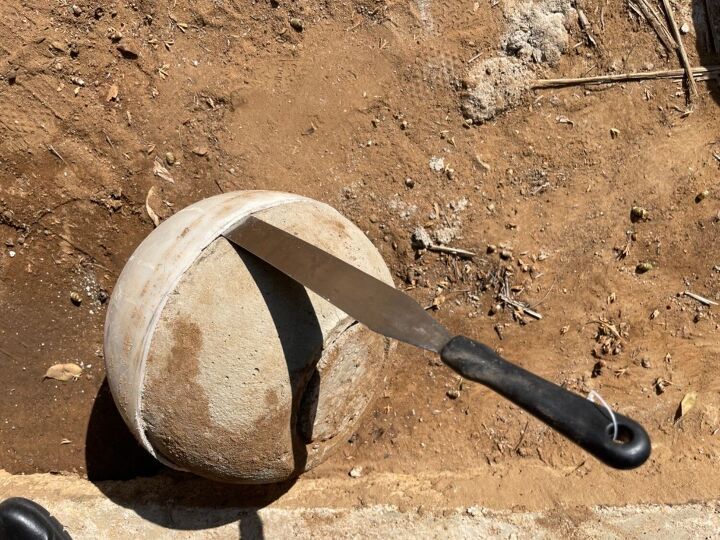
The bottom part was another story, probably because it was still a bit wet or because of the absence of release agent. Nevertheless, I kept on gently banging with the hammer and even resorted to my baking palet knife. Eventually it came out. I will leave it out to dry for a couple of weeks before sealing with Gripseal.
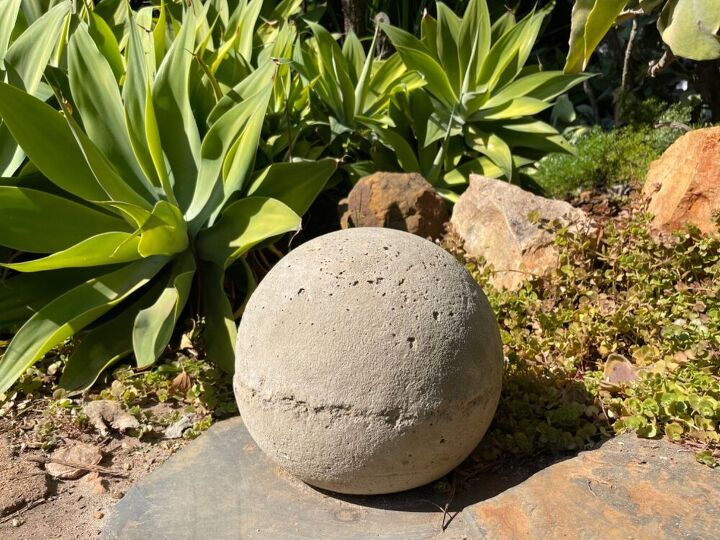
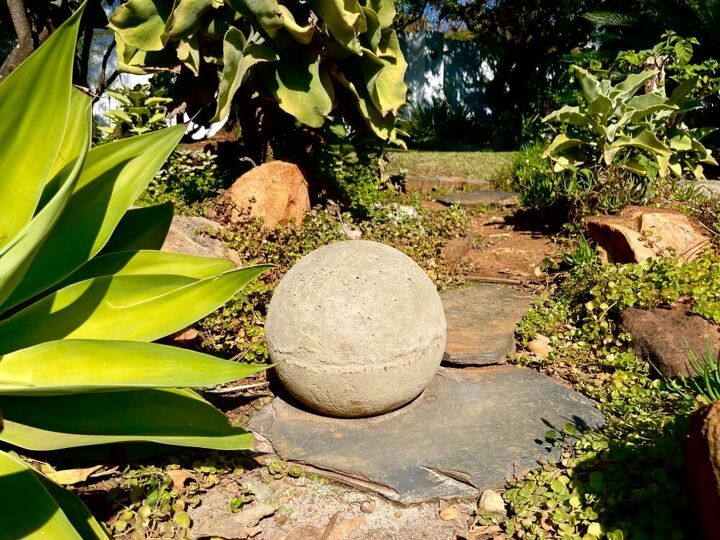
But there it is...a perfectly passable concrete orb at a fraction of the price of a bought one.
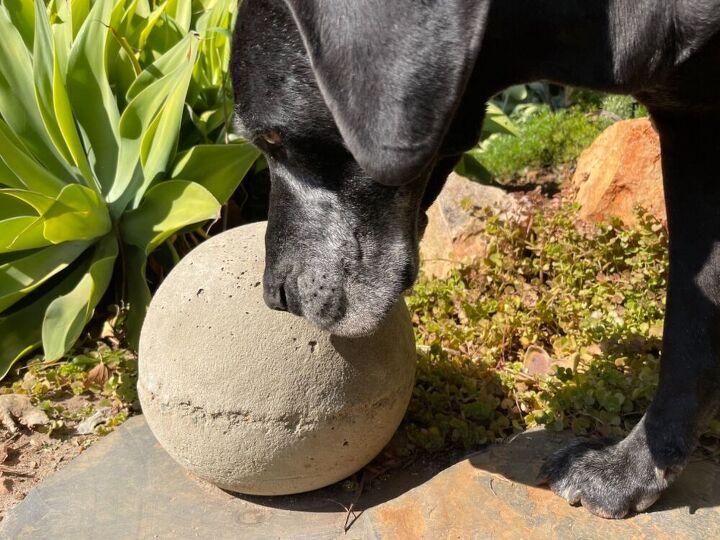
No boy, it's a bit heavy to play with, even for a huge dog like yourself.
And the best part is that the mold can be used again!


Comments
Join the conversation
-
I do love a nice concrete orb. I've been wanting to make these forever but couldn't figure out the best mold for them. You sure helped me! Now I have no excuse.
-
The top half was harder to remove likely because there was no air in between the cement and the concrete. Drill a big hole and tape the cut out piece back into the hole. When dry, remove the hole fill piece and let the air in. A bit of sanding should remove any marks left over...or a skim coat.


Frequently asked questions
Have a question about this project?
You are brilliant. I love the way your orbs turned out and also that you can reuse the mold. I am a bit impatient so I might need 4 molds so I could do them all at one time, or maybe just three if I was making a three legged table. I wanted to make concrete seating in the back yard, I wonder if a styrofoam ice chest could work in the same way?
Did you ever think to go to an old bowling alley and get you some bowling balls ! Pretty shine as well ! I fudged I used bowling balls cause I found them at a thrift store for 3.00! each all colors ! They had a bowling alley to close up and they brought shoes , socks balls you name it ! But it was comical bringing home 50 bowling balls in the back of my new model TAHOE ! No boxes I never would have got them in there in boxes so I had to stop shopping and drive 90 miles with those things rolling every where ! But what was so comical was when I would take off at a lite I cannot imagine what the car fill sitting next to me thought I had in the back of that thing cause there were rolling everywhere and bumping the sides of my tahoe I guess people thought o had kidnapped them ! But let me tell you what o did with sine of the balls easter came smd I got some shrink wrap in pastel colors and the balls in the bags and piled them up to look like eggs then I found some 1.00 plastic table clothes and mounded them up to look like a load of Easter eggs and then put my concrete bunny by them it was a hit and years later I was board with them then I painted a bunch of them to look like a red bug , all kind of bugs I sold each one out of my yard for 10.00
Why not just get a cheap plastic kids bouncy ball from 5 below or dollar tree. Carefully cut out a small circle; fill with concrete and let dry. Peel away plastic. Viola'