


Two Cardboard Playhouses From One Upcycled Box - Train & Rocket Ship!
Like everyone with kids these days, I am always looking to find new ways to entertain my toddler, and ideally ones that don’t cost very much!
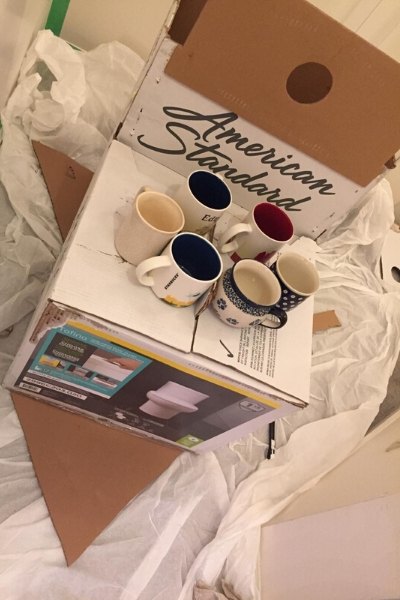
So when I had a new toilet installed, the shape of the cardboard box it came in got me thinking.
I decided to make a two-in-one cardboard playhouse that could be a train and a rocket ship!
Here is how:
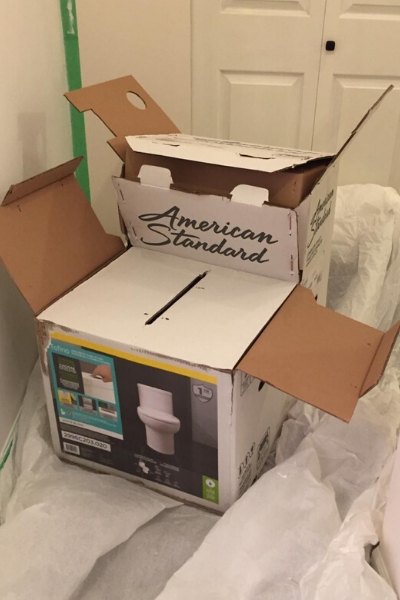
The first step is pretty straight forward – find a big box! An irregular shape like this toilet box works best. If you don’t have that you can always join boxes together to make the shape you want.
If you are like me you will have loads of boxes to choose from, especially with all the online shopping everyone has been doing lately.
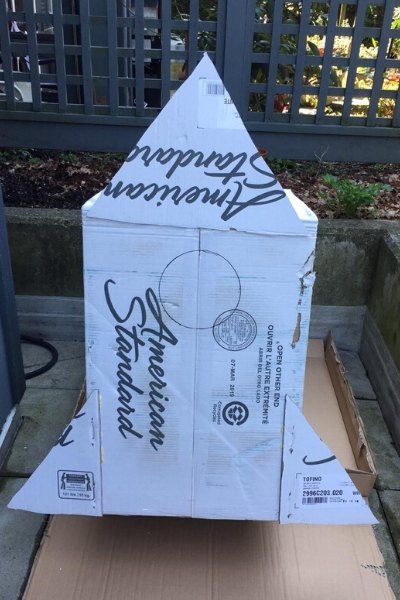
I wanted one side to be a rocket ship and the other side to be a train.
I decided this really from looking at the box from different angles.
When I laid it with the long side of the box down the short bit that stuck up the back reminded me of the cab of a train.
And when I turned it over so the short bit was on the ground and the long bit was vertical it kind of had a look of a rocket ship from the front – and the short bit would keep it stable I thought.
Now obviously for this to be a proper cardboard playhouse there needs to be a way for my son to get into it so I thought about how he could get in to both the train and the rocket.
I decided to leave the top of the cab open on the train and cut a rectangle from the back of the cab as well. So to get into the train he would go through the rectangle at the back and he can stand up like the driver. In order to get into the rocket ship he crawls into the opening at the top of the cab and wriggles to standing inside the rocket and looks out the window.
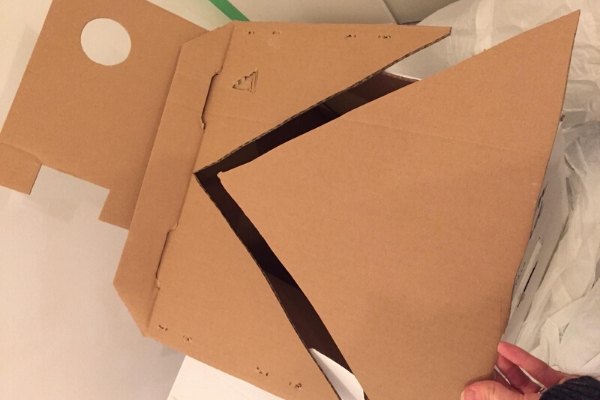
I started by cutting the rectangle from what would be the back of the train cab.
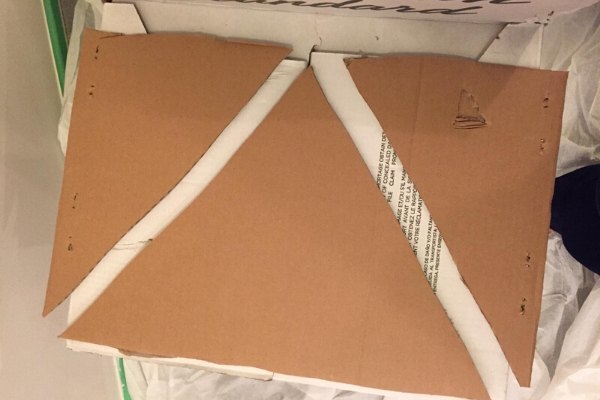
I then cut that piece into 3 triangles for the rocket ship point (at the top) and fins (off to the side at the bottom of a rocket ship).
I used a craft knife to do my cutting which worked well. You could try using some really sharp scissors but I think it would be harder to keep your lines straight(ish).
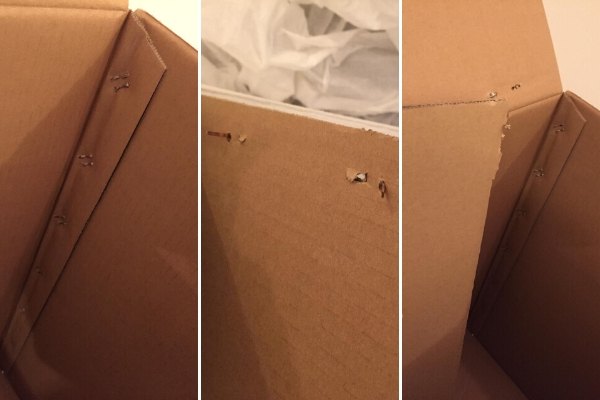
I also removed extra flaps and staples that were part of the box that I didn’t need. Remember this was a box that held a toilet, so it was pretty heavy duty and that’s why it had the staples!
I couldn’t get all the staples off, so before I started properly assembling the cardboard playhouse shapes I wanted, I first used the excess cardboard from the flaps to cover the staples (on the side where points could theoretically come through) so that there would be no danger of cuts or scrapes on my toddler.
I just glued extra cardboard pieces on top to cover those areas and to even out edges where there were ‘drapes’ that I couldn’t cut off. ‘Drapes’ I learned are the extra bit of cardboard that folds over a corner or another edge of the box. In a thick heavy box like mine they get in the way a bit!
Once the safety prep was done I started putting together the shapes that would turn my cardboard box into two cardboard playhouses.

I found an inner piece that I had cut off with a circle hole in it that I thought would add shape to the train part of my box so I glued that on the top of the short bit of my box – the part that would be the front of the train cab.
I then glued on the rocket ship point & fins.
I used gorilla glue. It takes a little bit longer to dry but it is more secure, which will help it stand up to toddler play.
For gorilla glue you need to add a little water to the cardboard before putting the glue on. Then add something weighted to hold the pieces together, I used coffee mugs, of course use a clamp if you have one.
Once the fins were dry I did a final bit of cutting for the window/porthole of the rocket ship. I used a bucket to trace the circle before cutting it out.
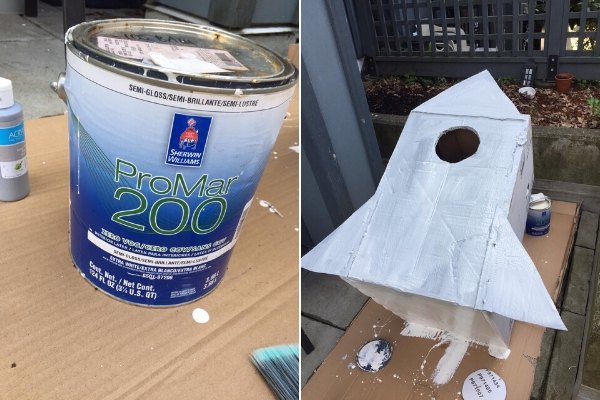
Once the glue is dry all the structural work is done. And you can start painting which is the fun part!
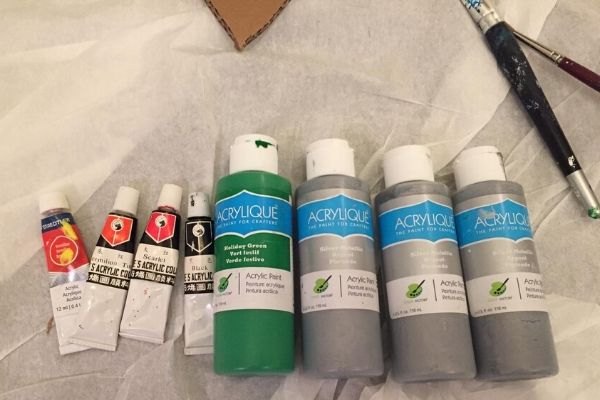
I went through our craft bin and old art supplies to see what I had for painting the box. Ideally I didn’t want to have to buy anything extra for this as I was trying to make something with what I had.
I have lots of leftover white wall paint around so I started with one coat of white all over the box as a base.

Luckily I had lots of silver craft paint left over from an other project so the rocket-side became silver. My son actually wanted a pink rocket but you have to work with what you have.
For the train side I planned out where the face and wheels would be before painting, this was to conserve paint as I didn’t have as much green as I would have liked.
Did I not mention this isn’t just any old train? My son loves Thomas the Tank Engine, but he’s blue and I didn’t have enough blue paint so I based my train face on Thomas’s friend Percy who is green.
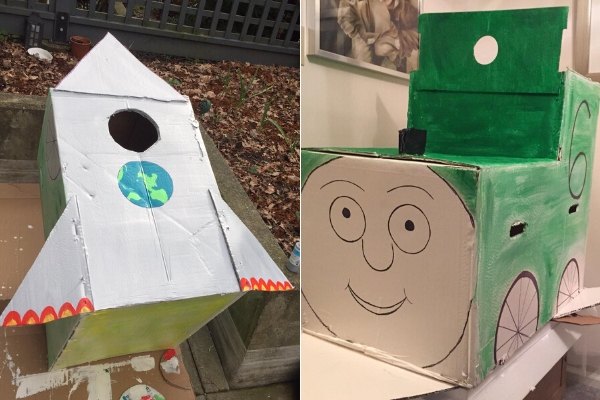
For the wheels I used a round bucket to trace the circle and a flat piece of cardboard to draw the straight lines on the wheels.
I had glued two small bits of cardboard at the top near the front to become the funnel and I painted them black, but in retrospect I should have cut out a little circle and glued a toilet roll in there as the funnel instead!
You don’t have to be an artist for this part just take a bit of time to plan it out first.
The face wheels and number were all drawn with a black sharpie pen.
I found a couple small acrylic green and blue paint tubes when I was already nearly done so I added the earth painting on the rocket, I looked up a picture of earth from space and free handed painting the land, it turned out good enough that my toddler could identify it.
The painting step is quick except for the time waiting for the different sides to dry so that it could be flipped over since all sides are painted for this project.
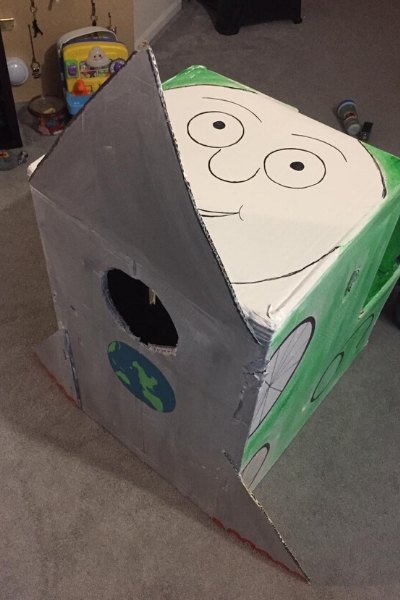
The photo above shows the finished playhouse from above so you can see where the train is in relation to the rocket.
Even if you don’t have exactly the same sort of box as I did I hope this tutorial will inspire you to use what you have to make something for your kids. It really is a great feeling when they are enjoying something that you made yourself!
If you are looking for more DIY upcycled projects for kids you might like this junk journal style colouring book made out of junk mail!

Here is the playhouse in use as a train and a rocket! Hours of fun!

Comments
Join the conversation
-
That is so creative. It's so cool. Two for one. Rocket ship and train in one. Definitely will outlast anything store bought.


Frequently asked questions
Have a question about this project?